Showing posts with label frame. Show all posts

2/25/26

'One Little Word' Tag Display (16 Years and Counting)

For 14 years, I displayed my One Little Word tags from cords, hanging directly on my wall. In 2025 when I made my 15th tag, I ran out of space with my current set up and moved the tags to a wood panel. I was really happy with how they looked, but it was only a one-year solution. There was no space for any additional tags. 2025 Cindy decided that was a problem for 2026 Cindy. 

2026 Cindy had been thinking about it for awhile (and occasionally shaking an angry fist at 2025 Cindy) before coming up with a solution that will last for 14 more years. I started with this 24x12" frame, then used Folk Art's Licorice (affiliate links) to paint the base black. I arranged my tags and stuck them in place with loops of washi tape. I still need to fix some little spacing issues and then put in the plexiglass, but this is how it looks now:  


I love seeing all my tags together and am excited to have so much more space for future years. I really hope I'm still making One Little Word tags 14 years from now.

2/27/25

What to Do with an Old Calendar: Frame Your Favorite Pictures!

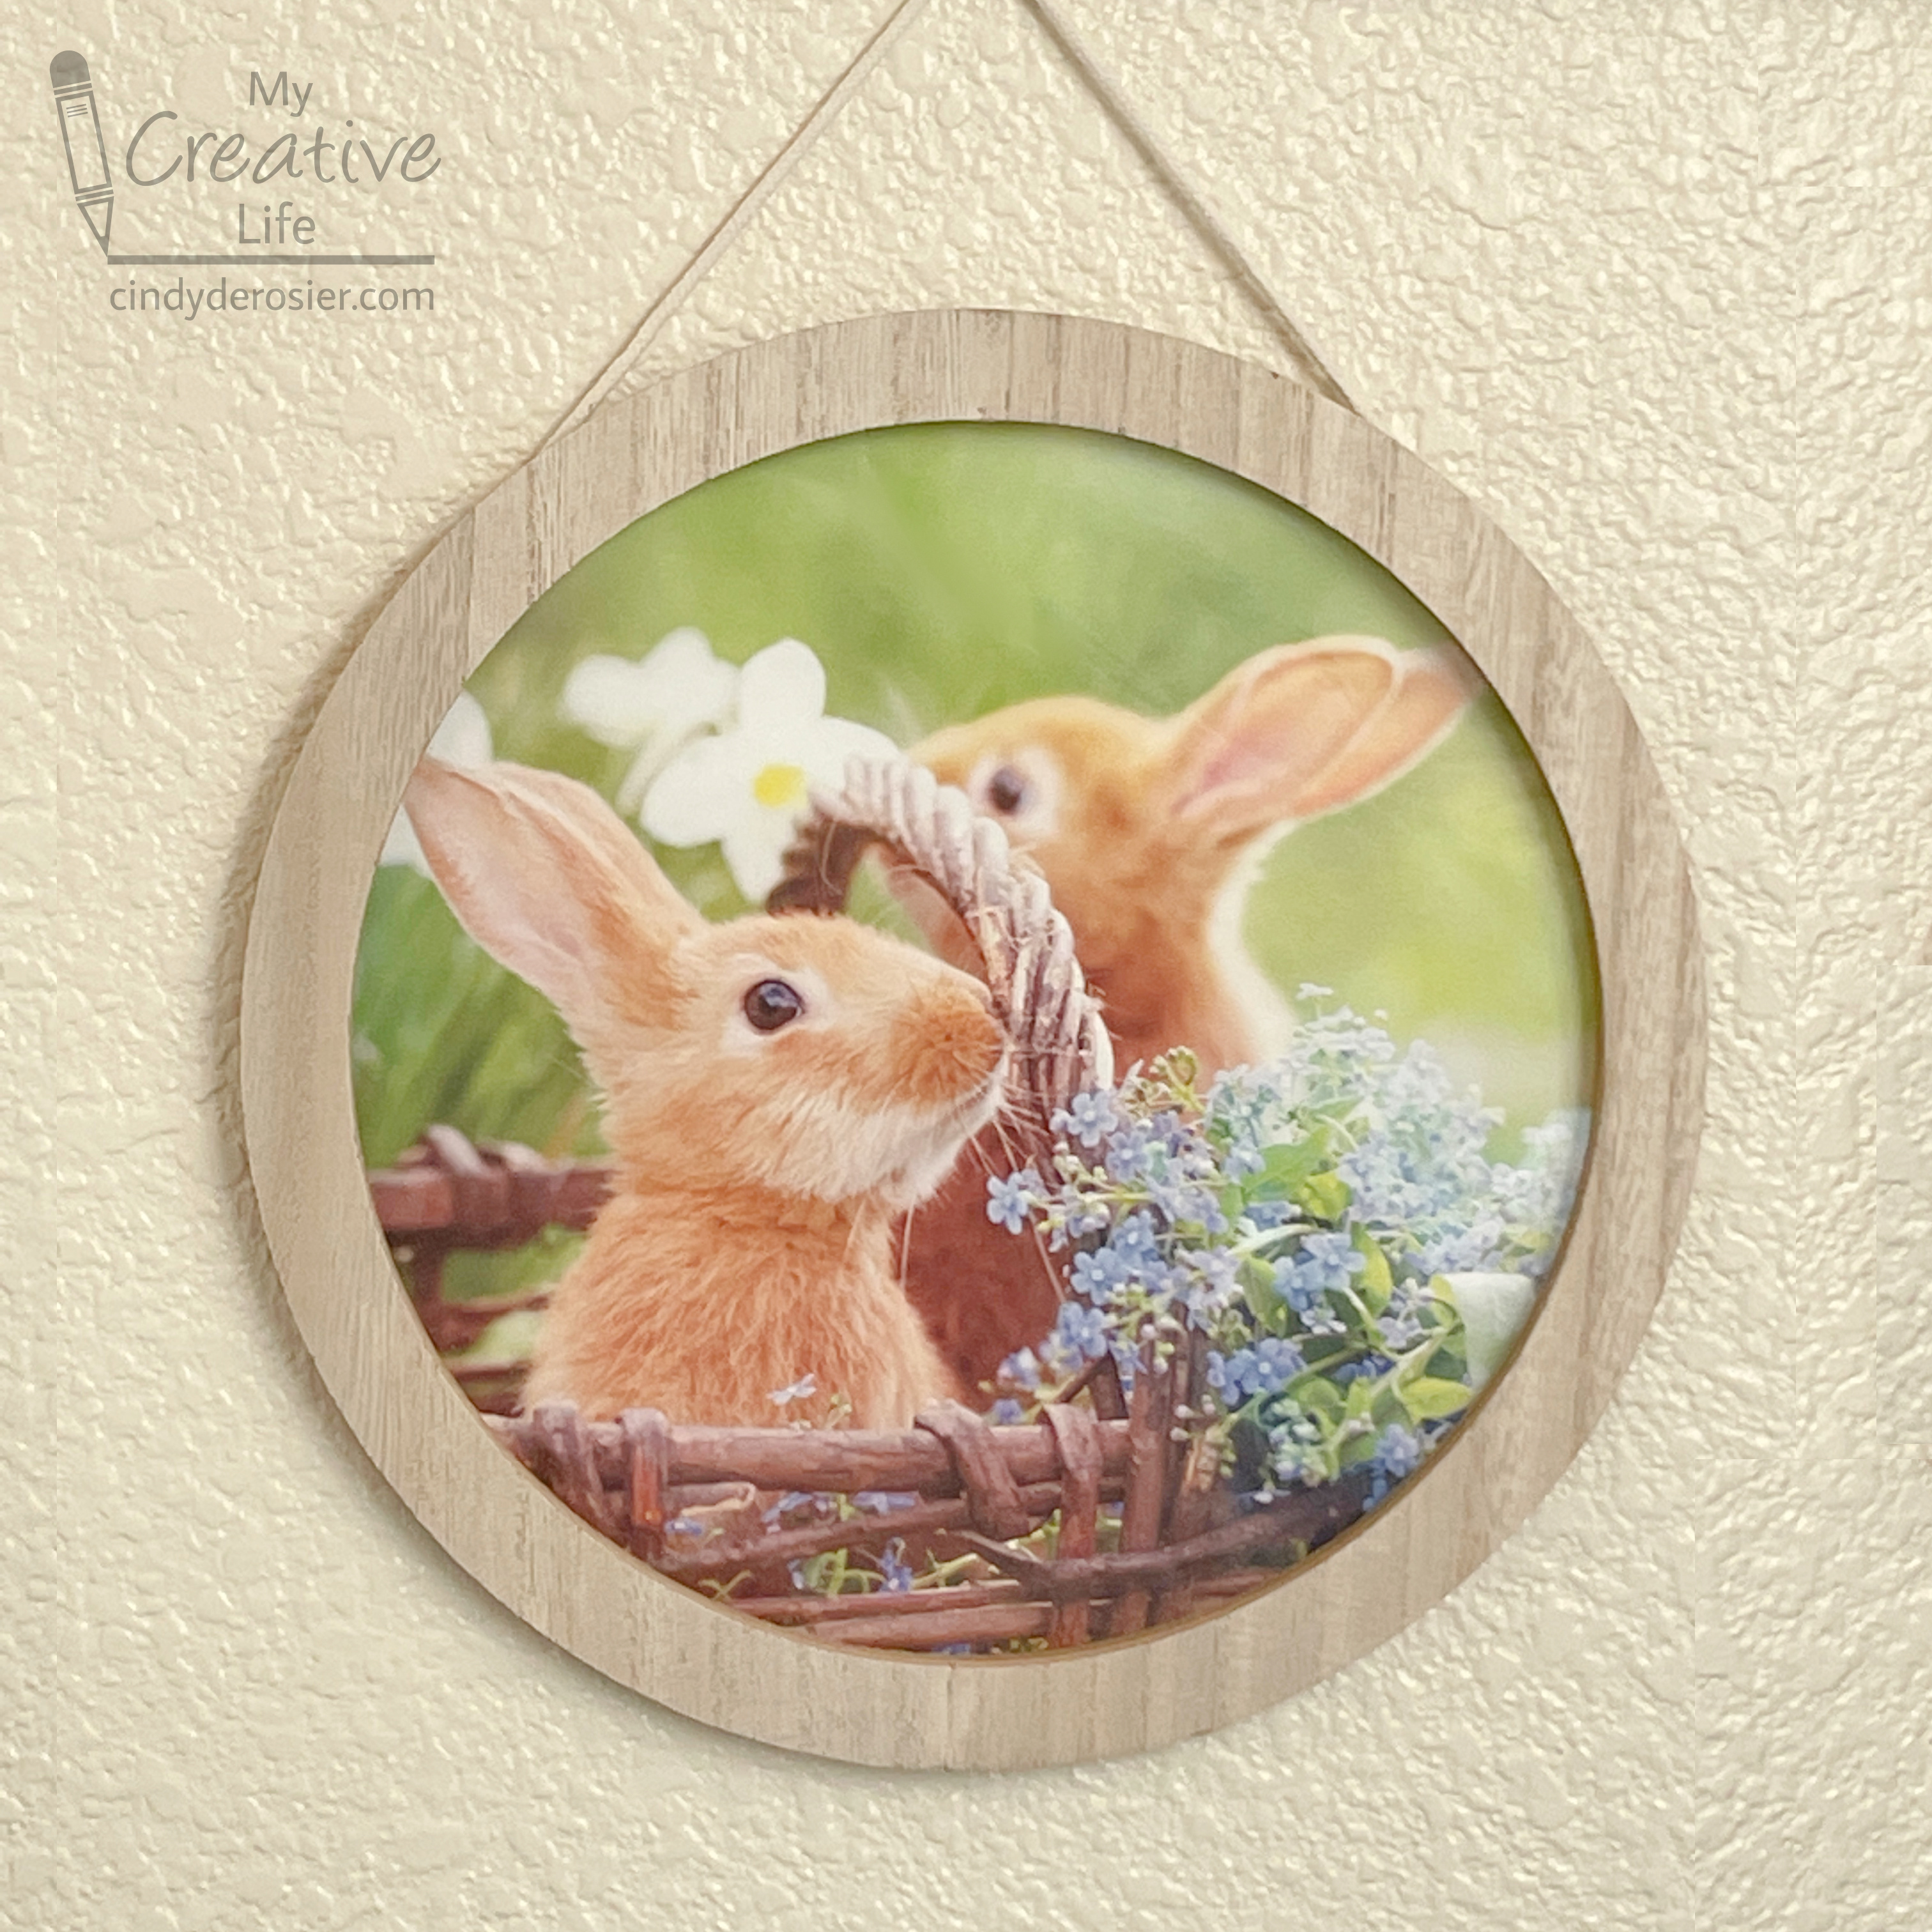
Each year, I get Steve a bunny-themed wall calendar. At the end of the year, he gives me the old calendar to use for crafting. When I received the new Framed Effects Circle Surface from Plaid, I thought it would be perfect to display a cute spring photo of bunnies. Affiliate links here and below. 


This project couldn't be easier. I started by using the frame to determine the cropping for the calendar image, then traced around the outside of the frame with a pen. 


I cut just inside the traced line, then used mini Glue Dots to adhere the bottom half of the image to the back of the frame. I chose to use Glue Dots because they're plenty strong to hold the calendar page in place, but still easy to remove when I want to change out the image. Finally, I cut flaps to expose hardware, then added Glue Dots to the top of the image. 


In just minutes, I was able to hang my framed calendar page. 


Obviously, I could have painted or stained the frame before adding the image. I like it as is. It's actually designed to be used for glass chip crafting, something I haven't tried yet. If you've tried it, let me know what you think and whether I should give it a go. 

10/20/23

Witchy Halloween Frame

Halloween crafts are some of my absolute favorites. This time I made what I'm calling a witchy frame. Witchy because it is green with warts and embellished with a broom. Affiliate links below. 

Steps: 


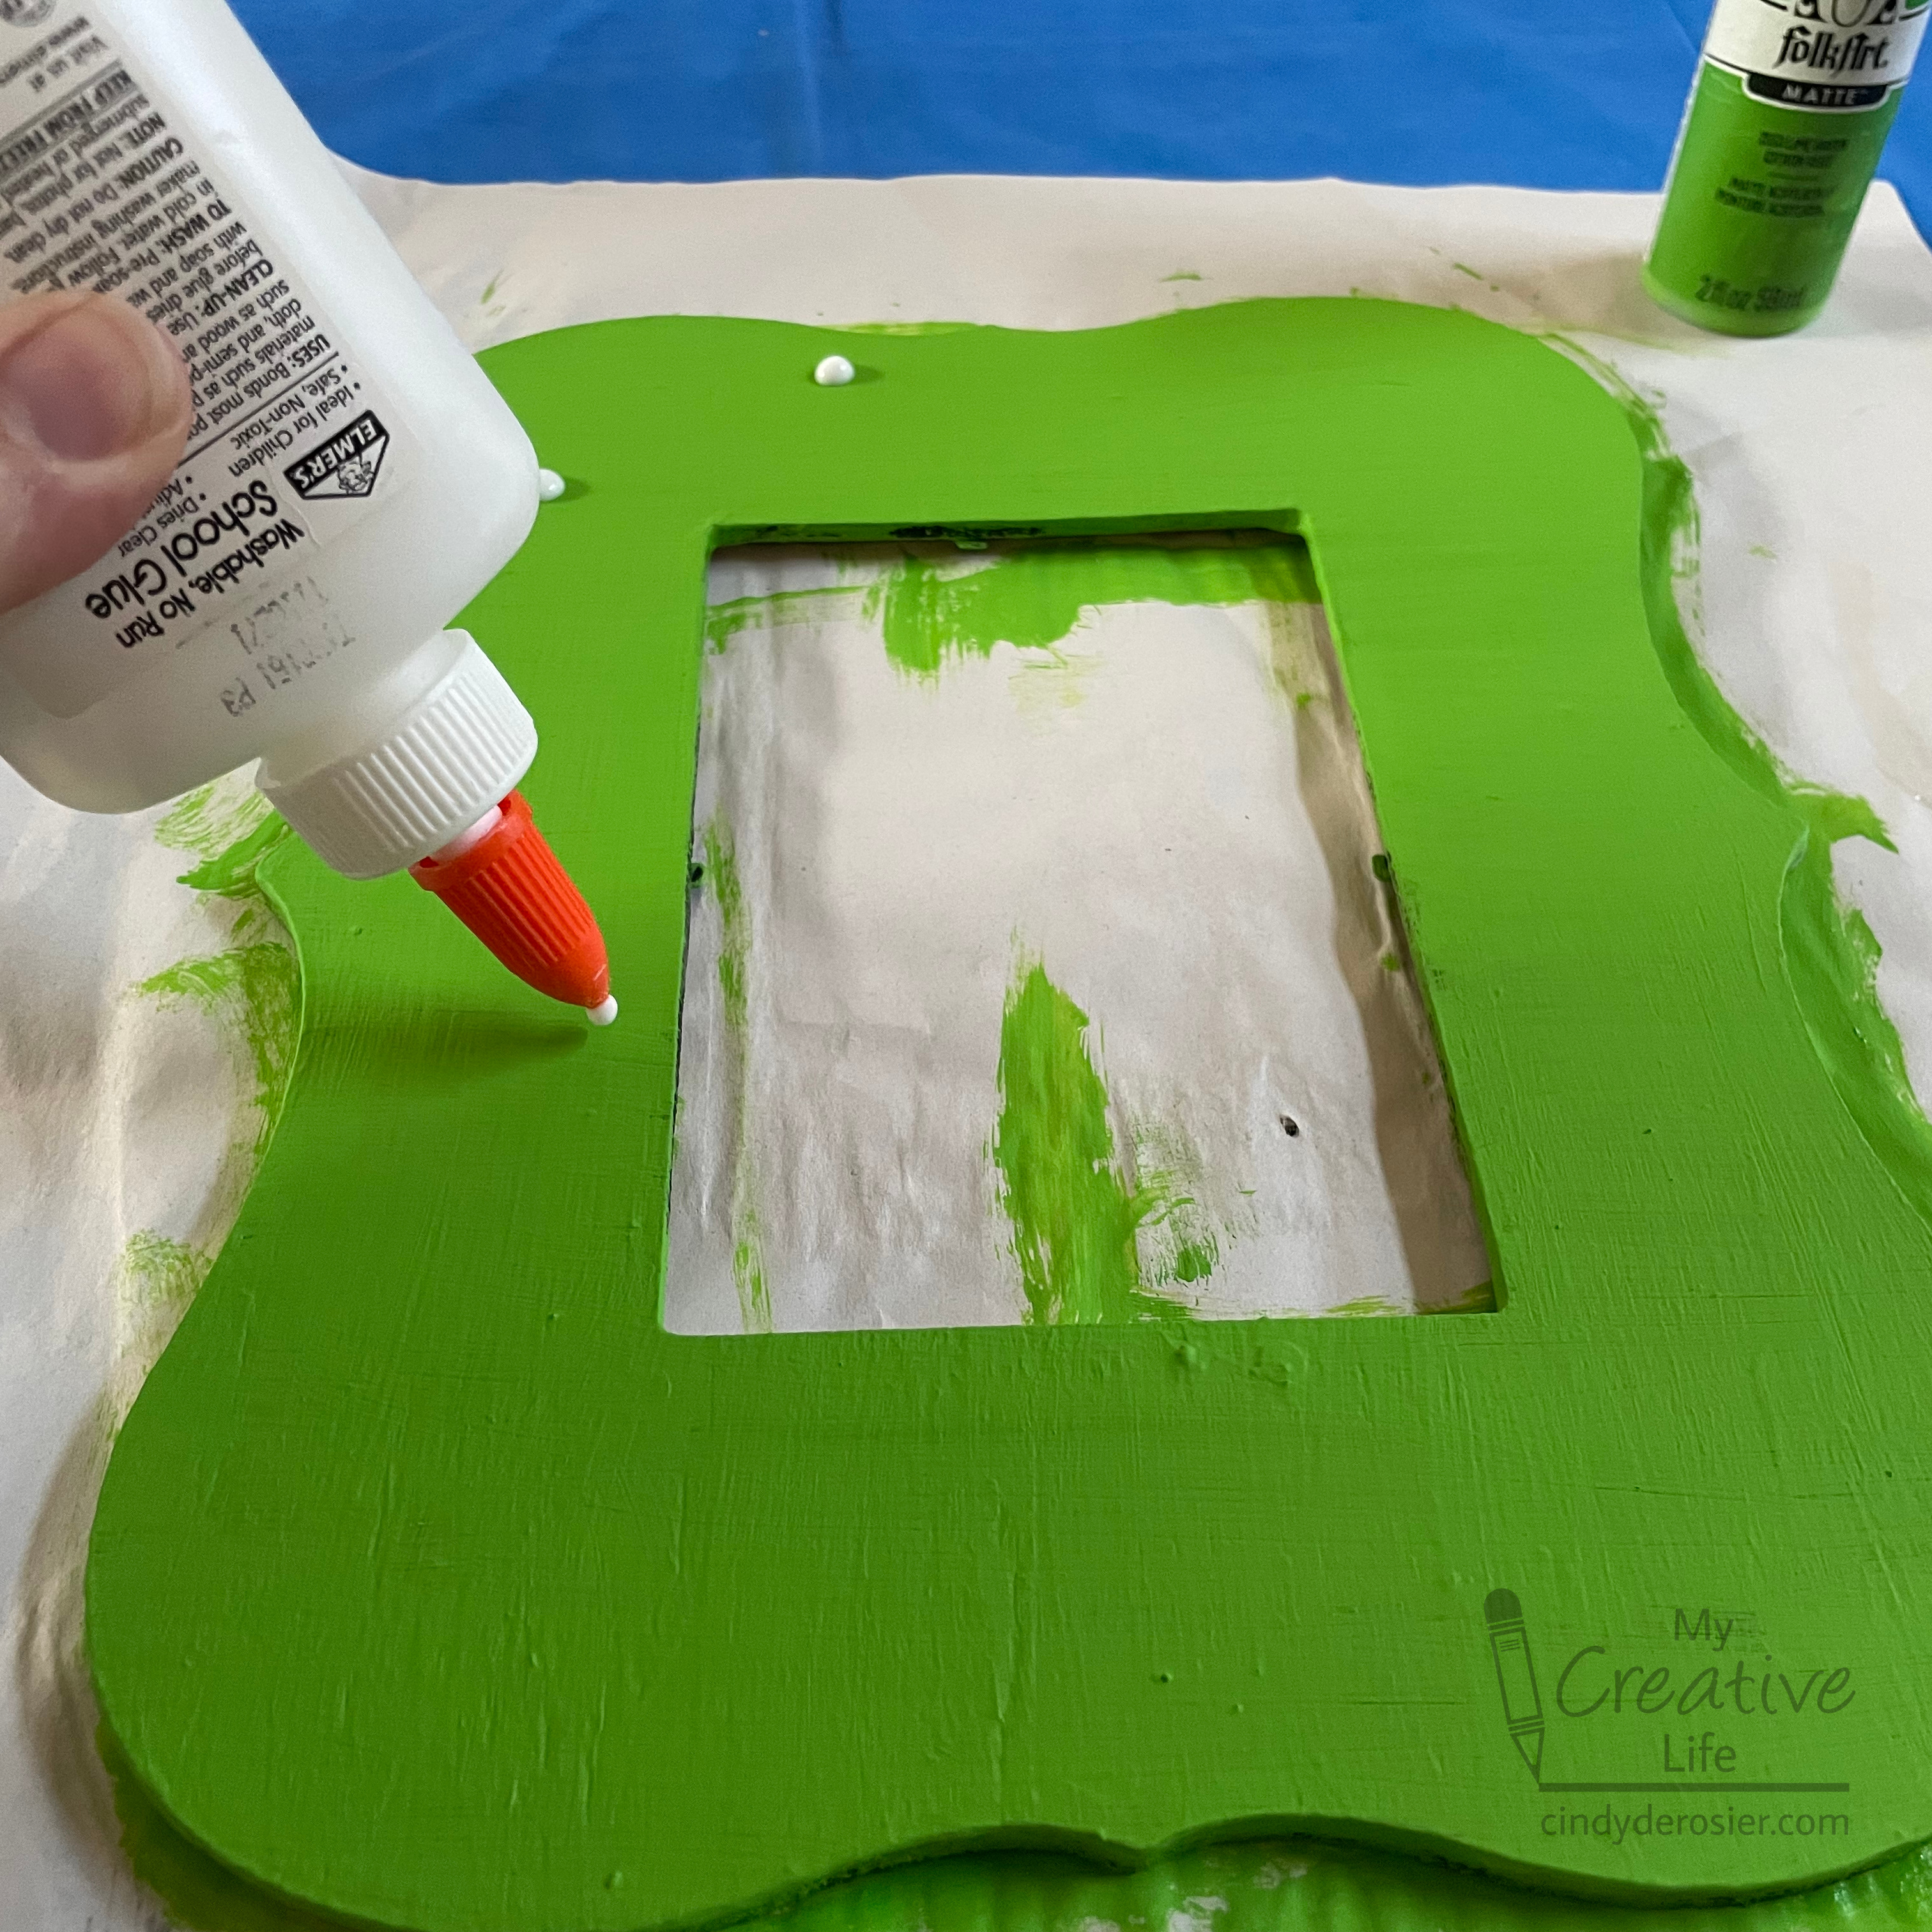
Paint the frame lime green. Let the paint dry completely, then add dots of glue randomly on the frame. They will dry flatter and larger than the original drop. 


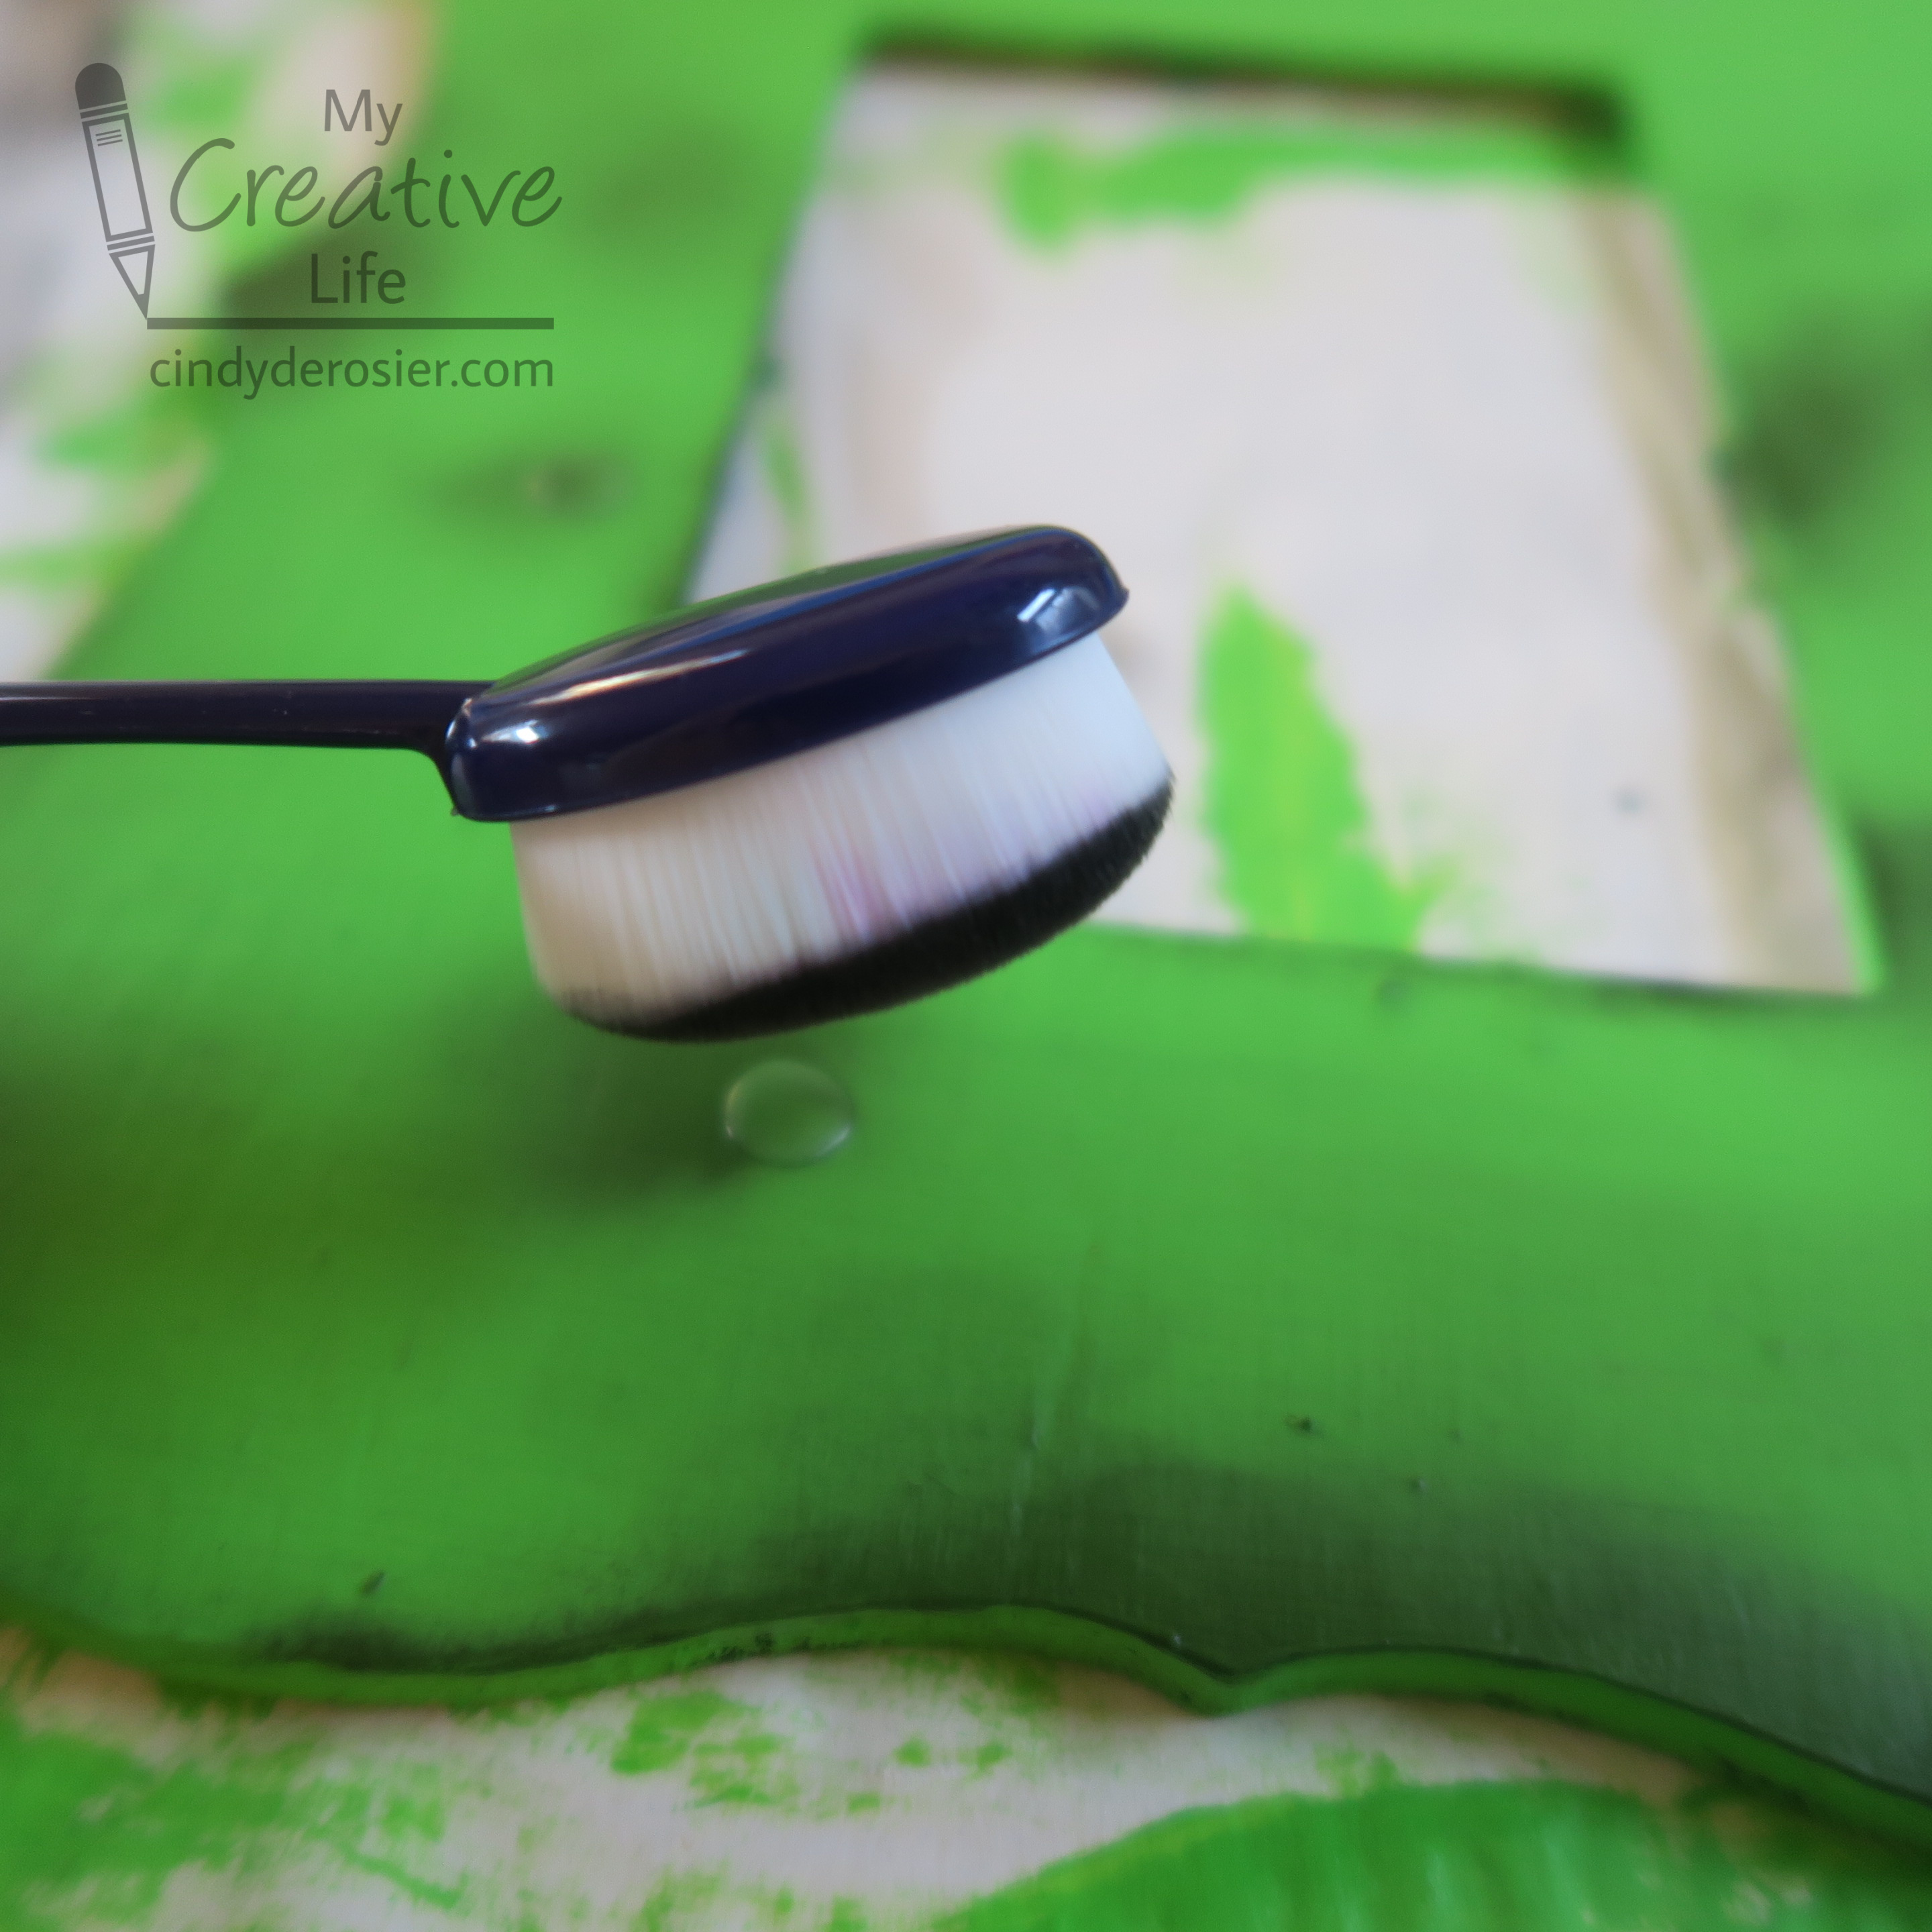
Let the glue dry completely. This could take a full day or more. When the glue is dry, use a blending brush to apply a small amount of grey or black ink over the dried spots of glue. Add some ink to the edges of the frame as well. 


This is how mine looked when I was done with the ink. That's the top of the frame facing the camera. 


Use Supertite to glue a broom and a spider to the frame. When the glue is dry, add a Halloween photo or message to the frame. 


I don't think I've mentioned it on the blog, but Trevor got braces early last week. I'm eating braces-friendly food in solidarity with him (because it would be super rude for me to expect him to avoid popcorn, caramel, and other favorites while I eat them in front of him), so I'm going to need to think what Halloween candy looks like this year. My favorites and Trevor's favorites are a no-go. Any suggestions for braces-friendly Halloween candy?

5/25/23

I Love Cats Photo Frame

Today's project is a cat-themed photo frame with a heart-shaped opening. I'm calling it the "I Love Cats Photo Frame," but I feel compelled to say that I don't love cats. I don't hate them or anything, but I don't love them. For starters, they're not nearly as awesome as rabbits

Evidence: 
  • Rabbits never bring you dead stuff like cats do. 
  • Cats eat cat food, which is one of the worst smelling substances ever, while rabbit food smells like a fresh-cut lawn. 
  • Cats have the uncanny ability to cough up hairballs in the worst places. Rabbits physically can't vomit.   

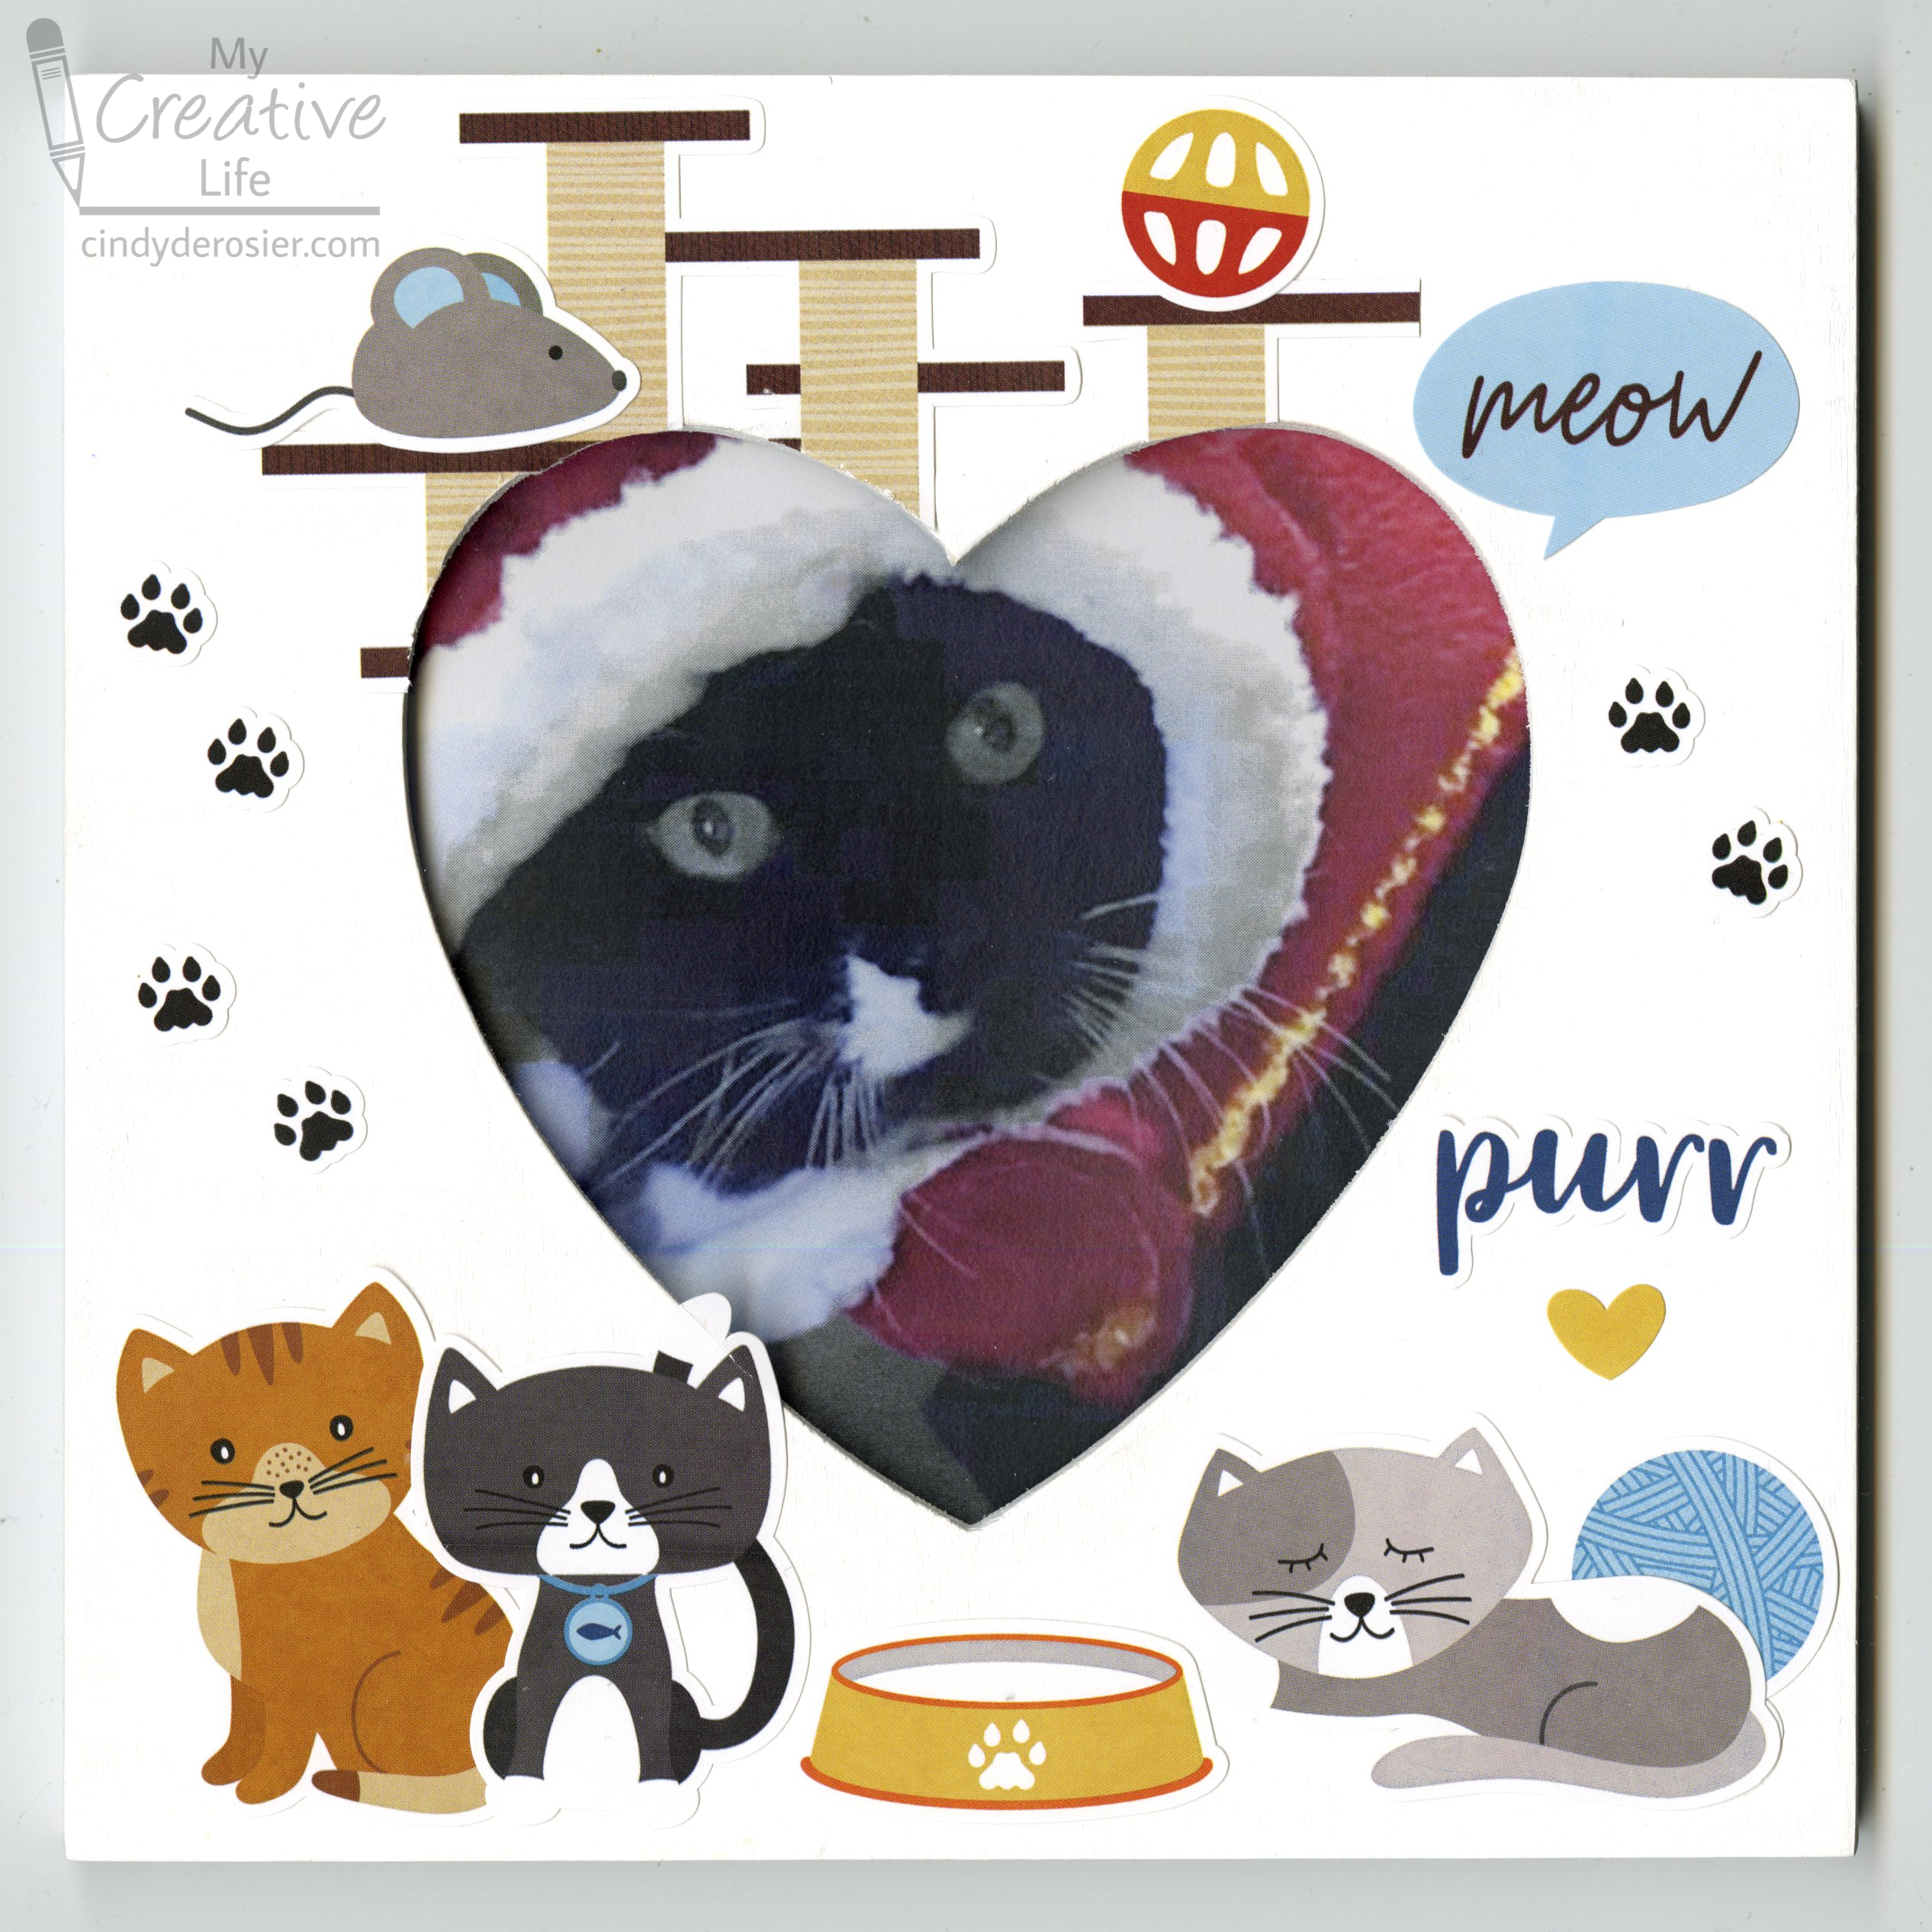
Despite the clear superiority of rabbits, there are plenty of people who love cats. My niece, Allison, is one of them. I made this frame for her, featuring a photo of her favorite cat, Tips. Tips does not belong to Allison, but that doesn't stop her from dressing her up. Affiliate links below. 


I Love Cats Photo Frame


Materials:


Steps: 


Paint a thin coat of gesso on the wood frame. Let it dry completely, then use a very fine grain sandpaper over the whole surface. You could technically skip this step, but it makes all the difference in having a smooth surface for adhering stickers. Wipe the frame clean so no dust remains, then paint it white. 

When the paint dries, adhere the stickers. I started with the cats at the bottom, then positioned the cat tree at the top, to make it look like it's in the background. I had to do some minor snipping to fit it in, which you can see by comparing my results with the original sticker sheet. I added the toys next, then the word bubbles, then filled in the extra space with paw prints. 

Because I used high quality stickers on a perfectly smooth surface, I didn't bother to seal the finished frame. If I had, I would have done a test of Mod Podge Ultra on an extra sticker to make sure it would hold up before spraying the actual frame. 

9/2/22

Easy Canvas Photo Frame

 I typically think of a photo frame as having an opening, but it's not mandatory. This version of a photo frame is made with a painted canvas. The photo is adhered to the surface with removable adhesive, rather than placed behind the frame and held in place with tabs. Affiliate links below. 


Easy Canvas Photo Frame


Materials:


Steps: 


Paint your canvas however you'd like. Neat or messy, with a brush or with fingers, lots of colors or only one - whatever! Be sure to paint the sides of the canvas as well. Let the paint dry completely. 


Apply painter's tape to the edges of the canvas. Then add a coat of white gesso over the uncovered portion. Let the gesso dry completely. 


Gently peel up the painter's tape. Apply repositionable Glue Dots to the back of your photo, then center it on the canvas. Instant frame, and you can change the photo whenever you'd like!

8/5/21

Scrap Paper Photo Frame

One of my favorite art blogs is Making Art Together, the blog of the Eric Carle Museum of Picture Book Art. In this post, Art Educator Sara Ottomotto talked about using the small scraps generated in the Art Studio for future projects in the space. The post inspired me to use my own small scraps for a project, creating a scrap paper photo frame.   


I started with a 4" x 6" photo (a duplicate of a photo from 5+ years ago that I already used on a layout) and a pile of scraps in browns, tans, greens, blues, and reds. My rule for choosing the scraps is that each had to be smaller than the photo in at least one direction. 


I started by adding tan strips behind the edges of the photos to make a mat. Then I repeatedly layered more pieces on top. I didn't give it much thought - I took a piece, added glue, and put it down where I thought it would look good. 

As you can see, I didn't use the red at all. I kept most of the structure browns and tans with some blue, and used the green for pop. The two green triangles on opposite sides help bring the eye in toward the photo instead of out beyond the frame. The two thicker rectangles frame either side of Trevor's face to keep the focus where I want it.  


While the resulting frame is very haphazard, I really like it. I wouldn't have expected something asymmetrical with uneven edges and imperfect cuts to appeal to me so much. I'm so glad I tried this! I definitely want to experiment with this technique again. 


5/29/20

Found Item Stamped Frame

Need a fun activity for the kids? Challenge them to search the recycle bin, junk drawer, and garage for items they can use as stamps. I used four household items to make this stamped frame. Can you guess what they are? 


The first item I used is probably the most obvious. I'll get to it a minute. First, I painted my frame white. I couldn't find a link to the frame I used, but this one is inexpensive and has a good amount of surface area for stamping (affiliate link). When the white paint dried, I used a plastic lid to stamp pink circles.  


Did you guess that the small orange circles with the empty center were made with a screw?


I was particularly pleased with the interesting purple shape I got by stamping the edge of a nut.


The bread tab added a fun line detail.


Did anyone notice that I used one of my all-time favorite color combinations? It's a nod to tomorrow, which is a very special day in Casa deRosier. Happy anniversary, Steve! Sweet Sixteen in Quarantine, and there's nobody I'd rather spend it with than you. 

1/29/20

Framed Diamond Art Baseball Glove

When I saw that Leisure Arts had a Diamond Art baseball design, I knew it would make a great gift for my dad. The sparkly art is fantastic, but it really came together when I framed it. Actually, that's not technically a frame - read on to learn what I did! Affiliate links below. 


Framed Diamond Art Baseball Glove


Materials:


Steps:


Complete the Diamond Art, then carefully trim away the excess fabric.

Thin down the paint with water. You want a runny, ink-like consistency. Use a paper towel to rub the paint on the square panel, covering all surfaces. Let it dry. If you want a deeper color, repeat.

Cut the cardstock to fit inside the panel. Spread a thin coat of FabriTac on the inside of the frame and press the cardstock in place. Let it dry.

Spread a thin coat of FabrTac to the back of the Diamond Art. Center it on the cardstock.


---------


You can do this same thing with any Diamond Art designs. I'm working on a similar project using one of Leisure Arts' NFL designs. If you haven't tried Diamond Art yet, give it a try. It's definitely addictive!

11/22/19

Snoopy on Ice Picture Frame

Back when I was planning Trevor's Peanuts-themed birthday party at the skate rink, I laminated and fussy-cut some of the Peanuts gang, not sure how I'd use them. I still didn't have a plan when the party rolled around, so I just taped them to the wall as decorations. I didn't throw them out, though. When I came across them this week, I decided to add them to a picture frame. It's really easy to make your own - affiliate links below. 


Snoopy on Ice Picture Frame


Materials:


Steps:


Paint the bottom portion of the frame white. Without cleaning the brush, mix some blue paint with a small amount of white on a palette, but do not blend them completely. Use horizontal strokes to create a cloudy (yet predominantly blue) sky. 

When the paint is dry, adhere your characters to the frame.

Add dots of white Enamel Accents to the sky. Let it dry completely. 


10/24/19

Sparkly Unicorn Diamond Art

I'm doing something I've never done before - posting a Christmas gift on my blog before giving it to the recipient. In this case, however, the recipient is my 6-year old niece, Allison, and I'm fairly confident she doesn't read my blog unsupervised. Not only that, but I kinda already told her what the gift would be. In fact, I posted a picture of Allison (and my godson Teagan) helping me with Allison's gift when we visited back in July.

So Allison knew that I would be taking the completed unicorn Diamond Art and turning it into something sparkly and fabulous for her, but she didn't know exactly what. Neither did I, to be honest! I debated all sorts of options before settling on wall art. I think she's going to like it. I wish you could see just how sparkly it is! Affiliate links below.


---------

Sparkly Unicorn Diamond Art


Materials:


Steps: 

Complete the unicorn, following the instructions on the package. Use microtip scissors to carefully cut it out. 

Paint the wood canvas with black paint. When it is dry, add a coat of Extreme Glitter. The more coats you add, the more sparkly it gets. I did two coats and got tons of sparkle. (Allison likes sparkle. It's practically a requirement for being a 6-year old girl to love glitter in all its forms.)


Cut the cardstock to size, then use a strong craft glue to attach it to the inside of the wood canvas. Use the same glue to attach the unicorn, alphabet letters, and heart(s) to the cardstock.


Diamond Art makes a fantastic gift for practically anyone on your gift list. My favorite diamond art manufacturer, Leisure Arts, has a huge (and growing) number of designs to choose from. If someone on your list would prefer to receive a completed design instead of doing it themselves, you have plenty of time to make this thoughtful gift before the holidays.

8/21/19

Football Photo Frame

A friend gave me a stack of foam sports ball embellishments, so I challenged myself to use the football. This frame was a lot of fun to make and would be great for displaying a team photo, a special autograph, or other memorabilia. This post contains affiliate links. 


---------

Football Photo Frame


Materials:


Steps: 


Paint the frame white. When the paint is completely dry, add evenly-spaced strips of tape vertically on the frame. Starting at the center, use number stickers to label the 50-yard line. (I didn't have enough 0 stickers, so I had to reuse it, which was a giant pain. Make sure you have enough stickers.)


Paint over the frame in green, using a pouncing motion. Don't use normal brushstrokes or you could get paint under the tape and stickers. 


I had to carefully paint around the areas that don't have their last 0 stickers yet. You won't have this problem, because you will have enough 0's for the whole project. 


Carefully remove the tape by lifting straight up. 


Now, peel up the numbers. I like to use a retractable craft pick for a job like this. (Note that even though the tool is completely ambidextrous, the printing makes it obvious that it was designed for/by right-handed people. Sigh.)


Anyway, use the pick to peel up the numbers. You may need to do a little bit of touch-up painting. When the paint is dry, use craft glue to attach the football to the upper right corner. 


Now just add your photo, autograph, or memorabilia and your frame is ready to display!

6/14/19

Sparkly Patriotic Photo Frame

For those who don't know, June 14 is Flag Day. Back in my teaching days, when June 14 fell on a weekday, we'd do a flag-inspired craft. Today’s craft is perhaps too time-consuming for school, but it's perfect for camp or home. Affiliate links below. 


---------

Sparkly Patriotic Photo Frame


Materials:


Steps: 


Paint upper left corner of the frame blue. Paint stripes down the right side, alternating red and white. There will be 13 stripes in all (7 red, 6 white). Paint the left side of the frame so that it matches the stripe pattern on the right. 

I didn't do any measuring, but if I were teaching this project to kids, I would have them use a pencil and ruler to plan out their stripes. Divide the height of your frame by 13 to get the approximate width for each stripe. It doesn't need to be exact, as should be obvious by the fact that I just eyeballed it. 


To apply the bling, work on one small section at a time. I divided the blue into three areas. Apply a generous amount of craft glue and then add gems, sequins, and other bling. Don’t overlap the materials and don’t worry about small gaps. Using the stylus makes this much easier than picking up the little pieces and trying to place them perfectly. 

When you finish a section that borders a white stripe, cut a length of pearl trim to fit the spot. Add a line of glue and put the pearl trim in place. Then continue with the next color. 


When you have filled in every section as well as you can with rhinestones, sequins, and gems, it’s time to fill in the tiny spaces with Diamond Dotz. Add a dots of glue, then place the Dotz.


Allow the glue to dry completely. Your sparkly frame is ready to fill with your favorite photo!


Obviously, this craft is perfect for any patriotic occasion. It makes a wonderful gift for a veteran or active-duty service member, too!

10/25/18

Fabric-Covered Frame

If you have some leftover fabric, say from the drawstring bags you recently made, use that fabric to cover an inexpensive frame. I used beaver-print fabric to make a frame for Steve to display a photo of his Wood Badge patrol, but I can think of a lot of other applications. Need to hem a prom dress or other special occasion fabric? Use the scraps to cover a frame that will hold a photo of the special event. Making a quilt or blanket for a new baby? Make a matching frame. Outgrown a Halloween costume? Use the fabric to make a frame to display Halloween photos.

Note that this project takes a LOT of drying time. Ideally, you'll let multiple layers of Mod Podge dry completely between applications, then let the whole project cure for 3+ weeks. In other words, don't get started on December 23 thinking you'll have Christmas gifts ready in time for family and friends.


--------

Fabric-Covered Frame


Materials:


Steps:

Remove the backing and the insert from the frame. If it has glass, remove that too. Place the fabric upside down on your work surface and lay the frame on top. Cut around the frame, allowing about 0.5" of extra fabric on all four sides.

Use the brush to apply a thin coat of Fabric Mod Podge to the front of the frame. Carefully set it facedown on the upside-down cut out piece of fabric.

Flip it so it is face up and let it dry for 15 minutes.

Working with one side at a time, apply Mod Podge to that side and back of the frame. Gently pull the fabric over smoothly and press it in place. Do the same thing on the opposite side. Now move on to the top and bottom sides. You'll do the same technique of Mod Podge and gently pulling and pressing the fabric into place, but you'll need to tuck any extra fabric at the corners underneath.

Cut an X in the fabric covering the opening from corner to corner. Trim the fabric so that there is enough to cover the inner edge of the frame when you wrap it toward the back but not so much that it gets in the way of the tabs that hold the photo. After trimming, apply Mod Podge to the wood and press the fabric into place.


At this stage, it will look something like this. As you can see, I didn't worry too much about making the back look good.


Let the frame dry overnight. At this point, you can either put a second coat of Mod Podge on to really seal it well, or leave it as is. Either way, now you need to let it cure for at least 3 weeks. 

After it is cured, add the photo, then cut a piece of cardstock to cover the back and glue it in place using craft glue. It protects the photo, but can be removed without harming the fabric if you ever want to switch out the photo. If you want to use the included dowel to prop up the frame, punch a hole in the cardstock before you glue it in place. 


Alternately, you could add a sawtooth hanger. Steve's frame will sit in a picture rail, so I didn't do either of those.


As long as you plan ahead to allow for the long curing time, these make very nice gifts. They take very little active time and cost very little to make. Give it a try!