Showing posts with label cat. Show all posts

4/16/25

Hello Kitty Easter Egg

Any Hello Kitty fans? Hello Kitty (real name: Kitty White) is a British cat, created by a Japanese designer in 1974 for the Japanese company Sanrio. She lives her parents and twin sister, Mimmy. Oddly, this family of cats has a pet cat. Hello Kitty first appeared in the United States in March 1975. I was three at the time, which explains why I don't remember a world without Hello Kitty. 

All this to say, I made a Hello Kitty Easter egg and I'm really happy with how it turned out. Affiliate links below. 


Hello Kitty Easter Egg


Materials:


Steps: 

Cut a ring off the cardboard tube that is approximately 1.5" high. Then cut out the felt. You will need a pink rectangle that is the same height as the ring and the same length as the circumference. Cut three small scallops from that piece for the neck and sleeves. Use the pink scraps to cut two triangles and a square for the hair bow. Then cut a length of lavender felt for the shirt and two white ears. 


Glue the lavender rectangle behind the pink rectangle. Then glue the pink rectangle around the cardboard tube ring. Place the egg, rounded side up, into the ring. Use a black paint pen to draw Hello Kitty's eyes, nose, and buttons. Glue the ears and bow in place. 

Snip six short pieces of black wire for Hello Kitty's whiskers. I experimented with a lot of ways to attach them and finally found that the best way is to make a tiny bend at the end of each wire, apply glue, then hold it in place until the glue dries. This is tedious, but effective. Hot glue would be faster, but it would be visible when it dries. Superglue might be better. Faster, anyway. 

5/25/23

I Love Cats Photo Frame

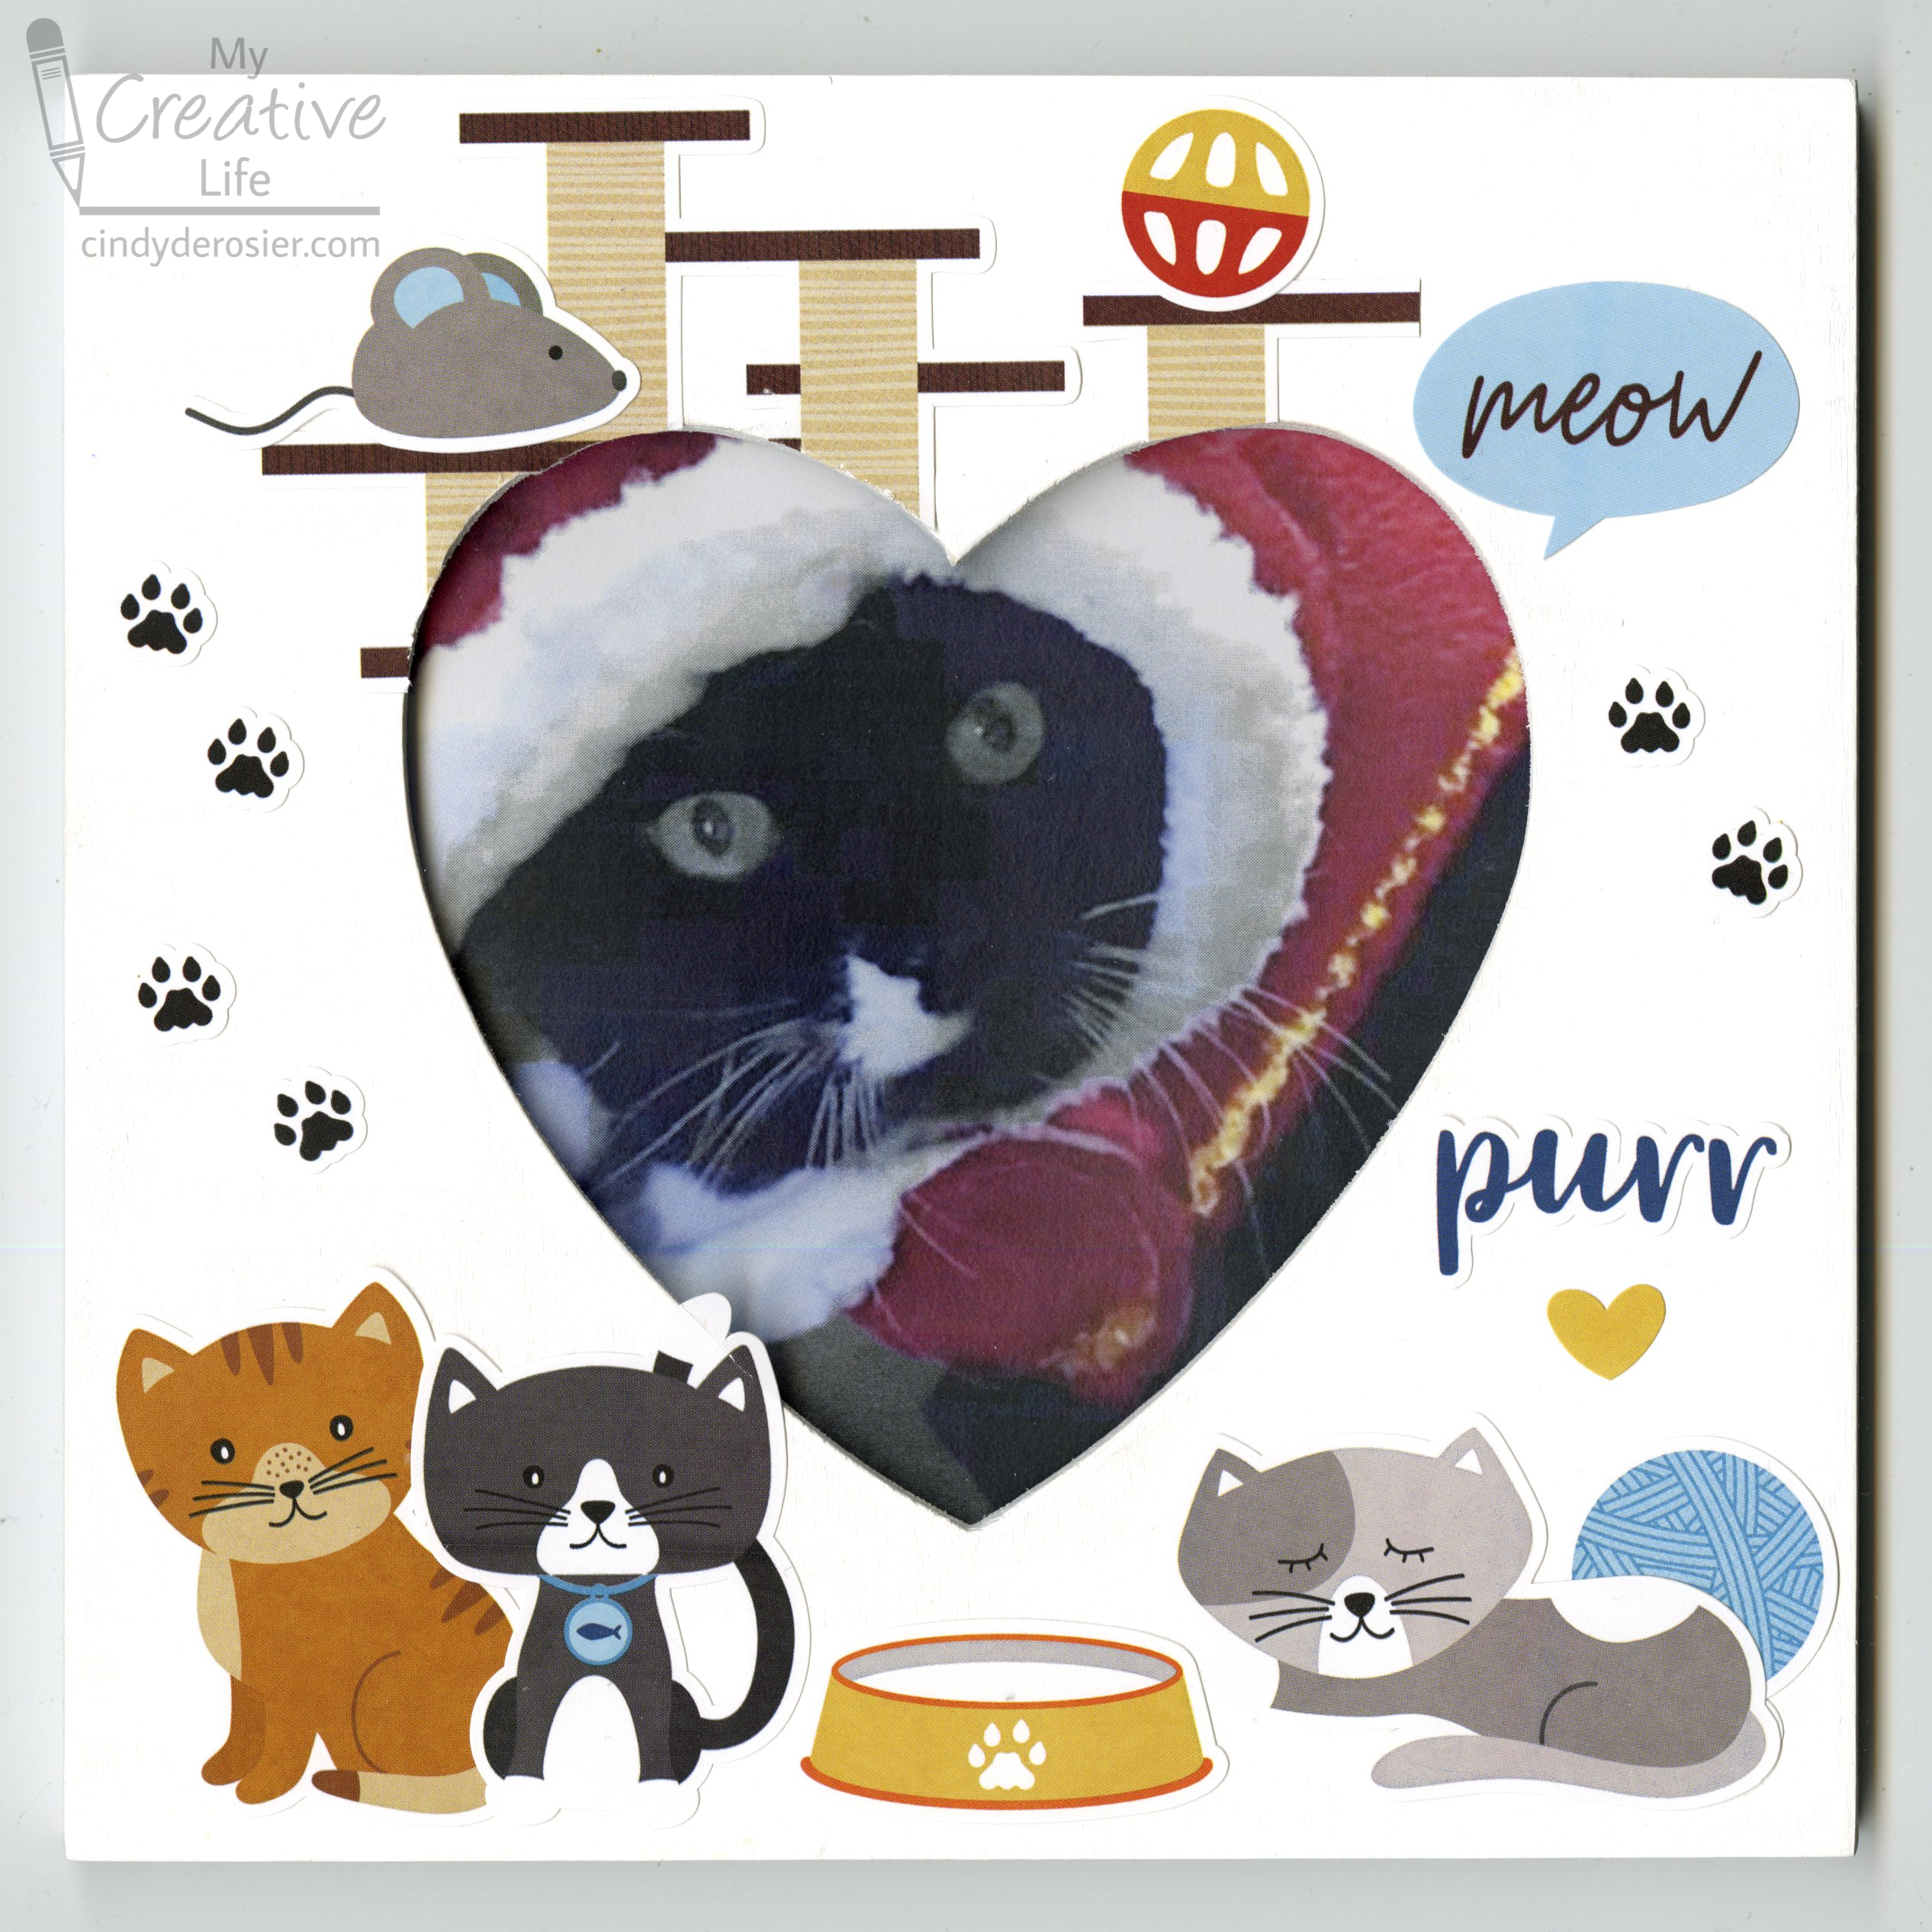
Today's project is a cat-themed photo frame with a heart-shaped opening. I'm calling it the "I Love Cats Photo Frame," but I feel compelled to say that I don't love cats. I don't hate them or anything, but I don't love them. For starters, they're not nearly as awesome as rabbits

Evidence: 
  • Rabbits never bring you dead stuff like cats do. 
  • Cats eat cat food, which is one of the worst smelling substances ever, while rabbit food smells like a fresh-cut lawn. 
  • Cats have the uncanny ability to cough up hairballs in the worst places. Rabbits physically can't vomit.   

Despite the clear superiority of rabbits, there are plenty of people who love cats. My niece, Allison, is one of them. I made this frame for her, featuring a photo of her favorite cat, Tips. Tips does not belong to Allison, but that doesn't stop her from dressing her up. Affiliate links below. 


I Love Cats Photo Frame


Materials:


Steps: 


Paint a thin coat of gesso on the wood frame. Let it dry completely, then use a very fine grain sandpaper over the whole surface. You could technically skip this step, but it makes all the difference in having a smooth surface for adhering stickers. Wipe the frame clean so no dust remains, then paint it white. 

When the paint dries, adhere the stickers. I started with the cats at the bottom, then positioned the cat tree at the top, to make it look like it's in the background. I had to do some minor snipping to fit it in, which you can see by comparing my results with the original sticker sheet. I added the toys next, then the word bubbles, then filled in the extra space with paw prints. 

Because I used high quality stickers on a perfectly smooth surface, I didn't bother to seal the finished frame. If I had, I would have done a test of Mod Podge Ultra on an extra sticker to make sure it would hold up before spraying the actual frame. 

5/12/23

Cat Painted Rock

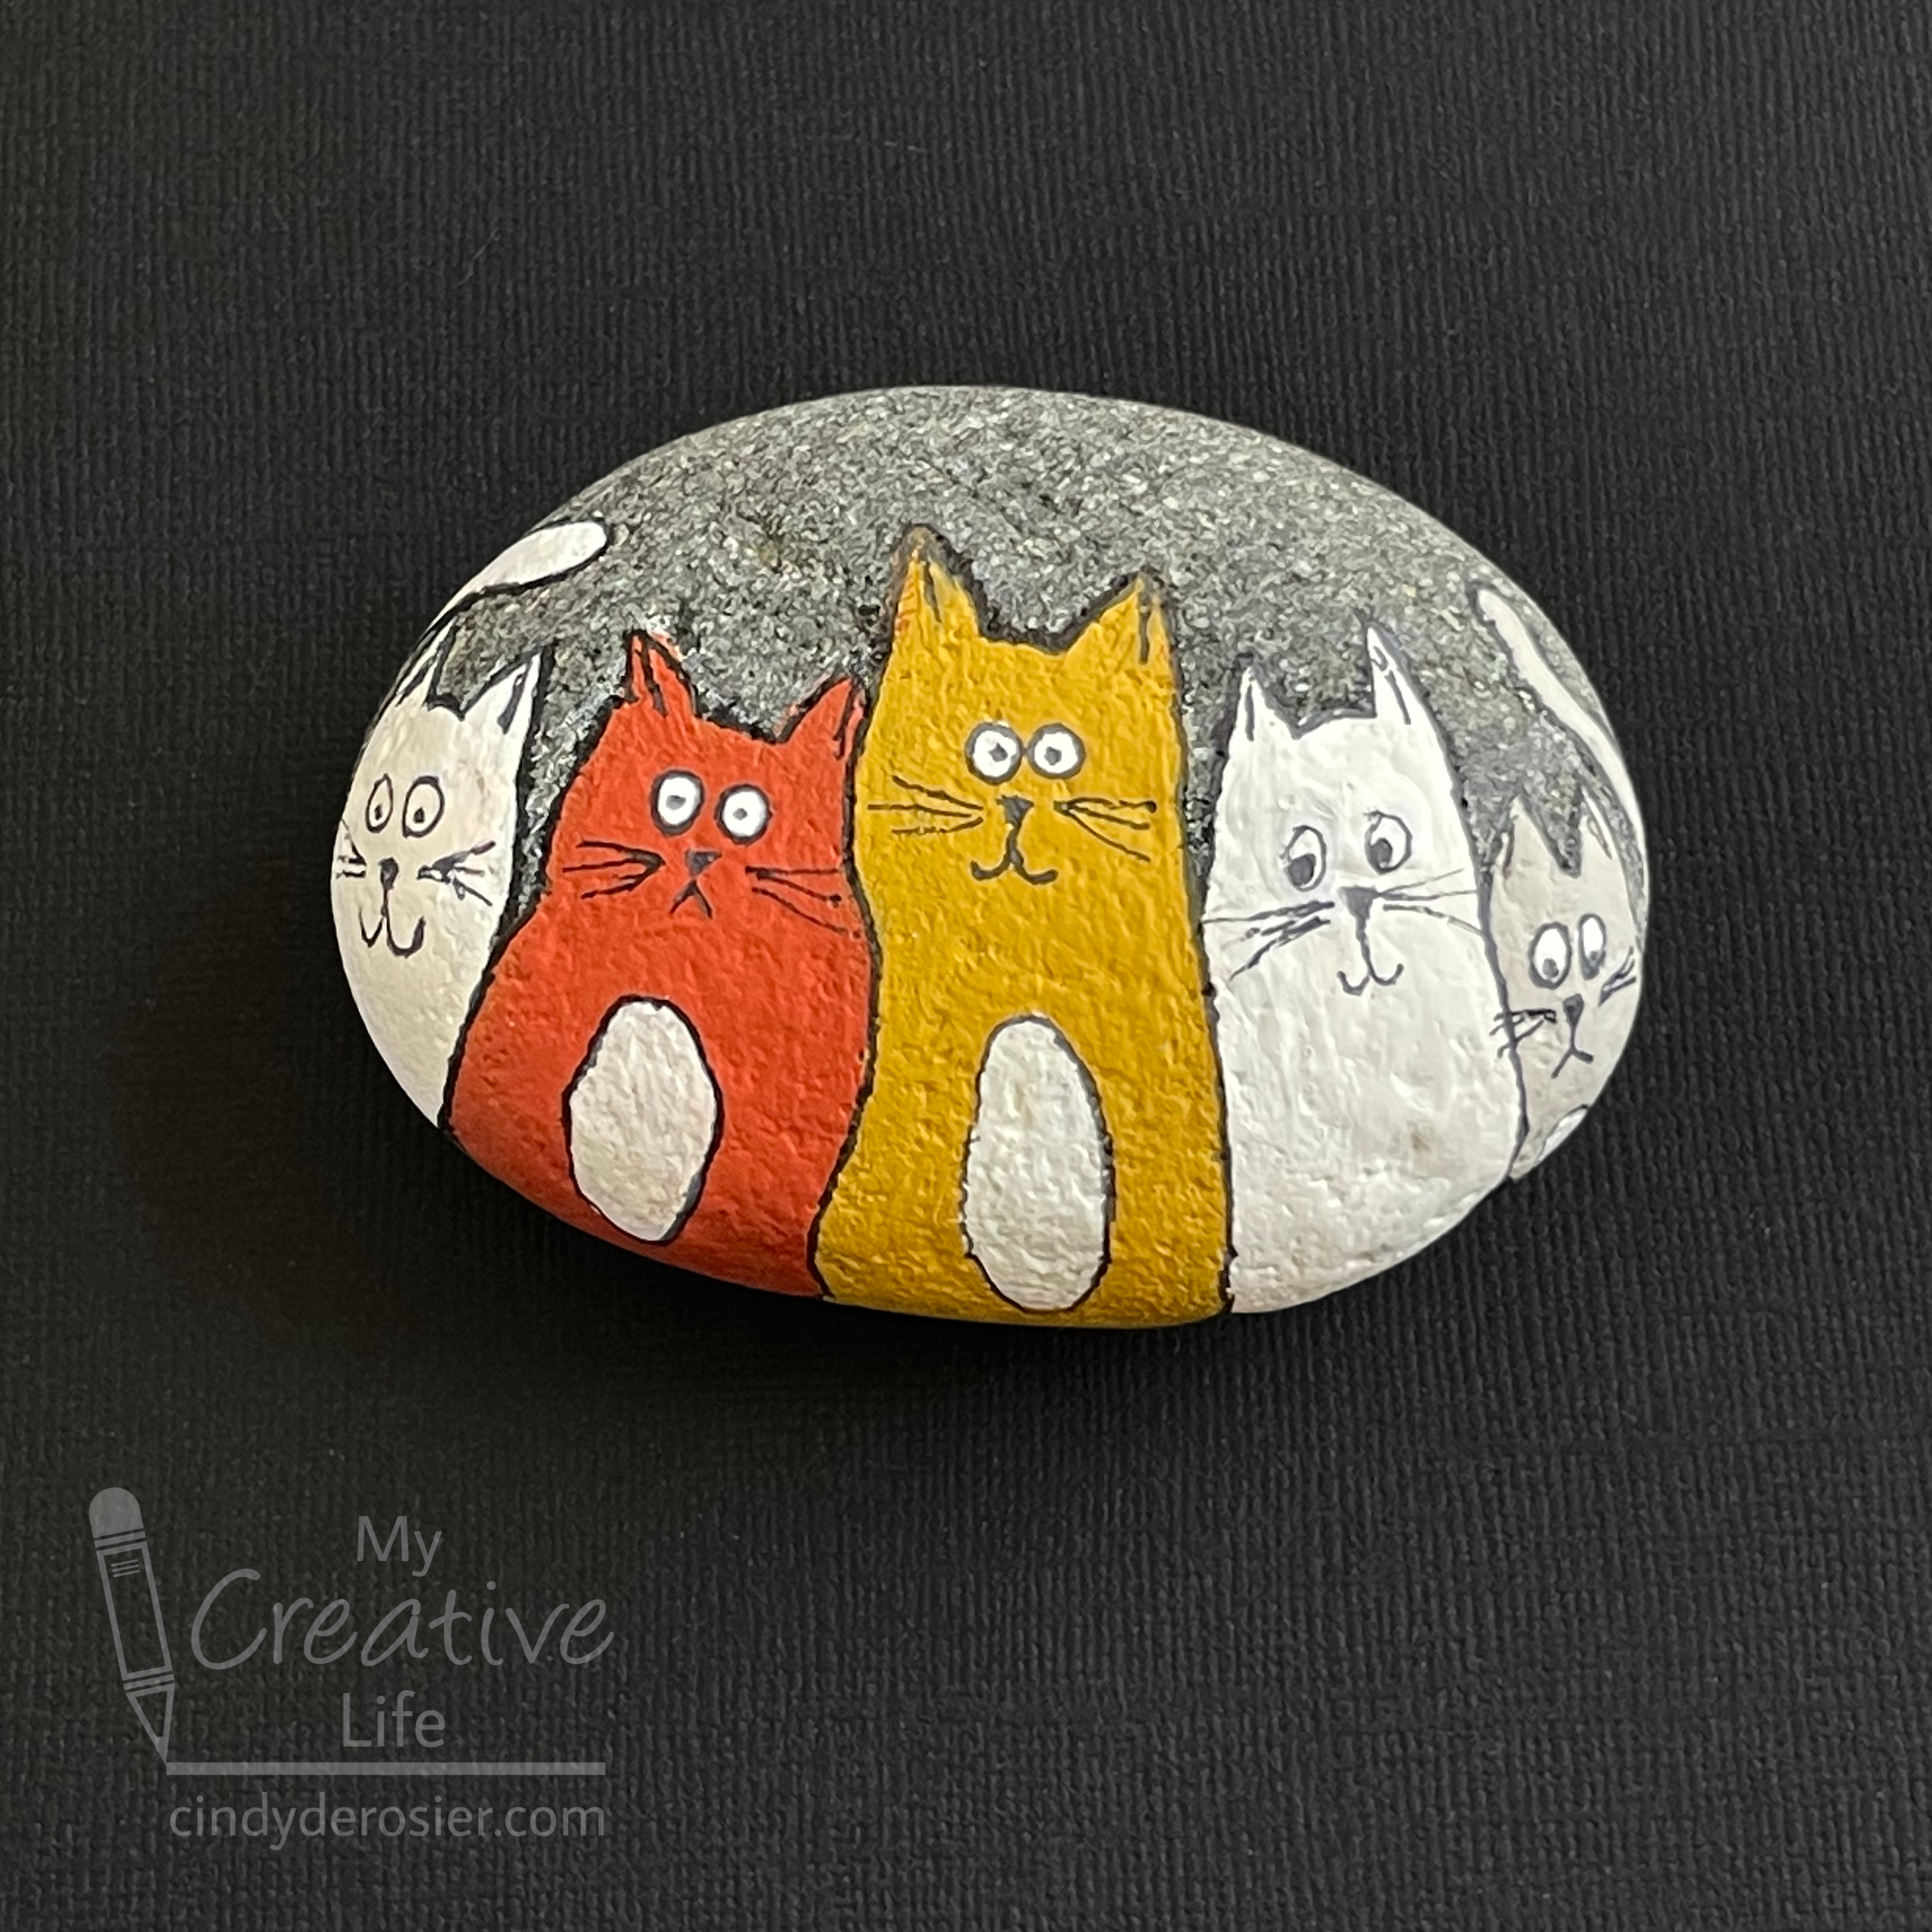
In over 12 years as a craft blogger, I've only shared a painted rock craft once. Time for another! Here is a cat painted rock. To clarify, it's not a cat-painted rock. I painted it. I don't even have a cat, let alone one who paints. Affiliate links below. 


Cat Painted Rock


Materials:


Steps:


Use the white colored pencil to lightly sketch the shape of your cats. I started with what would become the gold cat and worked my way outward. No details - just the oval shape of the cat with ears on top. 

Paint the cats whatever color you want. When the paint is dry, add white bellies (if desired) and white eyes (kinda necessary). When that paint is dry, use the Sharpie to outline the cats and add their facial features, including pupils. 

Spray the rock with Mod Podge Ultra to seal it.

5/24/22

Kitten Tooth Fairy Pillow

When Trevor was a baby, a friend introduced me to the concept of a Tooth Fairy Pillow. Instead of putting a lost tooth under your sleeping pillow, you put your tooth into the little pocket of a stuffed animal, which you set beside your bed. This makes it much easier for the Tooth Fairy to get the tooth without waking the sleeping child. Genius! Affiliate links below. 


Kitten Tooth Fairy Pillow


Materials:


Steps:


Use a piece of scratch paper to make a pattern the size and shape you want your kitten to be. Fold a piece of grey felt in half and place the pattern onto the felt so that the bottom of the pattern is along the fold. Cut out the felt. Then cut a semi-circle of white felt for the cat's tummy. 


Thread your needle with two strands of white embroidery floss. Place the white felt directly onto the fold line, then open up the grey felt. Pin the white in place if necessary. Use a backstitch to sew the white felt to the grey, leaving the top open so there's space to put a tooth or money. 


Sew the googly eyes in place. Thread four strands of pink floss onto your needle. Use a single stitch to tack the pom pom nose into place, then continue with a backstitch to make the cat's mouth. Add a dot of Fabric Fuse behind each eye and the nose to secure them. 


Thread the needle with a single strand of white floss. Tie a knot in the end, then poke the needle from the back to the front to make a whisker. Snip the floss at the desired length, then repeat. I like three whiskers on each side. 


Flip the cat upside down and put a drop of Fabric Fuse on the knot of each whisker to prevent them from pulling through. Let the glue dry completely before continuing. 

Thread the needle with all six strands of grey embroidery floss. (This is where the embroidery needle makes things easier.) Refold the kitten, then whipstitch around the outside, leaving a small opening for stuffing. Add the fiber fill, pushing it into the ears and distributing it evenly. Sew the opening closed. 


You can use this same idea to create a pillow to hold a gift of jewelry, or as a place to put little notes for someone special. It can also hold a good luck charm. Lots of possibilities!

5/19/22

Peekaboo Cat Cards

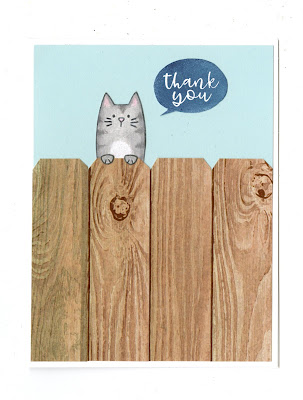
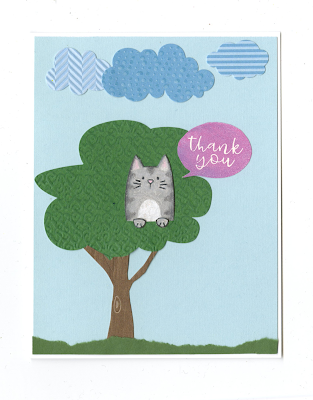
The cats I stamped and colored had been sitting on my desk for too long, so I turned them into cards. Although I'm an advocate for indoor cats, both cards feature cats in outdoor settings: one card has the cat sitting on a fence, while the other is sitting in a tree. Affiliate links below. 


To make this card, I glued sky blue cardstock to a white card blank. I cut a woodgrain paper into strips, cut them 2/3 the length of my card, then snipped off the corners and glued them in place to make the fence. I tucked the cat behind the fence, glued on the paws, and added the sentiment. The stamps are from from the Peekaboo Pets stamp set, colored with Prismacolor colored pencils.


This card also started with sky blue cardstock on a white card base. I used a craft knife to cut a slit in a tree sticker, slid in the cat, then put the sticker on the background. I added the cloud stickers and tore a piece of green cardstock to make the grass. I glued the cat, paws, sentiment, and grass to the blue background. 

Tomorrow I'll show you what I did with the dogs. Needless to say, they're neither on a fence nor in a tree. 

1/6/22

Cat Socks Punny Hidden Money Gift

Another holiday, another money gift! This time, I hid cash in a pair of socks. Cat socks, to be exact, which gave me the chance to torture my nephew (Timothy) with a bunch of cat puns.


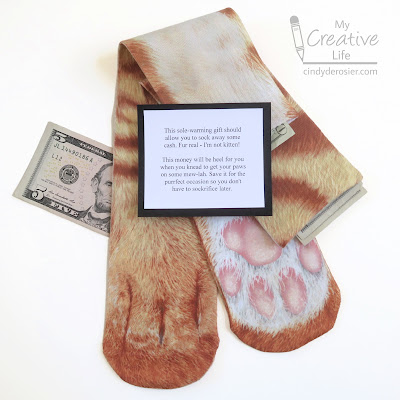
I purchased these cat socks (affiliate link) and filled them with cash, leaving $5 out. Then I typed up a note. It says:

This sole-warming gift should
allow you to sock away some
cash. Fur real - I'm not kitten!

This money will be heel for you
when you knead to get your paws
 on some mew-lah. Save it for the
purrfect occasion so you don't
have to sockrifice later.


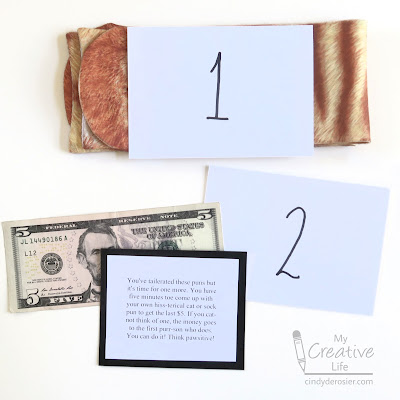
I put that note in an envelope and labeled it with a 1. I packaged it with the socks. Then I made a separate note, which went into a second envelope along with the $5 bill. 


The second note reads:

You've tailerated these puns but
it's time for one more. You have
five minutes toe come up with
your own hiss-terical cat or sock
pun to get the last $5. If you cat-
not think of one, the money goes
to the first purr-son who does.
You can do it! Think pawsitive!


Timothy opened his gifts with my parents, sister, brother-in-law, and niece. I can't wait to hear who got the $5 and what pun they thought up!

7/17/20

Torn Construction Paper Kitten

Torn construction paper is perfect for mimicking the fluffy fur of a kitten. But controlling tears is difficult...


... unless you use a wet Q-tip first. I've shared this technique before, for my panda project. Affiliate links below.


---------


Torn Construction Paper Kitten


Materials: 


Steps: 


Dip a Q-tip in water and "draw" the kitten's body onto black construction paper. Trace it at least twice, then while it is still wet, gently tear out the shape. The paper will come apart easily along the wet line. Repeat this for the kitten's head, ears, and tail. 


Use the same technique for the white patches on the kitten's chest and face, then the pink inner ears and nose. Assemble the kitten by gluing the kitten's body parts to the background paper. 


Glue the googly eyes in place, then use the black colored pencil to draw the mouth. Use the white colored pencil to draw the kitten's whiskers. Remember that they have whiskers above the eyes as well as on their muzzle and jaw. Use scissors to cut a silver tag, then write the kitten's name on it. Cut a length of cord for the cat's collar, then glue it and the tag in place. 

12/9/19

Pet Memorial Heart Box

Several friends have lost beloved pets recently. I designed this memorial heart box to hold a furry family member's ID tags, collar, or other memorabilia after they've passed. Affiliate links below. 


Pet Memorial Heart Box


Materials:


Steps:


Paint the wood box and two wood hearts Medium Gray. When the paint is dry, use a fine grit sandpaper (I used 400) to smooth down any lifted grain. Apply a second coat of paint. Paint the inside of the box using the same technique.

Glue the wood hearts to the box to make the ears.

Cut three pieces of floral wire, approximately 5.5" each. Glue them to the base of the heart, with them splayed out to look like whiskers.

Cut out two inner ears and a nose from pink felt. Glue them in place. Line the inside bottom of the box with felt as well.

Add a photo to the box if desired, then fill with mementos.

2/4/19

Bear and Cat Valentine Treat Toppers

I've been out of sorts since learning that there won't be any Sweethearts Conversation Hearts this year. I'd been a victim of the Great Necco Wafer Panic, unable to buy one of my favorite candies in 2018. And now this. Sigh.

Not only do I love Sweethearts, but they're a February staple for a kids' craft blogger. Fortunately, Brachs is still producing conversation hearts. I bought a big bag. While they're quite not as tasty as Necco's Sweethearts, they're a fine substitute and my Valentine's Day will not be ruined after all.

I did some experimenting with two sizes of treat bags to see approximately how many conversation hearts each would hold, then whipped up some treat toppers to fit each size. Read on to make your own. There are affiliate links in this post.


---------


"You're a PURRfect Friend" Cat Treat Topper


Materials:


Steps:


Fill a treat bag halfway with conversation hearts and set it aside. Cut the white construction paper into a piece approximately 3" x 6.5". Fold it in half. Cut a semicircle and two triangles from the grey construction paper, then punch a pink heart nose. Draw eyes and whiskers.


Glue the cat's face to the folded construction paper, curling the ears forward slightly. Staple the topper to the treat bag. Cut a piece of pink construction paper and write "You're a PURRfect friend!"


Glue the cat's nose in place, then glue the message to cover the staple. 


---------

"You're a BEARy Great Friend!" Bear Treat Topper


Materials:


Steps:


Fill a treat bag partway with conversation hearts and set it aside. Cut the white construction paper into a piece approximately 5" x 8". Fold it in half. Cut a semicircle and two round ears from the brown construction paper. Draw eyes and a nose, and darken in the inner parts of the ears. Glue the bear's face to the folded construction paper, curling the ears forward slightly. Fold over the top of the treat bag and staple the topper to it. Cut a piece of lavender construction paper and write "You're a BEARy great friend!" Glue the message to cover the staple.