Showing posts with label state insect. Show all posts

3/24/22

Pretzel Monarch Butterflies

I've used pretzels to make a butterfly craft before, but that was a savory project suitable for young children. This is a sweet craft, better for preteens and up. I had a lot of fun figuring it out as I went and I'm happy with the end results. Affiliate links below. 


Pretzel Monarch Butterflies


Materials:


Steps: 


Place a sheet of parchment paper underneath a wire rack. Prepare the black candy melts following the directions on the package. For each butterfly, dip two pretzel twists and one pretzel stick into the melted black candy, then transfer them to the rack. I used a sharp knife to make the pretzel sticks shorter; whether you need to do this or not depends on the brand you use. After the pretzels have sat for 30 seconds, transfer them to a different part of the rack so that they don't stick. Let them set completely. 


You'll be melting more black candy, so don't clean that container yet. 

Move the rack, then transfer the pretzels to the parchment paper. Prepare the orange candy melts. I experimented with different methods of filling the holes of the pretzel twists with orange (see failures below). I found the easiest and most effective method was spooning a dollop of melted candy into each opening, then using an extra pretzel stick to push it over the black candy. The goal is to leave a thin border of black between the orange areas. 

In retrospect, I should have used the scribe tool to get rid of the peaks in the orange that the pretzel stick left. 


When the orange has set completely, prepare more black Candy Melts. Use the scribe tool to draw lines of black candy across the orange to mimic the patterns of a monarch butterfly. Symmetry is more important than accuracy, so work on both the left and right wings at the same time so that you end up with matching pairs. Let the black candy set. Don't clean the container or the scribe tool - you'll use both again.  


Prepare a small amount of white Candy Melts in a separate container. Use a clean scribe tool to put dots along the outer edges of the pretzels. Again, work in pairs and focus on symmetry. Let the white candy set. 


Crumple a small piece of foil into a cradle to hold the butterfly wings in the position you want. Do this for each of your butterflies. Carefully remove the pretzel twists, keeping the stick pretzels in position. Melt more black candy. Working on one butterfly at a time, use the scribe tool to paint a line of melted candy along each side of the stick pretzel, then gently place the pretzel twists back into position.  
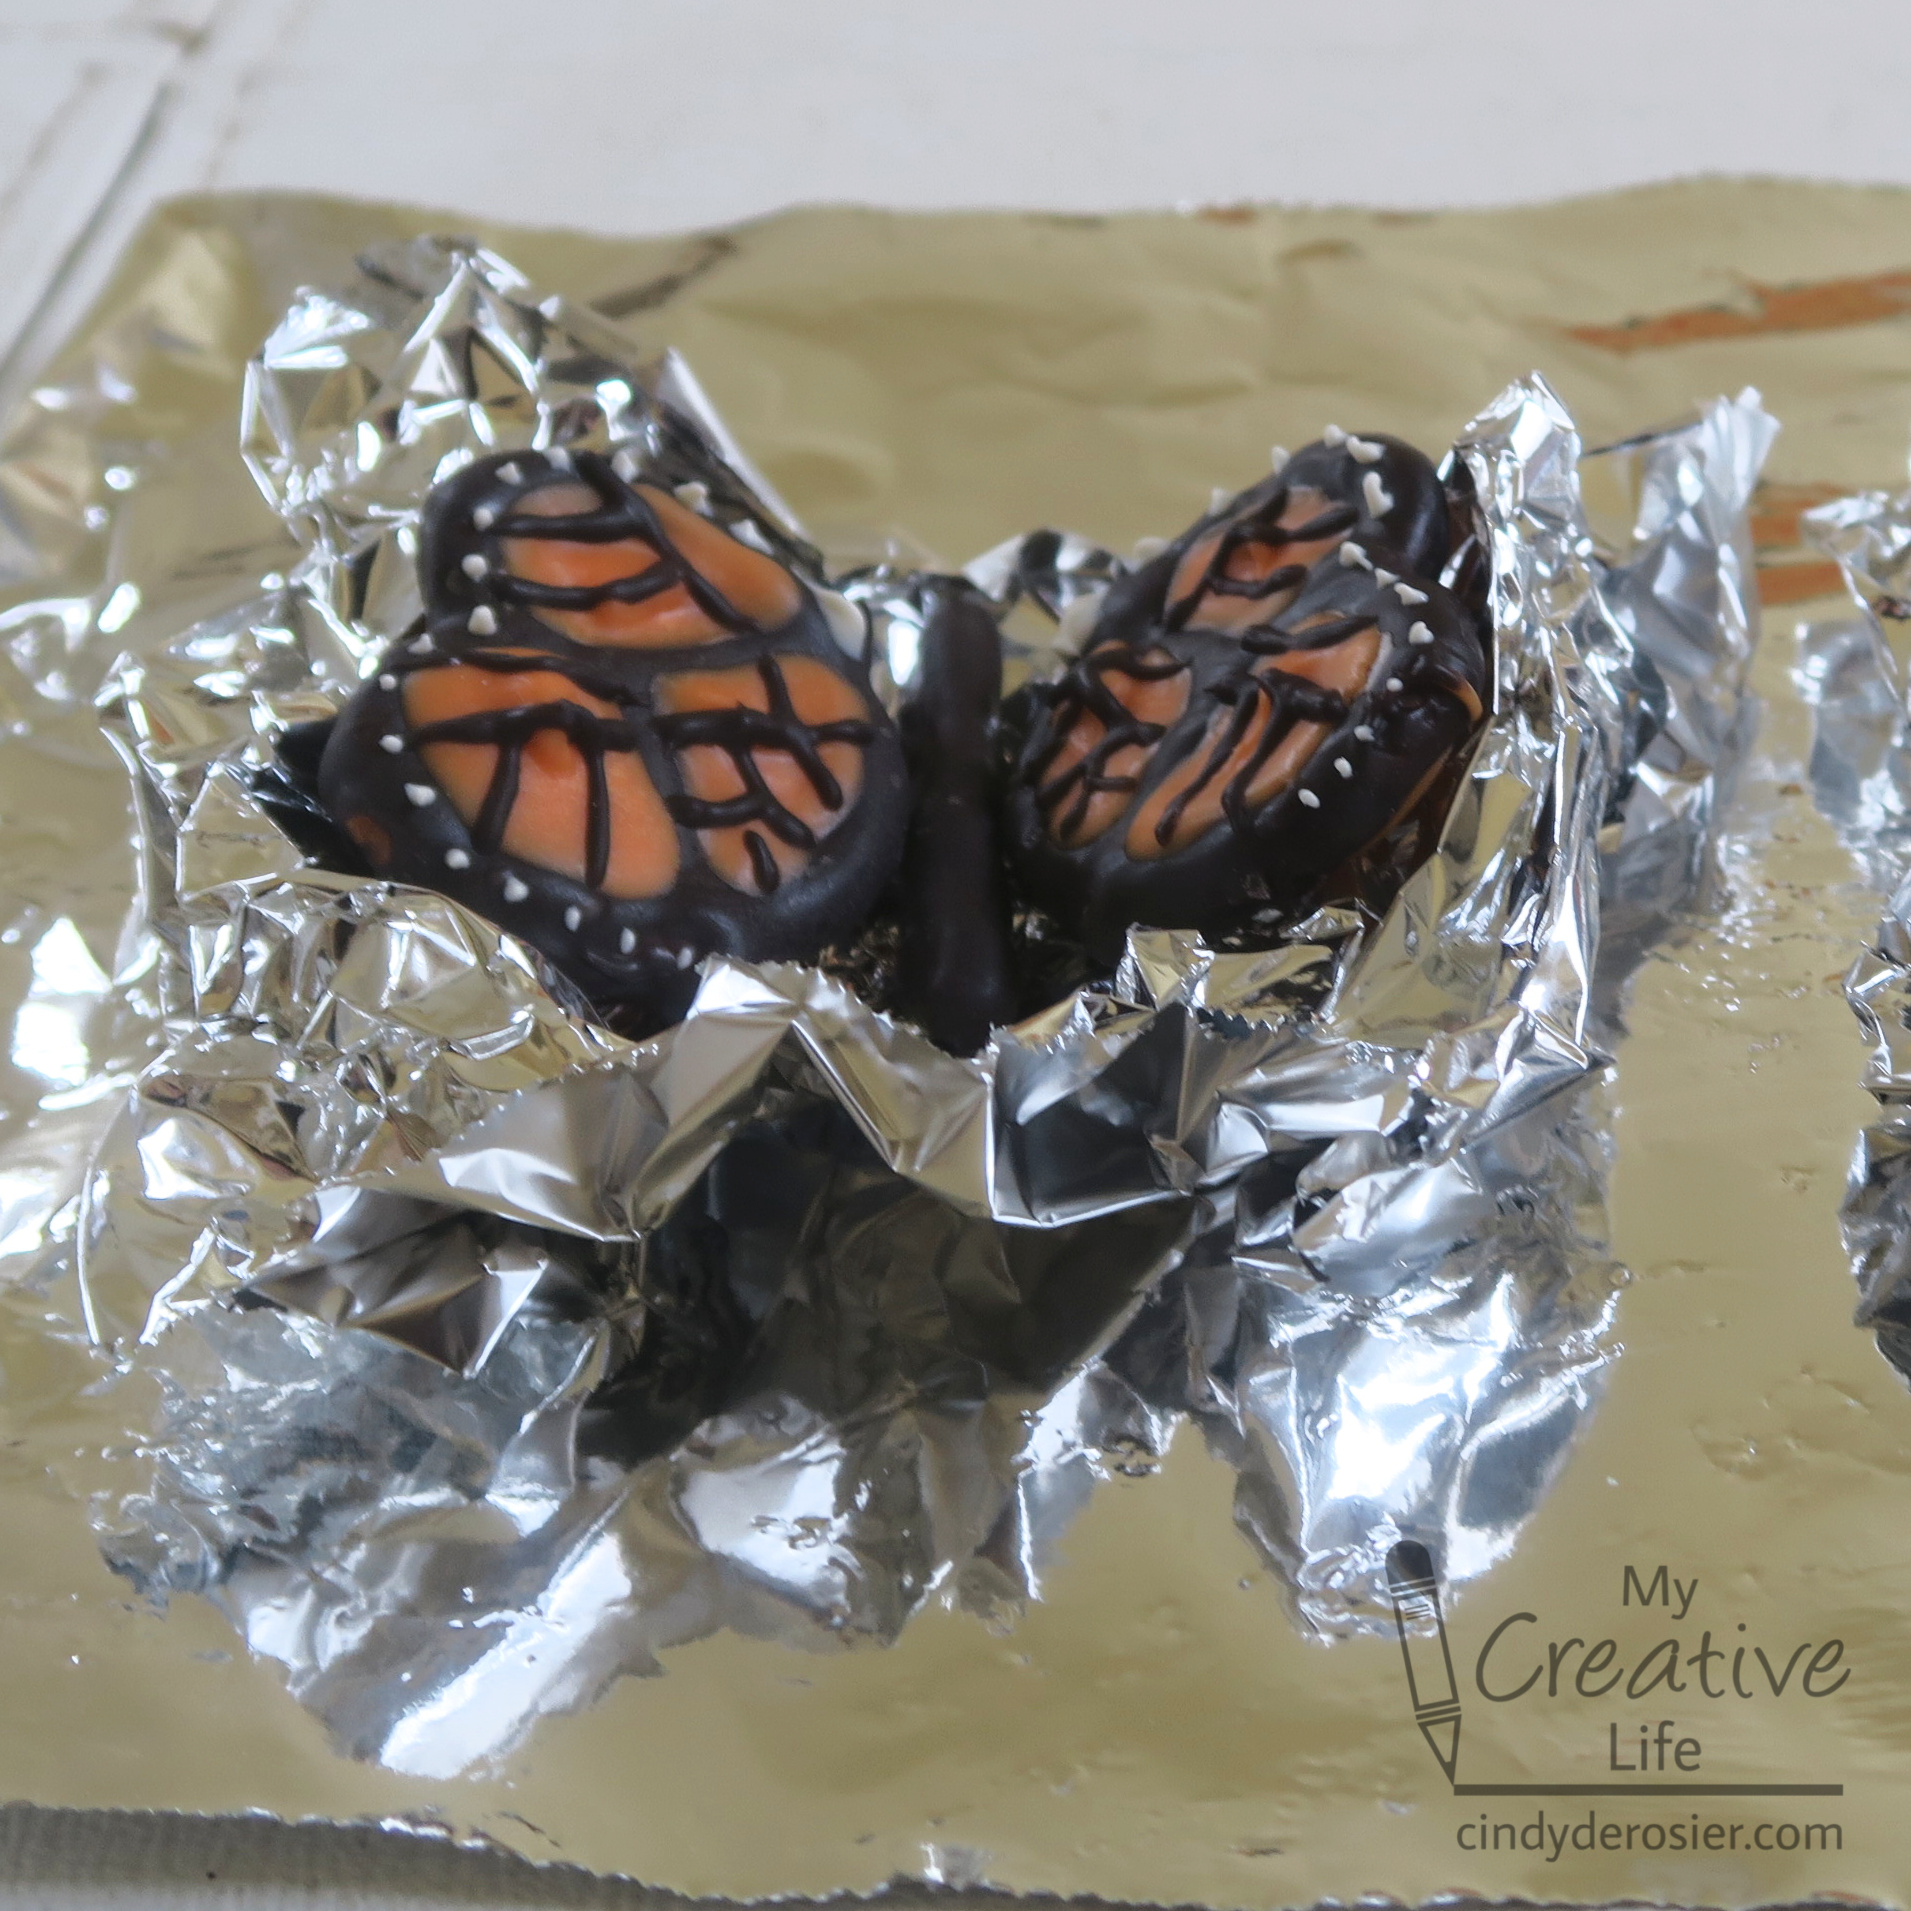

Reinforce the wings by adding a bit of extra black candy along the point where the wings meet the body. Let the candy set completely, then remove the butterflies and place them onto frosted cupcakes. 


Happy spring, everyone! Celebrate with a cupcake. 

10/18/21

Coloring State Butterflies

Fun fact: 48 of the 50 states have an official state insect. (The two that don't are Iowa and Michigan.) Some states have named more than one state insect, where others have multiple categories of insects. For example, Alabama has a state insect, a state agricultural insect, and a state butterfly. (Oddly, their state insect is a butterfly, but they named a different butterfly as their state butterfly.) Delaware has a state bug, a state butterfly, and a state macroinvertebrate. Tennessee has the most, having designated two official state insects, a state agricultural insect, and a state butterfly.  

It's the butterflies that I'm focusing on today. 

There are 29 states with either a state butterfly or state insect that's a butterfly. Seven are monarchs, and one is a Mullerian mimic to a monarch. I've made a couple of monarch crafts fairly recently, so I wanted to focus on some of the other state butterflies. And, of course, I've been working obsessively with colored pencils lately, so that's what I used. 

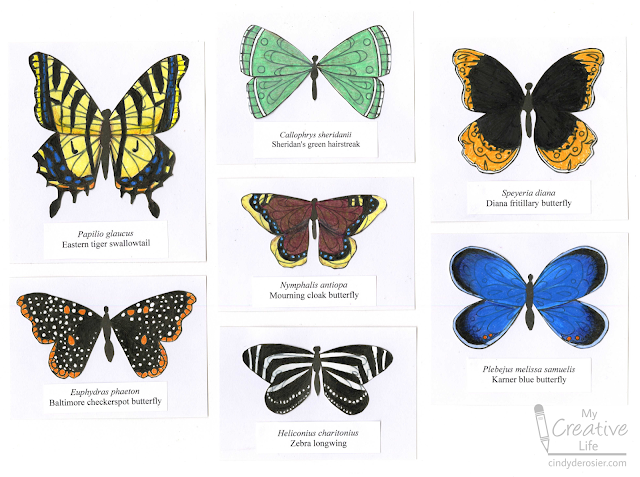
Here are the seven butterflies I made, representing: Alabama, Delaware, Georgia, North Carolina, South Carolina, and Virginia (Eastern tiger swallowtail); Arkansas (Diana fritillary butterfly); Florida (Zebra longwing); Maryland (Batimore checkerspot butterfly); Montana (Mourning cloak butterfly); New Hampshire (Karner blue butterfly); and Wyoming (Sheridan's green hairstreak). 


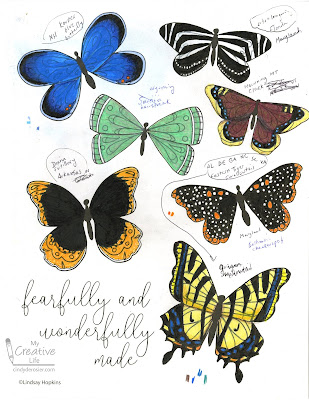
In retrospect, I made things WAY harder for myself than necessary. Rather than drawing the butterflies myself, or printing out line drawings, I used a black pen to alter an existing coloring page. I went through all the state butterflies and the seven drawings on the coloring page to decide which images would work for which butterflies. Then I started blacking in the changes. It was very tedious and took much (MUCH) longer than drawing them would have. Not to mention, I was left with lines from the original designs that didn't belong. Nevertheless, I pushed on. 

Here you can see that I've begun altering the butterfly on the bottom right of the page. I'd originally started to change it into an Oregon swallowtail (which is why you see "Oregon" written above it) but I ended up making the similar Eastern tiger swallowtail. You can see in my notes that I planned to turn the butterfly directly above the sentiment into "Arkansas or Colorado." I went with Arkansas' Diana fritillary butterfly. 


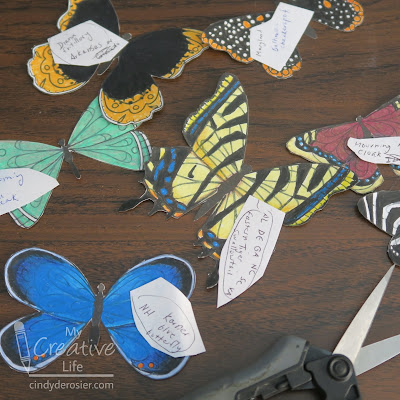
Here are each of the butterflies fully colored, along with my notes. You can also see a few places where I swatched my colored pencils. 


The next step was fussy-cutting all the butterflies. That took awhile, too. 


Finally, I mounted each butterfly on white cardstock and added a typed label with the scientific name and the common name. I love the way the butterflies all look together. 


This was a challenging project that taught me a lot. Someday I might redo these (drawing them by hand instead of starting with lines that shouldn't be there) and adding in the remaining state butterflies. But it's not going to be anytime soon. I'm officially taking a butterfly break. 

7/22/21

Puzzle Piece Monarch Butterfly

After you turn a puzzle piece into an alien, the next logical thing to do is to turn one into a butterfly. A monarch, to be specific. Affiliate links below. 


Puzzle Piece Monarch Butterfly


Materials:


Steps:


Prep the puzzle piece by painting a coat of gesso on the glossy surface. When the gesso has dried, add an orange base coat. Let it dry completely. 

Use a fine-tip Sharpie to color the sides and edges of the puzzle piece black. Then use an ultra-fine Sharpie to add lines that mimic the patterns of a monarch. 
 

With the white Uniball pen, add dots around the outside edges. 


Wrap a pipe cleaner around the puzzle piece to make the body of the butterfly. The top and bottom should extend beyond the puzzle piece, and the ends should be hidden on the back side. 

Cut a piece of Twisteezwire and wrap it around the the top of the pipe cleaner, twisting to secure it. Curl then ends around the body of the pen to create the curl.  


So far, I've turned puzzle pieces into a ladybug, crab, reindeer, girl, wreathalien, and now a butterfly. Trevor has made a spider and a bug. There are still several dozen pieces left from the terrible puzzle - what should I make next?

7/9/21

Handprint Monarch Butterfly

I'm a huge fan of handprint (and footprint) crafts. If you ever see me staring at my hand while twirling it slowly around, I'm probably thinking about a potential handprint craft. Today's is a monarch butterfly. Affiliate links below.


Handprint Monarch Butterfly


Materials: 


Steps:


Paint a clothespin black, then set it aside to dry. 

Dip one hand into orange paint, then use the paintbrush to add black lines on top of the orange paint. Work quickly so that it doesn't dry. 


Press your hand onto the blue paper. Pay attention to which hand you are stamping - the right hand goes on the left and the left hand goes on the right. Repeat the process with the second hand, leaving a small gap between the two handprints.


Use the tip of the paintbrush handle to add tiny white dots along the edges of the handprints. Let the paint dry completely. 

Wrap a length of pipe cleaner around the clothespin and then bend the ends gently to make antennae. Glue the clothespin to the center of the paper between the two handprints. 


The monarch butterfly is the official state insect of Alabama, Idaho, Illinois, Minnesota, Texas, Vermont, and West Virginia, but no matter where you live it's a great craft to make.

4/16/21

Ladybug Magnifying Glass Craft

Ladybugs are awesome. Even if they weren't as pretty as they are, they'd be awesome simply because they eat aphids. I've been fighting my annual backyard battle with aphids for the past two weeks and am thrilled when I find a ladybug who has joined me in the fight. Or, from its perspective, the buffet. 

There are already a gazillion ladybug crafts out there, but few portray ladybugs realistically, which was my goal with this craft. Affiliate links below. 


Ladybug Magnifying Glass Craft


Materials:


Steps:


Punch a 2" circle from black cardstock to make the base of the magnifying glass. Cut a long narrow rectangle for the handle. 

Cut a blue background into your desired size. (Mine is approximately 4" x 6".) Punch a 1.5" circle from the scraps. 

Punch a 1.5" circle from the green cardstock, then snip off the top and bottom. Cut the scraps into blades of grass. 


Cut three ladybug shapes from red cardstock. One should be about the same width as the green partial circle above, and the other two should be much smaller. 

Use a reference photo to draw the black details onto the ladybugs, using a Sharpie. Then add the white details with the gel pen. 


Now it's time to assemble. Glue the grass to the bottom of your background paper, making sure there's a long blade in the center. Then add the magnifying glass and handle. I tucked the magnifying glass under a few blades of grass and over some others. 


Center the blue circle onto the magnifying glass and glue it in place. 


Add the partial green circle, orienting it so that it looks like a magnified blade of grass. Glue the largest ladybug onto it, then drag its six legs. Glue the other two ladybugs to blades of grass that aren't being magnified. 


I had a lot of fun putting this together. Yea, ladybugs!

8/28/19

Dragonfly and Damselfly Garden Stakes

As you know, I'm a Plaid Ambassador, which means that the folks at Plaid send me boxes of products to try. (I know. Coolest thing ever.) When I opened a box with two bottles of  Dragonfly Glaze (affiliate link here and throughout the post), naturally I used it to make dragonflies! (Actually, one dragonfly and one damselfly.) They look so cute bobbling around in my houseplant.


---------


Dragonfly and Damselfly Garden Stakes


Materials:


Steps:


Paint a jumbo craft stick the color you'd like your dragonfly or damselfly to be. (I made one green with mini craft sticks representing Washington's state insect, the green darner dragonfly, and one blue with standard craft sticks, representing Nevada's state insect, the vivid dancer damselfly.) Paint the mini or standard craft sticks white. When the paint is dry, give each a coat or two of Dragonfly Glaze.

When the glaze is completely dry and you're happy with the shimmer, glue the eyes and the wings to the body. Leave a small gap between the wings. When the glue is dry, place a white Twisteezwire between the wings.


Twist the two ends of the wire together close to the insect's body. Then continue to twist the two wires around each other. 


Thread the twisted wire into a clear drinking straw, then press the straw into the potted plant. Adjust the wire as desired. 


My dragonfly and damselfly will be staying indoors, but you could put these in the garden instead. A coat of sealant will help it stay intact and shimmery throughout the growing season.

6/12/18

Monarch Butterfly Craft

After learning that 12 states have named the honey bee as their official state insect, I was curious to see what insect was the second-most named. I thought it might be the ladybug, which is the official state insect of seven states. Upon further research, I learned that the monarch butterfly is also the state insect of seven states! Here's my whimsical version of this beloved insect.


---------

Monarch Butterfly Craft


Materials: 

  • construction paper (or copy paper) - black, orange, light orange
  • ruler
  • paper trimmer
  • glue


Steps:


For each butterfly wing, you will need six strips of paper. Save yourself some work and cut two at a time of each of these:  
  • 7" x 1" orange
  • 6" x 1" light orange
  • 5" x 1" black
  • 4" x 1" orange
  • 3" x 1" light orange
  • 2" x 1" black


Separate the strips into two identical piles, one for each wing. Put a thin line of glue on one end of the 7" strip. Put the 6" strip on top. Add a thin line of glue on the same end of the 6" strip and put the 5" strip on top. Continue until all the pieces are glued together at one end. 


Put a strip of glue on the same place you've been gluing. Bend the 2" strip over and hold it in place. Repeat the process of adding glue and folding over each strip, one at a time, until you have a completed wing. Set it aside and repeat all steps to make a second wing. 


Cut a 5" x 1" strip of black construction paper and roll it into a tube. Glue it in place. Cut two very thin strips of black. 


Glue the black strips inside the black tube. Curl the ends to make antennae. (Fun fact: I had to look up that word to confirm that the plural of antenna is antennae. I thought it might be antenni, like alumna-alumni, but it turns out that a group of female graduates is alumnae... just like antennae. Alumni is a group of male graduates, though the word is also used for a mixed gender group. Etymology is fun!) 


Now glue the wings underneath the body. The monarch is done!


From another angle:


Obviously, you could change up the colors and make any kind of butterfly you want. You could also make the monarch more realistic by drawing in its black spots and making three distinct body parts. Whatever you'd like!


5/3/18

Cardboard Tube Firefly

Lately, I've become a little bit obsessed with state symbols. I know all of California's, having grown up here and then taught my 4th and 5th graders about them back in my teaching days, but it wasn't until Steve and I started making an effort to take Trevor to all 50 states that I started really caring about other states' symbols. For example, it was very important to me to eat Maryland's state dessert, Smith Island Cake, during our visit last fall. I'm glad I did. It was delicious. 

I noticed that a lot of states (including California) have a butterfly species as their state insect. But only one state, Pennsylvania, has named the firefly as its sole state insect. (Tennessee has named the firefly as one of four state insects.) I did a firefly craft way back when Trevor was in first grade and writing a report about fireflies. They are such interesting insects! I challenged myself to make a cardboard tube version of a firefly. 


I love how my firefly turned out! If I were an elementary school teacher in Pennsylvania or Tennessee, we would make these in the classroom as part of a study of state symbols. Then I would hang a string of blinking Christmas lights on a bulletin board or window, putting one firefly over each lightbulb. Wouldn't that be awesome?! If you know any elementary school teachers in Pennsylvania or Tennessee, tell them about my idea because I really think this should happen!

---------

Cardboard Tube Firefly


Materials:

  • cardboard tube
  • scissors
  • acrylic paint (black, red, yellow)
  • paintbrush
  • black cardstock or construction paper
  • craft glue


Steps:


Cut the cardboard tube in half. You only need one half for each firefly. 


Paint the firefly, using an image for reference. It helps to do a base coat and let it dry completely before adding the other colors. I experimented with different base colors and it didn't make much of a difference. 


I also experimented with rounding off the tube before painting it vs. after. My suggestion is to do the base coat in red or yellow, use the scissors to round off the head, and then paint in the details. When it's dry, use the scissors to perfect the head shape and to add slight rounding to the wings. 


Turn the firefly upside down. Cut eight thin strips of construction paper or cardstock. Two are antennae and six are legs. Glue them in place - antennae on the head and pairs of legs on the in the half closest to the head. 


Now hang some blinking lights and position the fireflies above them. And then send me a photo because I totally want to see how that looks with a whole classroom's worth of fireflies on display!