

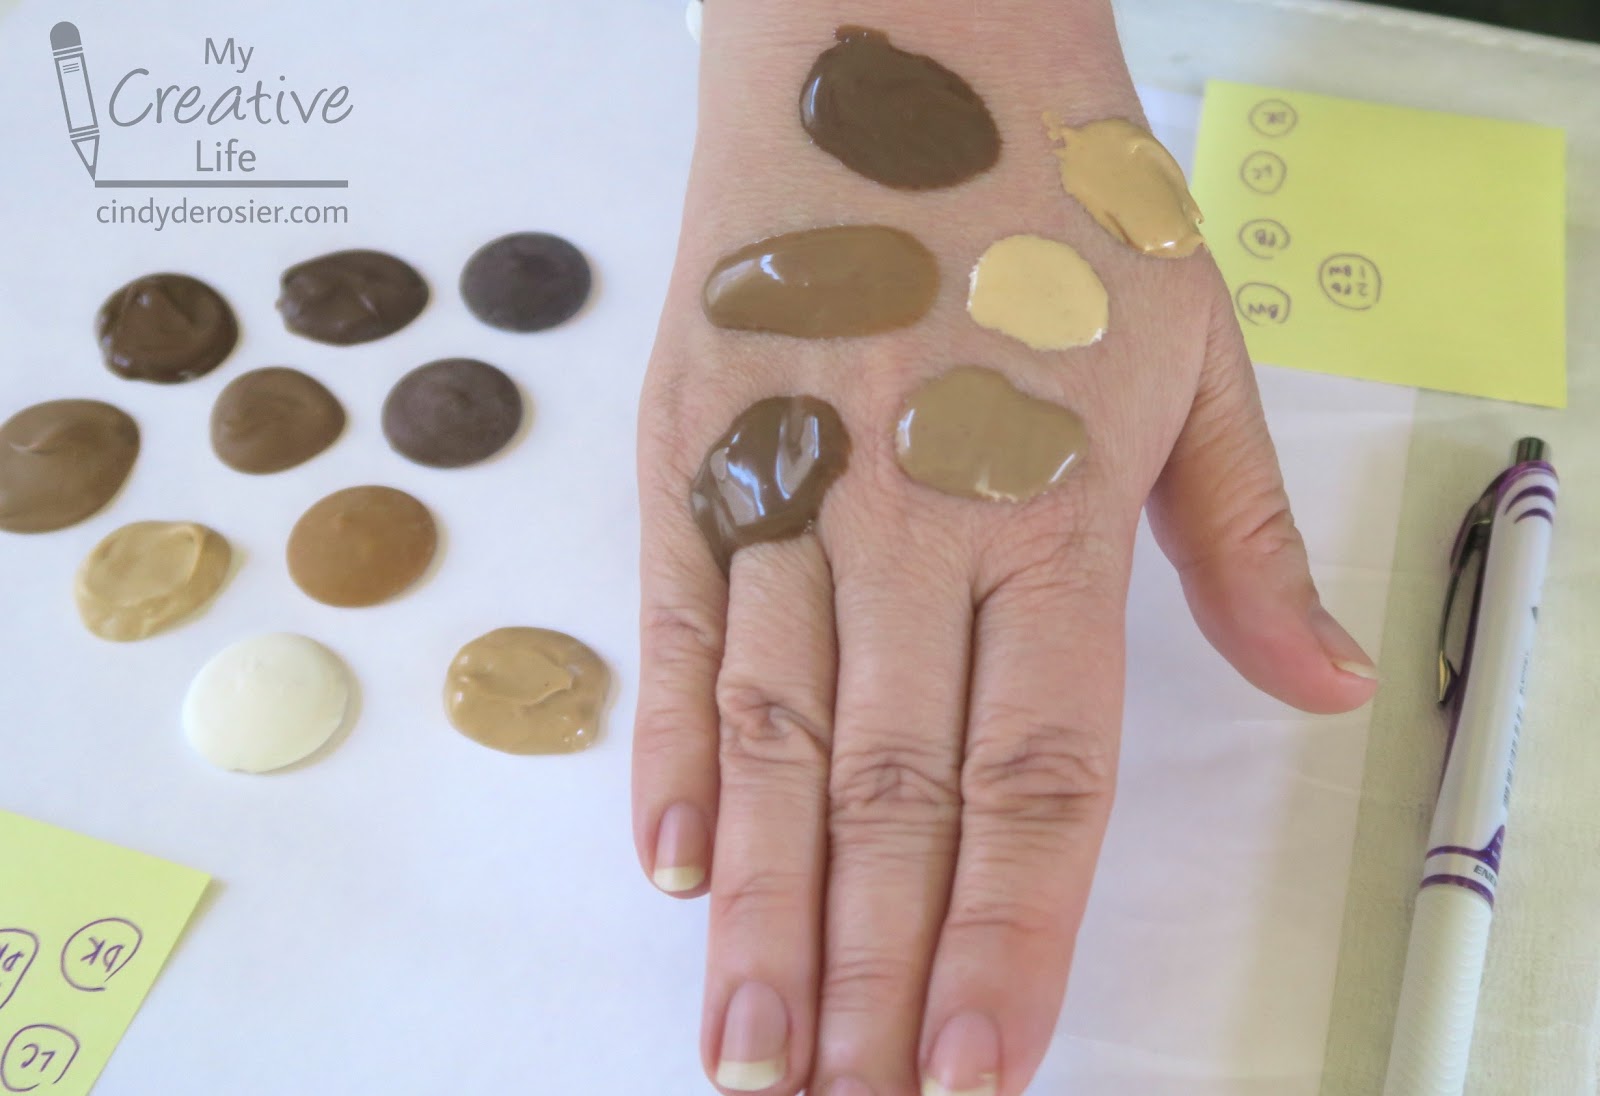
OK, so it doesn't actually look like me at all. The biggest problem is that the skin tone is totally off, which is really ironic considering the level of effort I put toward making the face accurately match my skin. I found a really handy Candy Melts Color Chart on Wilton's website, but nothing specifically about mixing Candy Melts to make skin colors. So I decided to make my own chart. I chose four colors (Bright White, Peanut Butter, Light Cocoa, and Dark Cocoa) and lined them up (from top to bottom in the photo). Then I melted equal parts of two adjacent colors and put a dollop at the intersection of the two colors I used. Finally, I mixed equal parts of three adjacent colors (for example, Bright White, Peanut Butter, and Light Cocoa) and put the resulting color in the far right column.

I tested all the blended shades, plus Peanut Butter, on my hand. None was quite right, but obviously some were more wrong than others.
I tried the closest shade on my inner wrist, based on the fact that someone told me years ago that's where you should test foundation colors. It's sort of close, right?

Take another look at my finished Me-on-a-Stick before you answer that.

So it turns out that when you add a little bit of melted candy to your wrist, it looks a lot lighter than when you have a thick layer that has solidified. I added a touch of white to the not-my-skin-tone and made myself a friend. She looks a bit more natural and a bit less like someone who has an unfortunate addiction to tanning.

Here are the two side-by-side.

So even though the Me-on-a-Stick is not exactly a perfect replica, it's still a lot of fun. I think kids would get a kick out of making their own Me-on-a-Stick. There are so many possibilities of candies you can use for the facial features and the hair.
---------
Me-on-a-Stick
Materials (affiliate links):
Steps:
Put a round pretzel down on a piece of waxed paper. Melt the appropriate color(s) of Candy Melt wafers to get the desired skin tone. Spoon the candy into the pretzel. Add sprinkles to make hair, eyes, nose, and a mouth. Let the candy harden completely.
Peel the candy off the waxed paper and turn it upside down. Put a dollop of Candy Melts on the back and add the lollipop stick. Let it set completely.

I learned a few things during the making of Me-on-a-Stick, besides the importance of choosing a lighter-than-you-think skin tone if you're trying to match your skin. First and foremost, I learned the Candy Melts do not set up on skin. I don't know why this surprised me, but I thought one flavor would set up on the back of my hand before I added the next one. Nope. They stayed runny. And speaking of runny, the Peanut Butter Candy Melts are runnier and melt faster than the others. Oh, and they're delicious. This was the first time I'd tried them. They're even more delicious when combined with chocolate and/or vanilla Candy Melts!

Gosh...how fun is this project! I think the friend has a more natural skin tone than tanned "Cindy"...hahaha!
ReplyDeleteHow FUN!!!! I loveeeeeeee this!! And a tanned Cindy is not a bad Cindy! LOL!! :)
ReplyDeletethe skin tone color would look less zombie-like if you add some pink or red because you do have blood vessels under your skin!
ReplyDeleteTrue! I should keep pink candy melts on hand.
Delete