9/21/17

Vegetarian (or Not) Taco Soup

We're finally leaving summer temperatures behind and getting into soup weather. One of my favorite easy fall meals is taco soup. 


Taco Soup

Base Ingredients:

  • 1 can diced tomatoes
  • 1 can black beans
  • 1 can corn
  • 1 cup salsa

Extras:

  • cooked rice
  • cooked chicken, beef, or pork
  • shredded cheese
  • avocado
  • sour cream
  • tortilla chips


Combine the tomatoes, beans, and corn in a sauce pan. Do not drain the liquid. Stir in 1 cup of salsa. It can be purchased or homemade and lets you customize the soup to your desired heat level. Bring to a boil, then turn down to low and let it simmer for 5-10 minutes. You can stop here if you want. The soup is perfectly tasty just like this. It's vegan, too. 


But I think it's much better with the add-ins. There's no right or wrong. If you have leftover rice, add it. If you have leftover ground or shredded meat, add it. 

Ladle the soup into bowls and garnish with shredded cheese, avocado, and/or sour cream. Serve it with tortilla chips. 

9/20/17

Boardwalk Craft

This post contains affiliate links. 

I know summer is behind us, but I have boardwalks on my mind. I'm deep into planning our next big trip, which will take us east to several states that are famous for their boardwalks. I don't think we'll actually be visiting those boardwalks on this trip (as I'm already packing in way more activities that a reasonable person would even consider), but we will definitely go to at least one Atlantic beach. 


Boardwalk Craft 


Materials:


Steps:


Cut or tear the water patterned paper approximately in half and layer it on top of the sand patterned paper. Glue it in place. 

Lay the skewers horizontally across the paper. They should reach from end to end without extending beyond the paper. If the skewers are too long, trim them. If the skewers are shorter than the papers, trim the papers so they are exactly the same as the skewers. 

Pull fluffs from the cotton balls to mimic the surf. Glue them in place.  


Put the skewers down parallel to one another on your work surface. Arrange the mini craft sticks across the skewers so they look like a boardwalk. Completely fill the skewers, then glue them in place. 


This gives you a sense of scale for the mini craft sticks. 


When the boardwalk is dry, turn it over and add glue along the length of the skewers, then glue them to the sand portion of the paper. 

Decorate the beach with stickers, such as a shovel and pail, a sandcastle, or a sea star. 

9/19/17

Paper Plate Volcano

As I was walking home from school drop-off, an idea for a paper plate volcano popped into my head. I have no idea why, as it's not like there's a volcano between our house and the middle school. When I got home, I whipped up my volcano. It came out exactly how I'd hoped and it was ridiculously fun to do the lava. I love my job. 


Paper Plate Volcano


Materials:

  • paper plate
  • scissors
  • stapler
  • paint (grey, black, red, orange)
  • paintbrush
  • sponge
  • cotton ball


Steps:


Use the scissors to cut a straight line to the center of the plate, then cut out a hole a little smaller than a dime. It does not need to be neat or exact. 


Overlap the cut ends of the plate to form a cone. Staple it to hold the shape.


Paint the volcano grey. 


Squirt some grey paint and black paint onto a surface. (I'd normally use my Frisbee, but I needed a second paper plate for another project, so I just used that.) Dip a dry sponge into the paint and pounce it all over the volcano. Repeat until the whole thing has a mottled look. 


There's no precision necessary. You're just trying to break up the grey and add the appearance of dimension.


Now comes the fun! Mix orange and red paint together to make lava. Dip the back of a paintbrush into the paint and drip it onto the top of the volcano. The paint should be thin enough to drip, but not so thin that it runs right down. I used Folk Art paint and the consistency was perfect right out of the bottle. You might need to adjust the consistency if your paint is too thick (add a tiny bit of water) or too thin (add a tiny bit of cornstarch slurry). 


Now walk away from your volcano. The paint will continue to run down and then will dry. You can always add more lava if there's not enough. 

When the volcano is completely dry, pull apart a bit of a cotton ball to make steam. Push it up from the inside of the volcano, then gently pull it out the top. It should be wedged in pretty well and will stay in place. If not, make your steam a little thicker or glue it in place. 


Anyone else in the mood for a Hawaiian vacation, or is it just me?


9/18/17

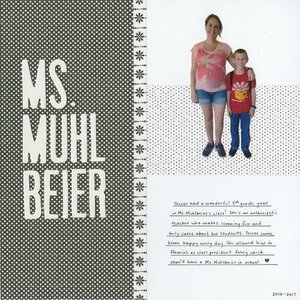
Ms. Muhlbeier

Trevor has been blessed with wonderful teachers during his school career. His 5th grade teacher, Ms. Muhlbeier, was no exception. She cares deeply about her students and puts a lot of effort into building a positive classroom community. She believes in making learning fun and was totally open to having some random mom taking over her classroom every week. Trevor thrived in her class. Thanks, Ms. Muhlbeier!

Ms. Muhlbeier (affiliate link)

To make the layout, I fussy cut the photo to eliminate the ugly background. I layered two black/white patterned papers (the border is actually the back side of the darker polka dot) on white cardstock, glued down the photo, then added the chipboard letters. Finally, I added my journaling. It always makes me a bit tense to journal directly on an otherwise-completed layout for fear of ruining it, but it worked out just fine like it always does. 

9/15/17

Paint Chip Bookmark

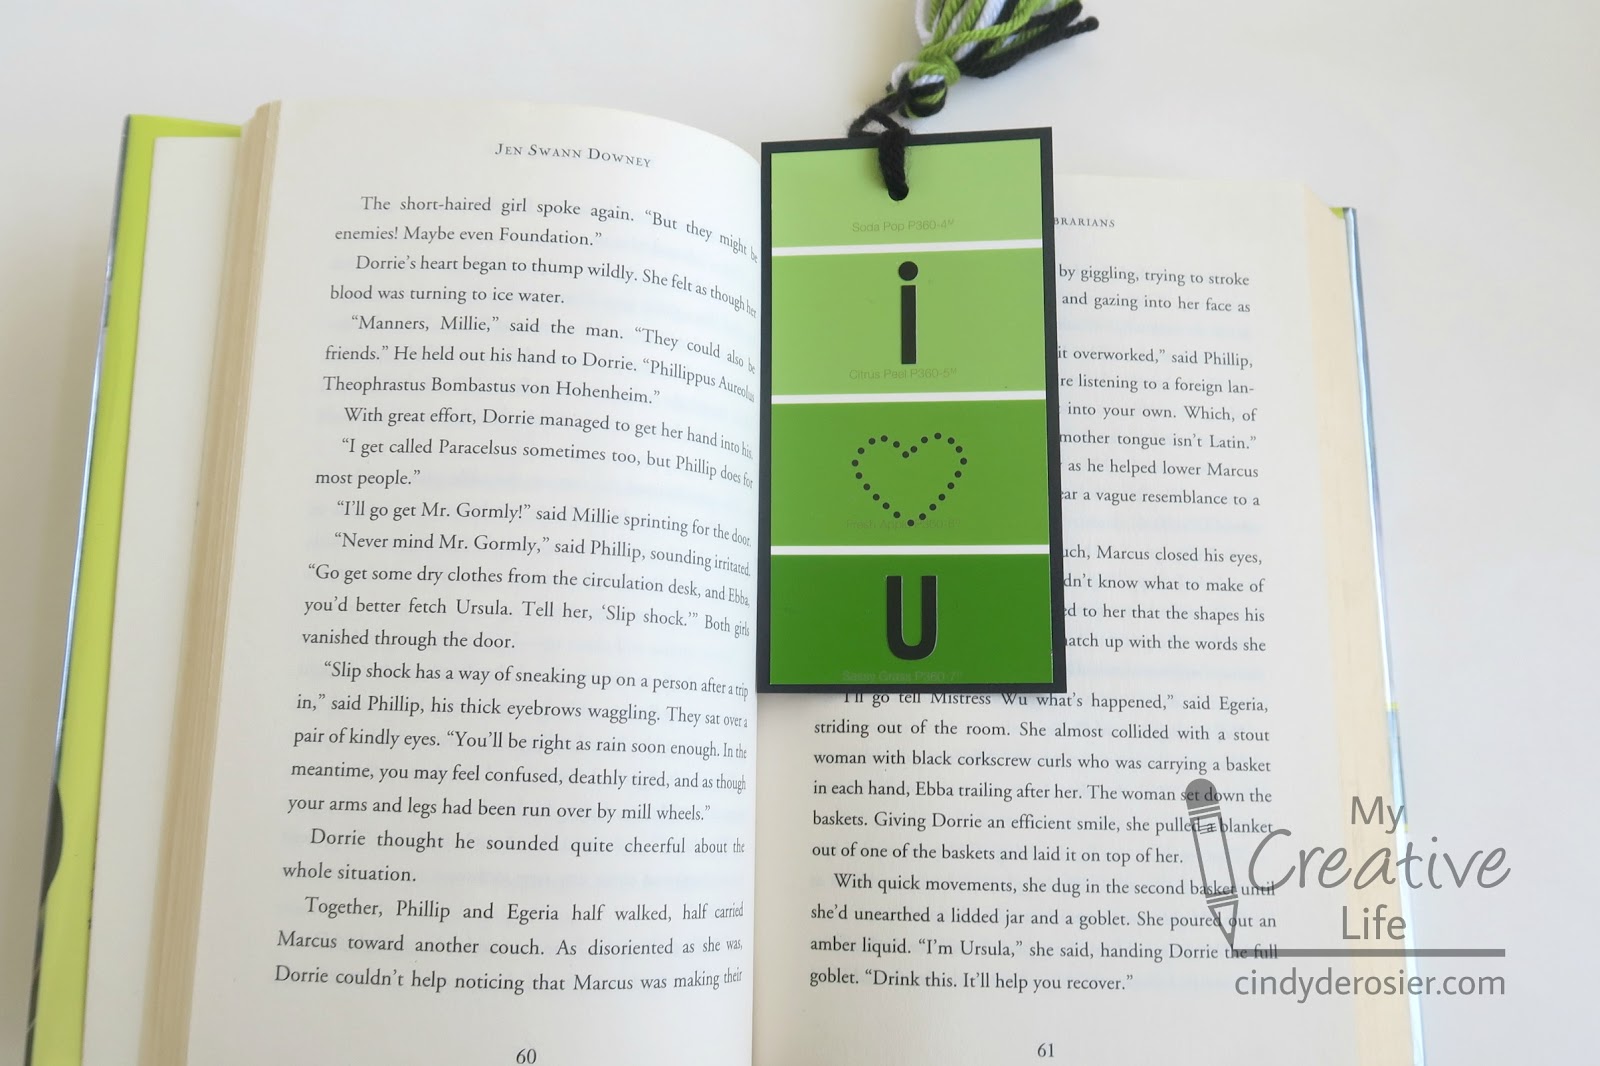
I found a random paint chip that I no longer needed, so I turned it into a bookmark. 


And then I put the bookmark in Trevor's library book and waited to see how long it would take him to notice. 


As it turned out, it did not take long at all. Within about an hour, he asked why there was a 'pom pom' near his library book. He got the book, opened it, and discovered the bookmark. He loved it. And now he knows the difference between a 'pom pom' and a 'tassel.' 


----------

Paint Chip Bookmark


Materials: 


  • Paint chip
  • Coordinating yarn
  • Black cardstock
  • Black letter stickers
  • Scissors
  • Paper trimmer
  • Adhesive
  • Hole punch


Steps:

  • Trim the paint chip to the desired size, then cut the cardstock 1/4" larger in both dimensions. Adhere the paint chip to the cardstock. 
  • Punch a hole at the top of the cardstock-backed paint chip. 
  • Add the letter stickers to the bookmark. You can spell out I {heart} U like I did, or use the person's initials. 
  • Make a tassel using the yarn. You can use different colors like I did, or just choose one color. I followed these directions to make my tassel.