Showing posts with label cotton ball. Show all posts

7/14/26

Root Beer Float Craft

I can only remember a single time in my life when I wasn't happy to see a root beer float. Every other time, I've been excited to receive this creamy and delicious treat. The root beer float dates back many years, although exactly how many is unknown. We do know that the ice cream soda was invented in Pennsylvania in 1874 by Robert Green. But did he specifically make a root beer float? Legend has it that Frank Wisner of Colorado made the first root beer float in 1893. Whether you're in Pennsylvania, Colorado, or anywhere else, this is a great time to make a root beer float craft and follow it up with the real thing. Affiliate links below. 


Root Beer Float Craft


Materials: 


Steps: 


Cut out the pieces you will need from watercolor paper: a rectangle with rounded corners at the bottom for the mug, a C-shape for the handle, a cloud shape for the ice cream, and a bent (or straight) piece for the straw. 

I should have arranged these the better way for this photo. See above.

Put the mug piece onto the scoring board. With the white pencil, score the center line. Then score more lines an equal distance apart. You can do this step with a ruler, but the scoring board is easier and more fun. 


Color the very bottom of the mug shape with the white pencil. Paint over the mug shape with brown watercolors. The white pencil will resist the paint. 


I chose to add a really pale wash of brown to the handle so that it didn't look so stark white when the rest of the mug had a brown tint. Paint the straw the color of your choice. I experimented with painting the ice cream a slightly yellow, but it looked weird (to me) against the pure white cotton balls. So I left the ice cream white. 

When all the pieces are dry, choose cardstock for the background. Add a contrasting strip along the bottom for the table the where the mug is sitting. Glue the pieces in place. Tear the cotton ball into a dozen or so pieces. Add glue along the bottom of the ice cream and the top of the mug, then place the cotton ball pieces into the glue. 

4/6/21

S'mores Campfire Treat Centerpiece

Out of the 2600+ blog posts I've written, my one about the World's Best Classroom Birthday Treat remains my most popular of all time. Today's project uses the same "recipe" to fill this cute campfire treat centerpiece. Affiliate links below. 


S'mores Campfire Treat Centerpiece


Materials:


Steps: 


Cut 7 teardrop shapes of various sizes from the yellow cardstock to make the flames of the campfire. Shade the edges with orange color pencil. 

Cut 5 cylinders from brown cardstock. Use a dark brown color pencil to draw concentric circles on the ends to mimic the cut ends of logs. Draw knots and bark lines randomly along the length of the cylinders. Switch to a brownish-red pencil and draw more bark lines, then again with light brown. 

Glue the logs together with craft glue, then add flames behind them. Use the tape runner to apply adhesive to the bottom of the display case, then press the campfire against it. 

Add spots of adhesive to the top of the display case. Pull bits of cotton from a cotton ball, separating them until they are whispy. Stick the cotton to the adhesive to mimic the look of smoke. Continue until the top is mostly covered. In this picture, you can see that I've covered the top already and have a large pile of cotton left over. All of that is from a single cotton ball. 


Prepare the s'mores trail mix


Fill the display case with trail mix. Sprinkle additional trail mix on the clean tables around the display cases so that hungry guests don't destroy your centerpieces.  


This would be a really fun activity for a Cub Scout Blue & Gold or other Scouting event, as well as for a camping-themed birthday party.

12/18/20

Hidden Money Santa Gift

'Tis the season for figuring out the next money gift for my nephew, Timothy! I was doing some experimenting and came up with this cardboard tube Santa. 


This isn't what I'm giving Timothy, because I couldn't bring myself to spend $15+ shipping him a box that contains a cardboard tube. I'd rather spend 55 cents to mail him something flat and equally creative. I'll share that after he's had a chance to open it. Next December when I'm desperate for another idea, I'm probably going to be kicking myself for sharing this, but hopefully one of you needs this now!


Hidden Money Santa Gift


Materials:

  • money
  • cardboard tube
  • craft knife
  • red craft paint 
  • black Sharpie
  • gold cardstock
  • red felt
  • cotton ball
  • craft glue

Steps:


Hold the money up against a bright window with a piece of scratch paper over the top. Trace around the face. Cut the face out of the scratch paper, then use that to trace the face onto the cardboard tube. 

Use the craft knife to cut the face opening from the cardboard tube. Paint the tube red. I painted both the inside and the outside of the tube to give it a more finished look. 

Use the Sharpie to draw a belt. Cut out a small square from the gold cardstock, then color the center portion black to make the belt buckle. Glue it in place.  

Cut a triangular hat. Pull apart a cotton ball, using one portion to make the pom pom at the top of the hat, a second piece for the hat's trim, and the remainder for Santa's hair and beard. Glue everything in place. 

Finally, roll the money and slide it into the tube so that the president's face lines up with the opening. It will stay in place, but you can add a piece of scotch tape for extra security if you wish. 


11/30/20

Heart Santa Magnet

The Heart Turkey has a friend. Meet Heart Santa!

 
They both are made with wooden hearts and they're both refrigerator magnets, though you could easily turn them into napkin rings or ornaments. 


Paint one heart red and one with your desired skin tone. Set them aside to dry.
 
Cut two pieces of embroidery floss, each around 3 inches. Tie a pony bead to one end of each piece to make Santa's legs.

Cut a hat from red construction paper or cardstock. From the scraps, cut a tiny round red nose. Cut a thin black strip for the belt, a small yellow square for the belt buckle, then an even smaller black square for the center of the buckle. 

Tear the cotton ball in half. Shape one half into a beard, then divide the other half to make the fur trim of Santa's hat, the pom pom on the end of the hat, and two eyebrows. 


Orient both hearts so they are upside down (point at the top, rounded area at the bottom). Glue the googly eyes to the center of skin tone heart. Add the eyebrows, nose, and beard. Glue the trim and pom pom to Santa's hat, then glue the hat to his head. Glue the belt to the red heart, then add the buckle and the inner buckle. Glue the head onto the body. Glue the legs behind the body, trapping them beneath the magnet.


A typo while I was writing this post turned Santa into Satan and left me giggling on and off for ten minutes. This led me to wonder if there are any kid-friendly Satan crafts out there. Alas, there seem to be only Satan-as-serpent crafts and printables about avoiding temptation. But my search yielded this hilarious news story about Satan in Vancouver Island, BC. It's literally old news (2019) but even if you saw it last year, it's funny enough to read again. You're welcome.

2/24/20

Crayon Resist Winter Hat Craft

We've been having gorgeous weather here in northern California, with clear blue skies and temperatures in the 70's. The trees have blossomed and the bulbs are up. Despite the way it's been around here, we technically have another month before spring actually starts. Which means it isn't weird for me to share a winter hat craft, right? I had the crayons out for a different project and decided it was time to do another resist project. I love the 'magic' of painting on a seemingly blank surface and having a pattern appear. Affiliate links below. 


Crayon Resist Winter Hat Craft


Materials:


Steps:


Use the scissors to cut the watercolor paper into a hat shape. With the white crayon, decorate the hat as desired. I made narrow vertical stripes on the band and an alternating pattern of cross-hatches and dots on the top of the hat. You won't be able to see what you've drawn very easily, which is part of the fun. 

Water down acrylic paint until it is thin like ink. Use vertical strokes to brush it on the hat, revealing the design. 


When the paint has dried completely, glue the cotton ball to the top of the hat. 

---------

I often end up down the proverbial rabbit hole when I'm getting Amazon links for posts. I find all sorts of fun things. This time, I searched for "fun winter hat" and got some beauts. I'd totally wear this cute cupcake hat. And I like this non-traditional Santa hat, though I don't think I'd have many occasions to wear it. This Dracula hat is awesome, but it seems more fall than winter to me. This octopus hat seems toasty warm, particularly if you're considering some wintertime bank robbing, which I am not.

12/3/18

Santa in the Chimney Craft

Steve and Trevor are well-trained to check with me before throwing anything out that might possibly be reused or turned into a craft. This chimney used to be a plain red gift bag that Steve received. Now it's filled with tasty truffles and ready to give to someone special!


I do most of my crafting at home, but occasionally I load up all the supplies I think I'll need for a project and complete it while I'm waiting after driving Trevor somewhere. Such was the case with this. I found a quiet corner to work during Trevor's Scout meeting. I was very pleased that I did indeed manage to bring everything I needed. That doesn't always happen, as my crafts often evolve as I make them!

The materials list below contains affiliate links. I receive a small commission on any purchases at no extra cost to you.

---------


Santa in the Chimney Craft


Materials: 


This is what the gift bag looked like when I started.


I used the ruler and the white pencil to mark every centimeter to a height of 13 cm. on both sides of the bag.  


Connect the marks to make horizontal lines, then trim off the top half of the bag. But don't throw it out!


Add staggered vertical lines to mimic the look of brick.


Remove the extra red paper from the trimmed-off handle section. Glue it to the inside of the bag to hide the kraft interior. If you want, you can draw bricks on it before gluing it in place. I didn't. There won't be quite enough red paper to fully line the inside, but you really only need to line the top inch or so. 


Now, tackle the boots. I folded a scrap of black construction paper in half and cut out a boot shape, giving me two matching boots. I originally thought I would cut a teeny square out of the center of a small square of gold paper in order to make the buckle, but I came to my senses and realized you can get the same look by layering a small black square on top of a slightly-larger gold square with no need to snip out any interiors. MUCH easier. Glue the squares in place to make the buckles.


Glue the boots to the inside top of the bag, leaving most of the boots sticking out. Add a bit of cotton (I used 1/4 of a cotton ball for each boot) where the boots touch the chimney. 


Fill the bag with truffles or other holiday treats and you have a gift that anyone would love! 

9/20/17

Boardwalk Craft

This post contains affiliate links. 

I know summer is behind us, but I have boardwalks on my mind. I'm deep into planning our next big trip, which will take us east to several states that are famous for their boardwalks. I don't think we'll actually be visiting those boardwalks on this trip (as I'm already packing in way more activities that a reasonable person would even consider), but we will definitely go to at least one Atlantic beach. 


Boardwalk Craft 


Materials:


Steps:


Cut or tear the water patterned paper approximately in half and layer it on top of the sand patterned paper. Glue it in place. 

Lay the skewers horizontally across the paper. They should reach from end to end without extending beyond the paper. If the skewers are too long, trim them. If the skewers are shorter than the papers, trim the papers so they are exactly the same as the skewers. 

Pull fluffs from the cotton balls to mimic the surf. Glue them in place.  


Put the skewers down parallel to one another on your work surface. Arrange the mini craft sticks across the skewers so they look like a boardwalk. Completely fill the skewers, then glue them in place. 


This gives you a sense of scale for the mini craft sticks. 


When the boardwalk is dry, turn it over and add glue along the length of the skewers, then glue them to the sand portion of the paper. 

Decorate the beach with stickers, such as a shovel and pail, a sandcastle, or a sea star. 

3/8/16

Bunny Week, Day 2: Cotton Ball Bunny and the Language of Lagomorphs

Welcome back to Day 2 of Bunny Week! Today's project is a Cotton Ball Bunny.


My inspiration was this real life rabbit:


-------

Cotton Ball Bunny


Materials: 

  • 2 cotton balls
  • 2 black seed beads
  • 1 white seed bead
  • pink chalk
  • glue


Steps: 


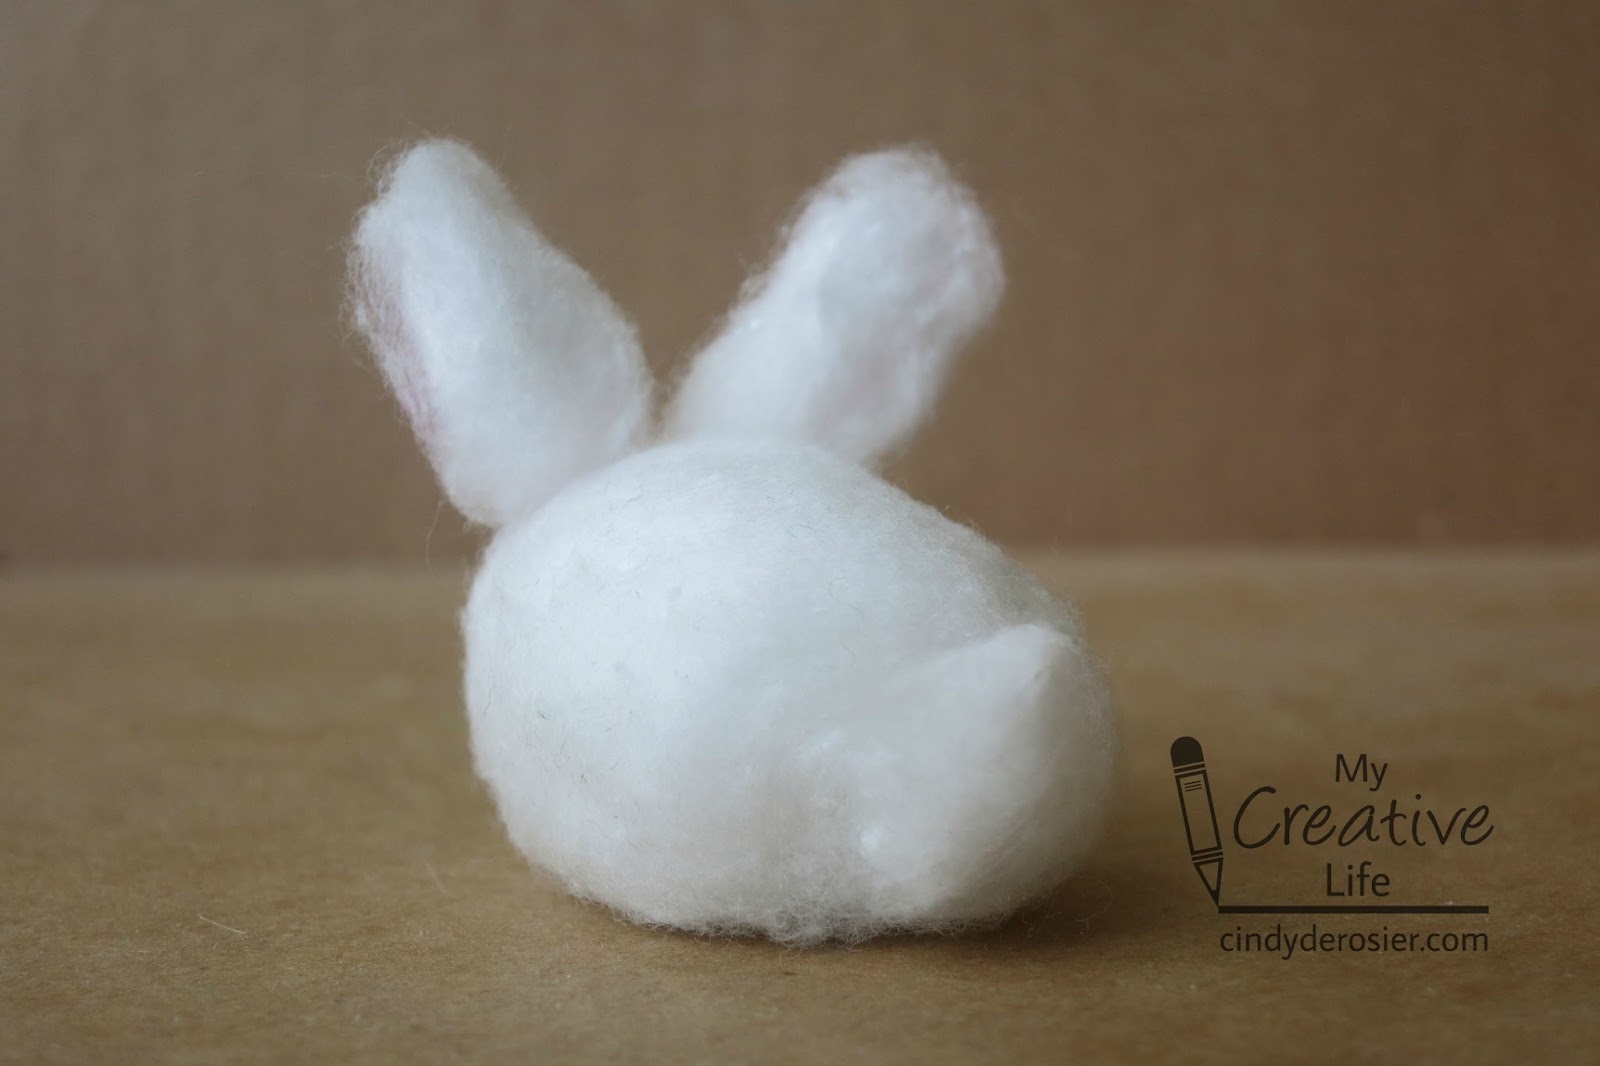
Fluff one cotton ball slightly to form the body of the rabbit. From the second cotton ball, pull a small piece to form the almond-shaped tail and two slightly larger pieces to form the ears. 

Use the remainder of the second cotton ball to apply pink chalk to the insides of the ears and to the white seed bead. 

Glue the tail, ears, eyes and nose in place. Done!


-------


Dogs bark, growl and whimper. Cats purr, meow and hiss. So how do rabbits communicate? Most people assume rabbits are silent, but they actually do make some noises. A happy rabbit being petted will lightly grind his teeth as a version of purring. If the petting is just right and the rabbit couldn't be happier, he chatters his teeth between the grinding. A rabbit squeezing into a tight place or using a lot of effort grunts. A worried rabbit who wants to warn his rabbit or human family about danger will loudly THUMP his back feet. And a terrified rabbit who is in mortal danger can make a loud scream. We heard Trouble scream once. Fortunately, he was perfectly safe but having a terrible nightmare. I woke him up and after initial confusion, he snuggled in and calmed down. 

Rabbits also use their environment to make noises to communicate. If we're not up early enough, Trouble will rattle his cage door to let us know it's time for breakfast. He clinks his empty water dish against his food dish if he needs fresh water. He pulls on the baby gates to make noises if he's annoyed that we've locked him out of a particular room. He also enjoys making sounds with his toys.

Rabbits do actually make sounds, but the majority of their communication is non-verbal. In fact, a rabbit can communicate dozens of things simply with their ears. For example:

  • Ears perfectly upright indicate the rabbit is calm yet alert. Nothing is wrong, but the rabbit isn't somewhere he can completely let his guard down.


  • Ears spread to the side means the rabbit is confused. If he could talk, he'd ask you what on earth you are doing. If he adds a slight head tilt, it means he thinks you're completely crazy.


  • Uh oh! A rabbit who turns his back on you with one ear slightly bent back toward you is a bit offended. You've committed some minor offense and the rabbit is letting you know that was not acceptable behavior. It's time to apologize or be ready to see some foot-flicks.


  • When the ears are back, but not flat, the rabbit is relaxed and sleepy. He's still listening for danger, but his eyes are getting heavy.


  • When one ear points, there is something unusual that direction. Perhaps a strange car drove by? A dog is barking on the next street over? Something is different.


  • You can watch that ear swivel forward or back to track the noise. I can watch Trouble's ears to know exactly when someone is going to knock on the door without any other cues.


Our favorite resource for learning how rabbits communicate is The Language of Lagomorphs: Your Guide to Rabbit Communication. We have learned so much from this site over the years. I wish we'd known about it before adopting Trouble; it would have saved us (and especially him) a lot of frustration in the early months before we became fluent in Lagomorph.

11/13/15

Pumpkin Pie Craft

In my line of work, I see A LOT of turkey crafts tutorials this time of year. I also see numerous Pilgrim crafts, leaf crafts and cornucopia crafts. You know what I almost never see? Pumpkin pie crafts. Time to change that. Affiliate links below. 


---------


Pumpkin Pie Craft


Materials:


Steps: 


1. Cut out the pieces for the pie. Start with the bottom crust. It is a long, tan rectangle with a slight angle cut from one end. Cut a slightly smaller rectangle from white, adding the same angle cut from one end. The two rectangles should layer with a little bit of tan showing on the bottom and right of the white. Cut an obtuse triangle from white for the top part of the pie, then cut a wavy strip of tan for the edge of the crust. It should be the same length as the shortest side of the obtuse triangle. 


2. Paint the white rectangle orange. Put a drop or two of brown into the remaining orange paint, mix, and paint the obtuse triangle. 

3. Create a background using the blue and brown cardstock. I actually made my pumpkin pie craft into a card, so I glued a blue rectangle and a brown rectangle onto a white card base. If I were making it as stand-alone art, I would use a solid piece of blue and glue a brown rectangle to it to represent the tabletop. 

4. Glue the pie pieces to the background. Stretch out the cotton ball slightly, then glue it where whipped cream would be.

That's all there is to it!

8/10/15

Project CAT - Challenge #6: Handprint Campfire

Hello! This is Trevor again! Welcome to Week 2 of Project CAT! Today is National S'mores Day! So we decided to make a handprint campfire with a roasting marshmallow.

This was our inspiration. We saw it at the fair. It was a preschooler who made it. We decided to make our own version. 


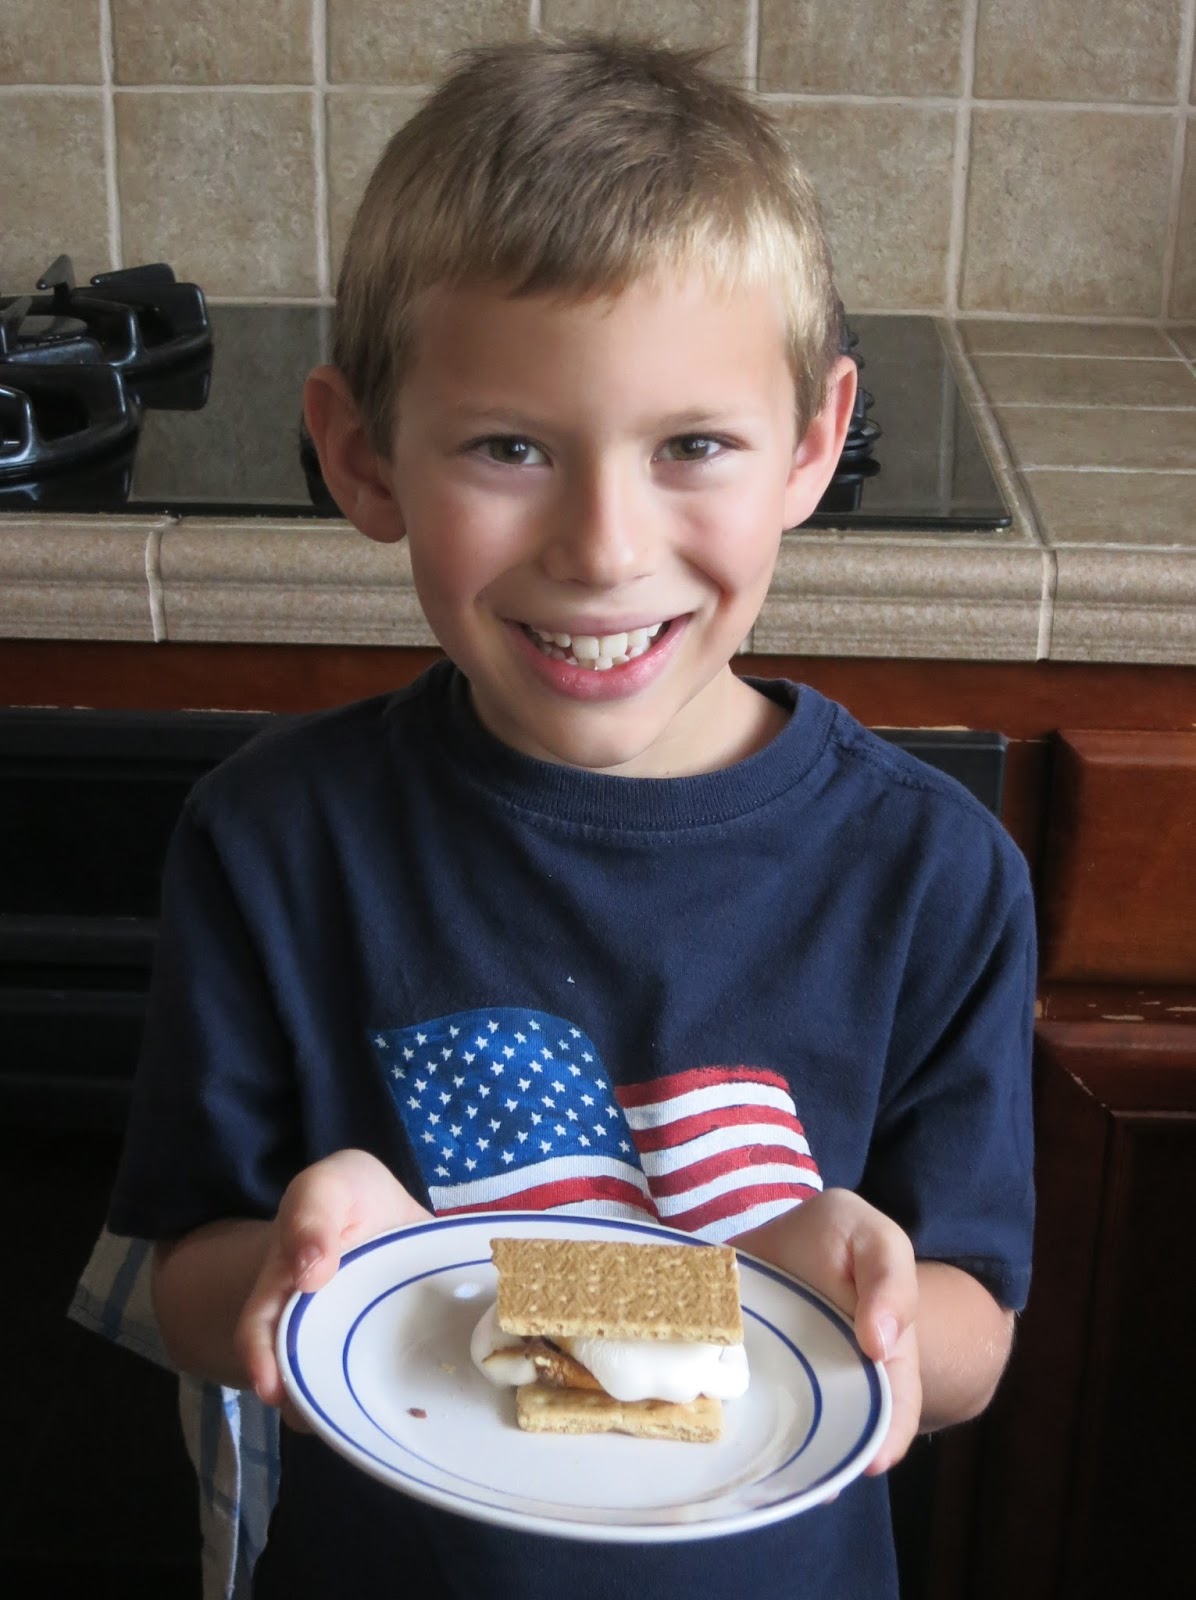
But before we got started, we ate s'mores. Did you know you can make them indoors? Just put a marshmallow on a skewer and put it over the stove! This is great for me because I cannot cook outside on a campfire because I am allergic to wood smoke and get really, really bad hives.


Yummy! Delicious! 


Now, it's time for the craft! This is what our version looks like:


Materials: white paper, craft sticks, brown color pencil, cotton ball, wooden skewer, glue, brown chalk, paint (yellow, orange and red), a foam brush and wire cutters. 

Step 1: Start by making your marshmallow. Using the chalk, color the marshmallow to make it look toasted. Then poke the skewer through the cotton ball. This might be a little bit hard. Add glue to the inside of the cotton ball so that the skewer stays in place. Set it aside.

Step 2: Color the craft sticks to make them look like logs. Add lines and circles to look like wood grain and knots.


Step 3: Paint your hand with yellow, orange and red paint. 


Step 4: Press your hand onto paper. If you want to, wiggle your fingers around to make it look more like a flame. (I did this.)


Step 5: Trim the skewer to make it even with the paper. We used wire cutters.

Step 6: Glue the skewer with the marshmallow on it and the craft sticks in place. You have a completed campfire!


Now it's your turn! Make a handprint campfire or something inspired by this handprint campfire. And have some s'mores, since it's National S'mores Day! Here are some recipes you might want to try:


4/5/13

N is for Nest

I have a post-it note beside my desk with the letters J, K, N, U, X, and Y on it. Those are the letters that are still missing from my list of Children's Crafts from A-Z. Trevor and I are determined to craft our way through the remaining letters as soon as possible. In the past few weeks, we've knocked Q (Quail) and V (Volcano) off the list. Once I finish this post, we'll scratch N off the list. N is for Nest! Affiliate links below. 


Paper Plate Nest

Supplies: 


We started by cutting a paper plate in half. Each of us painted our half with various shades of brown to look like a nest. (Our plate started out blue.) Here's how my nest looked when the paint was dry.


To give the nest texture, we glued on some of the paper bits that came in a gift basket we received.


We kept going until our nests were well-covered.


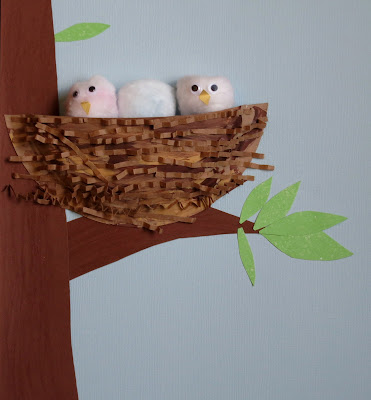
The next step was adding cotton ball birds. We rubbed some chalk on cotton balls, then added googly eyes and little paper beaks. We tucked the birds behind the nest. Here's mine:

Trevor chose to make two pink chicks and one blue egg that hadn't hatched yet.


The final step was making a background. We started with light blue for the background. We cut brown cardstock to make a tree trunk and branch, then used a crayon to give it a more realistic tree texture. We cut out green leaves to attach to the branches. Trevor left his leaves flat, while I bent mine to give them texture. Finally, we glued the nest and birds in place.

Here's Trevor's artwork. Mine is at the top of the post.

Five letters to go!