4/30/11

DIY Treasure Hunt

Last fall, I wrote about a scavenger hunt I made for Trevor to do when we went camping. What I didn't mention was that I also made a treasure hunt for him to do during the same camping trip. It was so much fun!

I started with a plain paper mache treasure chest from Michaels.


I painted the box inside and out with Americana's Asphaltum, letting it dry between coats. Then I used the combing tool to brush on a mix of Asphaltum and Yellow Ochre to create the appearance of wood grain. It took awhile to get the look I wanted. (Notice that I used my Frisbee to mix the colors!)


I bought a gold colored hasp from the hardware store and attached it in place. Then I added gold brads to the corners of the chest to look like rivets. Here's the finished treasure chest:


The next step was making up the clues. I gathered up kraft cardstock and envelopes, a Stampin' Up tree stamp, StazOn ink, and a Prismacolor pen. I stamped trees on each envelope and colored in the trunks. 


I had to wait until we arrived at the campsite to do the final steps: figuring out my hiding spots, writing the clues, numbering the envelopes, and then hiding them.


I made the clues very simple so that Trevor could read them himself.


He had so much fun on the treasure hunt! Of course, the best part was when he found the hidden treasure. The chest was filled with a camping activity book, some plastic snakes, a sand art project, and a handful of Lifesavers. Trevor loved it. 


Of course, being Trevor, he spent the rest of the weekend making up treasure hunts for the rest of us to do. Any time the adults were busy cooking, he sat down with the notebook and wrote out clues.


Here's one of his clues. It says, "GO TOW TREVORS TET. EDEN GO TO M TO"  (Go to Trevor's tent. And then go to M {Mommy} too). Adorable. This was shortly after he turned four- pretty good spelling and writing! I'm not sure why he chose the creative formatting.


We had so much fun with our treasure hunts! This one really simple craft is something that our family will enjoy for years to come. I can't wait to go camping this summer and enjoy more treasure hunts!

4/29/11

Birthday Cakes

This post contains affiliate links. 

As I mentioned previously, Trevor wants his birthday cake to be a zebra that stands up. I've also mentioned that I'm not very good at cake decorating. Trevor is a big fan of Ace of Cakes and therefore has no idea that mere mortals such as myself cannot make zebra cakes that stand up.

I've been doing some sketching in an attempt to design a cake that will: 1) make Trevor happy; 2) not require days and days of labor; and 3) not embarrass me. Bonus points if it tastes good (which means finding a way to do black zebra stripes that don't taste like bitter black food color). So far, I don't have a design that meets all goals. Fortunately, I have time.

I thought I'd share the birthday cakes from Trevor's first four birthdays. When he turned one, I chose a Very Hungry Caterpillar theme. I don't really remember how I made this cake. I think I used a bundt pan. I do remember that I lightly misted the green and red food color on top of white frosting rather than tinting the entire batch of frosting (thus avoiding the dreaded bitterness problem). The feet are Hershey's kisses.


When Trevor turned two, we had a Cookie Monster theme. I carved a little bit off the top of a round cake, then put it off-center on a 9x13 cake that I frosted in white. I frosted the mouth area in black (bitter!), then used the 233 grass tip to pipe Cookie's blue fur. I cheated on the eyeballs, as they are not edible. They're ping pong balls with black dots drawn on with a sharpie. A big pile of cookies hid a frosting mistake. 


Trevor chose a Monster's Inc theme for his third birthday. I had grand illusions of doing a Mike cake and asked for a sports ball cake pan for my birthday. After I received it (thanks Jonna!), I tried it out by making a birthday cake for a friend. It was a huge fail (sorry Karl!). I abandoned the idea of making a round Mike cake and instead went with a furry Sulley-inspired 3. I shaped the 3 out of rice krispie treats. The Sulley is a plastic figurine (more cheating). 


Last year, Trevor had a Maze Party. He wanted a cake with a maze on it that he could solve during the party. The cake was MUCH harder to make than it appears! The toughest part was designing a working maze to fit the cake, and then getting that maze accurately onto the cake. I used graph paper to design it, then used a ruler to press straight edges into the frosted cake to use as guidelines for piping. Not easy! I had to keep counting squares to make sure I didn't inadvertently create an unsolvable maze.

At the party, Trevor piped red frosting onto the cake to solve the maze. He was THRILLED with his cake. 


Oh, and Trevor just told me that he might want a giraffe cake instead of a zebra.  To be continued....

4/28/11

My Favorite Adhesives

I've never met a serious scrapbooker who wasn't passionate about adhesives. Most of us have tried and rejected many during the quest for the perfect adhesive. Somewhere along the way, we find the one or two adhesives that we will love forever.

My all-time favorite, go-to adhesive is the Tombow Mono Tape Runner (affiliate link here and throughout the post).


I use Tombow Mono for 95% of my scrapbooking and cardmaking. I like its strength (strong enough to keep things in place for years, but not at its full strength immediately, allowing for repositioning). The size of the runner is perfect for my small hand. It is easy to get into small places and goes on smoothly. Being left-handed, there are some adhesive applicators that block me from seeing what I am doing, which I obviously hate, but this one is great for use in either hand.

Of course, a tape runner isn't ideal for all situations. When I need to attach a button, rhinestone, or other accent, I use Glue Dots. I use the "Craft" size fairly often, but my favorite is the "Mini."


No matter what size, I love Glue Dots for their strength and how easy they are to apply. Plus, each box lasts a long time.

When I need to adhere chipboard or letters I've cut with the Wishblade, I use Martha Stewart's Glittering Glue.


I discovered it about six months ago when I received it as a gift. I love it! Not only is it really strong, but it is so easy to apply in the tiniest of spaces. I thought I loved my previous liquid glue, but this one is totally superior. 

I have at least 5 other adhesives that I use for special circumstances (vellum adhesive or Mod Podge, for example), but these three are the staples in my craft room. I can do almost anything with my Tombow Mono, Glue Dots, and Glittering Glue.

What are your favorite adhesives? Anything fabulous out there that I definitely have to try?

4/27/11

One Sketch, Two Looks

I wrote this post as a member of the Design Team at Flamingo Scraps and wanted to share it here.

I love working with sketches. Before I tried them, I used to think that they would limit my creativity, but in fact, the opposite is true. Sketches often take me out of my comfort zone and challenge me to work with shapes or layouts that I wouldn't typically come up with on my own.

This is a sketch by Rebecca Peck:


It's really simple, which I like. I decided to see if I could make two cards, both based on the sketch, that look completely different from each other.

For my first card, I used Prima's Rebellious collection. It follows the sketch fairly closely. I didn't want to cover up the cute bird paper with a solid circle, so my solution was a semicircle of Stickles dots, connected with a pen. 


For the second card, I used Prima's My Mommy and Me collection. I love the embossed leaf paper and didn't want to cover it with a solid circle either! I laid out a piece of embroidery floss with the intention of hand-stitching a semicircle, but I couldn't get it to lay flat to see if I liked the design. Then I realized the curvy floss would make such a cute balloon string! In the end, I used a pen to draw the string and ditched the floss altogether. 


This sketch was so much fun! As far as making two cards that look completely different from one another... mission accomplished!

4/26/11

How I Use a Frisbee When Scrapping

I wrote this post as a member of the Design Team at Flamingo Scraps and wanted to share it here.

Yes, I regularly use a Frisbee (affiliate link) while I'm crafting! The inside of a Frisbee makes a perfect paint palette. It's a nice large work surface, I can mix colors easily, the lip contains the paint, and it's very portable. But the best part is that clean-up is so fun and easy:


The paint literally peels up from the surface of the Frisbee! It is so cool! I've even cut the peeled pieces into shapes. I've never actually done anything with those shapes, but one of these days I'll do just that.

4/25/11

Party Planning

We're in party planning mode around here. Each year, we celebrate Trevor's birthday with two different parties: a backyard BBQ for family and godparents, then a smaller party with Trevor's playgroup friends. Trevor has decided he wants a zoo theme for his BBQ. On his actual birthday, we're having his friends-party at the zoo. The invitations went out today:


I made the giraffe from yellow and brown patterned paper scraps, using the pattern below. The original link to the pattern no longer works and I tried to find a replacement link to the original source, but could not.


After piecing together the giraffe, I attached it to the yellow and brown papers, scanned it, and then added the information digitally. I was able to quickly and easily change the information to create the invitation for the other party. 

Trevor has very specific ideas about his party. He wants a life-sized 'Pin the Spots on the Jaguar', a homemade monkey piñata that hangs by one arm, and this cake that he sketched for me:


I'm glad that Trevor has total faith in my crafting and cake decorating abilities! I am a bit concerned about my ability to create a life-sized jaguar, but I can probably pull that off. Maybe. A monkey pinata that hangs by one arm? I've made many piñatas in my life, but the vast majority have been shaped like an oval. As for a zebra cake that is supported by only its 4 legs.... no way! I have about six weeks to talk him into a more manageable, yet still fantastic, cake design.

Wish me luck!

4/24/11

Our Easter Cake

I love decorating cakes. I'm not particularly good at it, but that doesn't stop me from enjoying it. Part of my problem is that I am completely self-taught. Well, that's not totally true... when I was 11 years old, I enrolled in 4-H Cake Decorating, taught by Mrs. Tillman. We met four times, and I learned to make a decorating cone, properly insert tips and work the couplers, and pipe stars and leaves. Mrs. Tillman taught us how to make roses, but it would be a stretch to say that I actually learned that skill. When we arrived to each class, our practice cakes/cupcakes were already beautifully frosted for us, so I never learned how to achieve that smooth foundation. After the 4-H project ended, I took an approximately 23-year hiatus from cake decorating.

For the last several years, I've been decorating cakes again. I love playing with various decorating tips, and I've built up quite a collection. This year, Trevor and I made a cake for Easter:


As I said, I'm not particularly good at cake decorating, but I still think our cake is pretty cute!


We baked two round layers and let them cool. I cut arcs from each side of one layer to make two ears. (I've seen the remaining piece made into a bowtie for the bunny, but we didn't do that.) We arranged the three pieces on a cookie sheet and frosted everything with white frosting. I cut a stencil for the inner ears by folding a piece of copy paper in half and cutting out a arc. I opened it up, held it over each ear (very close, but not touching) and Trevor sprinkled a heavy layer pink decorator sugar through the opening. Trevor added two blueberry Jelly Belly eyes, a pink Jelly Belly nose, and then piped a mouth and whiskers with black frosting.

Happy Easter everyone!

4/22/11

Scrap Paper Easter Eggs

My friend Sheena came up with an awesome Easter craft idea that uses scraps of patterned paper. When I saw what she made with her son, I couldn't wait to make some with Trevor!

I gathered up all my patterned paper scraps and pulled out the long, thin strips.


We each selected 10-12 strips of patterned paper and arranged them on a plain piece of white paper.


When we were happy with the layout, we used decorative-edged scissors on one side of each paper. Trevor used a different pair of scissors for each of his papers!


We glued down the strips of paper, making sure that the side with the decorative edge didn't get covered. You'll notice that we did not worry about the strips being longer than the width of the paper. It's not a problem that they're hanging off the edge like that.


Next, we turned the whole thing over and traced around an egg-shaped template. I have zillions of templates for every possibly holiday or occasion leftover from my classroom. All my templates are made from manila folders that would otherwise have been thrown away. It's very convenient going to the file cabinet and pulling out an egg-shaped template! 


Finally, we cut along the line. The finished eggs are so cute!

4/20/11

Masks for Easter Eggs

Lead Fiskateer Tami Bayer showed us another simple yet brilliant project idea. She used her punches on contact paper to create masks to put on her Easter eggs. After dyeing the eggs, she peeled off the masks. The area covered with contact paper remained white. So clever and so easy!

I gave it a try. I chose a star and a circle punch.


I carefully applied the contact paper around the egg. It took awhile. Next, I put the eggs in the dye.


As soon as the color was how I wanted it, I moved the eggs to a paper towel.


I blotted each egg, then started peeling off the contact paper. I probably should have waited until they were completely dry, but I really wanted to see how they'd turn out!


I left the dots on the orange egg white, but I decided to add some color to the stars.


I love the way they turned out! Here's the completed orange egg. You can see the star egg in the background.


The dots aren't perfect, as the dye bled a little. I tried to smooth down the stars and circles as best I could, but in retrospect, a bone folder might have made the job easier and provided better results. I can't wait to try again next year!

4/18/11

The Most Horrifyingly Awesome Art Project Ever

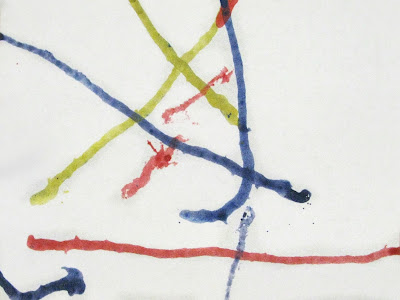
Check out this lovely art that Trevor and I made:


Here's a closer look:


Can you guess how we made it? Here's a hint:


Do you know yet? As you can see, it involved three colors of paint, some tweezers, and one more important item:


A maggot! To make the project, we picked up the maggot with tweezers and dropped him into one of the paint colors. Then, using the tweezers, we placed him on the paper and he immediately squirmed all over. Ours kept trying to zoom right off the page:


Isn't it awesome?! And horrifying?! Horrifyingly awesome?! I thought so too.  

Now surely by now you're asking where we did this. Obviously (I'd hope), not at home. This was one of the projects we did at Picnic Day, the annual open house at the University of California at Davis, where Steve and I both went to college. Each department has family-friendly projects that help teach about what they do. Maggot Art took place in the Entomology Department, where we also saw a hive of bees in action, tasted honey from different parts of the United States, and collected ladybugs to take home. Sadly, we didn't watch the Cockroach Races, as the area was quite crowded. What a spectacular day!

4/17/11

Scrapping Stamper - April Sketch

This month, Shannon at The Scrapping Stamper sent us this sketch:


I was immediately puzzled about what to do. I didn't have any shaped paper like that, so I used a homemade template to cut some. I knew exactly what pictures I wanted to use, but it meant my journaling wouldn't fit into the spot on the sketch. I decided to move the journaling and the title off the main area. That meant there wasn't room for the second side of the shaped paper. Oh well!

Inspired by the recent Fiskateers Winter Stamp Out, I used two swirly stamps and Versamark ink to create a subtle pattern on the brown paper. It didn't show up well in the scan, but I love the way it looks in real life. I also used stamps for the title and the date block.

Here's what I made:


I'm looking forward to the next sketch!

4/16/11

National Craft Month Party

As you know, I am a rabid Fiskateer. At the beginning of March, we Fiskateers were challenged to throw a party to celebrate National Craft Month. The party needed to have a theme, there had to be at least 5 guests, and there had to be crafting. The best party, as judged by three photos, would win fabulous prizes. I LOVE theme parties and used to host a lot of them, but haven't since Trevor was born. The Fiskateer challenge was just the motivation I needed!

I checked the calendar- the best date was only 10 days later. Not much time to throw together a winning party, but I was determined to make it work. After much debate, I decided on a theme- 50's Soda Shoppe. I own a poodle skirt and saddle shoes from my days as a ballroom dancer and I figured my friends could wear capris, sweater sets, and ponytails and totally fit the theme. Food was easy- ice cream sundaes and root beer floats.  I bought some 1950's candy and gum as well.


Growing up, I attended several weddings with my parents, and my mom never failed to express her shock at the extravagant meals at the various receptions. At her wedding in 1970, they served nuts and mints. She claims that in the 50's and 60's (and apparently 1970 as well), no one served food at weddings. To be a good hostess, you just put out nuts and mints. The same was true for parties. I'm not sure if she's correct, but I didn't want to risk being a bad 1950's hostess, so I served nuts and mints.

 
For decorations, I dug out a hula hoop, some fuzzy dice, and an extra pair of saddle shoes (of course I own two pairs of saddle shoes!), then raided my parents' record collection. I decided on the typical black/pink/turquoise 50's color scheme, with some Fiskars orange thrown in!

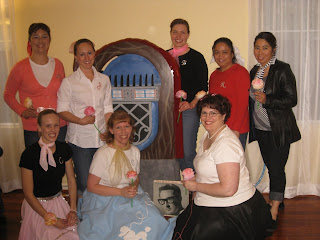
I have fabulous friends, who in turn have fabulous husbands who babysat the kids so we could have this party. One husband went above and beyond.  Carl Sciortino is an amazing artist who creates custom railings and other metal work. In his spare time, he "whipped up" a jukebox facade for my party. I hid my CD player behind it and the effect was awesome.


The most difficult part was selecting what crafts to do during the party. There were 8 of us- some are crafters, some are scrapbookers, and one claims to have no crafting ability at all. (Hi Courteney!)  I wanted the crafts to not only fit the theme, but be easy enough for everyone but not boring for anyone. And because my husband had been laid off and I'm a stay-at-home mom, I was determined not to spend any money on craft supplies. A tall order!

Fortunately, I have a well-stocked craft room. Our first craft was rhinestone monogram "pins" for our sweaters. Next we made carnations using kleenex, which apparently everyone did in the 50's. For our final craft, we made roses using toilet paper, which my mom says they made to decorate for school parties. The crafts all fit the theme, were fun, were easy (except the rose!) and I didn't spend a penny on craft supplies, so mission (mostly) accomplished!


Here's the whole group showing off our rhinestone monograms and carnations!


After all the crafting was done, we broke out the hula hoops. I could still keep the hoop up for a long time, but I'm sad to say that I was sore the next day!


My National Craft Month party was a great success. My guests and I all had lots of fun, which was my ultimate goal. But better still, my party won the contest! Thanks to Fiskars for the inspiration and the prizes. Celebrating National Craft Month with a party is definitely going to be an annual tradition for me!