7/31/20

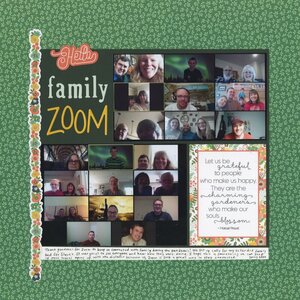
Family Zoom

Neither Trevor nor I had used Zoom before the pandemic hit (Steve had used it for work) and now it's pretty much a daily thing around here. When school went virtual, Trevor's teachers taught via Zoom. Weekly Scout meetings and monthly 'camp-ins' are on Zoom. Our church fellowship hour is on Zoom, immediately after the service (which is live on YouTube). Meetings for work and the various committees we're on take place via Zoom. We use Zoom to keep in touch and play games with friends and family. 

When our extended families did calls via Zoom, we took screenshots. I used those to make this layout. 

Family Zoom (affiliate link)

The top photo is my extended family, calling in from their homes in Idaho, Washington, and Oregon, plus us in California. The bottom photo is Steve's extended family, chatting from Texas, South Dakota, and Washington DC, in addition to California. Thank goodness for technology. I can't imagine going through this pandemic without seeing the faces of friends and family. It's not the same as seeing them in person, but it's the next best thing. 

7/30/20

Kiwi Felt Coaster

I love kiwis. So does Trevor. Steve doesn't like them, which is weird because they are totally delicious. But him not eating them means more for Trevor and me, so I can't complain. We used to get our kiwis from a kiwi farm three miles from our house, but they closed up operations a few years back. As far as I know, no one else local is growing kiwis commercially, which is a shame since they grow well here. It's also a shame because they are ridiculously expensive at the grocery store compared to what they cost directly from the farmer. 

We're not in kiwi season right now (late October through December in Northern California) so I don't have a recipe to share with my latest fruit coaster, which is (obviously) a kiwi. Affiliate links below. 


Kiwi Felt Coaster


Materials:


Steps: 


Cut out a circle of brown felt, approximately 4" in diameter. Cut out a circle of light green felt that is slightly smaller than the brown circle. Cut an irregular oval from cream felt for the center of the kiwi. 

Use cream thread to sew the cream center to the green felt. Divide the embroidery floss into three strands, then make two circles of small stitches pointing in toward the center. Don't aim for perfection; in a real kiwi, the seeds are irregular. When you've competed the seeds, use green thread to sew the green felt to the brown felt. 

7/29/20

The Ten Least-Visited States in the US

Obviously, now is not the time to travel, but there's nothing wrong with using the time at home to think about future travel. As you know, our plan is to take Trevor to all fifty states before he's 18. We'd expected to knock a few more states off the to-visit list in 2020, but life is nothing if not unpredictable. Once it's completely safe to travel, we'll have to adjust our plans to visit all of the remaining 16 states.

I came across this interesting article that lists the least-visited states in the US. It actually includes the 20 least visited, but I'm going to focus on the top (bottom?) ten. Before I proceed, can you guess what state is #1?


10. Oklahoma


We haven't visited Oklahoma yet, but when we do I think we'll end up spending the bulk of our time in Oklahoma City. Besides the Capitol and Oklahoma History Center, I'm most interested in seeing the National Cowboy and Western Heritage Museum, the OKC National Memorial and Museum, and the American Banjo Museum. And I really want to take a tour on the Bricktown Water Taxi!


9. Nebraska


I'm not surprised Nebraska is #9, as so many people (even Nebraskans) were surprised we'd vacation there. But it was fantastic! We could have spent weeks in Omaha and not run out of things to do and see. Go here to read about all of our Nebraska favorites.


8. Iowa


We only spent a day and a half in Iowa, which is obviously not nearly enough time. But we were impressed with everything we saw and did. There's a lot more than corn in Iowa (although we saw that, too)! Read about our favorite things to do in Iowa.


7. West Virginia


Our time in West Virginia was short, but we made the most of it. I'd recommend going just for the (free!) West Virginia State Museum. It's one of the best museums I've ever seen. Here's everything we did in West Virginia.


6. South Dakota


We haven't visited South Dakota yet, but as of a month or so ago, we have more reason than ever to plan a trip there. Our nephew, Ian, is now stationed in Rapid City. He and his wife, Rachel, are expecting their first baby at the end of the year!


5. Vermont


We haven't been to Vermont yet, but I've mapped out the route we'll take when we do. Highlights include the Vermont State House and Ben & Jerry's factory tour and Flavor Graveyard, with a possible diversion to see the world's tallest filing cabinet.


4. Montana


This one is heartbreaking, as we were supposed to be arriving in Montana this week. We'd planned four days in Missoula, then a day in Helena, then on to two days in Yellowstone, and then Grand Teton. I hated having to cancel.


3. Delaware


We spent one day in Delaware in October 2017. We focused on the Dover area and enjoyed our visit. Read about our stops here.


2. Wyoming


As I mentioned in my Montana comments above, we had planned to be in Wyoming next week and I'm so disappointed to miss it. Fortunately, we've been to Wyoming before and absolutely loved our day in Cheyenne. We packed a ton into our time there, which you can read about here.


1. Alaska


Did you guess that Alaska would be the least-visited state in the US? I sure didn't! I suppose it makes sense, being that it is both far from the Lower 48 and has the shortest tourist season. We've been to Alaska three times as a family of three (Steve and I had both been to Alaska separately before that) and we've loved every minute. Alaska is beautiful and if you haven't been, you should make plans to go. You can read about our recommendations for places to go and things to do in Alaska here.


7/28/20

Featured on 'Bryan on Scouting'

Remember the Scout-themed mystery hike I shared a few weeks back? It was featured on the Scouting Magazine blog, with Trevor front and center!


I'm really happy with the article and hope that people enjoy either the virtual or in-person versions of my mystery hike. The article outlines the steps I used to create it and includes tips for others to create a mystery hike in their own city. I hope others follow my lead so that I can solve someone else's mystery hike, either virtually or in-person!

7/27/20

The Percentages of Me - Math Practice Art

The other day, I randomly wondered what percentage of my life I've lived in Fairfield, California. I did a quick calculation - I've been here for 23 of my 48 years, or approximately 48% of my life. I've only lived in two other places: Livermore, CA for 37% of my life and Davis, CA for 15% of my life. Interesting!

The next thing I knew, I'd pushed aside the work I'd intended to do and made this:


It struck me that this would make a great math activity for upper elementary and middle school kids. It provides lots of practice converting fractions to percentages, converting those percentages to degrees of a circle, then using a protractor to make the circle graphs.

To begin, brainstorm categories of things with clear start and end times, like cities (or states, or countries) you've lived in, or schools you've attended, or sports teams you've played on. I chose six categories. In addition to where I've lived, I included: 
  • who I've lived with (my parents, roommates, alone, and with Steve)
  • my primary job (student, teacher, blogger)
  • my church home (Holy Cross, St. Marks)
  • my main club/organization (4-H, a ballroom dance troupe, MOMS Club, and BSA)
  • my favorite food (bread)

After choosing your categories, create a chart. Here is the start of my work page. Looking left to right on the first line, you can see the span of years I lived in Livermore (1972-1990), the fraction of my life that represents (18/48), the equivalent percentage (37%), and the number of degrees of a circle that covers (37% of 360° = 133°).


Once all the math is done, draw circles on drawing paper. (In the classroom, we'd use compasses and make proper circles. I just drew mine with a Sharpie, which doesn't look nearly as good.) Label each circle with the category and put the 'answers' underneath. Then use a protractor to divide each circle into the appropriately-sized pieces. 


Now add the title at the top. 


Color it in and you have a cool glimpse at your percentages! Something neat about this is that you can redo it each year and it will look different since your percentages will change. 


This would look so cool on a bulletin board in a classroom. I wish I'd thought of this 15+ years sooner, lol!
7/24/20

Why You Should Keep Googly Eyes on Hand at all Times

There are a lot of craft supplies that I keep on hand at all times: cardstock, construction paper, pipe cleaners, yarn, pom poms, craft sticks, tissue paper, acrylic paint, and a zillion other things. But I would argue that googly eyes are one of the most important. If I had to choose just three items to keep, it would be cardstock, acrylic paint, and googly eyes.

I'm a big fan of using googly eyes in crafts, but that's not the only thing I do with them. For example, check out my all-time favorite googly eye post. But if you want to have some real fun, glue googly eyes to packages in your cupboards and wait for the family to discover them!


It takes some experimenting to find just the right size for the larger logos.


The tiny ones are best for the smallest faces.


The Starbucks mermaid doesn't look that much different with her googly eyes!


When buying googly eyes, I recommend getting a variety pack like this one (affiliate link). The self-adhesive googly eyes are convenient and it covers the range of sizes I keep on hand (4 mm - 25 mm). That's hours of fun you've got there. 

7/23/20

Wax Paper Diamond Inspired by Arkansas' Crater of Diamonds State Park

It's time to check in on my progress toward creating at least two crafts inspired by each of the 50 states. Back in March, I shared my chart showing 32 states with two or more projects. In four months, I've brought the total up to 42 states, leaving just eight to go. Actually, only seven remain because today's craft, a wax paper diamond, is inspired by Arkansas. 

Did you know that Arkansas has one of the only places in the world where anyone can search for diamonds from their original source? People come to Crater of Diamonds State Park from all over the world to search 37 acres for diamonds that are theirs to keep. We haven't traveled to Arkansas yet, but when we do, I hope we're able to include Crater of Diamonds on our itinerary. 


Wax Paper Diamond


Materials:

  • lined paper
  • mechanical pencil or ballpoint pen
  • ruler
  • wax paper
  • scissors
  • black construction paper
  • glue
  • toothpick


Steps:


Draw an elongated hexagon on lined paper. Divide the bottom line into three equal parts. Draw a quadrilateral (specifically, a trapezoid) extending down from the middle section. (I didn't use a ruler, but you should. You should also draw in pencil so you can make adjustments. I did mine in Sharpie so that it would show up better in the photos.) 


Add four more quadrilaterals below the initial hexagon. 


Make a point directly below the center of the hexagon, then connect each of the bottom points of the quadrilaterals to that point. 


Place a piece of wax paper over the diamond you've drawn. Retract the lead of a mechanical pencil (or retract the tip of a ballpoint pen) and use it to trace over each line of the diamond. A ruler or other straight edge is essential. Press firmly.


After you've traced all the lines, remove the wax paper. Carefully cut around the outside edge. If you want to display your diamond vertically, mount it to black construction paper by using a toothpick to place the tiniest amount of glue possible along the underside of some of the traced lines. 


---------

Out of curiosity, I checked to see if you can buy real diamonds on Amazon. What was I thinking? Of course you can. You can buy (almost) anything on Amazon. In fact, there were so many diamond options that I ended up in a bit of a rabbit hole. Here are affiliate links for the most expensive diamond ring I could find, as well as the most expensive diamond watch. (Interestingly, I found watches that are more expensive but don't have diamonds on them.) Either of those would give me a pretty nice commission, lol. If you're looking to waste time, poke around and see if you can find a more expensive diamond ring or watch and let me know in the comments.

7/22/20

Battle of the Books

Back in December, Trevor joined his middle school's Battle of the Books team. Every two weeks, all of the Battle of the Books participants received a new book, which they needed to read and study. On Battle days, Trevor's school (B. Gale Wilson) and the other 5 middle schools in the district competed against each other in dual meets. After each team had competed against all the others once, there would be a championship meet between the two top teams. The BGW team met twice a week after school to discuss the books in depth and brainstorm questions that might appear. They were well-prepared and worked really well as a team. So well, in fact, that they went into the Championship Battle undefeated.

The Championship Battle, scheduled for April 2, never happened.

Obviously, this is an extremely minor disappointment compared to all the other things canceled due to the pandemic. But I feel bad for those kids who worked so hard and were having so much fun. It was their last year of middle school, so there's no looking forward to next year's team. They hadn't taken their team photos for the yearbook yet, or even posed for a group photo before school was abruptly moved to distance learning. All I have are a few lousy snapshots from the meets.


Why am I bringing up the Battle of the Books now, months later? Because I recently finished reading what should have been the championship book (along with the other three books in the series). I loved it. I loved all of the Battle books. Even though Trevor and the BGW team didn't get to finish their season, they are all better for having read and studied some really great books.

I don't know who selected the Battle books, but they couldn't have made better choices. They're as enjoyable for adults as they are for teens. I loved each of the books enough to search out and read more by each author. Below are affiliate links for all of the books. I highly recommend you give them a read.


When I drafted this post, I mistakenly included one that I'd thought was a Battle book, but was actually from Trevor's book club. It was fantastic. 


Have you read anything great recently? Let me know in the comments. Happy reading! 

7/21/20

No-Melt Banana Split

I'm not a huge fan of bananas, but there's no question my favorite way to eat them is in a banana split. This one is unusual, because you can leave it out all day and it will never melt. 


The secret? That's not ice cream. Affiliate links below. 

----------


No-Melt Banana Split


To make your own no-melt banana split, put three jumbo marshmallows in an oval ramekin. Slice a banana in half lengthwise and put one half on either side of the marshmallows. Pour chocolate over the middle marshmallow, mashed strawberries over another, and pineapple over another (I actually used orange marmalade instead. It was delicious.) Sprinkle chopped peanuts over all three sauces, then add a maraschino cherry


Since it's not ice cream, you can't eat it effectively with a spoon. Instead, use a knife to slice the bananas, then use a fork or skewer to pick up banana pieces and dip them in sauce. Then you can enjoy the marshmallows with whatever sauce remains. Yum!

---------

Speaking of Banana Splits, does anyone else remember this? 


What was the plot? Was there one? I literally don't remember anything about it except that I used to watch it when I was really young. Wikipedia to the rescue! And then I found this, which doesn't answer my questions, but raised a whole lot more.


Thank you for joining me on this unplanned, nonsensical stroll down memory lane. Well, less like a stroll and more like a confusing, yet strangely groovy, dance. 

7/20/20

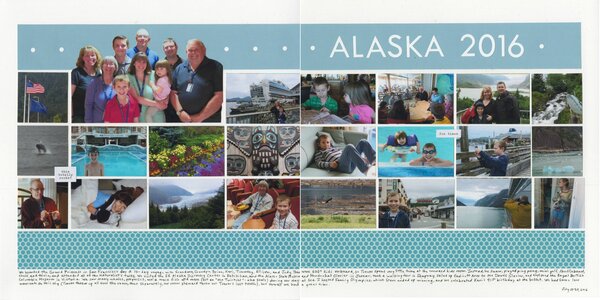
Alaska 2016

I've mentioned many times that I keep a daily journal, which is critical to my being able to scrap trips years after they happen. My blog serves as a secondary journal. In the case of our 2016 cruise to Alaska, I blogged about the Family Olympics I hosted onboard the ship, but didn't actually blog about anything else about the trip. As usual, the journal was a lifesaver when it was time to record the trip highlights on the scrapbook page. 

Alaska 2016 (affiliate link)


As you can see, I went with a basic grid design with a fussy-cut family photo as the focus. The photos do a decent job of highlighting the things we did onboard and ashore. I included bunch of journaling at the bottom.

7/17/20

Torn Construction Paper Kitten

Torn construction paper is perfect for mimicking the fluffy fur of a kitten. But controlling tears is difficult...


... unless you use a wet Q-tip first. I've shared this technique before, for my panda project. Affiliate links below.


---------


Torn Construction Paper Kitten


Materials: 


Steps: 


Dip a Q-tip in water and "draw" the kitten's body onto black construction paper. Trace it at least twice, then while it is still wet, gently tear out the shape. The paper will come apart easily along the wet line. Repeat this for the kitten's head, ears, and tail. 


Use the same technique for the white patches on the kitten's chest and face, then the pink inner ears and nose. Assemble the kitten by gluing the kitten's body parts to the background paper. 


Glue the googly eyes in place, then use the black colored pencil to draw the mouth. Use the white colored pencil to draw the kitten's whiskers. Remember that they have whiskers above the eyes as well as on their muzzle and jaw. Use scissors to cut a silver tag, then write the kitten's name on it. Cut a length of cord for the cat's collar, then glue it and the tag in place. 

7/16/20

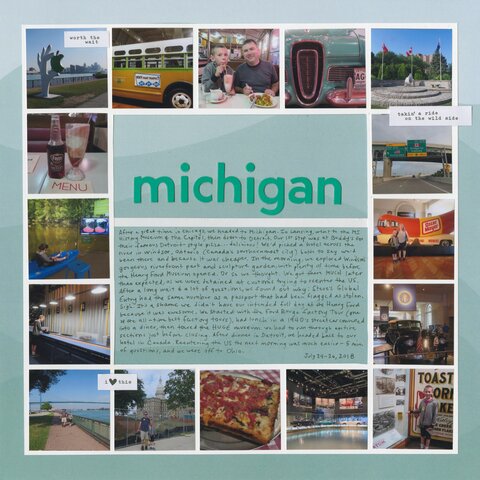
Travels in Michigan

Scrapping photos from past trips is keeping me from dwelling on the trips we're not taking right now. If not for COVID-19, we'd be headed out on a multi-state adventure next week. I'm really disappointed, but we had no choice but to cancel. Not only would going put ourselves at risk, but I think it's irresponsible for US travel bloggers to be advocating travel right now. I get that there are a lot of considerations and that many in the travel industry are frantic as the industry suffers more each day, but we need to JUST. STAY. HOME. And wear a mask. Please and thank you. 

Michigan (affiliate link)


Anyway, Michigan. I had a lot of photos from the time we spent in Lansing and Detroit, plus I knew I'd need a huge amount of space for journaling. (I HAD to tell the story of our time at the US Detention Center. I'm still bummed I couldn't take a picture, but if I had, I'd probably still be there.) I cropped my photos into squares and arranged them around the outside, leaving space for the title and journaling inside. It's really plain, but it does the two things I like all scrapbook pages to do: tells the story and keeps the focus on the photos.

7/15/20

Felt Apple Coaster and Apple Pie Slushie Recipe

Once I started making felt coasters, I couldn't stop! (Here are the tutorials for the lemon, lime, and orange.) They're such a quick and satisfying project. Today I have a felt apple coaster and a delicious, refreshing Apple Pie Slushie. It has all the wonderful flavor of fall in an icy version that's perfect for summer. Affiliate links below. 


Apple Pie Slushie


Ingredients:

  • 2 c. apple juice
  • juice of one lemon 
  • 1 tsp. cinnamon
  • 1/4 tsp. nutmeg
  • 1/4 tsp. cloves


Steps:

Combine all ingredients, then pour them into an ice cream maker. (This is the one we have and I LOVE it.) Churn for approximately 15 minutes, then transfer to glasses. Garnish with whipped cream and cinnamon. 


---------


Felt Apple Coaster


Materials:


Steps: 


Cut out a circle of red felt, approximately 4" in diameter. Cut out a circle of cream felt that is slightly smaller than the red circle. Cut five teardrop-shaped seeds from brown felt. 

Use brown thread and a very short running stitch to sew the seeds to the cream circle. When all the seeds are attached, use cream thread to sew the cream circle to the red circle.