4/30/18

Camp Chawanakee

As a Cub Scout, Trevor went to the same summer camp three years in a row. He loved it, but was excited to visit a different camp. As expected, he had a blast at Camp Chawanakee. I loved seeing the photos and hearing all his stories. 

Camp Chawanakee (affiliate link)

This summer, Trevor's troop is going to Camp Emerald Bay on Catalina Island! I'm already looking forward to hearing about their adventures. They're going to have such a great time. 

4/27/18

12 Things You Can Do with Coloring Book Pages

If you or your kids got into the coloring book craze, chances are you have a lot of completed pages still in the book rather than out on display. Here are twelve fun ways you can show off your coloring!

---------

12 Things to Make with Coloring Book Pages


1. Faux Stained Glass


It's ridiculously easy and the effect is so cool. The secret is something you'll find in the kitchen!


2. Pencil Holder


Wrap an empty box or can with a completed coloring page and you have a handy organizer that is as functional as it is fashionable!


3. Place Cards


Do a little bit of fussy cutting and turn your coloring pages into a set of themed place cards. You could even leave them uncolored for the guests to color before the meal!


4. Wrapping Paper


Use blank coloring pages to wrap a gift! Add pens or colored pencils on top to make the gift extra fun. Of course, you could also use completed coloring pages as gift wrap.


5. Greeting Cards


Turn completed coloring pages into pretty greeting cards, suitable for a variety of occasions. You can get 4+ cards from a single coloring page.


6. Jar Toppers


Top homemade jam with hand-colored art for a gift that anyone would love to receive!


7. Napkin Rings


Making napkin rings from coloring pages couldn't be easier! Make sets for holidays, seasons, or everyday use. The colored images add so much beauty to the table.


8. Decorated Gift Bags


Coloring pages turn a plain bag into a totally unique gift bag that looks great! Anything goes!


9. Egg Cups


Decorate the Easter table with bunny egg cups holding colored eggs. Or use more evergreen designs for the breakfast table year-round.


10. Labels for Food Gifts


Turn images from coloring books into labels for food gifts or other treats. There are a lot of ways to do this - be creative!


11. Bookmarks


Turn a single coloring page into 5+ pretty bookmarks. Keep one for yourself and give the others as gifts!


12. Gift Boxes


Add a coloring page to a gift box with a window for a quick, easy, and beautiful way to give a gift.


How do you use your completed coloring pages? If you haven't used them before, are you inspired to get those coloring pages out of the books? I'd love to see what you've made!

4/26/18

South Dakota Badlands Painting

This post contains affiliate links. 

After completing the South Dakota Little Passports kit with Trevor, I was inspired to create this:


---------

South Dakota Badlands Painting


Materials:


Steps:


You can make your painting any size, but I chose to cut down my paper to about 6" x 9". That's the size I'd do in a classroom setting so that the paper is small enough to focus on detail.

Begin by brushing water onto the paper with horizontal strokes to lightly moisten the paper (the goal is moist, not wet). I LOVE using the water brush - nothing to spill and perfect water flow every time. Add swipes of blue across the top, browns across the center, and golden tans and hints of greens across the bottom.


The paint should dry very quickly if you haven't used too much water. If the paper is still wet, wait. When it is dry, add horizontal lines of color along the center section, then build up the mountains. Use light browns, golds, rusts, creams, and related shades. You're trying to mimic the sedimentary rock of the Badlands


Lightly sketch the shape of a bison (I'm trying to break my bad habit of calling it a buffalo) in the bottom section of the paper. 


Fill it in with brown paint, dark for the body and lighter for the horns. 


Now add a streak of yellow to the sky and shadows to the left sides of the mountains. Create brush in the foreground using golds and greens. When everything is dry, use colored pencils to fix any gaps (I smoothed my mountains a bit) and then add eyes and a nose to the bison.


It looks like a beautiful place to visit. Someday!

4/25/18

Construction Paper Lighthouse Painting (and Fun with Optical Illusions!)

Art can be wonderfully relaxing and fulfilling, but it can also be incredibly frustrating. If you've ever tried to draw a friend's portrait or paint nature's beauty with any degree of accuracy or realism, you know that it is very, very difficult. The challenge is to replicate what you see, as opposed to what your brain tells you that you are seeing. 

Sometimes our brains are too smart for our own good. For example, what colors of paint would you reach for in order to paint the lighthouse in this image? 

Lighthouse Image

My brain is telling me that the lighthouse is actually white (with red accents), correcting for the fact that it is nighttime in the photograph. But if you want to paint the lighthouse as it appears at night, you need to reach for Paint B, the lavender. I sampled that shade directly from the right-hand side of the photograph. The lighthouse doesn't look lavender, but it is. 

Experiment with this by painting your own version of a lighthouse. While watercolor paper or a canvas might be your preferred surfaces for painting, this project works well on inexpensive black construction paper. That means this is an affordable project for the classroom or another group where canvases would be prohibitively expensive.


---------


Construction Paper Lighthouse Painting


Materials:

  • black construction paper
  • empty box
  • construction paper scraps
  • white mist
  • pencil
  • acrylic paint
  • flat brush
  • paint palette (frisbee!)


Steps:


Place a piece of black construction paper in the empty box. Arrange scraps of construction paper over it so that only a narrow 'beam' of black is exposed. Spray this area lightly with the white mist. (I used Mr. Huey. This link and and the other in this post are affiliate links.)


Remove the scraps and you're left with the beam of light shining from what will be the lighthouse. I wasn't careful enough covering the black and ended up with a thin white horizon line that I hadn't intended. No problem - that just determined where my water line would be. 


Use a pencil to draw the outline of the lighthouse. Add a water line if you didn't accidentally end up with one!


Add paint to your palette. Remember, no white! No red either. The challenge is to paint what you see without the corrections your brain is trying to make. I used one color by Testors (Hazey) and four by Folk Art (Lavender, Licorice, Berry Wine, and Thunder Blue). 

Now, the MOST important thing about painting on construction paper: No water. None. Do not start with a moist brush, do not rinse your brush, do not use any water at any point. If you just use acrylic paint, the cheap construction paper will hold up just fine through dozens of layers of paint. But use a moist brush and it will disintegrate. 

With a DRY brush, use the lavender to shape the lighthouse you sketched. Add bits of blue and grey to add highlights and shadows horizontally. Do not rinse your brush between colors! Just keep adding layers of paint. You want the colors to blend. If you're not happy with how it looks, add another layer. Then another and another until you are.

Use the Berry Wine to paint the red portions of the lighthouse. Details aren't important - just add the shapes. Add a little Licorice to the brush, turn it vertically, and dab in the windows at the top of the lighthouse. Then add shadows below each of the 'red' areas.


Now add the land the lighthouse is sitting on. Just keep layering colors. 


Do not be tempted to rinse the brush! Part of what makes the painting more realistic is the depth that comes from using multiple colors. 


Make short horizontal strokes to create the ocean. This will take a lot of layers to look realistic. Highlight the area of the water where the lighthouse's beam is shining. 


This is how mine turned out. Not a masterpiece by any means, but a decent representation of a lighthouse at night. And a lot of fun to create.


I found a great resource for fun facts about lighthouses. I was researching which US state has the most lighthouses (Michigan is #1, Maine is #2) and learned so much more. Enjoy!

4/24/18

Camporee 2017

I've mentioned many times that the idea of being behind with my scrapbooking doesn't bother me that much, but I absolutely hate when I allow myself to get lapped with an annual event. Three years' worth of Christmas celebrations blur in my mind if I don't scrap each one before the next happens. For that reason, I wanted to get Trevor's 2017 Camporee trip with the Scouts into the album before the 2018 trip. 

Camporee 2017 (affiliate link)

I'm just in time, because Trevor heads to Camporee this weekend! 

4/23/18

Exploring South Dakota Through Little Passports

Trevor and I continue to have a great time together learning about the 50 states using the Little Passports USA Edition! Our next virtual trip took us to South Dakota, home of (among other things) the world's largest collection of mammoth fossils. Here's Trevor building the model of a mammoth. 


Trevor thought it would be funny to pose the mammoth as though he were studying the Little Passports state journal. He was right. It was funny. 


We read about Mt. Rushmore and learned that each face is 60 feet tall. It took 14 years to carve them! After a matching activity about the four presidents on Mt. Rushmore, we solved a rebus about Badlands National Park. (I just had a flashback to when I was in 5th grade. Our class put on a play called 'Badlands Ballyhoo.' I remember literally nothing about it except the title and that we had a lot of fun. Any elementary school friends reading who can help spark some memories?) 

We learned that the Badlands are famous for their multicolored rock formations, shaped by water and wind millions of years ago. And, of course, erosion continues to shape the landscape. To learn how, Trevor did an experiment. He put four colored candies at opposite ends of a plate. He used an eyedropper to put 10 drops of 'rain' on the blue candy, 20 drops of 'rain' on the green candy, 30 drops of 'rain' on the yellow, and 40 drops on the red.  


We left the plate untouched for 15 minutes. When we returned, it was evident that the 'rain' had caused erosion. The candies (representing rocks) that got the most rainfall dissolved more than those with less rainfall.


Trevor solved a dot-to-dot activity about the Lakota and Cheyenne natives of the Black Hills. Then we solved a logic problem about Belle Fourche, a small town with the nickname of "Center of the Nation" because it is near the geographic center of the US. We did a fill-in puzzle about L. Frank Baum, who wrote The Wizard of Oz while living in Aberdeen, SD. I'd always assumed he'd written it in Kansas, but apparently I was wrong! We read about the famous events in South Dakota history and marveled at the Corn Palace, first built in 1892. It's on our must-visit list when we eventually make it to South Dakota. I love quirky stuff like that.

We did another logic activity, this time inspired by Custer State Park. It is home to bison, pronghorn, mountain goats, deer, elk, and burros. The burros are famous for standing in the road to stop traffic and beg for treats. Pretty smart, those burros! 

Speaking of treats, the South Dakota recipe was for kuchen. Yum!


We had such a good time on our virtual journey through the Mount Rushmore State and look forward to eventually traveling there in person. Thanks again, Little Passports!


4/20/18

Coloring Page Gift Box

This post contains affiliate links.

It's amazing how many ways you can use completed coloring pages when you stop and think about it. I came across this empty box with a clear window...


... and realized that I could add a completed coloring page and use it to hold a gift. No wrapping paper required! I cut a completed coloring page from The Art of Coloring Kaleidoscopes to fit the opening. It looked OK, but the colors weren't quite right. 


I painted the box white and it looked so much better.


You could do this with literally any coloring book and any box, tin, or pouch with a clear window. Get those completed coloring pages out of the book and out where they can be admired!

Coloring Books 725

4/19/18

Sympathy Card

I made this sympathy card for a friend who lost his mother to pancreatic cancer.

With Deepest Sympathy (affiliate link)

It's hard to tell from the photo, but I used grey chalk to shade the white background, starting from the dove and moving to the upper left. At that corner, where the grey is most concentrated, I added the smallest hint of blue, orange, and pink chalk. To me, the color represents hope and promise, which can be hard to see during the pain of grieving. I hope my card brings him some comfort.

4/18/18

New Mexico, 2016

Another travel page into the album! This was from our November 2016 trip to Santa Fe and Albuquerque

New Mexico, 2016 (affiliate link)

That was a really fun trip. It was hard narrowing down which photos to use, but I think these hit the main highlights. 

4/17/18

Pulling Prints from Poured Paints (Kid-Friendly! Yes, Really!)

Poured paint crafts are REALLY popular right now. I'm not surprised, as poured paint is mesmerizing to watch, fun to do, takes no special skills, and yields gorgeous end results. There are some downsides, of course: it uses a ridiculous amount of paint, the paint is mixed with a pricy pouring medium, the drying time is crazy long, the potential for a messy accident is huge, and even if everything goes right, clean-up is a pain. I challenged myself to come up with an inexpensive, low-mess version of a poured paint project that is 100% kid-friendly. In fact, I made three cards and wrapped a gift from a single poured paint project!


It took a bit of experimenting to get the results I wanted, so let me walk you through what I did. I'll also tell you what I wished I'd done. Lucky you, learning from my mistakes! 

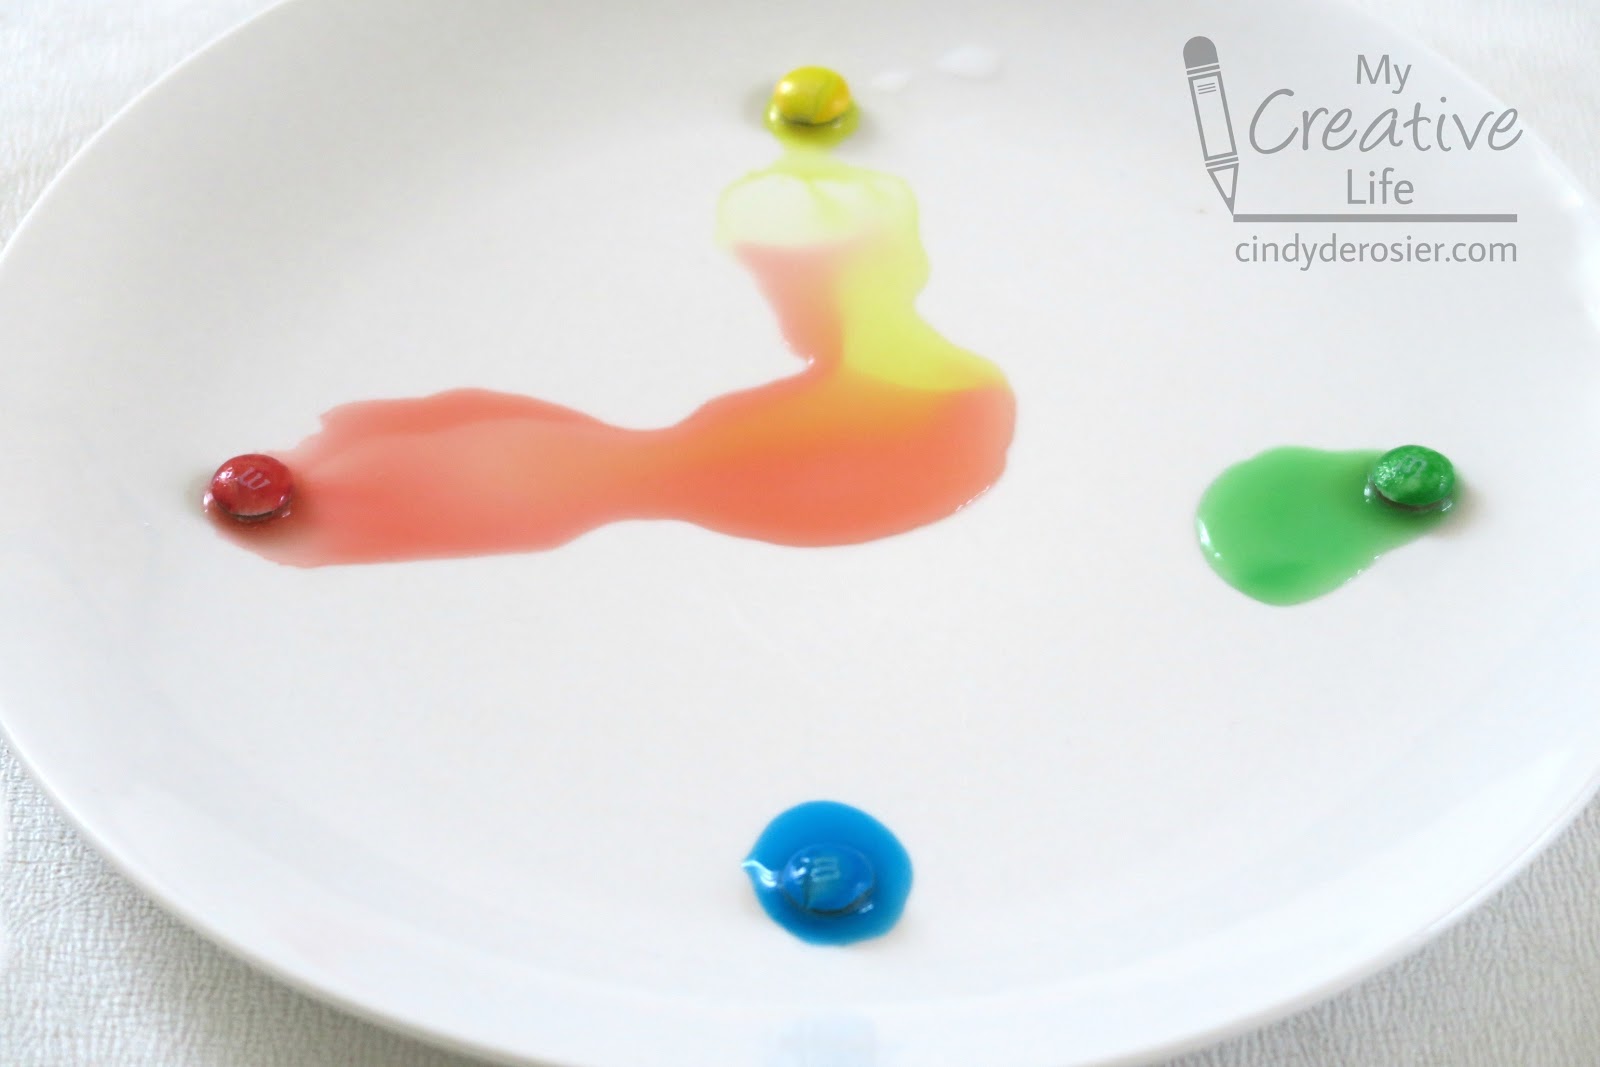
The first step is to choose your paint colors. I'd stick with three for your first project. I chose green, yellow, and pink. I should mention that I used Folk Art acrylic paint (affiliate link). I didn't try other brands, so I'm not sure if they'll work as well. Don't use tempera paint. It will flake when it dries.

Find three empty containers (K-cups are PERFECT for this) and pour about 1/4 oz. (1/2 tablespoon) of paint into each. Thin the paint with a few drops of water, mixing it with a toothpick. Add more water until it will pour smoothly, but not be runny. Think heavy cream.  

Set the paint aside and prepare your work surface. I covered my table with paper, then taped a piece of aluminum foil to the paper. In retrospect, I should have put the aluminum foil into a low-sided box, like the kind that hold flats of soda. But this worked out fine. I set up a posterboard behind my work space, which I envisioned as a just-in-case splash barrier (which I didn't end up needing). It did prove valuable though, as it reduced the glare on the foil significantly.

Next, I wadded up a small ball of foil and set it in the center of my foil work surface. I started by pouring pink onto the foil ball from a height of about 8 inches. It was too thick and the paint mostly just sat there. Trial and error. I thinned my paints a little and tried with yellow. Yes!


I poured green on top of that, then added more pink. Do you have any idea how difficult it is to use your non-dominant hand to take a photo of pouring paint while you focus on making sure said paint doesn't end up in the wrong place? I'll tell you. It's quite difficult. 


After pouring the last of my paint, I used a toothpick to drag the paint out from the center just a little bit. Then I poked the foil ball to remove it. 


I carefully lined up a piece of white cardstock over the paint...


... and lowered it into place. I gave it a gentle press...


... then carefully lifted it up. It worked!


I repeated the process two more times for a total of three pulled prints. I set them aside to dry. By now, the paint on the foil had smeared quite a bit and nearly reached the edges of the foil. It was really pretty and I had high hopes that the paint would dry nicely on the foil. I left it overnight and was happy to see that it dried beautifully.

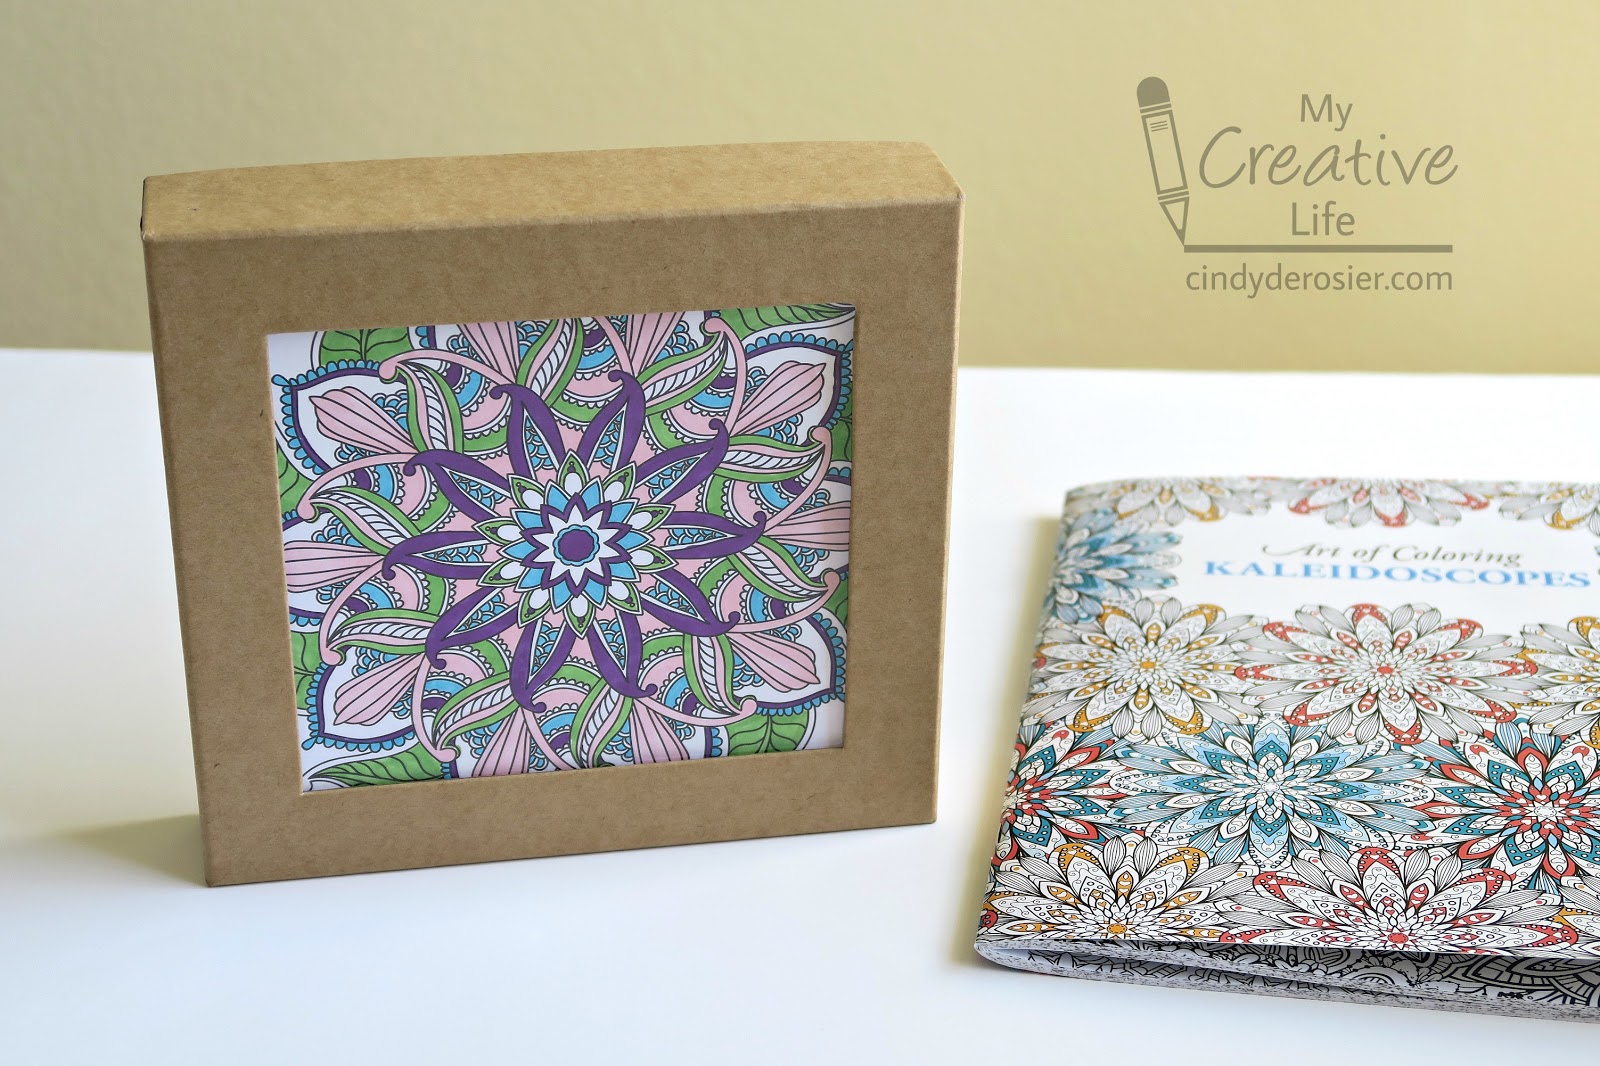
I turned my attention to the cards. I trimmed them to size and mounted them onto green, yellow, and pink card bases. 


Now, the foil. I had just enough to cover a small box. I crossed my fingers... and was thrilled that the paint didn't flake off when I bent the foil. Yea! I've never wrapped a gift in foil before, but it was so quick and easy. No tape needed!


This was such a fun project! I think the gift wrap and card go together beautifully. I consider this whole paint pouring experiment a grand success!


Have you tried pouring paint? Tell me what you've tried and how it worked, or if you're now inspired to give it a try!