
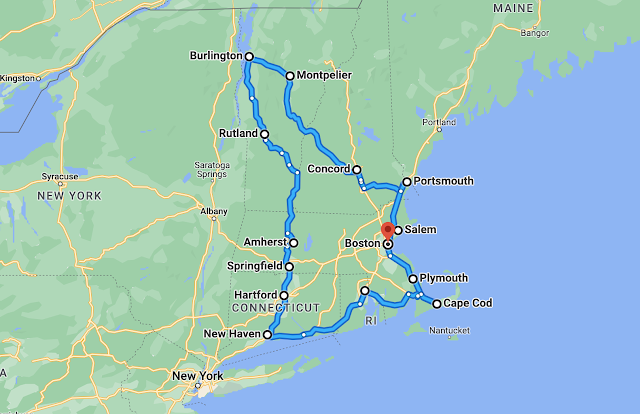
Our latest fun-filled family adventure took us to five states in fifteen days. We flew to Boston, rented a car, and then drove about 850 miles through Massachusetts, Rhode Island, Connecticut, Vermont, and New Hampshire before finishing up the trip back in Boston.

As always, we packed in all sorts of educational attractions: museums, tours, historic sites, and more. We tried the local specialties and learned as much as we could about the area. We had a fantastic time and I'm really excited to tell you all about it!
Because I blog about educational travel, I was given admission tickets, media rates, discounts, and other benefits for some of the places we visited during our trip. A few places we went are free for everyone, while we paid full price for the rest. This has no bearing on my reviews. Everything I'm sharing is something that I recommend without hesitation. If you see any gaps in my narrative, it is because I didn't love that particular attraction, restaurant, or hotel enough to recommend it to you, regardless of how much I paid or didn't pay.


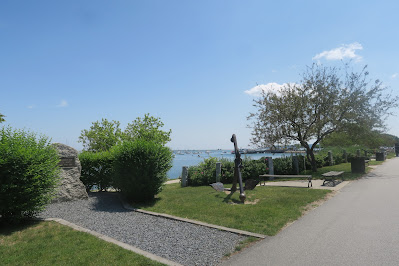
We took a beautiful walk through Plymouth to see the National Monument to the Forefathers. Believe it or not, Trevor and I are in that picture, standing at the base of the monument. That's a helicopter in the sky.


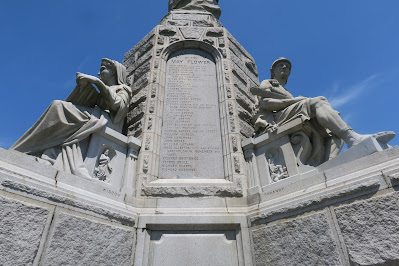
The monument was completed in 1889 to honor the Mayflower passengers. The figures along the sides depict Morality, Education, Law, and Liberty, while Faith stands on the main pedestal. She is holding a Bible with her left hand while her right points toward heaven.
At 81 feet tall, it is the largest solid granite monument in the United States. I was shocked to learn that the original design called for it to be almost twice as tall. At a "mere" 81 feet, it dwarfs everything around it.


---------
Boston, Massachusetts to Providence, Rhode Island
On Tuesday, June 13 we flew nonstop from San Francisco to Boston. Our plane landed at 11:15 pm local, so all we did that evening was get to our hotel. The Embassy Suites Boston at Logan Airport was clean, comfortable, quiet, and very convenient. I wish I could say I recommend it, but I can't.
We'd set a really early alarm since we planned to be packed and downstairs eating breakfast by 7:00 am on Wednesday, June 14. So all three of us were dressed and packing when the fire alarm went off around 6:45 am. We went to our nearest emergency exit (conveniently next door to our room) and joined a dozen people heading downstairs from the 6th floor. We met a few more along the way. The emergency exit led to an alleyway behind the hotel with a gate. A locked, or possibly jammed, gate. The biggest men in the group tried to force it open, but couldn't. A hotel employee noticed that we were trapped, and led us back into the building and through the entire length of the hotel and out a different emergency exit. There we were able to cross the street and join the other hotel guests who successfully evacuated. After awhile, the firefighters gave an all-clear. We were never in danger (it was a false alarm) but we were very distressed to have been trapped by what was supposed to be an emergency exit. We went directly to the front desk. The manager wasn’t there, but we were assured he would call us “immediately.” Care to guess how long that took? Nine days. And that was after I contacted him (and copied the CEO). The manager said the gate has been fixed. There's a lot more I could say about this, but I'd rather put my energy into telling you about the rest of the day.
We'd set a really early alarm since we planned to be packed and downstairs eating breakfast by 7:00 am on Wednesday, June 14. So all three of us were dressed and packing when the fire alarm went off around 6:45 am. We went to our nearest emergency exit (conveniently next door to our room) and joined a dozen people heading downstairs from the 6th floor. We met a few more along the way. The emergency exit led to an alleyway behind the hotel with a gate. A locked, or possibly jammed, gate. The biggest men in the group tried to force it open, but couldn't. A hotel employee noticed that we were trapped, and led us back into the building and through the entire length of the hotel and out a different emergency exit. There we were able to cross the street and join the other hotel guests who successfully evacuated. After awhile, the firefighters gave an all-clear. We were never in danger (it was a false alarm) but we were very distressed to have been trapped by what was supposed to be an emergency exit. We went directly to the front desk. The manager wasn’t there, but we were assured he would call us “immediately.” Care to guess how long that took? Nine days. And that was after I contacted him (and copied the CEO). The manager said the gate has been fixed. There's a lot more I could say about this, but I'd rather put my energy into telling you about the rest of the day.
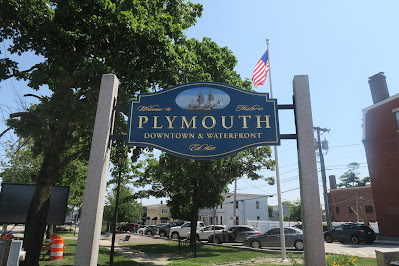
Our first destination was Plymouth, 41 miles south of Boston.

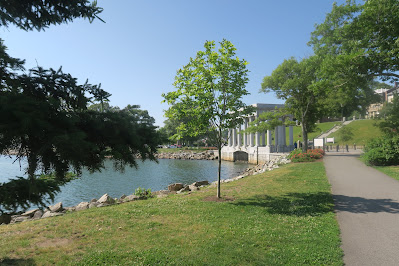
If you know your American history, that name should sound familiar. In 1620, 102 Pilgrims arrived from England on the Mayflower, anchored at Plymouth Rock, and formed the first permanent European colony in New England. Their journey is memorialized at Pilgrim Memorial State Park.
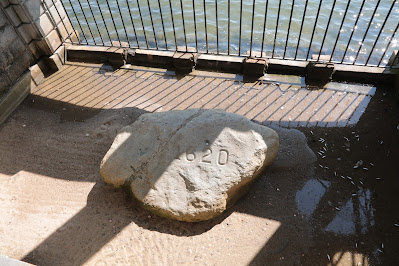
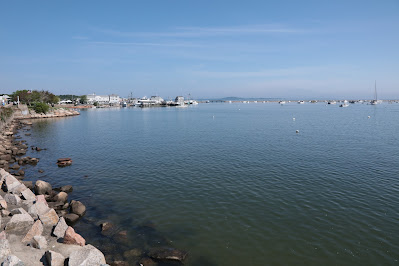
There are two main things to see at Pilgrim Memorial State Park. The first is Plymouth Rock. It is housed in a large stone pavilion.

See the grate at the water level?

That's where Plymouth Rock is. It's underwhelming, but I expected that. And now I can say I've seen it.

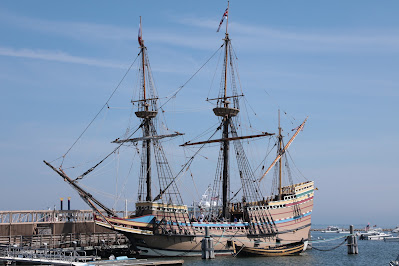
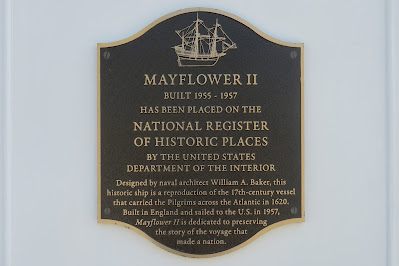
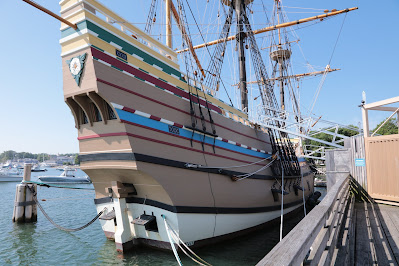
A short distance away, you'll find the Mayflower II replica.


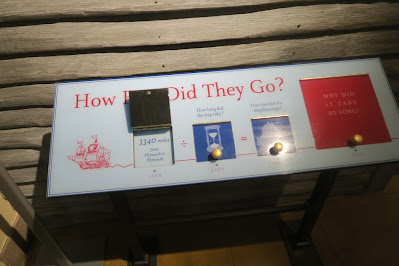
I can't even begin to imagine how awful it would be aboard a ship that small with 101 other passengers and all their belongings (including farm animals) for 66 days before reaching land. No latrines, no cabins, no privacy, no fresh food, no relief from the sea sickness, no thank you.
And that was only the start of it. They continued to live aboard the ship for months, rowing to shore during the day to build houses, then returning to the ship. In New England. In the winter. More than half of the original settlers died that winter. It's incomprehensible. They'd planned to arrive in October, which would have been better (but not ideal) for months of rowing and housebuilding.
We were blessed with perfect weather during our June visit. Having never experienced a New England winter, I can only imagine how different this would have looked to the Pilgrims.


Let me zoom in for you.... there we are!

At 81 feet tall, it is the largest solid granite monument in the United States. I was shocked to learn that the original design called for it to be almost twice as tall. At a "mere" 81 feet, it dwarfs everything around it.

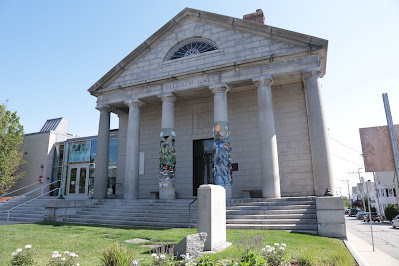
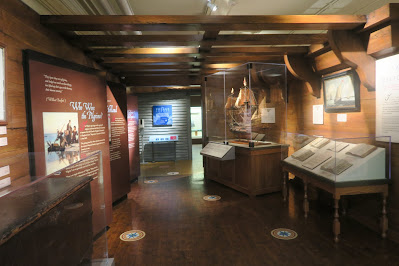
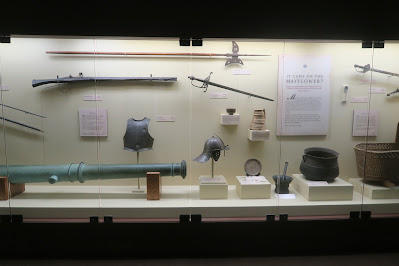
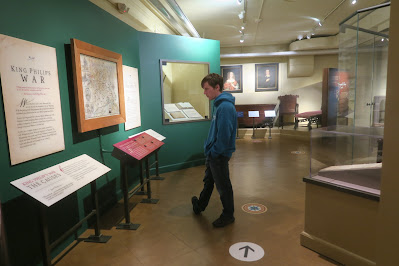
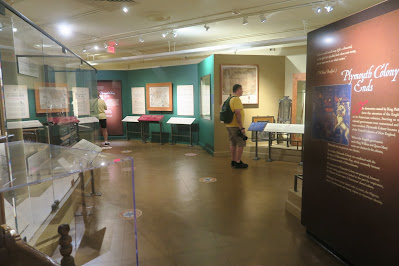
After another short walk, we reached the Pilgrim Hall Museum. It is the oldest continuously operating public museum in the United States.


The museum's status as the oldest in the US would be reason enough for me to want to visit, but that's far from the only reason you should go. It is an excellent museum, with a strong commitment to historical accuracy and inclusion. Not only do they tell the story of the Pilgrims and showcase their belongings, but they also feature the experiences of the Wampanoag. They lived in the area for 13,000 years before the English colonists arrived and are still there today.
We started with an excellent exhibit about six different women of Plymouth, representing different ages and life situations, some colonists and some indigenous. As we continued through the galleries, I was impressed by the efforts to correct the many myths that persist about the Pilgrims.


It was all very interesting.


I appreciated the opportunities to sit in a reproduction of the chair on display and to touch part of Plymouth Rock.


This was my favorite part of Pilgrim Hall Museum. It was so interesting to learn where, when, and why the myths about the Pilgrims originated.

Paintings and poems from the 1800's gave us a stereotyped image of the Pilgrims, often with many historically inaccurate details.


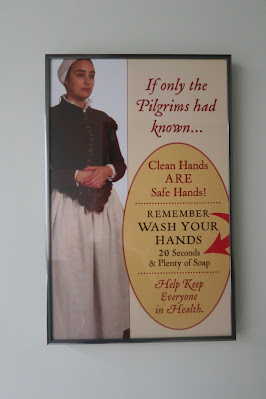
I was amused by this sign in the bathroom.
One final thing to share from the Pilgrim Hall Museum: this poster. If I still had a classroom, I would have bought it in a heartbeat. It is fascinating and horrifying and really helps you visualize the struggles of the Pilgrims.
We could have easily spent all day exploring Plymouth. It's a cute, walkable town loaded with history. But we had other places we needed to be. Our next destination ended up being one of the highlights of the entire trip. I'll tell you all about it on Monday.


.png)
