7/30/21

Confirmed!

Today's layout is about Trevor's confirmation in March. I've shared two other pages from that day - one about Trevor and his mentor and another about what our first visit to in-person church in over a year was like with all the COVID restrictions. 

Confirmed! (affiliate link)

For this layout, I used two photos from the ceremony, one of the palms decorating the entrance to the church (he was confirmed on Palm Sunday), and a screenshot from the live broadcast of the service on YouTube. It shows the special hymn we chose as well as comments of congratulations posted by friends and fellow congregants watching online.

I briefly considered making a fourth layout about the occasion (I know! Who am I and what have I done with Cindy?!) comparing my own confirmation with Trevor's. But ultimately I decided that didn't need to be in the album. While we were both confirmed at the same age and with the same denomination, the similarities pretty much stop there. Besides the glaring fact that Trevor's confirmation occurred during a pandemic, his was a ceremony for 1. My group had 12. I'm the one on the right with the pink-trimmed dress. 

While I won't be making that layout, I am strongly considering making one with photos from my mom's (and her mom's) confirmations. It would be really cool to have a page with 4 generations of Lutherans. I know I've seen a confirmation photo of my mom and I think there's one of my grandma somewhere too. Mom, next time I visit, let's look for those photos!

7/29/21

Sheet Pan Dinner

I absolutely love the ease and convenience of a sheet pan dinner. You put some oil on a sheet pan, then load it up with whatever protein and veggies you have on hand, and drizzle a little bit more oil on top. Pop it into a 350°F oven, give everything a stir around 30 minutes, then roast for another 15 minutes or so and dinner is ready. The exact time depends on what items you're using and what size the pieces are, but I generally find 45 minutes to be just about right. 

Here's our family's dinner from a recent weeknight: pineapple sausages (from Costco), sweet potatoes, baby carrots, cauliflower, and broccoli. The veggies all came from our produce box


I've made sheet pan dinners with a lot of different things, but my favorite protein to use is frozen, fully-cooked sausage. It heats perfectly in 45 minutes, I don't have to worry about over- or under-cooking it, and the steam it produces helps keep the vegetables moist. Here's the "before" picture - notice the sausages are completely frozen. 


Are you a fan of sheet pan dinners? I'd love to hear any successes (or failures) you've had!

7/28/21

15th Birthday

Trevor's 15th birthday fell during finals week. Coupled with the pandemic (California was not yet fully open and Trevor was not fully vaccinated yet), we were limited in how we could celebrate. But we did what we could to make his day special.  

15th Birthday (affiliate link)

The upside to having a low-key celebration at home is that I didn't have to struggle to decide which photos to include. One with the cake and one opening presents, with a mention of the special meals he chose in the journaling, told the story. I'm really happy with how this layout turned out.  

7/27/21

Playdough Texture Tools

I was a big fan of Play-Doh when I was a kid. Specifically, I liked the play sets. My favorites were the barbershop, the ice cream maker, and the barbecue set. (These affiliate links go to the modern versions of the 1970's toys I loved.) I still like playing with doughs and clays, but it's been years since we've had any Play-Doh in the house. (Trevor played with it occasionally when he was little, but it just wasn't his thing.) Now I use Model Magic, Sculpey, or homemade salt dough when I am in the mood to play with clay.

The last time I had my clay out, I made myself a set of texture tools using random items from the craft room. I'm really happy with how they turned out. 
 

The first step was gathering craft sticks and a bunch of random stuff. I wasn't sure what would print well on clay, so I tried a wide variety of things. 


Next, I attached each item (pony beads, buttons, a wooden swan, a rubber band, yarn, a chipboard tree, pipe cleaner, a shiny trim, Twisteezwire, pennies, and a feather) to craft sticks. I used hot glue for everything except the rubber band, pipe cleaner, and Twisteezwire, which I just wrapped around their craft sticks. 


I pressed each into the clay....


.... lifted them up to see the results. Most of them printed very well! The only total failure is the feather. The clay stuck to it and it didn't print well. The thin trim isn't great, but it was better than expected. 

I am most happy with the pony beads and the buttons. They give great texture to the clay. My second favorites are rubber band, pipe cleaner, and Twisteezwire. 


Make your own set of texture tools for playdough! Kids will love every step, from searching the house for items to use, to pressing their tools into dough to create textures. If you try anything that works particularly well (or particularly poorly!) let me know in the comments. 

7/26/21

Eagle Scout Card

COVID-19 meant that many Scouts who achieved the rank of Eagle were not able to hold in-person Court of Honor ceremonies. On Saturday, we attended our first Eagle Court of Honor in over two years. The recipient, Evan, is a family friend. He worked with Billion Graves for his Eagle Project. This is the card I made for Evan. 


Congratulations to Evan and all the other Eagle Scouts, particularly those whose projects were affected by COVID-19 restrictions. I'm so impressed with how you changed your plans and persevered despite the challenges. You truly represent what it means to be an Eagle Scout. 


7/23/21

RHDV

Around the same time that the COVID pandemic reached the United States, a serious disease affecting wild and domesticated rabbits and hares began spreading rapidly across North America. Rabbit Hemorrhagic Disease Virus (RHDV) was first identified in 1984, but was not seen in North America for 36 years. In March 2020, it appeared in the southwestern US and Mexico. By May 2021, it was killing rabbits in southern California. By June 2021, northern California had its first case. 

RHDV is highly contagious and deadly to rabbits. It has no known cure. Vaccines are not widely available in North America, though as states experience outbreaks, veterinarians can request special permission to import European vaccines. RHDV is spread through direct contact with other rabbits or their droppings, but it is also spread indirectly. Humans, other household pets, and insects can transmit the virus to healthy rabbits. 

Trouble used to enjoy occasional supervised backyard playtime, but he is an indoors-only rabbit now. This is the best way to keep him safe from flies, fleas, or other insects that could spread RHDV to him. The other way we can protect him is by removing our shoes before entering the house. To remind us (and any visitors), I made a sign:


Due to Trouble's age (nearly 11) and the difficulty in procuring vaccines, I don't think we'll be able to get him vaccinated. Fortunately, because we don't have any other pets and don't interact with other rabbits, his risk is very low as long as we don't track in anything on our shoes. 

For more information about RHDV or anything having to do with rabbits, visit House Rabbit Society

7/22/21

Puzzle Piece Monarch Butterfly

After you turn a puzzle piece into an alien, the next logical thing to do is to turn one into a butterfly. A monarch, to be specific. Affiliate links below. 


Puzzle Piece Monarch Butterfly


Materials:


Steps:


Prep the puzzle piece by painting a coat of gesso on the glossy surface. When the gesso has dried, add an orange base coat. Let it dry completely. 

Use a fine-tip Sharpie to color the sides and edges of the puzzle piece black. Then use an ultra-fine Sharpie to add lines that mimic the patterns of a monarch. 
 

With the white Uniball pen, add dots around the outside edges. 


Wrap a pipe cleaner around the puzzle piece to make the body of the butterfly. The top and bottom should extend beyond the puzzle piece, and the ends should be hidden on the back side. 

Cut a piece of Twisteezwire and wrap it around the the top of the pipe cleaner, twisting to secure it. Curl then ends around the body of the pen to create the curl.  


So far, I've turned puzzle pieces into a ladybug, crab, reindeer, girl, wreathalien, and now a butterfly. Trevor has made a spider and a bug. There are still several dozen pieces left from the terrible puzzle - what should I make next?

7/21/21

The Latest Six Craft Roundups

Time to share another batch of craft roundups I've made for Fun Family Crafts! First, Barn Crafts for Kids. One is mine. Can you spot it?  


Cactus crafts are some of my favorites. One of the ones below is mine. As always, I made this graphic using PicMonkey. I've used it long enough that I'm developing some of my own hacks. For example, to make the sand for the title graphic, I started with a sand-colored rectangle, added a glitter texture, then faded the texture until it left just enough texture to mimic sand. Then I used the eraser tool to make an irregular edge. 


Next, Photo Crafts for Kids. Two of the ones below are mine, but neither one has photos of Trevor, Steve, or me. 


Next is Clown Crafts. Two of these are mine. 


Next, Pony Bead Crafts. None are mine. 


This roundup of Shark Crafts for Kids was my favorite to make. Two of the projects are mine. I really wish I'd thought up those socks. 


With the addition of these, we are up to more than 120 Craft Collections at Fun Family Crafts. It's fun seeing them all together. It also lets me see at a glance which graphics need updating (which remains my absolute favorite part of my job). Yea, PicMonkey!

7/20/21

Quirky Collages: Hummingbird Gift Bag

I've completed another coloring page from Don Stewart's Quirky Collages to Color (affiliate link here and below). This time, I colored his hummingbird collage. I used Prismacolor art markers, cut out the image using microtip scissors, and adhered it to a plain gift bag.  


Here's a closer look at the colored image. Can you spot the nine flowers that make up the hummingbird? You should find: anthurium, bird of paradise, calla lily, chrysanthemum, crocus, hydrangea, orchid, rose, and trumpet vine. 


Adding your colored images to gift bags is a great way to get them out of the coloring book and seen. It's also an easy way to personalize a gift bag. Just choose an image you know the recipient will love!

7/19/21

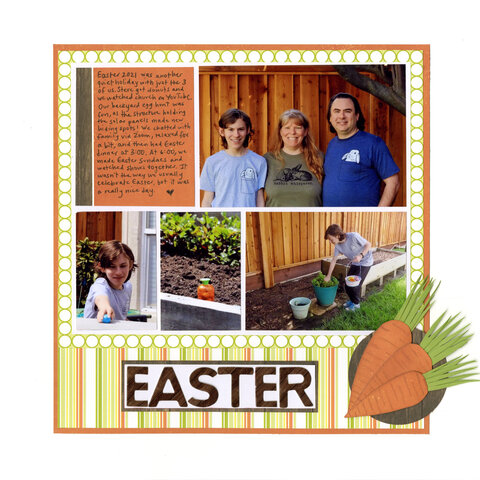
Easter 2021

Any of you long-time scrapbookers recognize the circles and striped patterned papers I used for this layout? You have to go waaaaay back. The manufacturer, one of my all-time favorites, shut down in 2009.

Easter 2021 (affiliate link)

Anyone else miss Scenic Route? Of all the paper manufacturers that have come and gone, they are the one I miss the most. I only have a little bit left in my stash, so I only pull it out when it's perfect for a page.
The orange/woodgrain paper is from Echo Park, one of my current favorites. Check out the journaling spot at the top left. The woodgrain is the tear strip from the bottom of the paper, still attached. I was so pleased to be able to use it like that. I think that's a first. I love how it balances with the carrots and the circle behind them.
One more detail to point out from this layout: the title. Did you notice that the E's are significantly narrower than the other letters? That's because they used to be B's. A quick trim and I had the letters I needed. I love fonts like that.

7/16/21

Watermelon Ice Cream Cones

My latest edible craft? Watermelon Ice Cream Cones. 


Well, more like "Watermelon" Ice Cream Cones, since it's actually raspberry flavored, not watermelon. Come to think of it, it's sorbet, not ice cream. So I suppose it should be called "Watermelon" "Ice Cream" Cones with two sets of air quotes, but that seems a bit much. Let's stick with...


Watermelon Ice Cream Cones


Materials: 


Steps:


Prepare the Candy Melts in a glass dish, following the instructions on the package. Dip the tops of the cones into the melted candy to coat the edges. 


Set them on a sheet of parchment paper to set up. 


Scoop sorbet into the cones. 


Press the mini chocolate chips into the sorbet. Put the cones in the freezer for at least 15 minutes to firm up, then serve. Delicious and perfect for summer!

7/15/21

Mickey Parade Waver

Like yesterday's Sweet Dreams craft, today's Mickey Parade Waver is recreated from someone else's idea. It originally appeared on Disney's Spoonful site, which has since closed, meaning that our link on Fun Family Crafts goes nowhere. So I added it to my list of clever crafts I wanted to recreate, rather than having the tutorial lost forever. 

When Jonna came over for a visit and some crafting, she offered to tackle making the Mickey Parade Waver. She worked on it while I wove my paper blanket and checked a few other things off my crafty to-do list. My contribution to the Mickey Parade Waver was limited to digging out all the supplies as she needed them, suggesting the awesome star washi tape for the handle, and photographing the finished project. Affiliate links below. 


Mickey Parade Waver


Materials:


Steps: 


Print out the pattern. Layer it on top of a double layer of white felt and cut through all three layers at the same time. Place the pattern on top of red felt and cut out the accents. 

Using red thread, sew the accents onto one layer of the white felt. Layer the two pieces of felt together again, then use white thread to sew from the bottom left, up and around the hand, stopping at the bottom right. (The entire base will be open, like a glove.)

Stuff the glove with fiber fill, using the dowel to push it into the fingers. Wrap the dowel with washi tape, then insert it into the glove. Put a bit of tacky glue along dowel, just above where the glove ends. Rotate the dowel to cover it in glue, then use white thread to stitch the bottom closed.

---------

As before, if you know who originally created this craft for Spoonful, please let me know so that I can credit the designer!

7/14/21

Sweet Dreams Weaving Practice Craft

A big part of my job at Fun Family Crafts is making sure our site features well-written tutorials for projects kids want to make. A lot of projects come to us as submissions from the creator, but plenty of others are there because I've specifically gone out looking for unique project ideas. When I find an image that would be a good fit for our site, I track down the original source and encourage them to submit the project. Then we add it to our collection of 12,000+ curated kid-friendly craft tutorials

Unfortunately, it's not always possible to find the original source. For example, when a blogger deletes their site, all links that previously led from an image to the tutorial become dead. Another problem occurs when someone downloads a picture of a project they like, then uploads just the photo to Pinterest, without a link to the source. Not only is the creator robbed of the pageviews and affiliate income they would have otherwise had, but the pin is useless because no one can access the tutorial from it. In both of these cases, I use Google Image Search and other techniques to do what I can to find the original source. When that fails, I use the photo as inspiration to design my own version so that a tutorial for the idea exists. Such is the case for today's project.

This version is mine:


And this is the original photo, likely a snapshot of a bulletin board, uploaded without a link or credit:


It's such a clever project, and a great way for kids to work on weaving skills. And they look so cute all grouped together. 
 
---------

Sweet Dreams Weaving Practice Craft


Materials:

  • construction paper
  • scissors
  • glue

Steps:


Begin by making the blanket. Layer two (or more) pieces of construction paper together and cut out a rectangle the size you want the finished blanket to be. Pick one color to be the base (I used blue). Make long, vertical cuts in the base to prepare it for weaving. Do not cut the strips apart! You want them to remain attached. This is the warp. Cut the second piece (I used green) into horizontal strips. These should be detached from each other; these are the weft. Weave the weft over and under the warp. Each strip you add will go the opposite direction of the previous strip. 

When the entire blanket is woven, glue down all the flaps on both sides to secure the weaving. When the glue is dry, trim off any extra material. 

Use construction paper to create the sleeper's head, neck, and face. Cut two hands from the same skin color you used. Add hair, then draw on a face with sleeping eyes. 


Finally, cut out a rectangle for the bed and a smaller white rectangle for the pillow. Assemble everything by gluing the pillow to the bed, the head to the pillow, the blanket under the chin, and the hands at the top of the blanket. 


I'd love to know if the steps I used are the same as the ones the kids used in the original photo. And I really wish I could give credit to whoever designed this project. If you recognize it, let me know and I'll update the post!


7/13/21

Last Day of Ninth Grade

Remember the custom scrapbook papers I used to make thank you cards for Trevor's teachers? I used two of Scrapbook Customs' customizable papers to make this layout about Trevor's last day of 9th grade. I absolutely love these papers. This might be the fastest layout I've ever made, since the papers did most of the work for me!

Last Day of 9th Grade (affiliate link)

This post has all the steps to order scrapbook paper featuring your own school colors, name, and mascot. It also has a coupon code you should use to get 10% off everything at Scrapbook Customs. I can't wait to play with more of their custom papers! 

7/12/21

Puzzle Piece Alien

One craft idea begets another. After making my footprint alien, I realized that a puzzle piece would make a great alien, too. Affiliate links below. 


Puzzle Piece Alien


Materials:


Steps:


Prepare the puzzle piece by painting a coat of gesso on the glossy surface. Use a stiff brush or an old toothbrush to make a starry background on black cardstock, as described in the footprint alien project.

When the gesso has dried, paint the alien. I'm a fan of green aliens, but you can obviously choose whatever you want. 

When the paint has dried, cut a piece of Twisteezwire and wrap it around the base of a tab, twisting to secure it. (Did you know they're called tabs? Check out this interesting article.) Then twist the ends of the wire around the paintbrush handle, one at a time, to create the curl. Glue a googly eye in place. Cut out a friendly mouth and glue it beneath the eye. (Or whatever. It's your alien. If there's ever a place where there's no right or wrong way to do something, it's when you're making an alien craft.)

Cut out a planet for your alien to sit on and glue it to the starry background. Then glue your alien in place. 

There are so many creative possibilities with this project. Give it a try!

7/9/21

Handprint Monarch Butterfly

I'm a huge fan of handprint (and footprint) crafts. If you ever see me staring at my hand while twirling it slowly around, I'm probably thinking about a potential handprint craft. Today's is a monarch butterfly. Affiliate links below.


Handprint Monarch Butterfly


Materials: 


Steps:


Paint a clothespin black, then set it aside to dry. 

Dip one hand into orange paint, then use the paintbrush to add black lines on top of the orange paint. Work quickly so that it doesn't dry. 


Press your hand onto the blue paper. Pay attention to which hand you are stamping - the right hand goes on the left and the left hand goes on the right. Repeat the process with the second hand, leaving a small gap between the two handprints.


Use the tip of the paintbrush handle to add tiny white dots along the edges of the handprints. Let the paint dry completely. 

Wrap a length of pipe cleaner around the clothespin and then bend the ends gently to make antennae. Glue the clothespin to the center of the paper between the two handprints. 


The monarch butterfly is the official state insect of Alabama, Idaho, Illinois, Minnesota, Texas, Vermont, and West Virginia, but no matter where you live it's a great craft to make.

7/8/21

Camping Adventure 2021

To prepare for the upcoming Scout summer camp that we're in charge of, our family did a one-night camping trip at the site back in May. We explored the campgrounds, brainstormed ideas and thought about logistics for camp, and took a ton of photos. 

Camping Adventure 2021 (affiliate link)

This layout came together very quickly because all my photos fit nicely in a grid. I adhered the pictures on the kraft paper, matted that, and put it on the plaid paper. To make the title, I layered seven stickers on top of an eighth sticker. I added two extra stickers in the top left and finished with journaling. 
Looking at these photos makes me even more excited for summer camp! The Scouts are going to have such a great time. 

7/7/21

Happy Camper Craft

Most summers, I am home alone for a week while Steve and Trevor head off to a summer camp with the Scouts. I use the time to finish huge projects, like in June 2017 when I added a section to my blog with travel and craft recommendations for all 50 states. Not this year. Not only will I be attending summer camp with the Scouts, but I've been planning it! For the past month, I've been setting the schedule, securing merit badge counselors, building a menu and shopping list, designing daily patrol challenges, and taking care of a bunch of other details to ensure a successful week for the Scouts. 

With camp on my mind 24/7, it's no surprise that my crafting reflects that. 


Happy Camper Craft


Materials:

  • construction paper or cardstock
  • white paint
  • stiff brush or old toothbrush
  • scissors
  • glue

Steps:


Dip the paintbrush into white paint. Drag your thumb across the bristles of the brush to send tiny flicks of paint onto the black background paper. You can also use an old toothbrush. Set the paper aside to dry.

Using black cardstock or construction paper, cut out a rectangle that is the same length as your background paper. Then cut out trees from black by snipping away triangles from each side to mimic the look of branches.  

Cut a parallelogram and an obtuse triangle from green to make the tent and the tent flap. Cut a yellow circle for the moon, then create the happy camper. I started with a round head, then added a neck, a shirt and hair, and finally the blue sleeping bag bits. After drawing eyes, a nose, and a smile, I glued the parts of the camper together. Position the tent flap over the camper and trim away any bits of sleeping bag that protrude beyond the left side of the flap.


Glue the ground down on the dry background paper, then add the trees. Next, glue the moon in place. Glue down the main part of the tent, then add the camper and the tent flap.  


Happy camping, everyone!


7/6/21

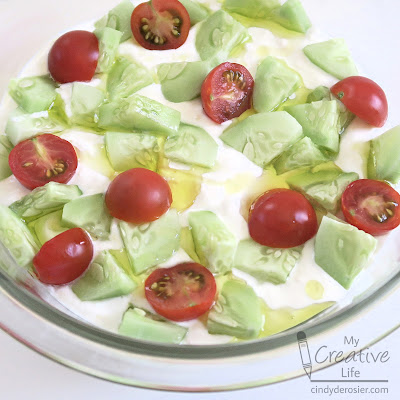
Greek Salad Dip

I randomly came across a recipe for a whipped feta dip that sounded tasty. I played around with the idea, incorporating the ingredients I like best in a Greek salad. The recipe below is how I made it, but it's super easy to tweak to include your favorite ingredients. 


Greek Salad Dip


  • 1 c. feta
  • 3/4 c. Greek yogurt
  • 4 oz. Neufchatel cheese
  • 2 T. olive oil, plus extra for drizzling
  • 1 T. lemon juice 
  • 1 tsp. lemon zest
  • 1 tsp. minced onion
  • 1/4 tsp. salt
  • dash of red pepper flakes
  • cucumber, peeled and sliced
  • cherry tomatoes, cut in half

Combine the feta, Greek yogurt, Neufchatel cheese, and 2 T. of olive oil in a bowl. Use a mixer to blend them until whipped and fluffy. Stir in the lemon juice, lemon zest, onion, salt, and red pepper flakes. Refrigerate for at least 2 hours. 

Top the dip with cucumber slices, cherry tomatoes, and other ingredients you may wish to add (kalamata olives, bell peppers, etc). Drizzle olive oil on top. Serve with pita chips. 

7/5/21

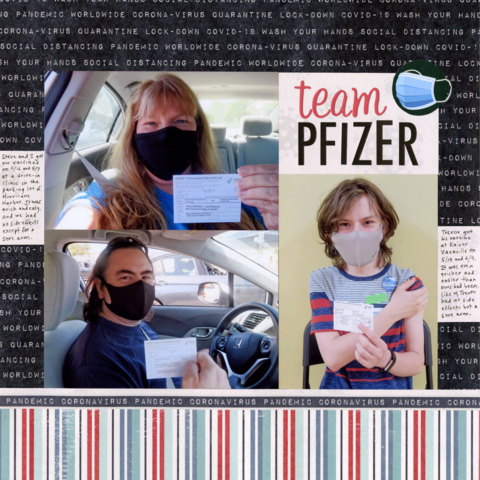
Team Pfizer

I used the leftover papers and sticker from my Canceled by COVID layout to make this page about our COVID vaccines. The deRosier family is #TeamPfizer. Steve and I have been fully vaccinated since mid-May and Trevor since mid-June. 

Team Pfizer (affiliate link)

I'm really happy with how this layout came out... almost as happy as I am that our family is fully vaccinated and can get back to spending time with friends and family, eating in restaurants, and traveling!

7/2/21

Footprint Alien

In case you weren't aware, today is World UFO Day. At Fun Family Crafts, we celebrate all the holidays, so I made this footprint alien specifically to add to our collection of UFO and alien crafts. It was a lot of fun to do! Affiliate links below.


 Footprint Alien


Materials:


Steps:


Paint the bottom of your foot with green paint, then step onto a piece of black cardstock. Do NOT lift your foot. 

Dip the stiff paintbrush into white paint. Drag your thumb across the bristles to send flicks of paint onto the black paper, mimicking stars. You can also use an old toothbrush.  

When you are happy with the starry background, lift your foot off the paper. Wash the paint off your foot, thumb, and wherever else it may have gotten. Use the paintbrush to make a grey planet for the alien to stand on. Let the paint dry completely. 

Add googly eyes, a mouth, feet, and any other features you'd like. Be creative and have fun!

7/1/21

Happy Holidays, Meter!

Steve works for an awesome company run by a pair of brothers who have shown in many ways that they care about their employees. One of those ways was with the 2020 holiday party. COVID meant that an in-person gathering was out of the question, so they held a cooking class / dinner party via Zoom. Each employee received a shopping list and a gift card to pay for drinks, appetizers, and the ingredients they'd need to make fettuccine carbonara from scratch. Everyone cooked and chatted and ate and drank and it was great.   

Happy Holidays, Meter! (affiliate link)

I kept things simple with this layout: one photo of our appetizers, one photo of Steve making fresh pasta, one photo of the finished pasta, and a group photo (so to speak). I added a few die cuts, some journaling, and it went straight into the album.