3/31/23

Hatching Chick Card

I've been cleaning up the craft room (see Wednesday's post). I needed a cleaning break, so I used some of the scraps in my desk to make this hatching chick card. It works as an Easter card, but it's equally fun as for sending a birthday wish, either for someone who has celebrated many hatch days or for a new addition to the family. Affiliate links below.   


Hatching Chick Card


Materials: 


Steps: 


Cut a piece of blue cardstock to fit your card blank. Cut green cardstock the same width as this base. 

Cut out an egg shape from white cardstock. Use a zigzag pattern to cut the egg into two pieces. Punch two clouds from white cardstock. Cut an oval chick from the yellow cardstock, then two tiny yellow feathers. Then cut an orange triangle beak. 

Assemble the card by gluing the green grass to the blue sky. Glue the clouds in the sky, overlapping them slightly. Glue the chick behind half of the egg, then add the yellow feathers behind the chick so they stick off the top of its head. Adhere the other half of the egg to the card, then put the half with the chick in it overlapping it slightly. Add the beak and googly eyes. 

Don't forget to add a fun sentiment on the inside!

3/30/23

Washington Monument Cherry Blossoms Craft

The cherry blossoms in Washington D.C. are iconic. I have several friends who live in the D.C. area who post photos when the blooms are at their peak. One such photo inspired me to make this craft featuring the Washington Monument. Affiliate links below. 


Washington Monument Cherry Blossoms Craft


Materials:


Steps: 

Use the brown marker to draw branches and twigs on either side of a piece of blue cardstock. They'll largely be covered with blossoms. 

Cut a narrow rectangle from the white and black (or dark blue) cardstock. Glue them together so that half of each color shows. With scissors, trim the top of each color to make the point of the Washington Monument. Then, on each side, cut a slight taper from the top of the rectangular part to the bottom. 

Cut shades of pink and/or white cardstock into 1" squares. 


Glue the Washington Monument onto the blue cardstock. Put a dot of glue onto one branch, then crumple up a square of tissue paper and stick in to the branch. Repeat this process until you've filled the branches. You might find it easier to do all the crumpling and then all the gluing. I worked in batches of about 10 blossoms at a time. 


In researching this project, I came across these fun facts about the Washington Monument, courtesy of the National Constitution Center. We visited in 2017 and LOVED it. I hope to return someday. George Washington will still dwarf Trevor, but not by nearly as much!

3/29/23

WOYWW? More Like, "Where Is My Workdesk Wednesday"

Have you heard of "What's On Your Workdesk Wednesday?" WOYWW is a popular way for craft bloggers and artists to share their work-in-progress. It's fun to get a peek into other people's creative space. 

Today is Wednesday and my desk is a disaster. In fact, my entire craft room is a disaster. I've been struggling to keep up with deadlines, which means I haven't been taking the time to clean up after projects. This, in turn, makes it much harder to do the next project. I greatly prefer to work in a clean, well-organized space, but that isn't always my reality. You can accurately gauge how caught up I am with life by how my craft room looks. Today, instead of WOYWW, it's more like WIMWW (Where is My Workdesk Wednesday)!

As I said, I like working in a clean space, with everything put away where it belongs. But that isn't the case with all artists and crafters. I know many who find inspiration in chaos and work best in a cluttered, disorganized studio. For others, a mess is an unavoidable side effect of the type of art they make. I recently came across a photo from the studio of my all-time favorite children's book author and illustrator, Eric Carle. It makes me feel a little better about the current state of my workspace. 


I figured if there is any artist whose studio could justifiably be a mess, it would be Jackson Pollock. I did some Googling. Considering his technique, Pollock's studio (which you can visit), is neater than I expected. His shoes, on the other hand...


I can't imagine getting anything done in this studio. But apparently it worked for Francis Bacon


BoredPanda compiled photos of 300+ artists in their studios. They range from pristine to... not. And by "they" I mean the studios, not the artists. (Although now that I think about it, the artists themselves do run the gamut.) One of my favorites amongst all the picture is this one of Bernard Buffet


As it turns out, my workspace isn't nearly as bad as I thought! But it still needs a good cleaning, which is on the agenda for tomorrow. 

3/28/23

Easter Egg Doodles

When I made cardstock eggs for my woven Easter basket craft, I cut out a bunch of extras to use for other projects. Here's what I did with 12 of those eggs:


I challenged myself to create a dozen completely different patterns using only a black pen. I thought it might be hard to come up with so many different doodles, but once I got going, the ideas kept coming. It was a lot of fun. 

So what do you do with the doodled eggs? You can string them to make a banner, or add them to Easter place cards or napkin rings. Or, use them as inspiration for doodling on real eggs! Dye them first and let them dry completely. Or leave them their natural color. With the eggs at room temperature, draw on them using a food safe marker (affiliate link). There are a lot of brands to choose from; I've found there isn't much difference between them. The most important thing is making sure your eggs are completely dry and at room temperature. Enjoy!


3/27/23

Non Voyage

We were really disappointed when we had to cancel our trip over winter break, but there was a major upside: we had fourteen unscheduled days at home to do whatever we wanted. We definitely took advantage of that found time! We visited museums in Sacramento and here in Fairfield. We cooked from scratch, completed three puzzles, read, did a bunch of art (me) and played video games (Steve and Trevor), stayed up late (Trevor) and slept in late (also Trevor). We got our COVID booster shots. Steve and I went wine tasting. And we rang in the new year with friends Rebecca and Cailei. 

Non Voyage (affiliate link)

I had originally planned to title this layout "14 Found Days at Home." That ended up being my subtitle. When I came across the "Bon Voyage" die cut, I did some creative surgery to remove the B, then added an N sticker and made my title "Non Voyage." I'm incredibly pleased with myself. Adding UN above the "Pack Your Bags" sticker is the pièce de résistance. 

3/24/23

Woven Easter Basket Craft

I enjoy weaving projects and have found that 99% of kids like them too. I love that weaving is a very simple skill that can be made much more complicated by using thinner strips, alternating patterns, multiple colors, or other variations. I kept it fairly simple with this basic Easter basket craft, but you'll notice that I alternated weaving white and green strips horizontally, giving it stripes rather than a checkerboard pattern. 


Woven Easter Basket Craft


Materials: 

  • construction paper or cardstock
  • scissors
  • glue

Steps: 


Cut a bowl-shaped piece of construction paper or cardstock in the color you want your basket to be. Trim equal amounts off each side (easiest if you gently fold the basket in half and cut them simultaneously); these will be the basket handle. Cut the scraps into strips that are at least as wide as the basket. If you want to use a contrasting color, cut those strips too. 


Make a paper bow by cutting five pieces of paper as shown below. Gently fold the top two pieces to make the loops of the bow, then glue the bottom two pieces behind them. (I just noticed that I switched their order in the photo. In order to make the bow look the same as the completed one above it, swap the two tails so that their tapered edges match the finished bow.) Glue the square on top to hide the fact that your bow is made of five pieces and not one continuous piece. 


Set the basket and handle aside, then make vertical cuts in your basket, stopping 1/2" before the top so that they don't fall apart. Then begin weaving. 


Glue down all the ends, front and back, then trim any excess. Cut colorful eggs, then glue them behind the basket. Glue the basket to a background paper, then add additional eggs if desired. 


Happy crafting!


3/23/23

Bubble Wrap Sensory Art: Rain Boot Craft for Kids

They say art imitates life. With that said, I'll give you one guess as to what life in California has been like recently. 


I've lived in California all of my 51 years and have never seen so much rain. In a normal year, we get a few rainy days here and there during winter and early spring. Recently, "normal" has meant "drought." So all this rain, while needed, just feels so strange. 

This simple craft starts with a neat sensory experience that kids of all ages will love. (I'm a good 30+ years past "kid" and I loved it.) You can easily adapt this project for different ability levels. Pre-cut the boots for preschoolers and toddlers to glue in place; challenge older kids to decorate the boots and pants or to add a sidewalk to their artwork. 

---------


Bubble Wrap Sensory Art: Rain Boot Craft 


Materials: 

  • white paper
  • paint
  • bubble wrap, cut slightly larger than your paper
  • scissors
  • glue

Steps: 


Cover your workspace with newspaper, then squirt some paint onto the center of your white paper. I used two shades of blue. 


Cover the paper with the bubble wrap, bubble side touching the paint. 


Starting at the center and working outward, pop the bubbles. The paint will gently splash outward, but will be contained by the plastic wrap. There's no need to pop the bubbles that don't have paint under them, but feel free. I did. :)


Remove the bubble wrap and set the painting aside to dry. Cut out two boots and two legs from another piece of white paper. Cut a quadrilateral for a raincoat or skirt as well. 


Paint the boots, legs, and raincoat/skirt with the color/pattern of your choice. When everything is dry, glue the legs behind the boots, then glue them to the puddle. Glue the raincoat or skirt on top of that, then trim off any excess paper that sticks over the edge. 


While some say that art imitates life, others say that life imitates art. If that's the case, I'd better start making some sunshine-themed crafts!

3/22/23

Happy National Craft Month!

I know it seems a little weird to be wishing you a Happy National Craft Month on the 22nd day of March. But there's a reason I waited. My friends at FaveCrafts are celebrating all month long with fun tutorials and giveaways. Each day they're featuring a different craft tutorial and I'm the designer of the day. 


My project is actually from last year and it's one of my all-time faves. To see what it is, head over to FaveCrafts and scroll down to March 22. Be sure to check out the rest of the craft tutorials while you're there. I especially love the March 20th project by my friend Amy Latta - so cute! And don't miss the links for all of the giveaways! I see some fantastic prizes. 

Happy National Craft Month, everyone!

3/21/23

Idaho 2021

It is extremely satisfying to finish the layout at the top of my scrapping to-do list. In this case, the top of the list was our 2021 trip to Idaho. We drove to Idaho Falls, then spent three days in Idaho before crossing over into Montana for a few days. We returned to Idaho, then drove west across the state to visit my family before heading home. I've already done the Montana layout and a page about the Estajonesier time, but I was struggling with the Idaho one. Since the time was split before and after Montana, I wasn't sure what to do. I decided to make a single layout with both sets of photos and to place it immediately before the Montana page in the scrapbook. 

Idaho 2021 (affiliate link)

Once the decision was made, the layout came together quickly. I wish I'd left myself more room for journaling, but at least the whole story is in a series of blog posts. Knowing that the blog and the albums compliment each other means that I don't have to count on either one to have 100% of the information I want to document 100% of the time. 

3/20/23

Shark Name Art

Time for more name art! Specifically, Shark Name Art. 


This project would be awesome for a school or team with sharks as a mascot, as an accompaniment to a study of sharks, or just for everyday fun. It's easy to do, but definitely takes some creative thinking!

---------

Shark Name Art


Materials:

  • shark template
  • pencil
  • scissors
  • construction paper (grey and blue)
  • glue stick or tacky glue
  • black pen

Steps: 

Print a copy of this shark template, which has two identical sharks facing in opposite directions. 


Use a pencil to lightly fit your name into a shark. Each letter should extend to the outline and there should be as little space between letters as possible. This is going to take some experimentation and some erasing, so keep those pencil lines light. Every name is going to look completely different and some may seem harder than others, but don't give up! When I first thought up this craft, I only drew the left-facing shark because I could see that it would be easy to turn the snout into a C and the tail fin into a Y. The I and the D were easy, but I really struggled to make my N fit. I did, but then realized that a right-facing shark might be easier for some names. I actually like the way CINDY fits into the right-facing shark better than the left, so definitely try both. 


Pick the shark you like better (or do both, like I did), then layer the template you've made over a piece of grey construction paper. You can use paperclips to hold the papers together if you want. Cut out the first letter, cutting through both pieces of paper at the same time. Set aside the template and place the grey letter onto a piece of blue construction paper. Repeat the process for each letter. Line up the cut letters carefully on the blue paper. If you like how they look, glue them in place. 

When I cut my left-facing shark and arranged it on my paper, I didn't like the way the N looked. With the notch I'd cut at the top, it looked more like a K. So I used the template to recut just that letter. I like the new N much better. 

Finally, use a black pen to draw an eyeball. 


Wouldn't these sharks look amazing on a classroom bulletin board, with all the different names represented? Or on a "Go Sharks!" team banner? You could even laminate your shark and then use it as a bookmark. So many possibilities!

3/17/23

One Color Challenge: Green

Recently, a lot of art bloggers and YouTubers have been doing the One Color Challenge, where they create a work of art using one single color. But that's not all - they have to use EVERY shade they have of that one color. Today is St. Patrick's Day, so I'm focusing on green. 

Here is Sarah Renee Clark, using over 670 green colored pencils on a coloring page. 


And here is ADCArtAttack, using an unknown (large) number of green markers, also on a coloring page. 


Both of their results are amazing. It's incredible seeing their talent in action. 

I decided to do my own mini version by making a quick all-green acrylic painting in my sketchbook. I'm not a painter, so it would be a challenge no matter what colors I used! I wasn't sure how many bottles of green paint I own; it turns out the answer is 8. 


I can't express how much I like having all my paints displayed in the craft room. (Thanks again, Steve!) It would have taken forever to dig out all the greens from the bins I used to store them in. 

I only had 20 minutes before I needed to leave to get Trevor from school, so there was no time for planning my painting or second-guessing anything. When working with green, a landscape seems obvious, so that's what I did. I jumped right in with the dusty green and the leaf green. 


I used a stiff round brush to pounce two medium shades of green on, avoiding the central light area.


I used the darkest green to draw tree trunks and branches. Then I used a kelly green, plus some of the shades I'd already used, to add foliage to the foreground. 


That left me with a moss green and a citron. The trees got some moss, then I highlighted them with citron. Finally, I added some citron flowers in the foreground.


It's no masterpiece, but it was a really fun challenge. And, it's gotten me one step closer to my goal of filling a sketchbook. I'm calling that a success. 

3/16/23

Painted Dragonflies, Inspired by 6th Grader Jack M. from Arkansas

I've been painting dragonflies in my sketchbook. Whimsical, colorful dragonflies. 


Immediately before I started painting dragonflies, I was doing prep work for an upcoming trip to Arkansas. I'm very excited to get to see some of the things we were supposed to have seen over winter break. I thought rescheduling the trip would be a lot easier than it's turning out to be. I'd already done all the research before, so it's just a matter of booking exactly the same things, right? Nope. We're traveling for a different number of days. Attraction hours have changed, due to the season and holidays. Hotels I'd booked for winter are full or prohibitively expensive for when we'll be traveling. All this to say, I'm basically having to redo everything.

But plenty of good has come of this. We'll be visiting a few places that were closed over the winter holidays and now will be open. The extended daylight hours and non-freezing temperatures make parks, botanical gardens, pedestrian bridges, and other outdoor attractions much more, well, attractive. And speaking of attractive, I stumbled across the awards ceremony for the 61st Young Arkansas Artists Award Ceremony

One piece stood out to me: Spring Dragonflies, by Jack M. Jack is a 6th grade student of teacher Jamie Freyaldenhoven, somewhere in Arkansas. Or at least, he was. The video was posted 10 months ago, so presumably Jack M. is in 7th grade now. 


Jack got Honorable Mention, but I am awarding him Judge's Favorite. I love Jack's artwork. The colors, the textures, and the sense of motion really draw me in. I dropped everything so that I could make my own version. This is officially the latest project in my "Inspired By" series. As before, my style is nothing like this artist's. I was curious to see how my personal aesthetic would come through using Jack's piece as inspiration. 

I know absolutely nothing about his process, although I do know he used acrylic paint, paint sticks, and a Sharpie. I don't own paint sticks (something to add to my Amazon wishlist?), but I own plenty of acrylic paint and Sharpies. (Well, not plenty. I'm always on the lookout for new colors of both.) Affiliate links here and below. 

I started by painting two pages of my sketchbook sky blue. While that was drying, I cut out a dragonfly template from some scratch cardstock. I could have drawn them freehand, but having the template made it easier to play with orientation and to keep the sizes consistent. 


I traced dragonflies, then painted the wings with random spots of color. I used the same basic colors Jack did (yellow, orange, pink, blue, and purple), but I made no effort to mimic his placement of color. When that was dry, I used a navy colored pencil to scribble onto the wings. This added some of the movement and texture I see in Jack's work. 


Next, I painted the black bodies of the dragonflies and outlined their wings with black paint. In between the dragonflies, I put patches of green. While Jack used a a bright, almost-neon green to do a loose outline, I used a leaf green to paint leaves between the dragonflies. 


My next step was using a green colored pencil to draw veins on the leaves. Then I painted on the dragonflies' antennae. I switched to scanning because it was getting too dark in the craft room to do quick phone photos. 


The last thing I did was to use my new Posca pen to add eyes, highlights, and outlines to the dragonflies, similar to what Jack did. I opted not to add any white to my background like he did. Here's my finished artwork:


And here's Jack's: 


No surprise, mine feels very controlled next to his more whimsical, freer piece. I like control - what can I say. But the inspiration is definitely there and I did use techniques that I wouldn't otherwise have tried. Jack M. from Arkansas, keep making art. I'm a fan. 

One final note: both Washington and Alaska have a dragonfly as their state insect. It's easy to adapt this painting to make either of them. For the Green Darner Dragonfly, leave the wings the color of the background, then scribble in them with a brown pencil. Paint the bodies green, blue, yellow, and garnet, as shown in the photo. For the Four-Spot Skimmer Dragonfly, leave the wings the color of the background, then use a silver pencil to scribble in them. Paint the bodies gold, brown, and black, using the photo as a reference. 

3/15/23

Birthday Art Haul

My 51st birthday was on Sunday. The celebration was much more subdued than last year's 50th birthday extravaganza, if 5 people spending a weekend playing board games, learning about history, and eating a lot counts as an extravaganza. I think it does. This year, I spent my birthday scrapbooking with my crafty besties. I always enjoy my time with them, but they went out of their way to make my day extra special. Steve and Trevor had a Scout event, so when they got home we had dinner and Baskin-Robbins clown cones (one of my favorite birthday treats). It was a great day.  

My friends and family spoiled me with plenty of fun gifts. I thought I'd share the art-related stuff I got. I'm including affiliate links. You have my permission to buy yourself any of these items, no matter when your birthday is. 


Crop-a-Dile Multi Punch

I've owned a Crop-a-Dile Big Bite for 14+ years and I love it. WRMK makes high-quality tools that can be used for so much more than just crafting. Having the Multi Punch will allow me to punch 5 different sizes of holes through chipboard, fabric, metal and other thicker materials that don't work well with standard punches. 
I've heard great things about this 9x12" paper pad by Strathmore. It is 50lb weight and smooth, which is great for alcohol-based markers
Before receiving this pack of 36, I owned 3 Inktense pencils. These water-soluble pencils are vibrant and they dry quickly and permanently. There's not much you can do with only three pencils, so I'm looking forward to playing with this set. 
I have enough coloring books to keep me busy for years, but that doesn't mean I don't want new coloring books! This Disney Villains book has great illustrations that will work well with my giant marker collection or my colored pencils. I can't wait to try it out! It might be awhile though - I've been working on a page from a coloring book I got for Christmas and I'm determined to finish that before starting another page.  
I've been needing a new grey ink pad and Archival Ink is one of my favorites. 
Posca is the most beloved brand of paint pens. They can write on paper, but also on photos, glass, fabric, plastic, and a lot more. This pack has white pens in three different sizes. Plus, there's a bonus set of pencil sticky tabs. The green one matches my favicon!
I love Flair pens. When I saw this special edition of botanical colors, I immediately put it on my wishlist. The black is the only duplicate of the Flair pens I already own, and there's no such thing as too many black Flair pens. 
All of my ink daubers are dying at once (since I got them all at the same time, about 10 years ago), so these will come in handy. A friend recommended these in particular. I'm curious to see how the bristly head works compared to the foamy heads I'm used to using. 


I'll be sharing all of these on the blog eventually, along with some of the non-craft gifts I received. Anything in particular you're eager to see? 

3/14/23

Outlook Forum 2023, Part 2

The first item on the schedule for the second full day of the 2023 Visit California Outlook Forum began with a 6:45 am meeting time. I was one of a couple dozen who set the alarm clock early and ventured out in the rain for an outdoor activity.  


Technically, we met indoors at 6:45, then moved outdoors at 7:00 for the official start. I was surprised to see that there was a light breakfast waiting for us at 6:45. I shouldn't have been surprised, but with a full breakfast scheduled for 8:00 am, I didn't expect pre-breakfast to be served. I don't normally eat that early, so I had a single blackberry because it was enormous and looked delicious. It was. 

So what was our outdoor activity? It was a fabulous Art Walk, led by Heather Fortes of 
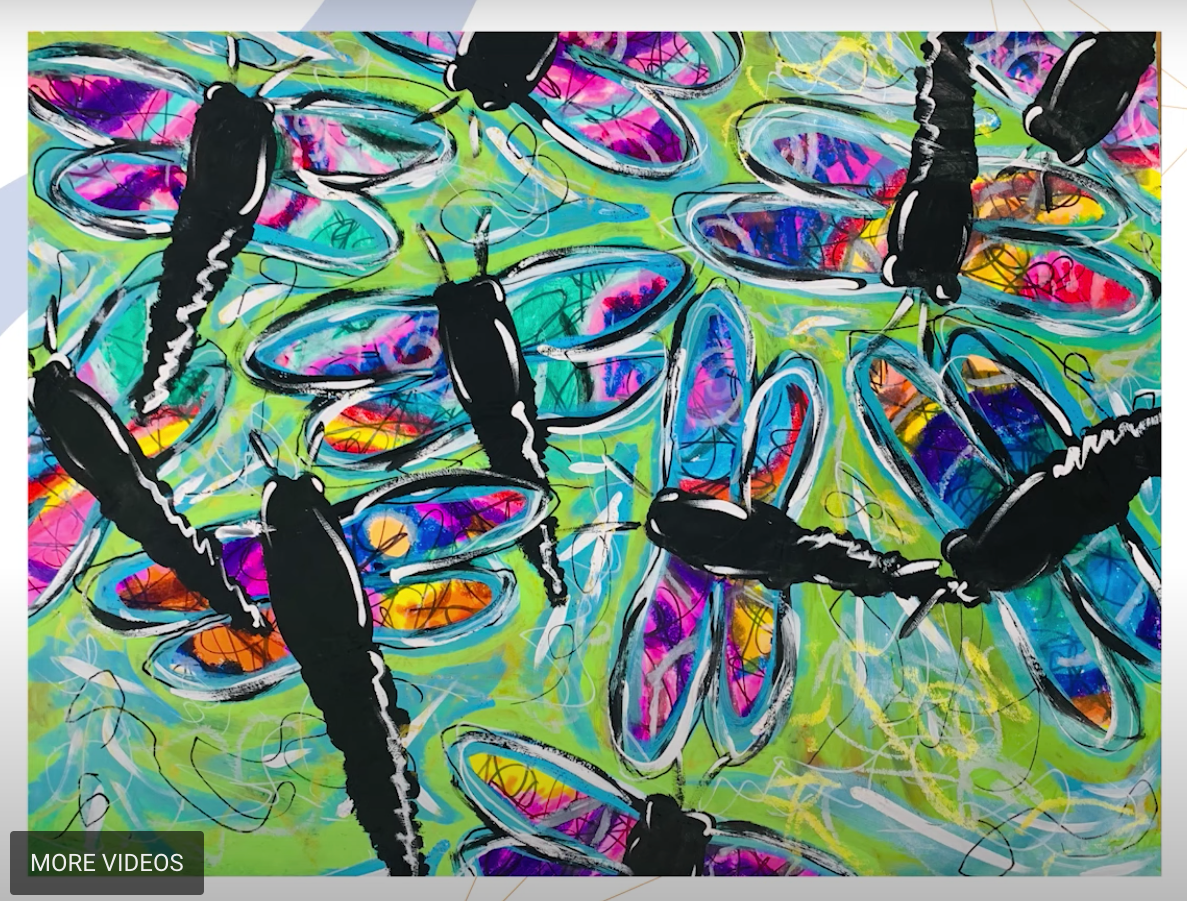
SacTown Bites food tours. Sacramento is home to a lot of public art, which is just one of many things I love about our state capital. Most of that public art is large-scale murals. Wide Open Walls is an annual festival that brings diverse mural artists from around the world to beautify Sacramento. Since 2016, WOW artists have painted 210 permanent works.  


I'm in Sacramento fairly often and have obviously seen many of the murals, but having Heather explain them was so much better than just seeing them. 


I would love to do one of her SacTown Bites tours someday.  

Speaking of food, as soon as we returned to the convention center, it was time for breakfast. Since I'd skipped pre-breakfast (except for the blackberry), I was ready to eat. This time, I chose a souffle with hollandaise, a berry muffin, scrambled eggs, bacon, and another yogurt parfait. And a smoothie, which I got after setting this plate down to photograph it. There were tons more options, but this was more than enough food for me. 


We had breakfast in the ballroom. Our first presentation was a conversation between Caroline Beteta, President and CEO of Visit California, and Eleni Kounalakis, Lieutenant Governor of California. 


That was followed by "Facing Industry Challenges" by Michael Dominguez. 


Next, a big announcement. Outlook Forum 2024 will take place March 11-13 in Palm Springs. Based on the crowd response, there will be a great turnout. 


Next was my favorite presentation from the entire Outlook Forum: "Visit Native California: A Platform for California's Native Voices." This panel included three guests: Wade Crowfoot, California Secretary of Natural Resources; Reid Milanovich, Chairman of Auga Caliente Band of Cahuilla Indians; and Sherry Rupert, CEO of the American Indian Alaska Native Tourism Association (AIANTA). 


I am a huge advocate for including Native voices in travel and am always looking for opportunities to learn about Native cultures. (You may remember the our visit to Owamni in Minneapolis.) I've been following the progress on the Agua Caliente Cultural Museum closely; it was so neat to hear the chairman of the tribe speaking about it.  


I was really excited to hear Sherry Rupert of AIANTA mention the Chickasaw tribe of Oklahoma as a success story in the area of Native tourism. We were supposed to have visited the Chickasaw Cultural Center over winter break (instead, we had a 12-hour trip to nowhere). 


When we had to cancel our trip, that was one of the locations I was most disappointed to miss. A second was the highly-regarded First Americans Museum. I'm in the process of rescheduling that trip, so I'm thrilled to announce that we will be visiting both locations soon. 

Next was an absolutely fascinating interview with Vivek Ranadivé, who among other things, is the mastermind behind Golden 1 Center. It is the first arena in the world to be 100% solar powered and achieve LEED Platinum designation. It is ranked the 6th best arena in the world - right here in Sacramento! Ranadivé is incredibly interesting and well-spoken. If he ever writes an autobiography, I'll be the first to buy it. 


At this point, we had gone a full four hours since the start of our last meal (excluding the snacks that were on offer between speakers), so naturally we had an enormous lunch. It was called "A Taste of Sacramento" and featured lots of delicious choices from some of Sacramento's best eateries, including: Camden Spit & LarderChando's TacosFrank Fat'sGinger ElizabethLocalisSéka Hills, and Urban Roots. Once again, we had lots of time to chat while we ate. 


After lunch, we had a presentation about Web3. Since I was starting at literally zero knowledge before this session, I learned a lot. 


Speaking of learning, I now know that Visit California has divided the state into 12 tourism regions. When I set up my California Travel Page, I broke up the state into 10 regions, based on what made sense to me. My 10 are similar to the official 12, but I will be updating my site to reflect the 12 official regions. Eventually. It's a big task. 


Next, we had a breakout session. I chose "Keeping Tourism Accessible." Speakers Hannah Grant, Cory Lee, Yat Li, and Jenn Martin were all outstanding. I don't have much experience traveling with someone with accessibility needs, so this was very eye-opening. I'm glad it's a big part of the conversation in the travel industry. 


Naturally, we were all on the brink of starvation 2 hours after lunch ended, but fear not! Bags of popcorn and bowls of Gunther's Ice Cream awaited us when we exited our classes. 

The final breakout session I chose was "Mining Consumer Insights: Evolving Tools and Techniques for Today's Modern Marketers." It was fascinating. I don't know much about marketing, so it was really interesting to learn all that goes into promoting everything from small businesses to the entire state of California. 

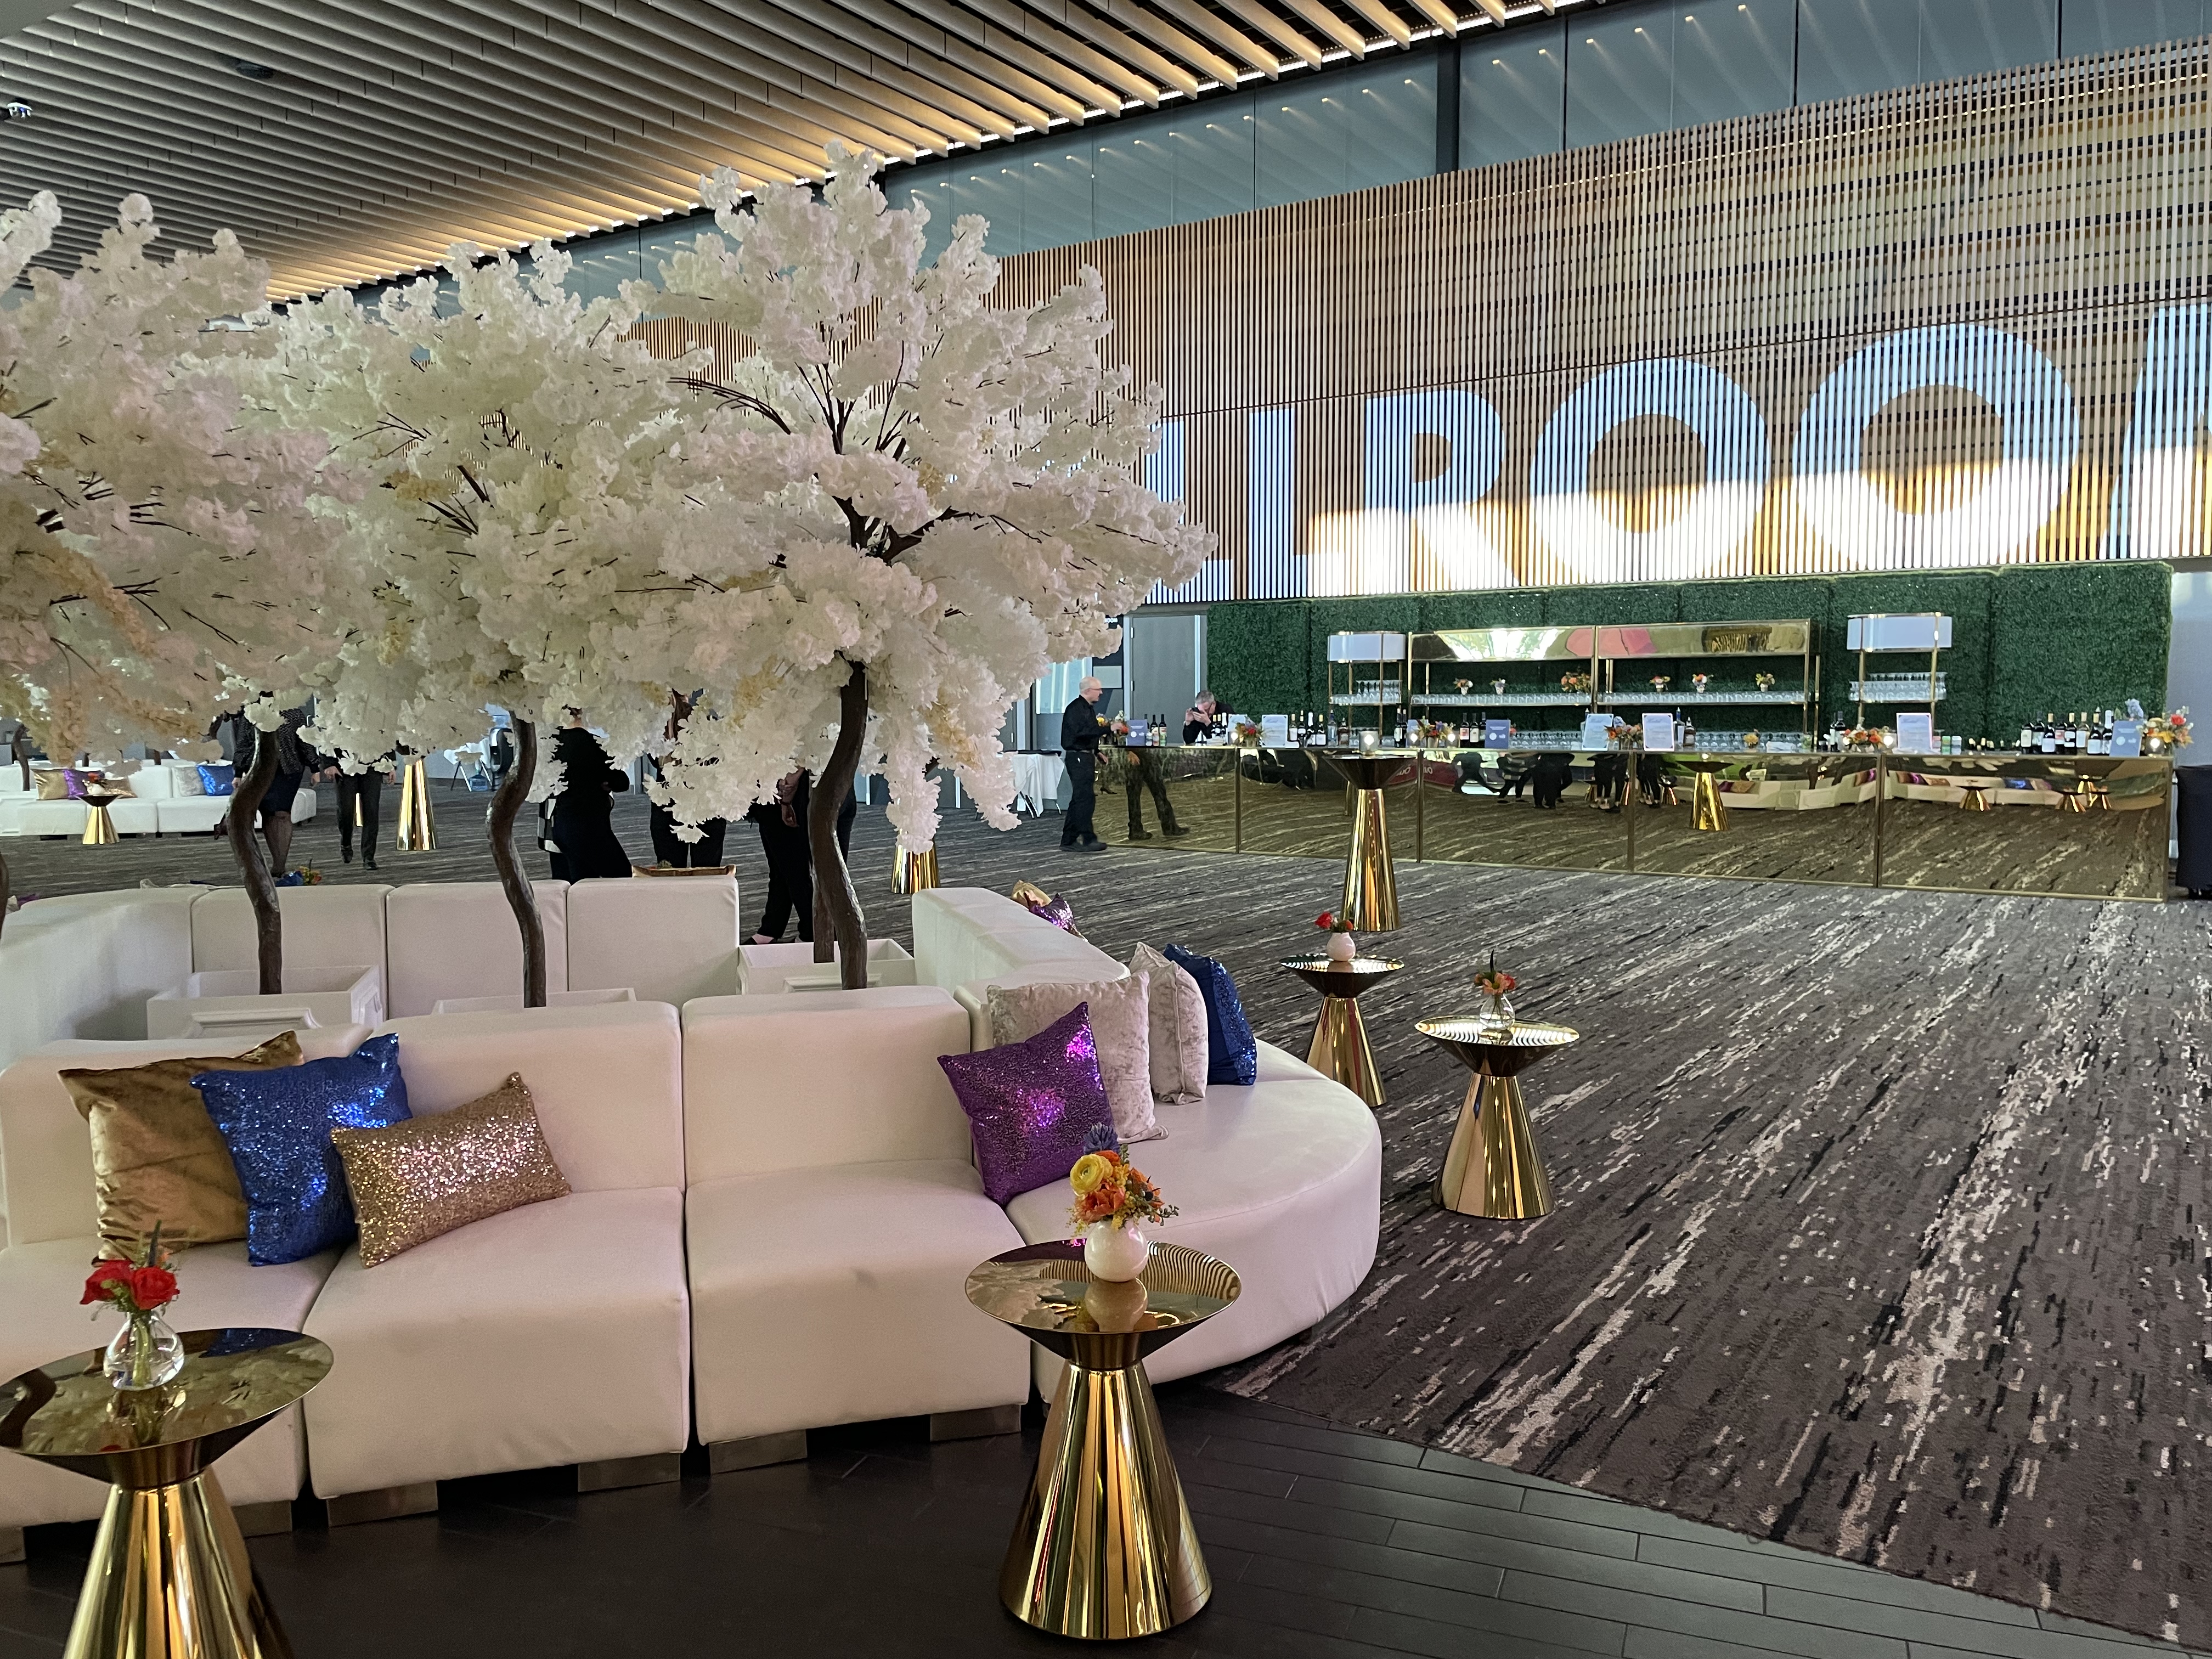
When we left that session, the pillows in the lounge area had been replaced with sparkly, sequin-covered ones. 


We had a break to change, then returned to find the lounge all dressed up for evening. As usual, the food was abundant and the drinks flowing. 


Once in the ballroom, we dined on an incredible feast. This vegetarian appetizer was to die for. 


Following dinner, it was time for the Finale and Outgoing Officer Recognition. 


And with that, Outlook Forum 2023 ended for me. Everyone else went to a dessert reception, because somehow they could still eat. The following day was the Visit California Winter Board Meeting, but it didn't make sense for me to spend money on an extra hotel night to attend. 

Overall, I had a great time at Outlook Forum and am very glad I went. It definitely wasn't tailored toward a travel blogger, but I knew that going in and did my best to use my time beneficially. I left with new connections, ideas for blog posts, resources for travel, and lots of California destinations on my travel bucket list.