
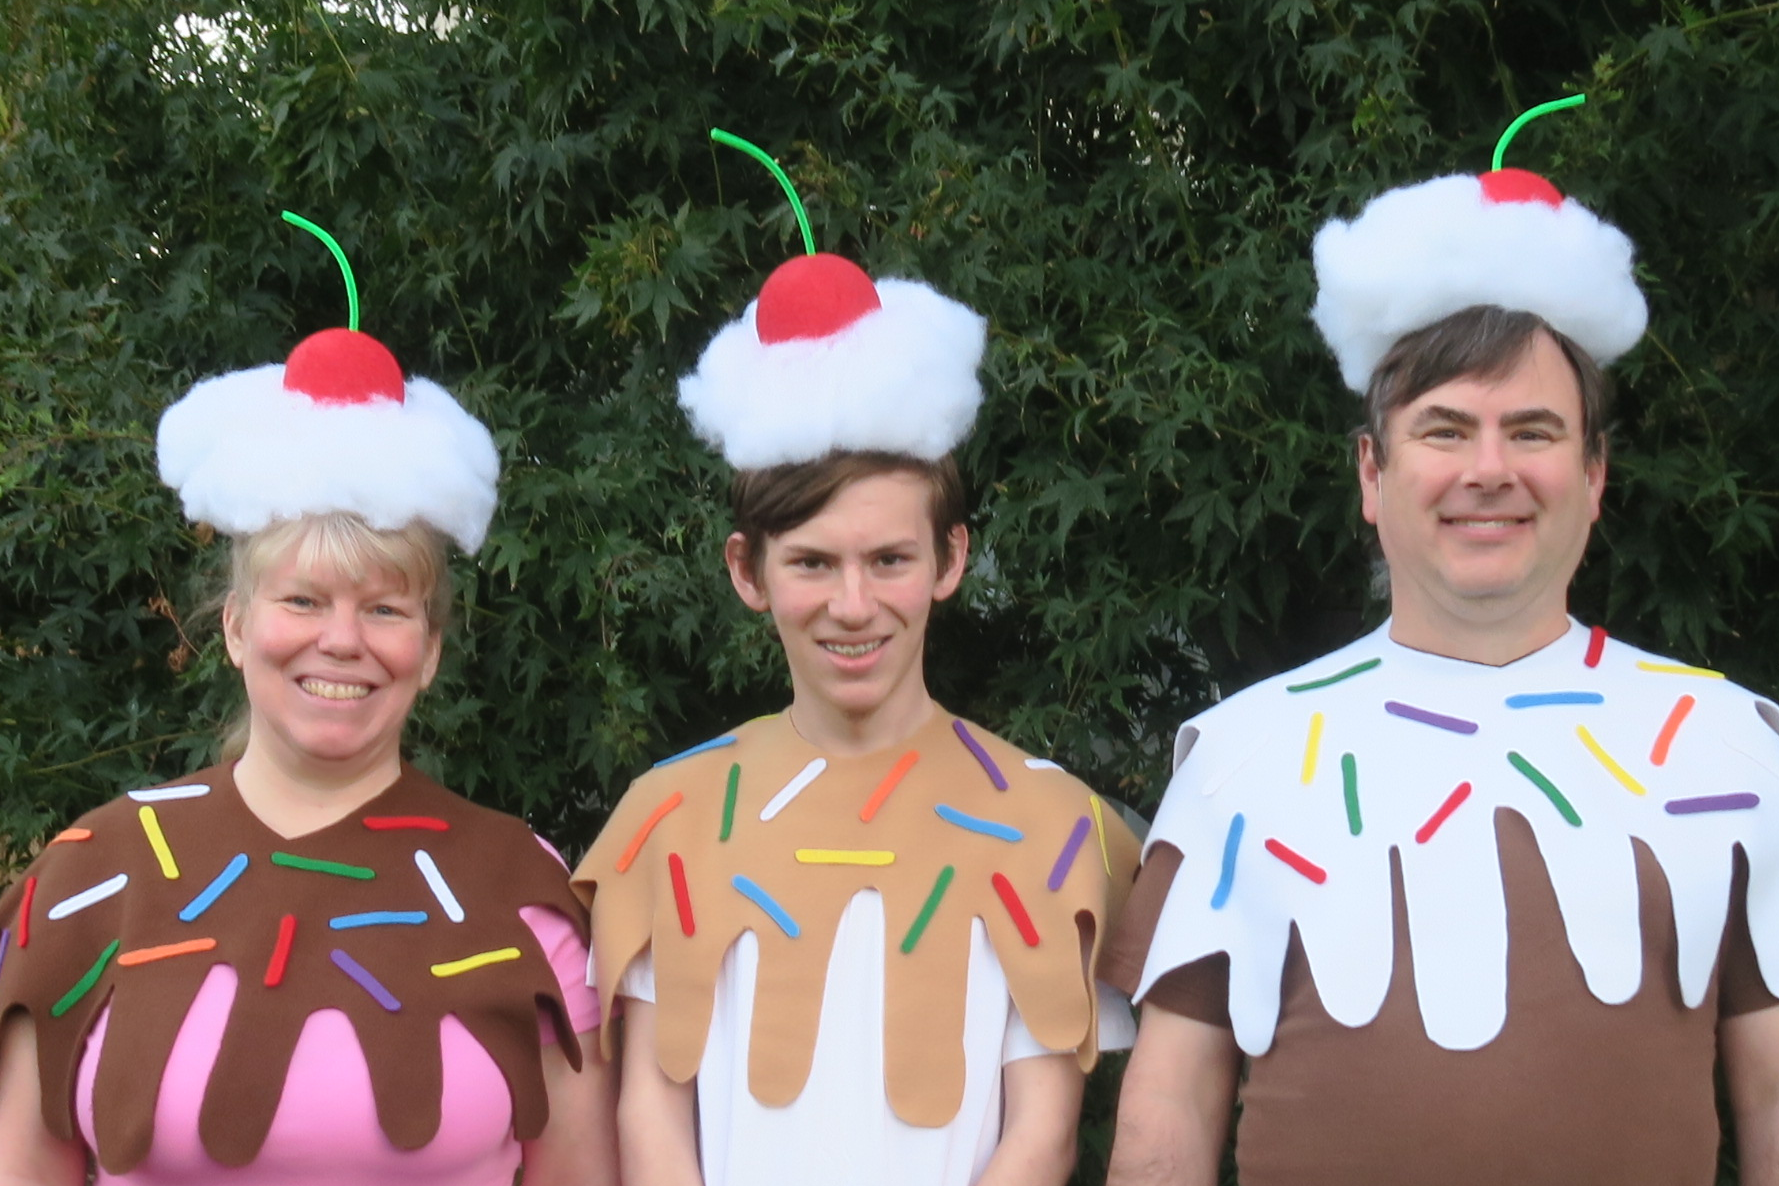
I love Halloween. This year, our family dressed up as an ice cream sundae.
It's a fun costume for three people, but could just as easily work for one or two. You could easily add a stuffed (or cardboard) banana and turn this costume into a banana split. Or dress an additional person with a banana costume (affiliate links here and below). A lot of the kids who came to the door and saw just me thought I was dressed as a cupcake. So that's another possibility!
This costume took very little time to make, which is good since I didn't start until just a few days before Halloween. Even better, there's no sewing involved. And best of all - the chocolate, caramel, and marshmallow sauces are removable, so you can wear the t-shirt afterwards as part of your regular wardrobe.
No-Sew Ice Cream Sundae Costume
Materials:
- t-shirts (brown, white, pink)
- polar fleece (chocolate, caramel, marshmallow)
- craft felt (red, orange, yellow, green, blue, purple, white)
- glue gun
- white party hats (or colored hats + white gesso)
- Poly-fil
- 4" styrofoam balls
- red paint
- green pipe cleaners
Steps:
I started by figuring out which of us already owned plain t-shirts in each particular ice cream color, then bought polar fleece to pair accordingly. I got white (marshmallow) fleece to go with Steve's brown (chocolate) shirt, camel (caramel) fleece for Trevor's white (vanilla) shirt, and dark brown (chocolate) fleece to go with my pink (strawberry) shirt. Each of those "toppings" is essentially a cape.
I tried to make a paper template for the capes, but that failed. So I used inexpensive felt instead. After figuring out how long (22") and wide (30") I wanted the capes, I cut a neck hole in the felt and added some random drips. I made adjustments by cutting, of course, but also stapling the felt in a couple of places to make it more the shape I wanted. Then I put the template on the polar fleece and cut out the shapes.

Each cape got 16 sprinkles, which I cut from the craft felt. They're approximately 3" long. I scattered them on the capes and used the glue gun to adhere them.

I had colorful party hats on hand, so I cut the tops off of them, then painted them with gesso. You can skip this step (and the associated drying time) by starting with white hats in the first place. I painted the styrofoam balls red.
When the paint was dry, I used hot glue to attach the styrofoam balls to the party hats. I used a paper piercer to poke a hole at the top of each. Then I snipped green pipe cleaners in half, gave them a gentle bend, and pushed them into the holes. No glue needed.

I shaped the Fiber-fil into cylinders and then glued them to the party hats.

That's all there is to it! You could add velcro or another closure to the topping capes; we just used safety pins. The hats stayed on pretty well until we bent over; bobby pins will help keep them in place.

This was a really fun costume. It's easy to store (pull out the cherry stems, stack the hats, and fold the capes) so I'll be hanging onto them to possibly wear in the future.


