Showing posts with label animal. Show all posts

4/21/25

Koala Easter Egg

If you're looking for a really easy Easter egg to decorate, go for this koala. This is about as easy as it gets. And it's so cute! Affiliate links below. 


Koala Easter Egg


Materials:


Steps: 

Paint the egg grey. When the paint is dry, draw the koala's eyes, nose, and mouth with the Sharpie. Cut a pair of ears from grey felt. Glue them in place. 

4/14/25

Panda Easter Egg

Dyeing Easter eggs is so much fun, but there are a lot of other ways to decorate eggs that are just as fun. I used a black paint pen to turn an egg into an adorable panda. Affiliate links below. 


Panda Easter Egg


Materials:


Steps: 


Paint the clay pot and the toothpicks green. Set them aside to dry. 

Put the egg onto something to stabilize it. (I used a ring cut from a cardboard tube.) Use the paint pen to draw the panda's eyes, nose, and mouth. 


Cut a pair of ears from black felt and set them aside. Cut 12 skinny leaves from green felt. 

When the paint is dry, glue the ears to the egg and the leaves to the toothpicks. Then glue the toothpicks to the clay pot. Rest the panda inside the pot. 

4/10/23

Bat Flyout Scene in Ink

One of the coolest things I've ever done was witnessing a bat flyout. We live about 30 minutes from the Yolo Causeway, one of the top ten places in the world to see a bat flyout. We recently drove home from Sacramento at just the right time to be driving over the Causeway when hundreds of thousands of bats came pouring out from beneath us. Well, not pouring. They were flying. Hence "flyout" and not "pourout." It was spectacular and incredibly awesome because we totally weren't expecting it. 

I'm always happy to see bats, wherever I am. Every bat I see feasting means fewer mosquitos biting. Bats live all over the world, in a wide variety of habitats. You can find different bat species in forests, deserts, and everything in between. Today's project honors these nocturnal helpers. As a bonus, it gave me the chance to test out my new blending brushes. Affiliate links below. 


Bat Flyout Scene In Ink


Materials:


Steps: 


Apply black ink to a blending brush, then add the ink to the cardstock. Use a light hand. You want some small areas of black, but mostly gray with white peeking through. You can see my example in the upper left. Ignore the other backgrounds; I was testing out different ink pads to see how they worked with the brushes. By the way, I LOVE my new blending brushes. They're super comfortable, have great control, and hold just the right amount of ink. 


Punch a circle from some scrap cardstock to make a template for the moon. Blend yellow and orange ink into the open space. 


Use a straight edge to draw tree trunks. To keep them looking natural, keep the spacing irregular and don't have all of them be perfectly vertical. 


Use quick, upward swoops to draw branches and twigs on the trees. As you go, thicken the trunks of a few trees to add variety. 


Now add bats! Start with a central blob and add short wings to each side. You can add as many or as few bats as you want. Finish by adding the ground to anchor your project. 


It's a shame that bats are typically only associated with Halloween. These wonderful creatures deserve to be celebrated year-round.
 

3/31/23

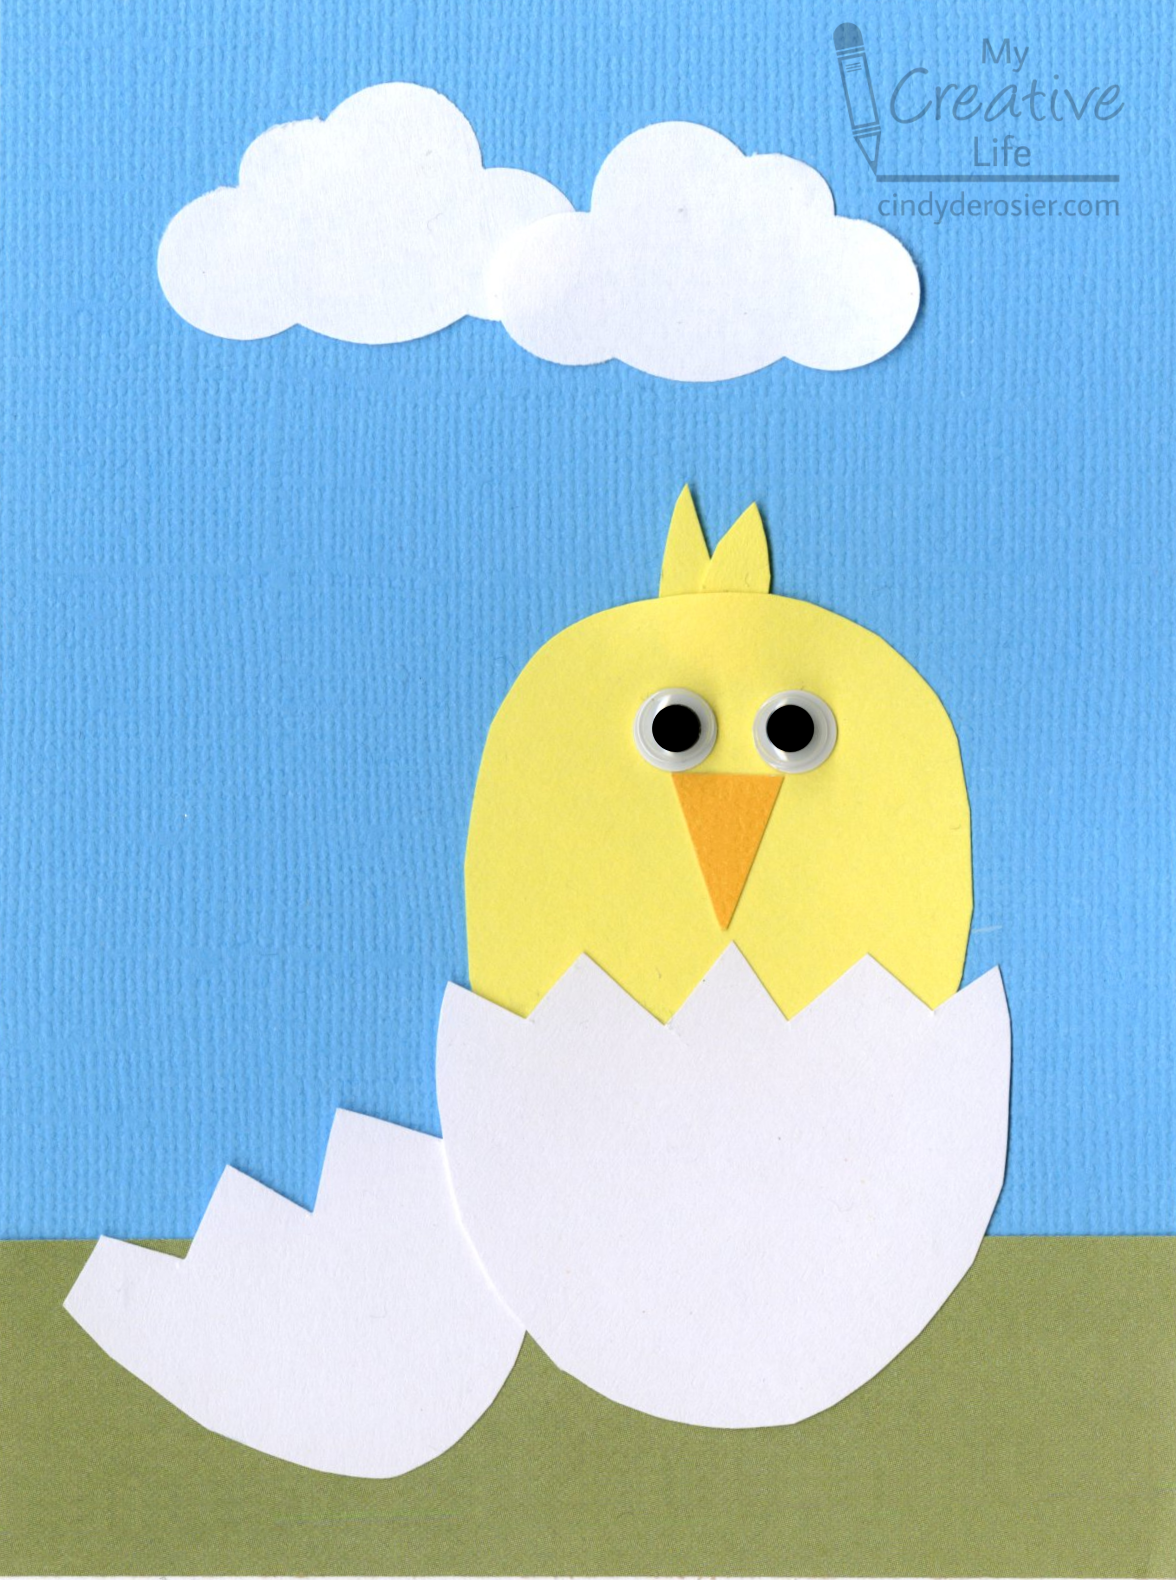
Hatching Chick Card

I've been cleaning up the craft room (see Wednesday's post). I needed a cleaning break, so I used some of the scraps in my desk to make this hatching chick card. It works as an Easter card, but it's equally fun as for sending a birthday wish, either for someone who has celebrated many hatch days or for a new addition to the family. Affiliate links below.   


Hatching Chick Card


Materials: 


Steps: 


Cut a piece of blue cardstock to fit your card blank. Cut green cardstock the same width as this base. 

Cut out an egg shape from white cardstock. Use a zigzag pattern to cut the egg into two pieces. Punch two clouds from white cardstock. Cut an oval chick from the yellow cardstock, then two tiny yellow feathers. Then cut an orange triangle beak. 

Assemble the card by gluing the green grass to the blue sky. Glue the clouds in the sky, overlapping them slightly. Glue the chick behind half of the egg, then add the yellow feathers behind the chick so they stick off the top of its head. Adhere the other half of the egg to the card, then put the half with the chick in it overlapping it slightly. Add the beak and googly eyes. 

Don't forget to add a fun sentiment on the inside!

3/20/23

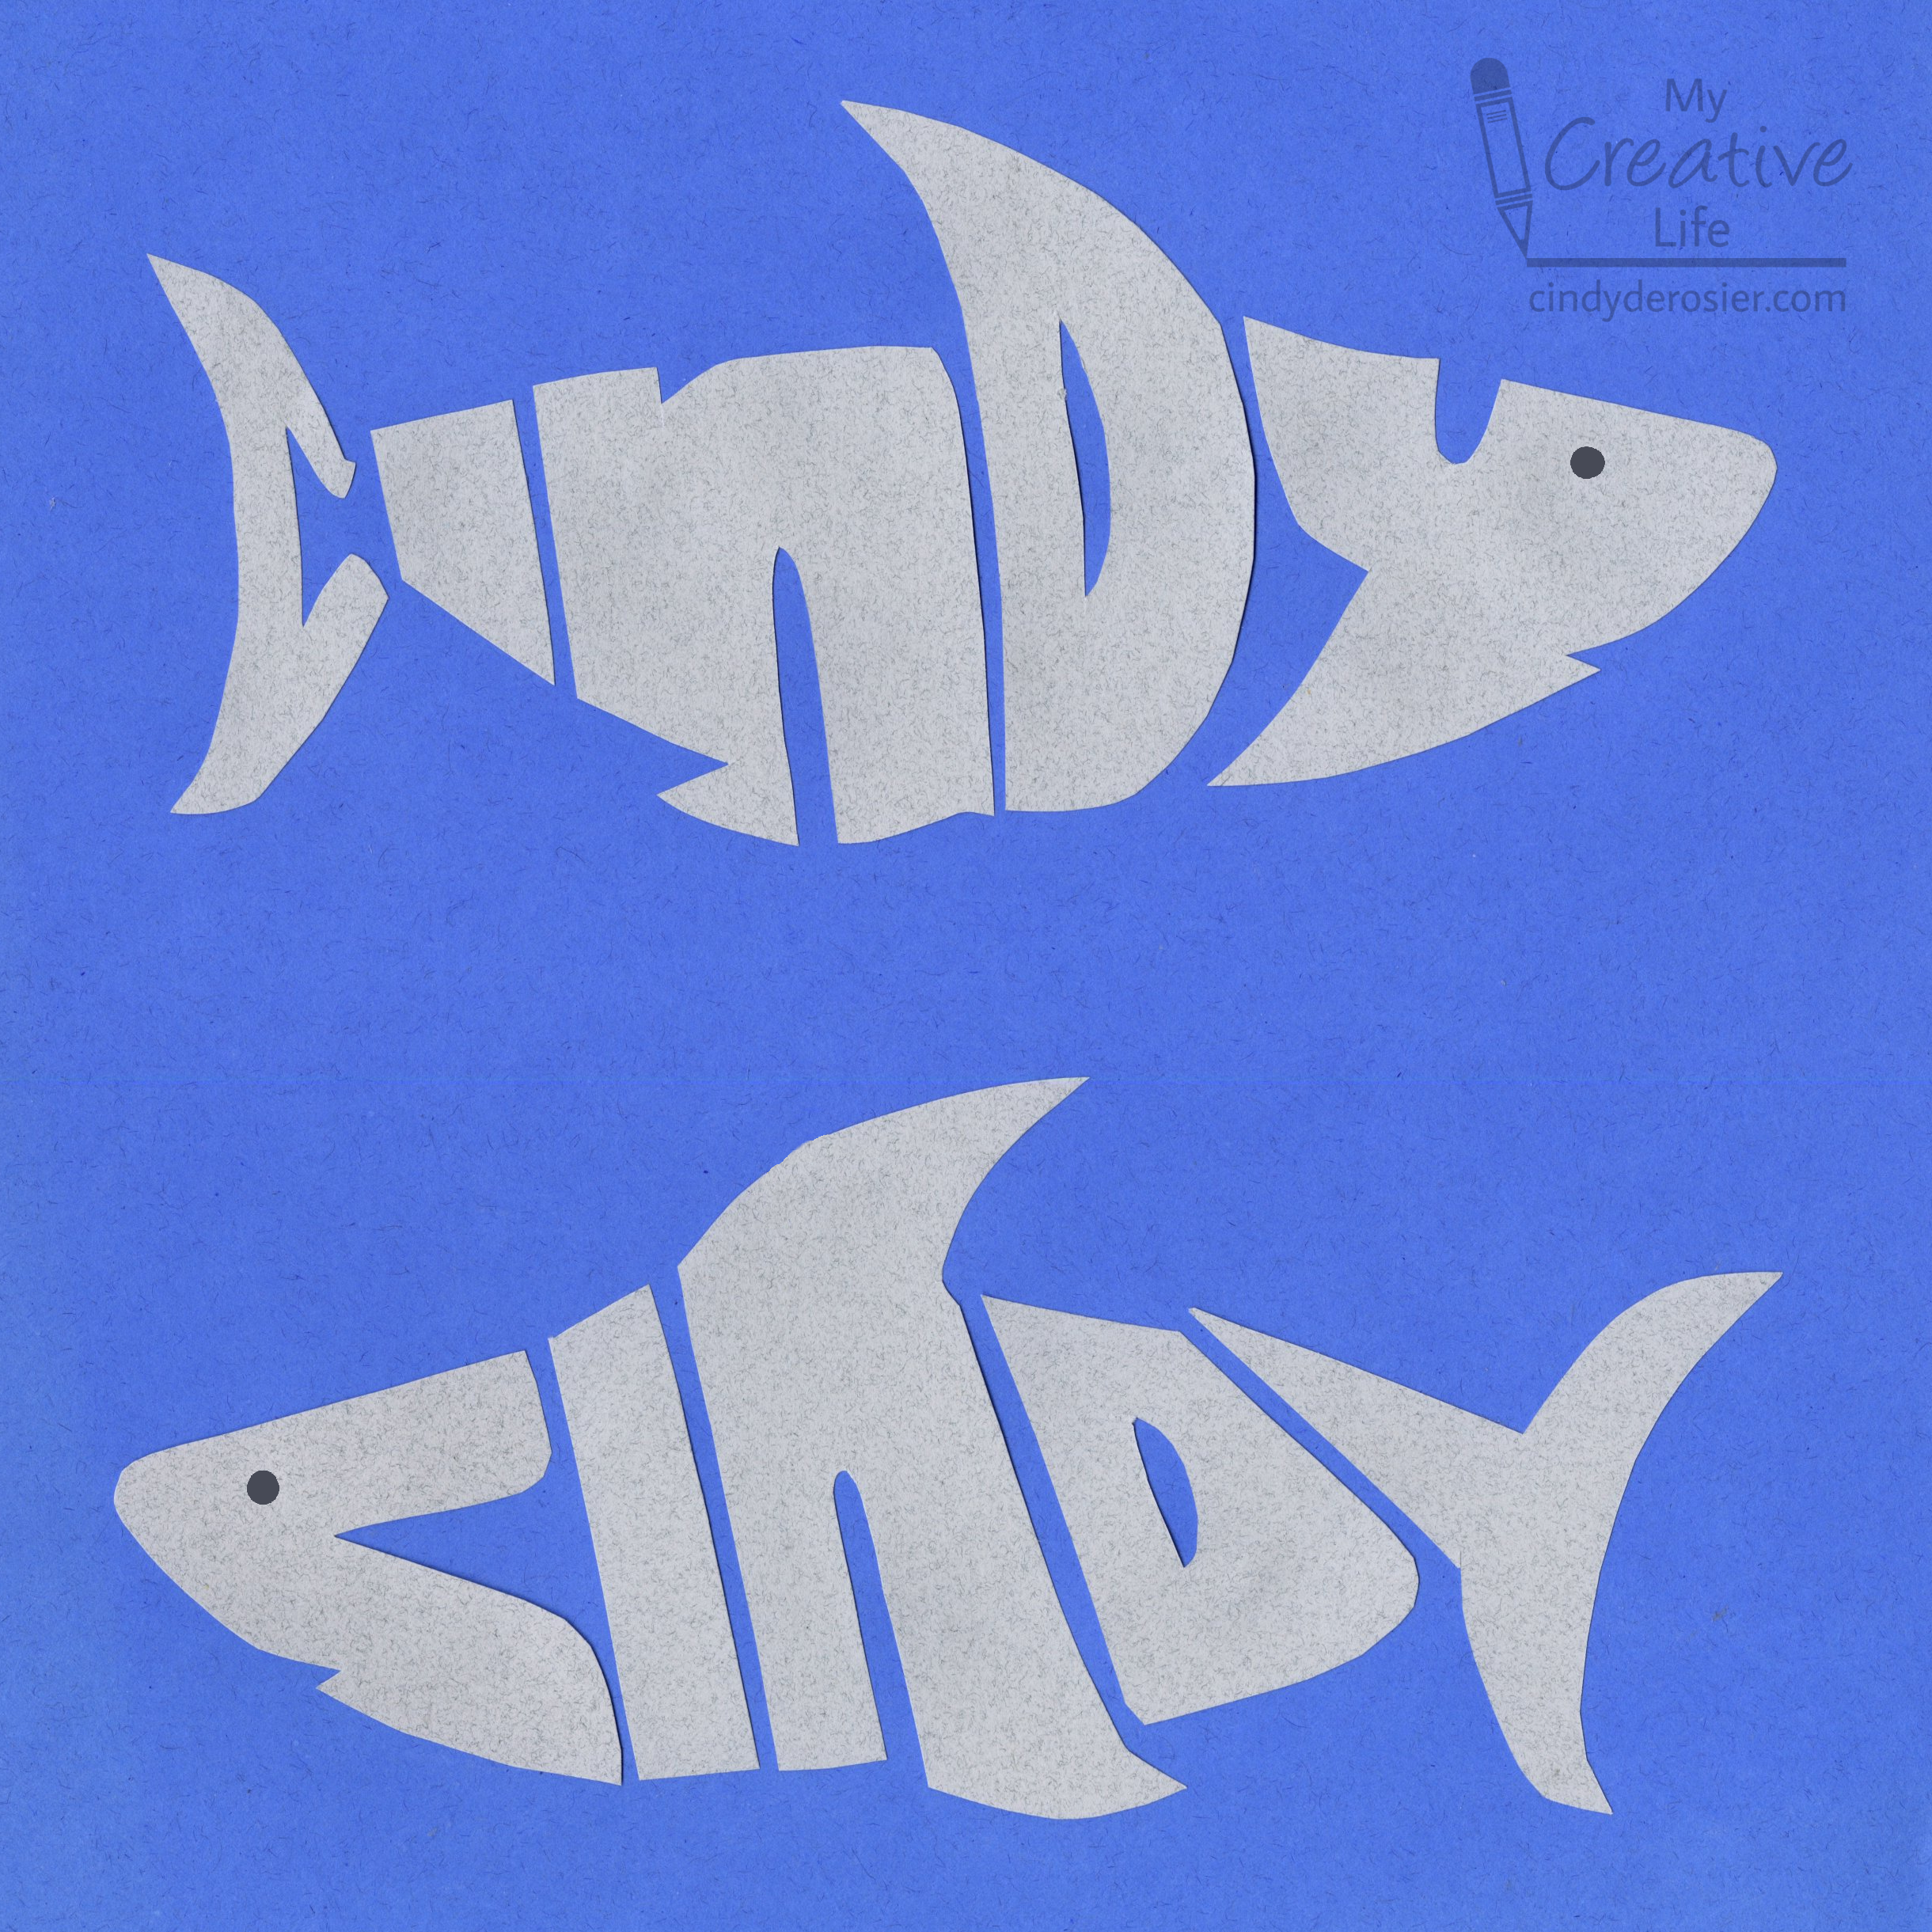
Shark Name Art

Time for more name art! Specifically, Shark Name Art. 


This project would be awesome for a school or team with sharks as a mascot, as an accompaniment to a study of sharks, or just for everyday fun. It's easy to do, but definitely takes some creative thinking!

---------

Shark Name Art


Materials:

  • shark template
  • pencil
  • scissors
  • construction paper (grey and blue)
  • glue stick or tacky glue
  • black pen

Steps: 

Print a copy of this shark template, which has two identical sharks facing in opposite directions. 


Use a pencil to lightly fit your name into a shark. Each letter should extend to the outline and there should be as little space between letters as possible. This is going to take some experimentation and some erasing, so keep those pencil lines light. Every name is going to look completely different and some may seem harder than others, but don't give up! When I first thought up this craft, I only drew the left-facing shark because I could see that it would be easy to turn the snout into a C and the tail fin into a Y. The I and the D were easy, but I really struggled to make my N fit. I did, but then realized that a right-facing shark might be easier for some names. I actually like the way CINDY fits into the right-facing shark better than the left, so definitely try both. 


Pick the shark you like better (or do both, like I did), then layer the template you've made over a piece of grey construction paper. You can use paperclips to hold the papers together if you want. Cut out the first letter, cutting through both pieces of paper at the same time. Set aside the template and place the grey letter onto a piece of blue construction paper. Repeat the process for each letter. Line up the cut letters carefully on the blue paper. If you like how they look, glue them in place. 

When I cut my left-facing shark and arranged it on my paper, I didn't like the way the N looked. With the notch I'd cut at the top, it looked more like a K. So I used the template to recut just that letter. I like the new N much better. 

Finally, use a black pen to draw an eyeball. 


Wouldn't these sharks look amazing on a classroom bulletin board, with all the different names represented? Or on a "Go Sharks!" team banner? You could even laminate your shark and then use it as a bookmark. So many possibilities!

1/20/23

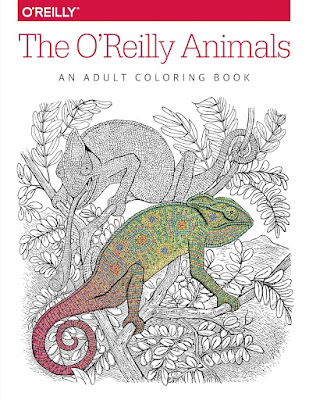
The O'Reilly Animals Coloring Book

 Steve bought me a coloring book for Christmas and I loooove it. 


The O'Reilly Animals Coloring Book features twelve beautiful, highly-detailed animal images, each adapted from engravings that, in turn, were inspired by illustrations in natural history books from the 18th and 19th centuries. Affiliate link here and below. 


If you don't know the story of the O'Reilly animals, it's well-worth a read. I hadn't heard of them until I married my computer-scientist husband, who has a substantial collection of O'Reilly books. The covers are so distinctive and completely unlike any of his other professional materials. 

As I mentioned, the O'Reilly coloring book has only 12 pages, which is unusually few for a coloring book. I like every single design, which is pretty much NEVER the case. I am super picky about coloring books. Not only is the paper in this book high-quality, but they're printed single-sided, so you don't have to choose between designs. The images are realistic and detailed, but not overly so. 

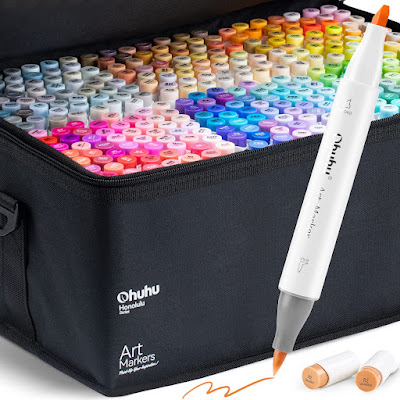
I colored the first page, Toucans, using the 320-set Honolulu series alcohol markers by Ohuhu


The folks at Ohuhu sent me this complete set to try out and I'm happy to report that they color like a dream! The range of colors is incredible and the ink flow is just right. I used both the brush and chisel ends for coloring and love the options for both precision and coverage.

I will share a complete review of the Ohuhu 320-marker Honolulu markers on Monday, so be looking for that. In the meantime, buy yourself a new coloring book. You deserve it. 

1/18/23

Library Roulette, Class 700: Dotted Leopard Frog Craft

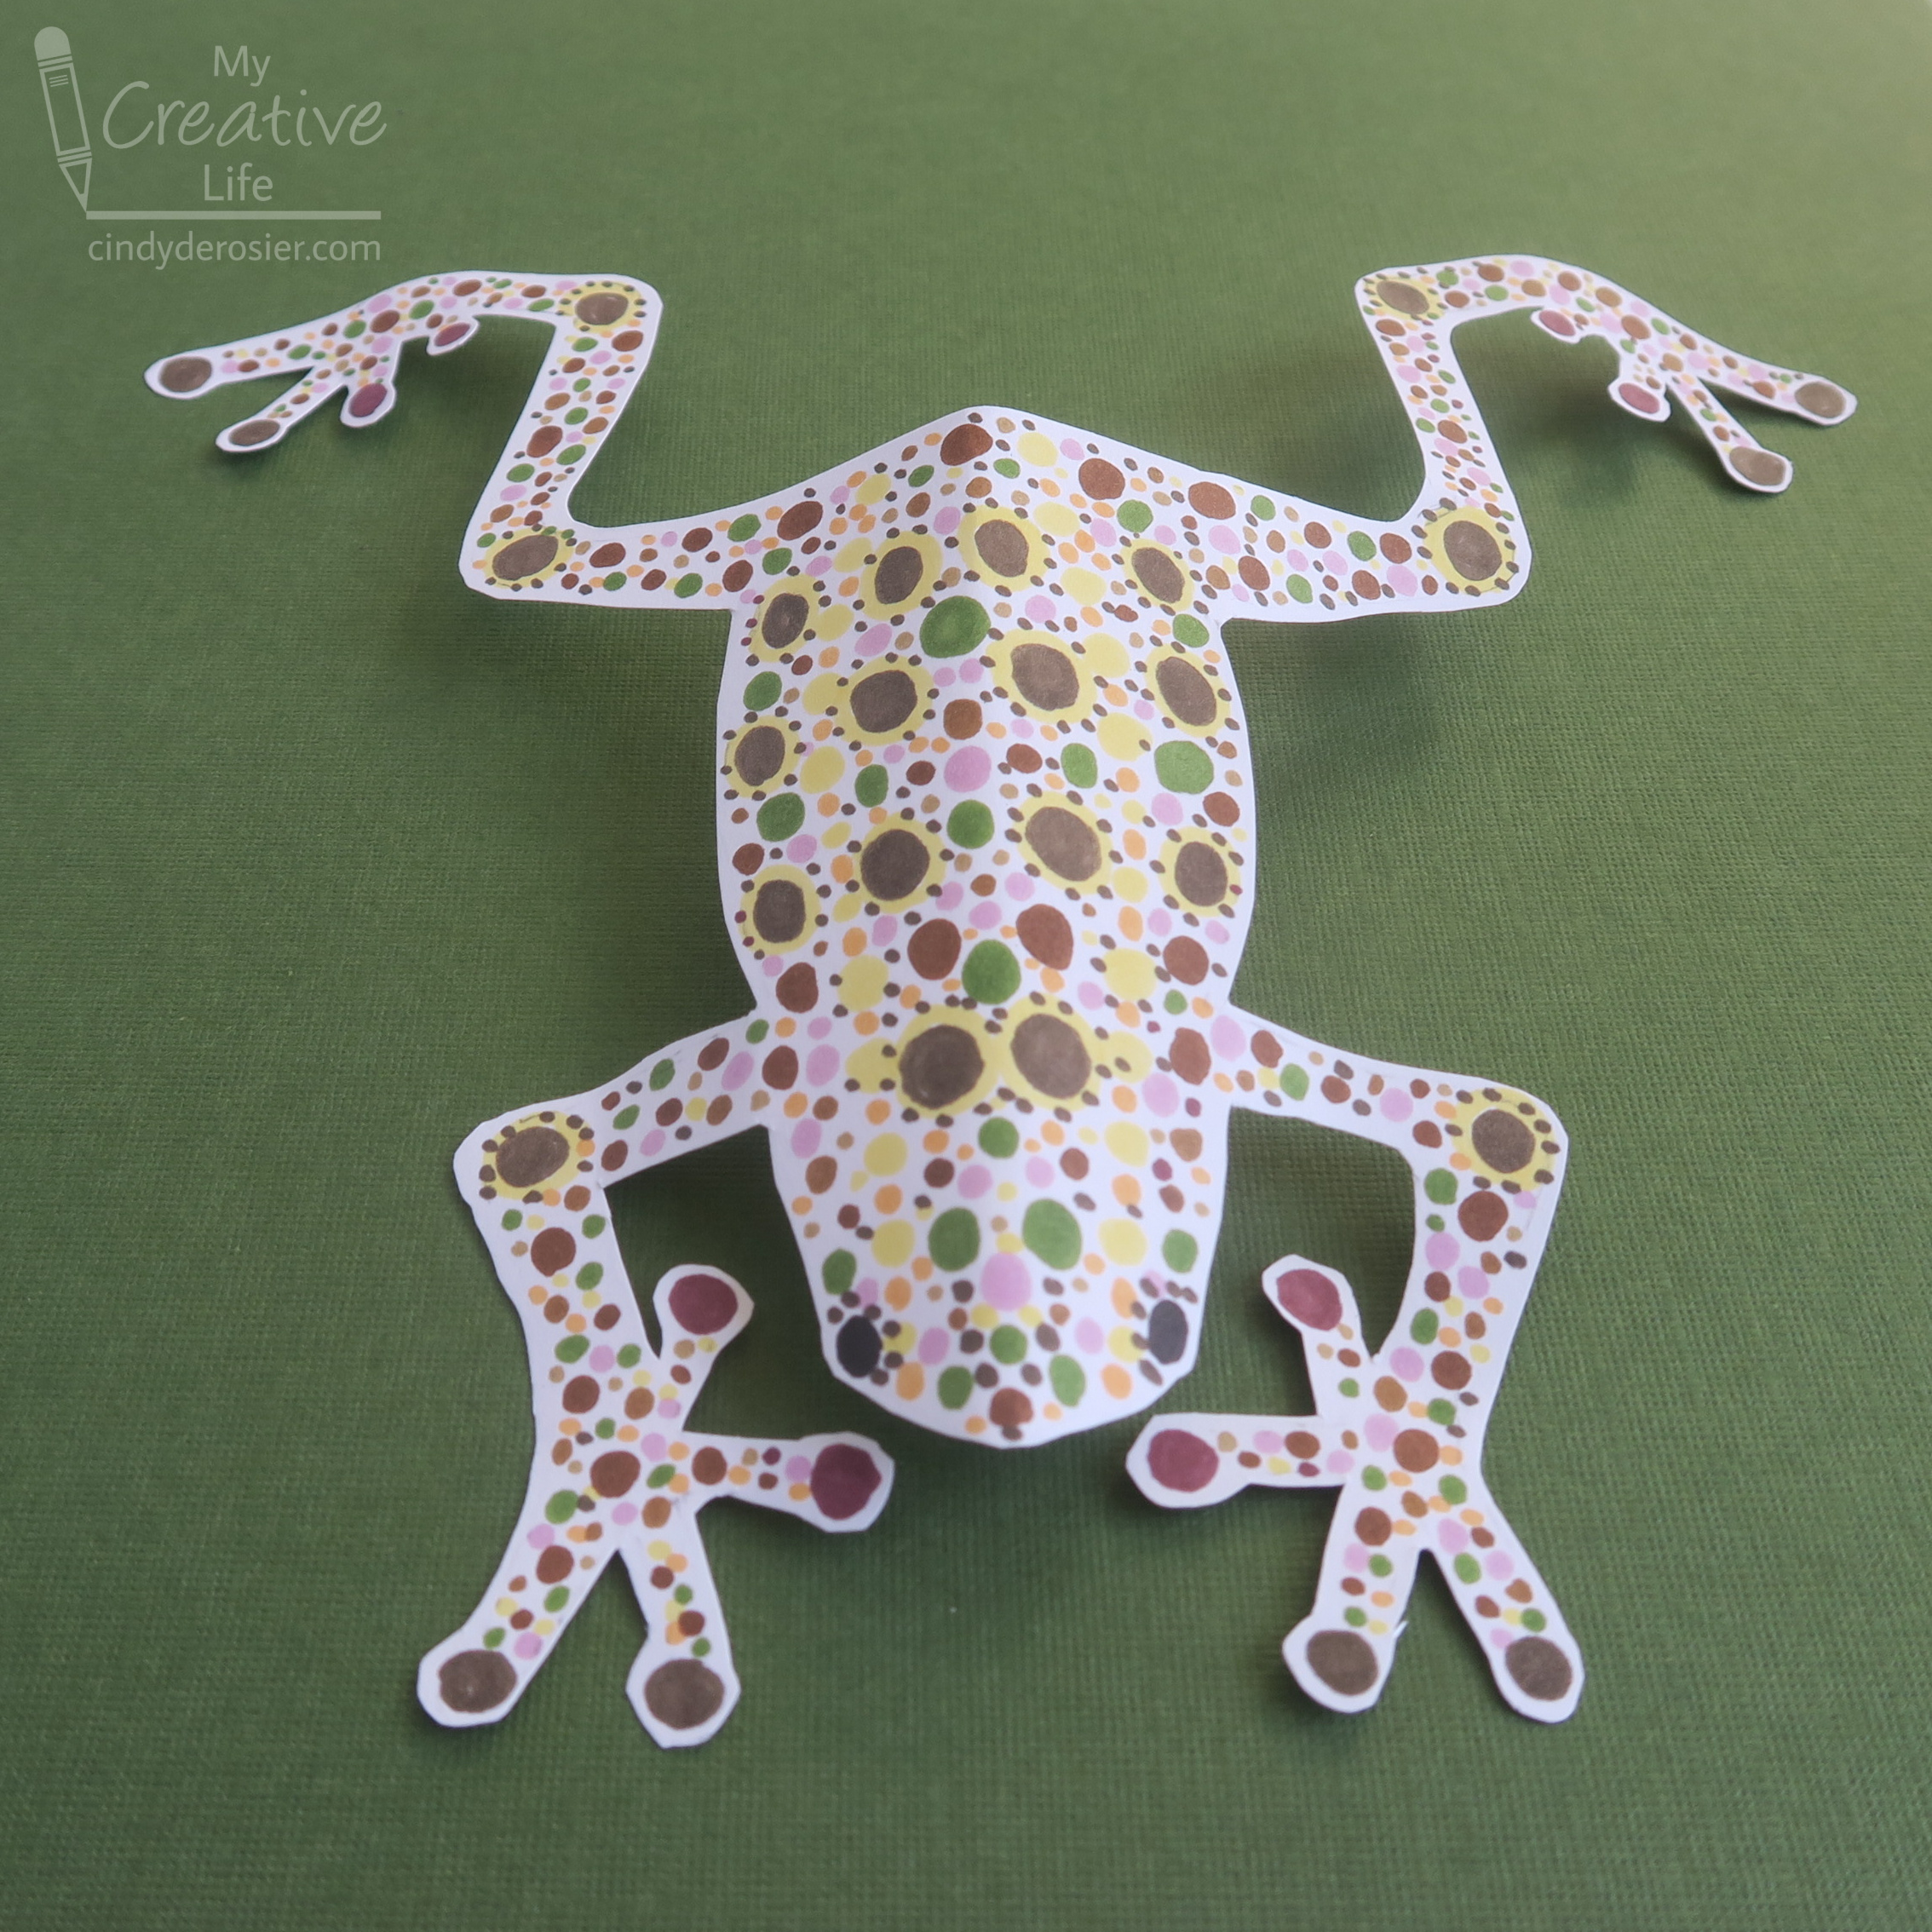
Today's craft is a dotted frog. Specifically, it's a whimsical version of a northern leopard frog, the state amphibian of Vermont and the proposed state amphibian of Minnesota.  


Before I explain how I made it, let me start with why I made it. One of my creative resolutions for 2023 is to play Library Roulette with books from the 700 section, then using them to inspire a craft project. To understand what I mean by Library Roulette, go way back to 2012 when I played it for the first time. To understand what I mean by the 700 section, look at this chart of the Dewey Decimal categories within the 700's. 


I used five randomly generated numbers from 700-799 to select five library books. My numbers were 770, 738, 740, 746, and 751. As you can see, 770 is Photography. 738 is Sculptures and Plastics. 740 and 746 are Drawing and Decorative Arts. 751 is Painting. 


 I chose to work with Lots of Dots by Ana Enshina (affiliate link here and throughout the post) first. 


This unique book shows how easy it is to create beautiful works of art using nothing but dots. The first few pages explain the technique, then the rest of the 135-page book is filled with dotted artwork and the templates to make them yourself. I love everything about this book, but it seems like a risky choice for a library. The perforated templates are designed to be torn out; fortunately, no one has done so. (Thank you, fellow library patrons!)

Since I obviously wasn't going to tear out a page from a library book (I can't even tear out pages from books I own), I used the frog from the "Easy" section of the book as a guideline for drawing my own on a piece of scratch paper. I folded the paper in half and cut it out to make a symmetric pattern, which I traced lightly onto Bristol Vellum

I selected colors from the gorgeous Ohuhu Kaala 60-Marker Landscape Set and made some swatches on my paper. Because I was inspired by the leopard frog, I used the yellow and orange to add dots down the frog's back to mimic its actual coloration. 


I used my darkest brown to make the leopard frog's namesake spots. I used the same brown on the frog's joints, then used it and another brown on the fingers and toes.  


I outlined each brown spot with tiny yellow dots, then started filling in the rest of the frog. I kept it sort of symmetric, without being too precise about it. 


Finally, I erased the pencil guidelines and cut out the frog using microtip scissors. It looked striking against a piece of green paper...


... but a bit too much like a 'specimen' in my opinion. By giving it a gentle bend along the midline, then adding bends to the joints, I had a much more lifelike leopard frog.  


This was a really fun project and Lots of Dots was a great way to start off this edition of Library Roulette. I can't wait for the next book and craft!

12/9/22

Recycled Cardboard Box Penguin

This penguin project is the seventh craft in my series based on crowd-sourced responses to ten questions. Can you guess what the question was? 


Here's a hint:


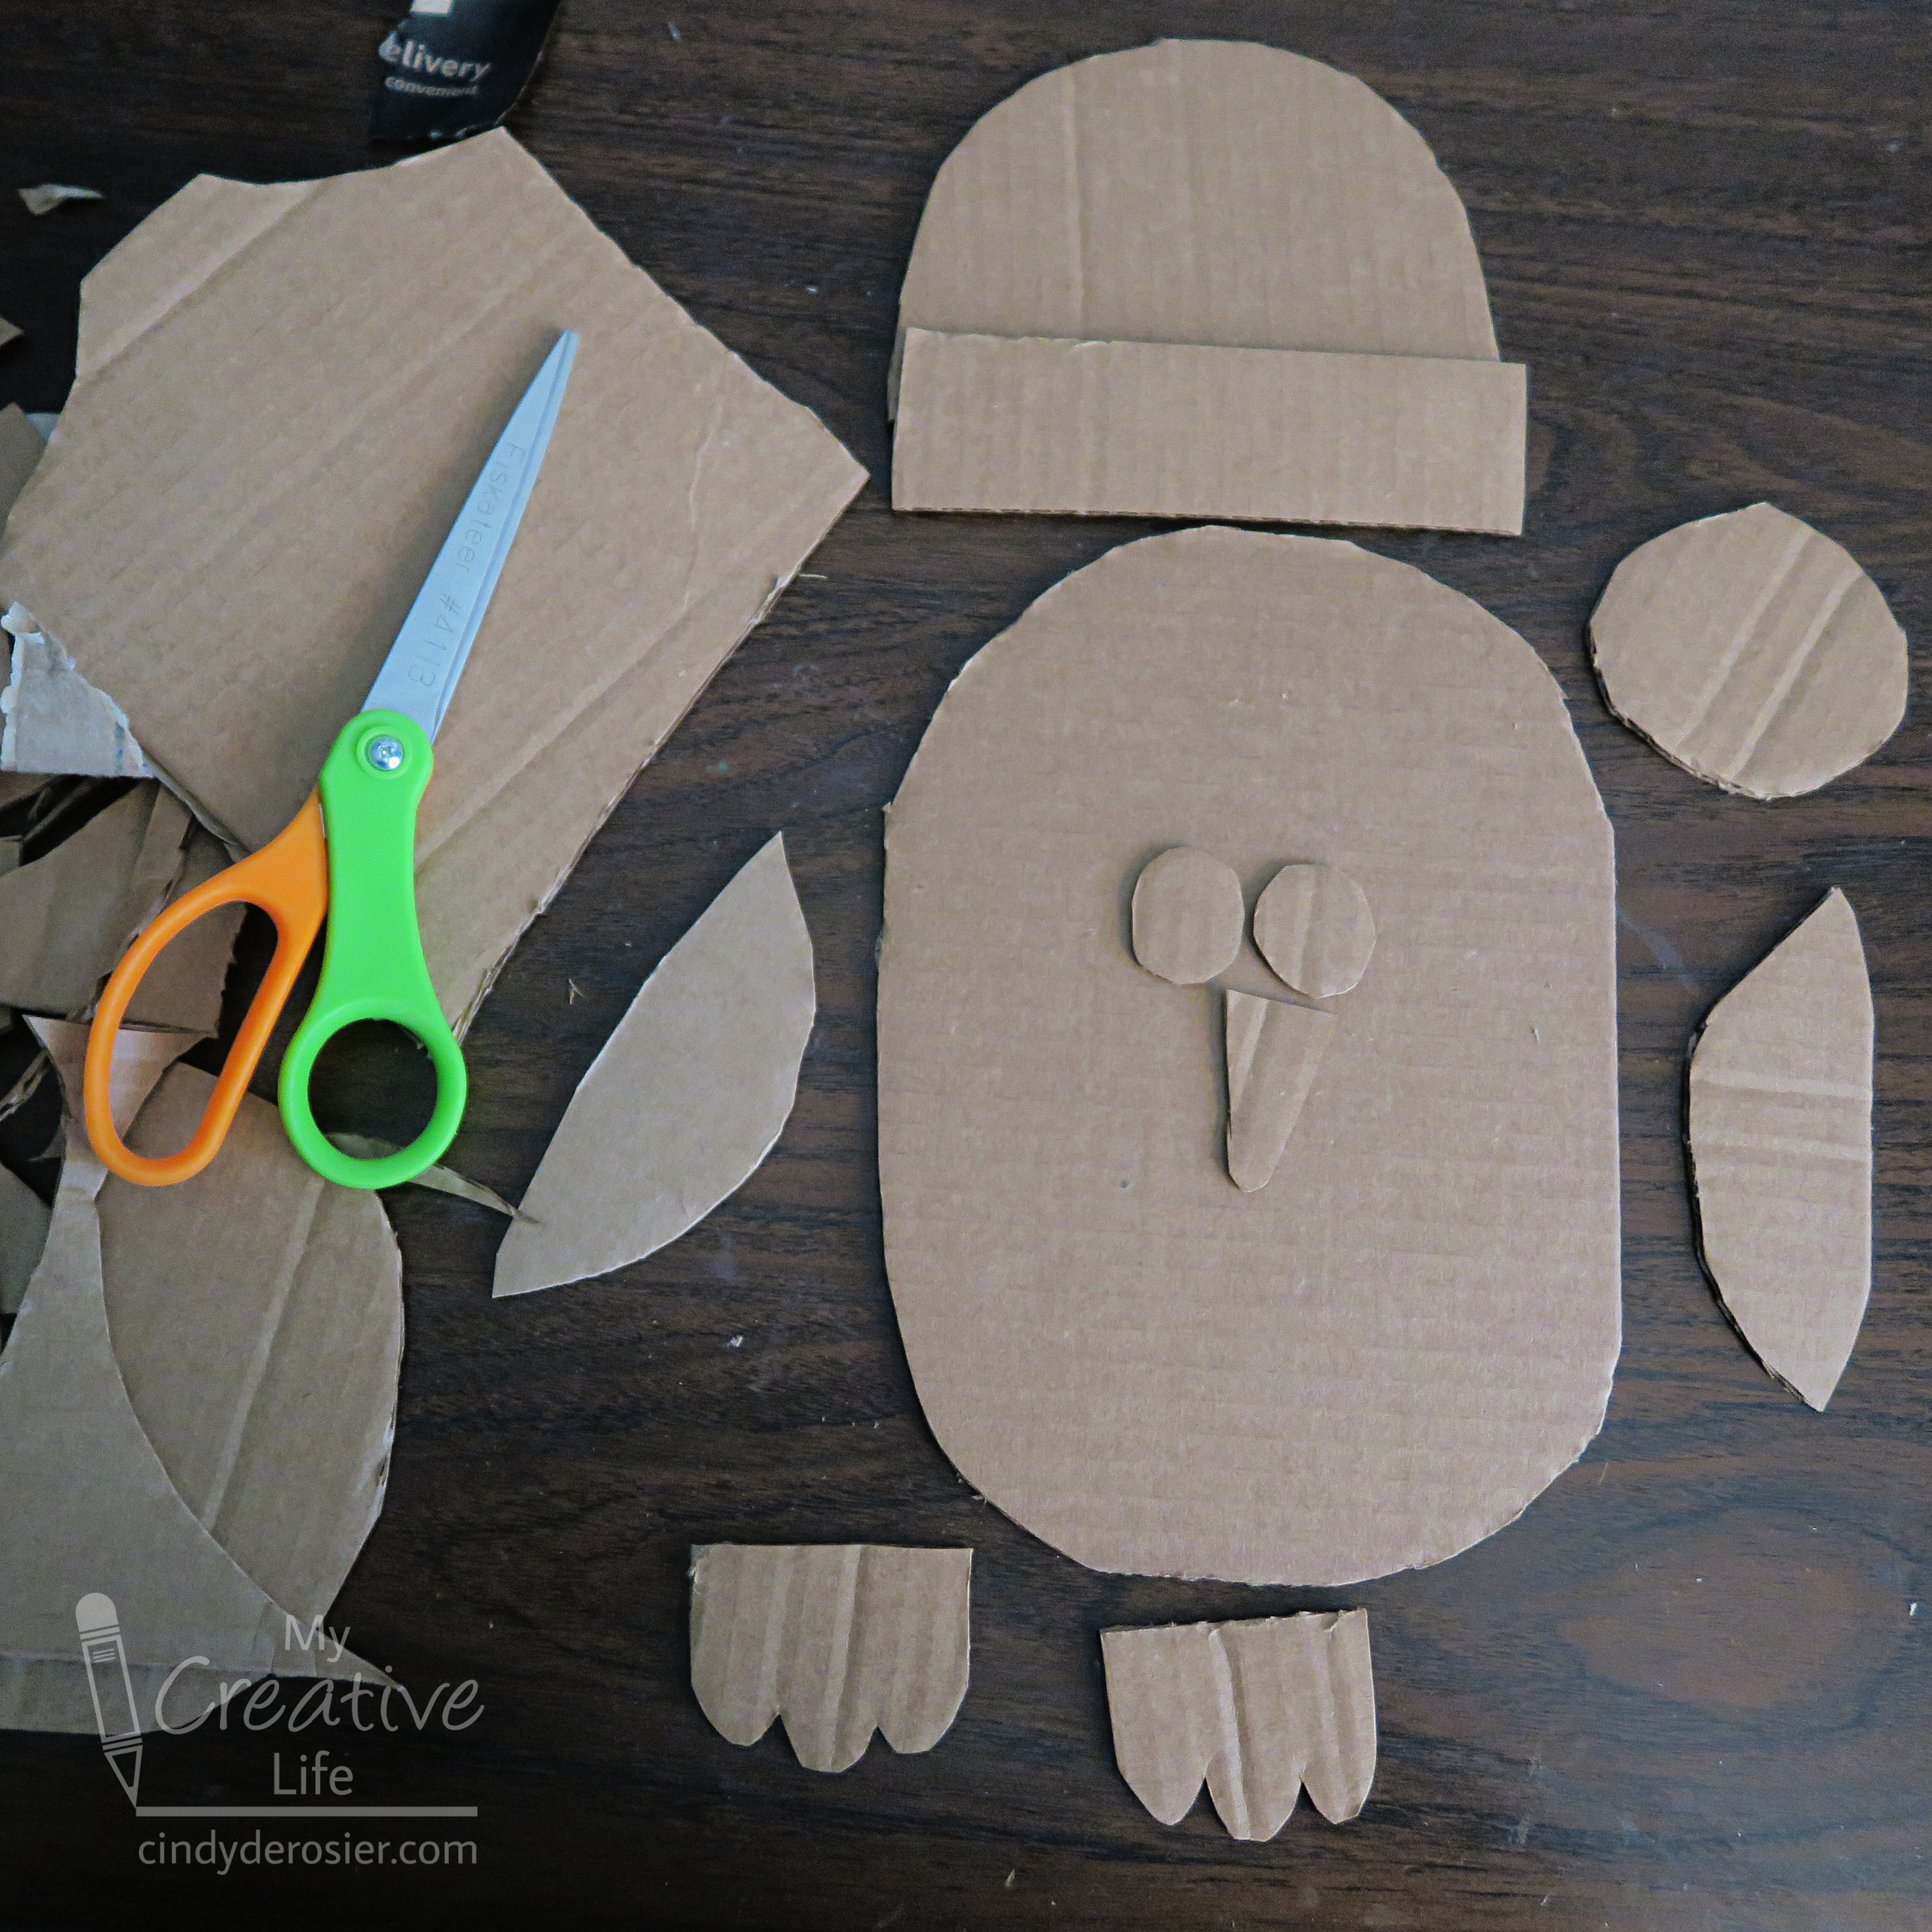
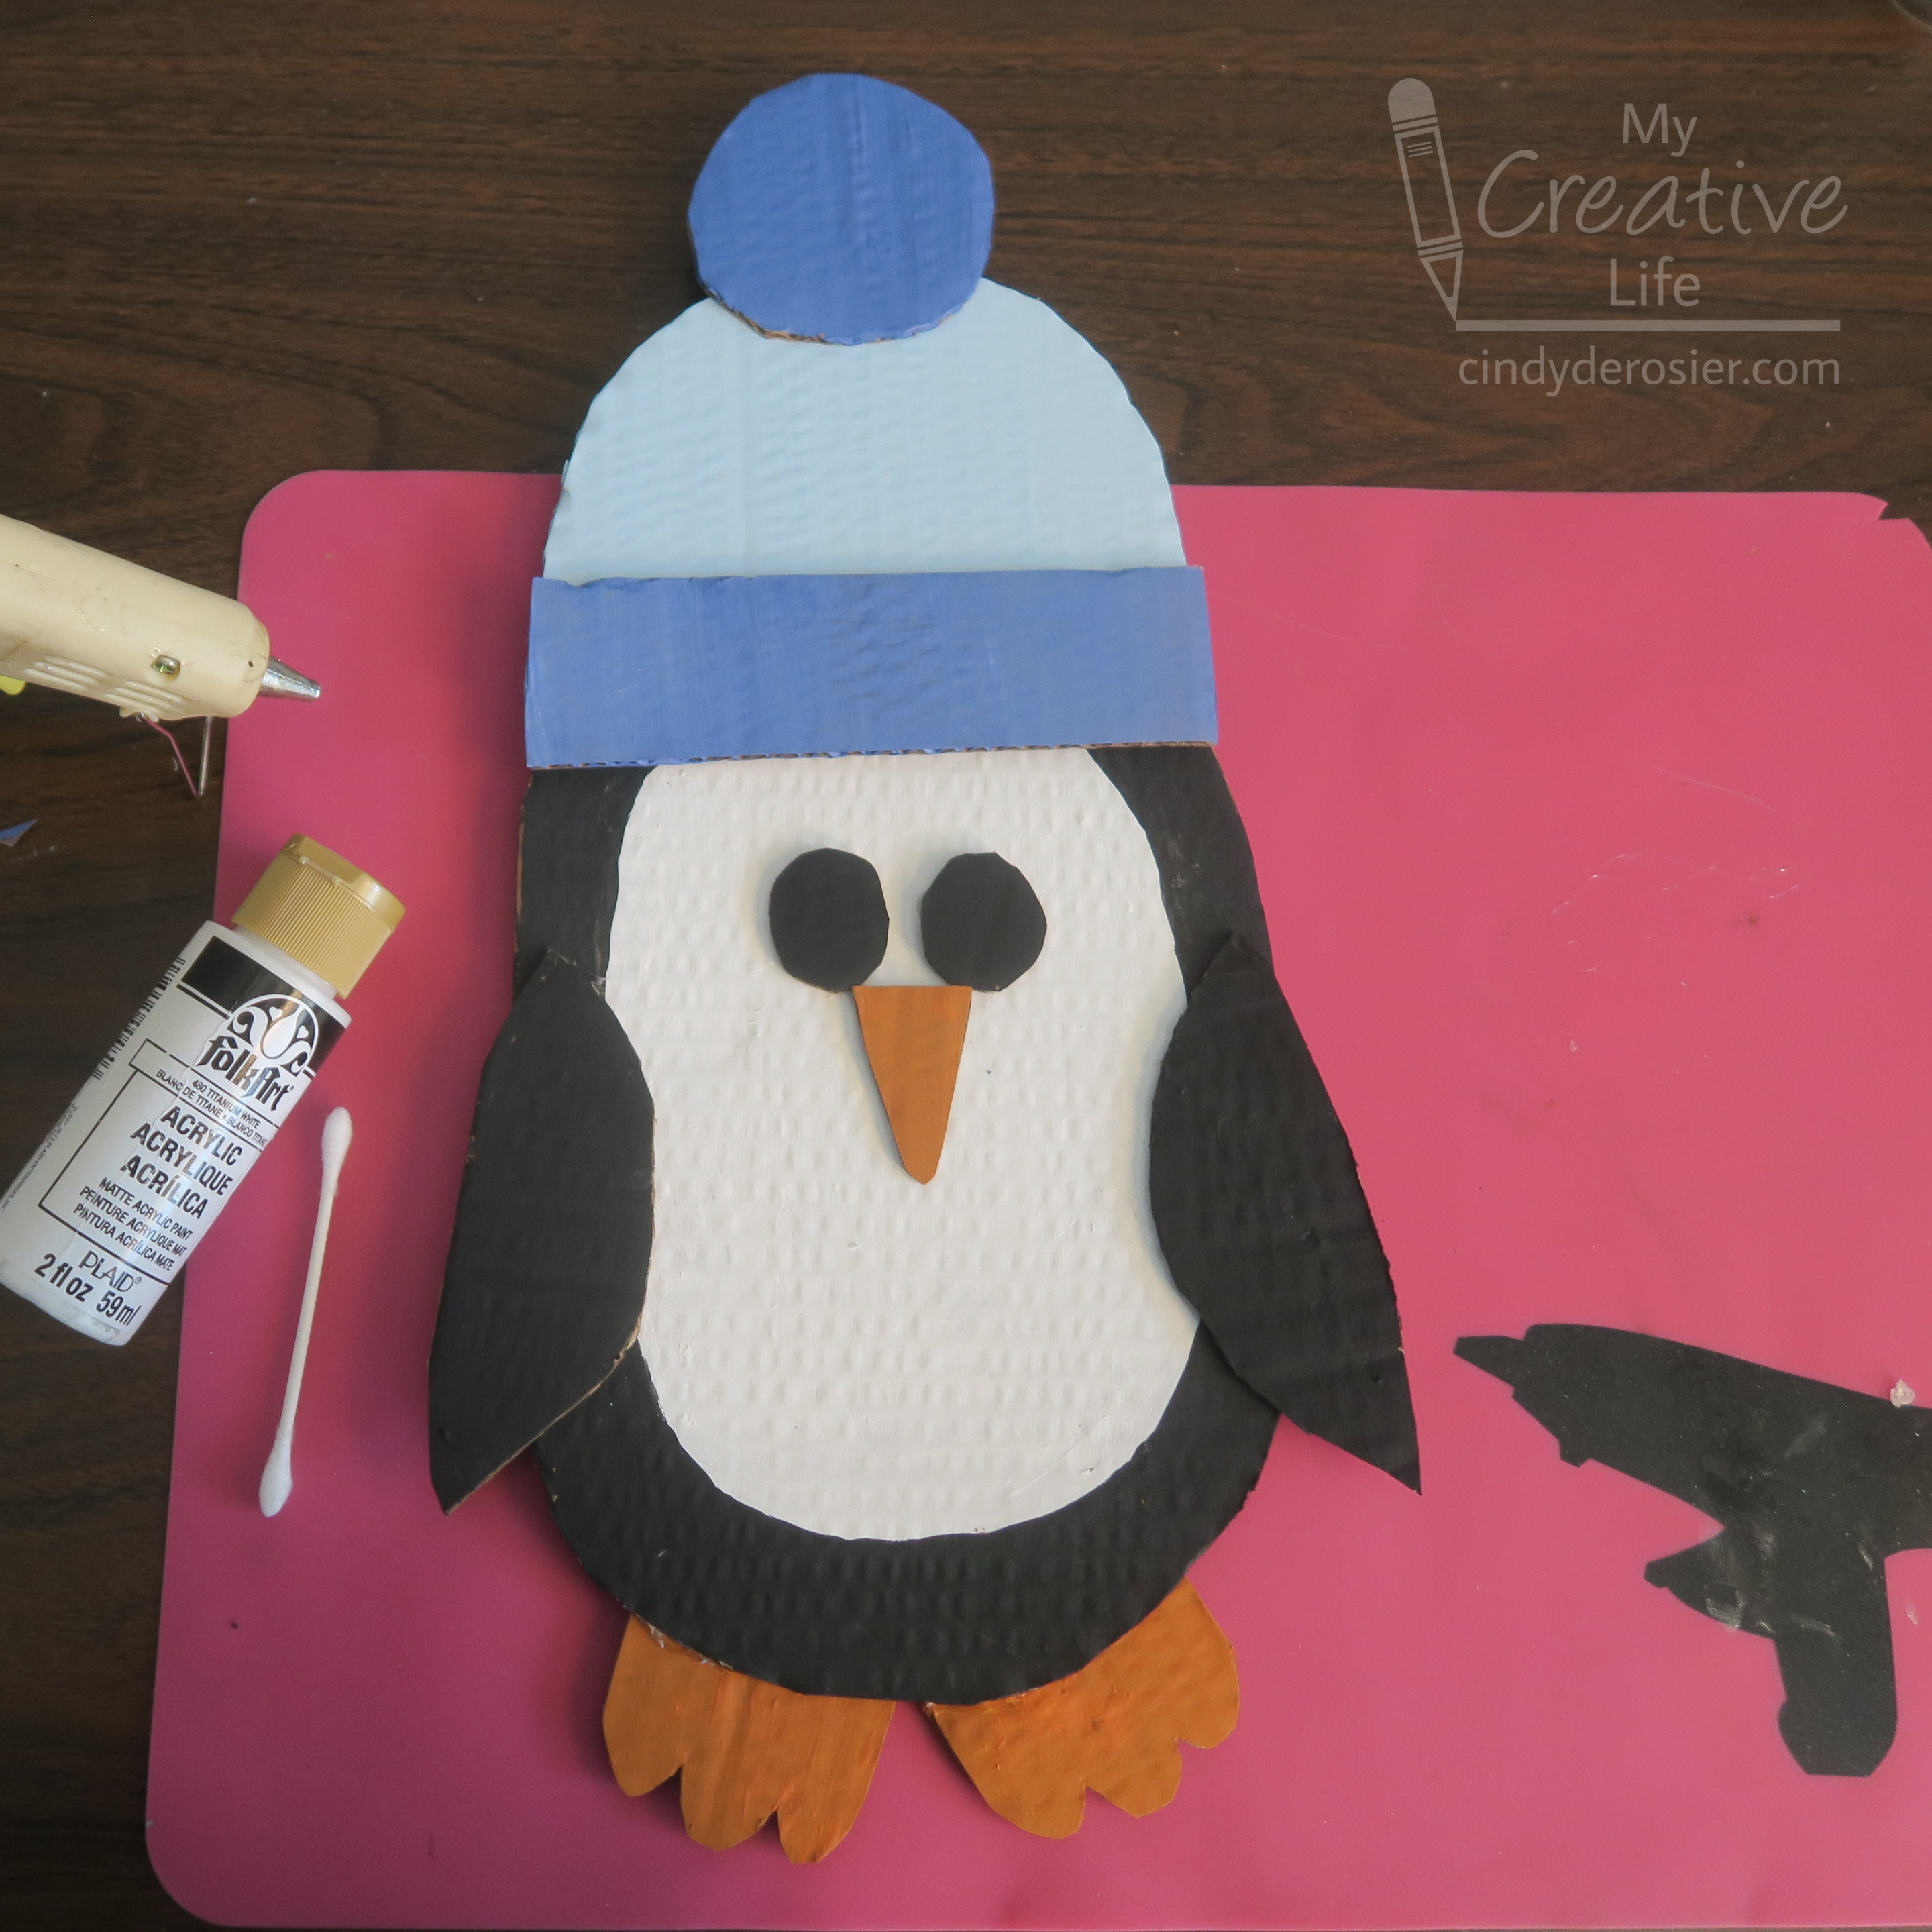
I asked, "Name something you recycle." I chose the answer of cardboard boxes as the inspiration for my craft. And, in fact, that specific box pictured above helped guide my thinking. When I saw 'made with less material' printed on it, I guessed (correctly!) that it would be easy enough to cut into shapes with scissors. Standard cardboard is best cut with a utility knife, which is great for straight edges, but not for cutting out small, circular items. I designed today's penguin to test how difficult it would be to cut rounded shapes from this thinner-than-usual corrugated cardboard.

The answer? Not difficult at all! In no time, I had cut out an oval body, circular eyes, a triangular beak, a pair of wings, a pair of feet, a hat, the hat's trim, and the hat's pom-pom.  


I painted all the pieces with acrylic paint and let them dry. Incidentally, I thought it was really interesting how this thinner cardboard reacted to the paint. Look at the slightly lumpy texture. That didn't change when the paint dried. 


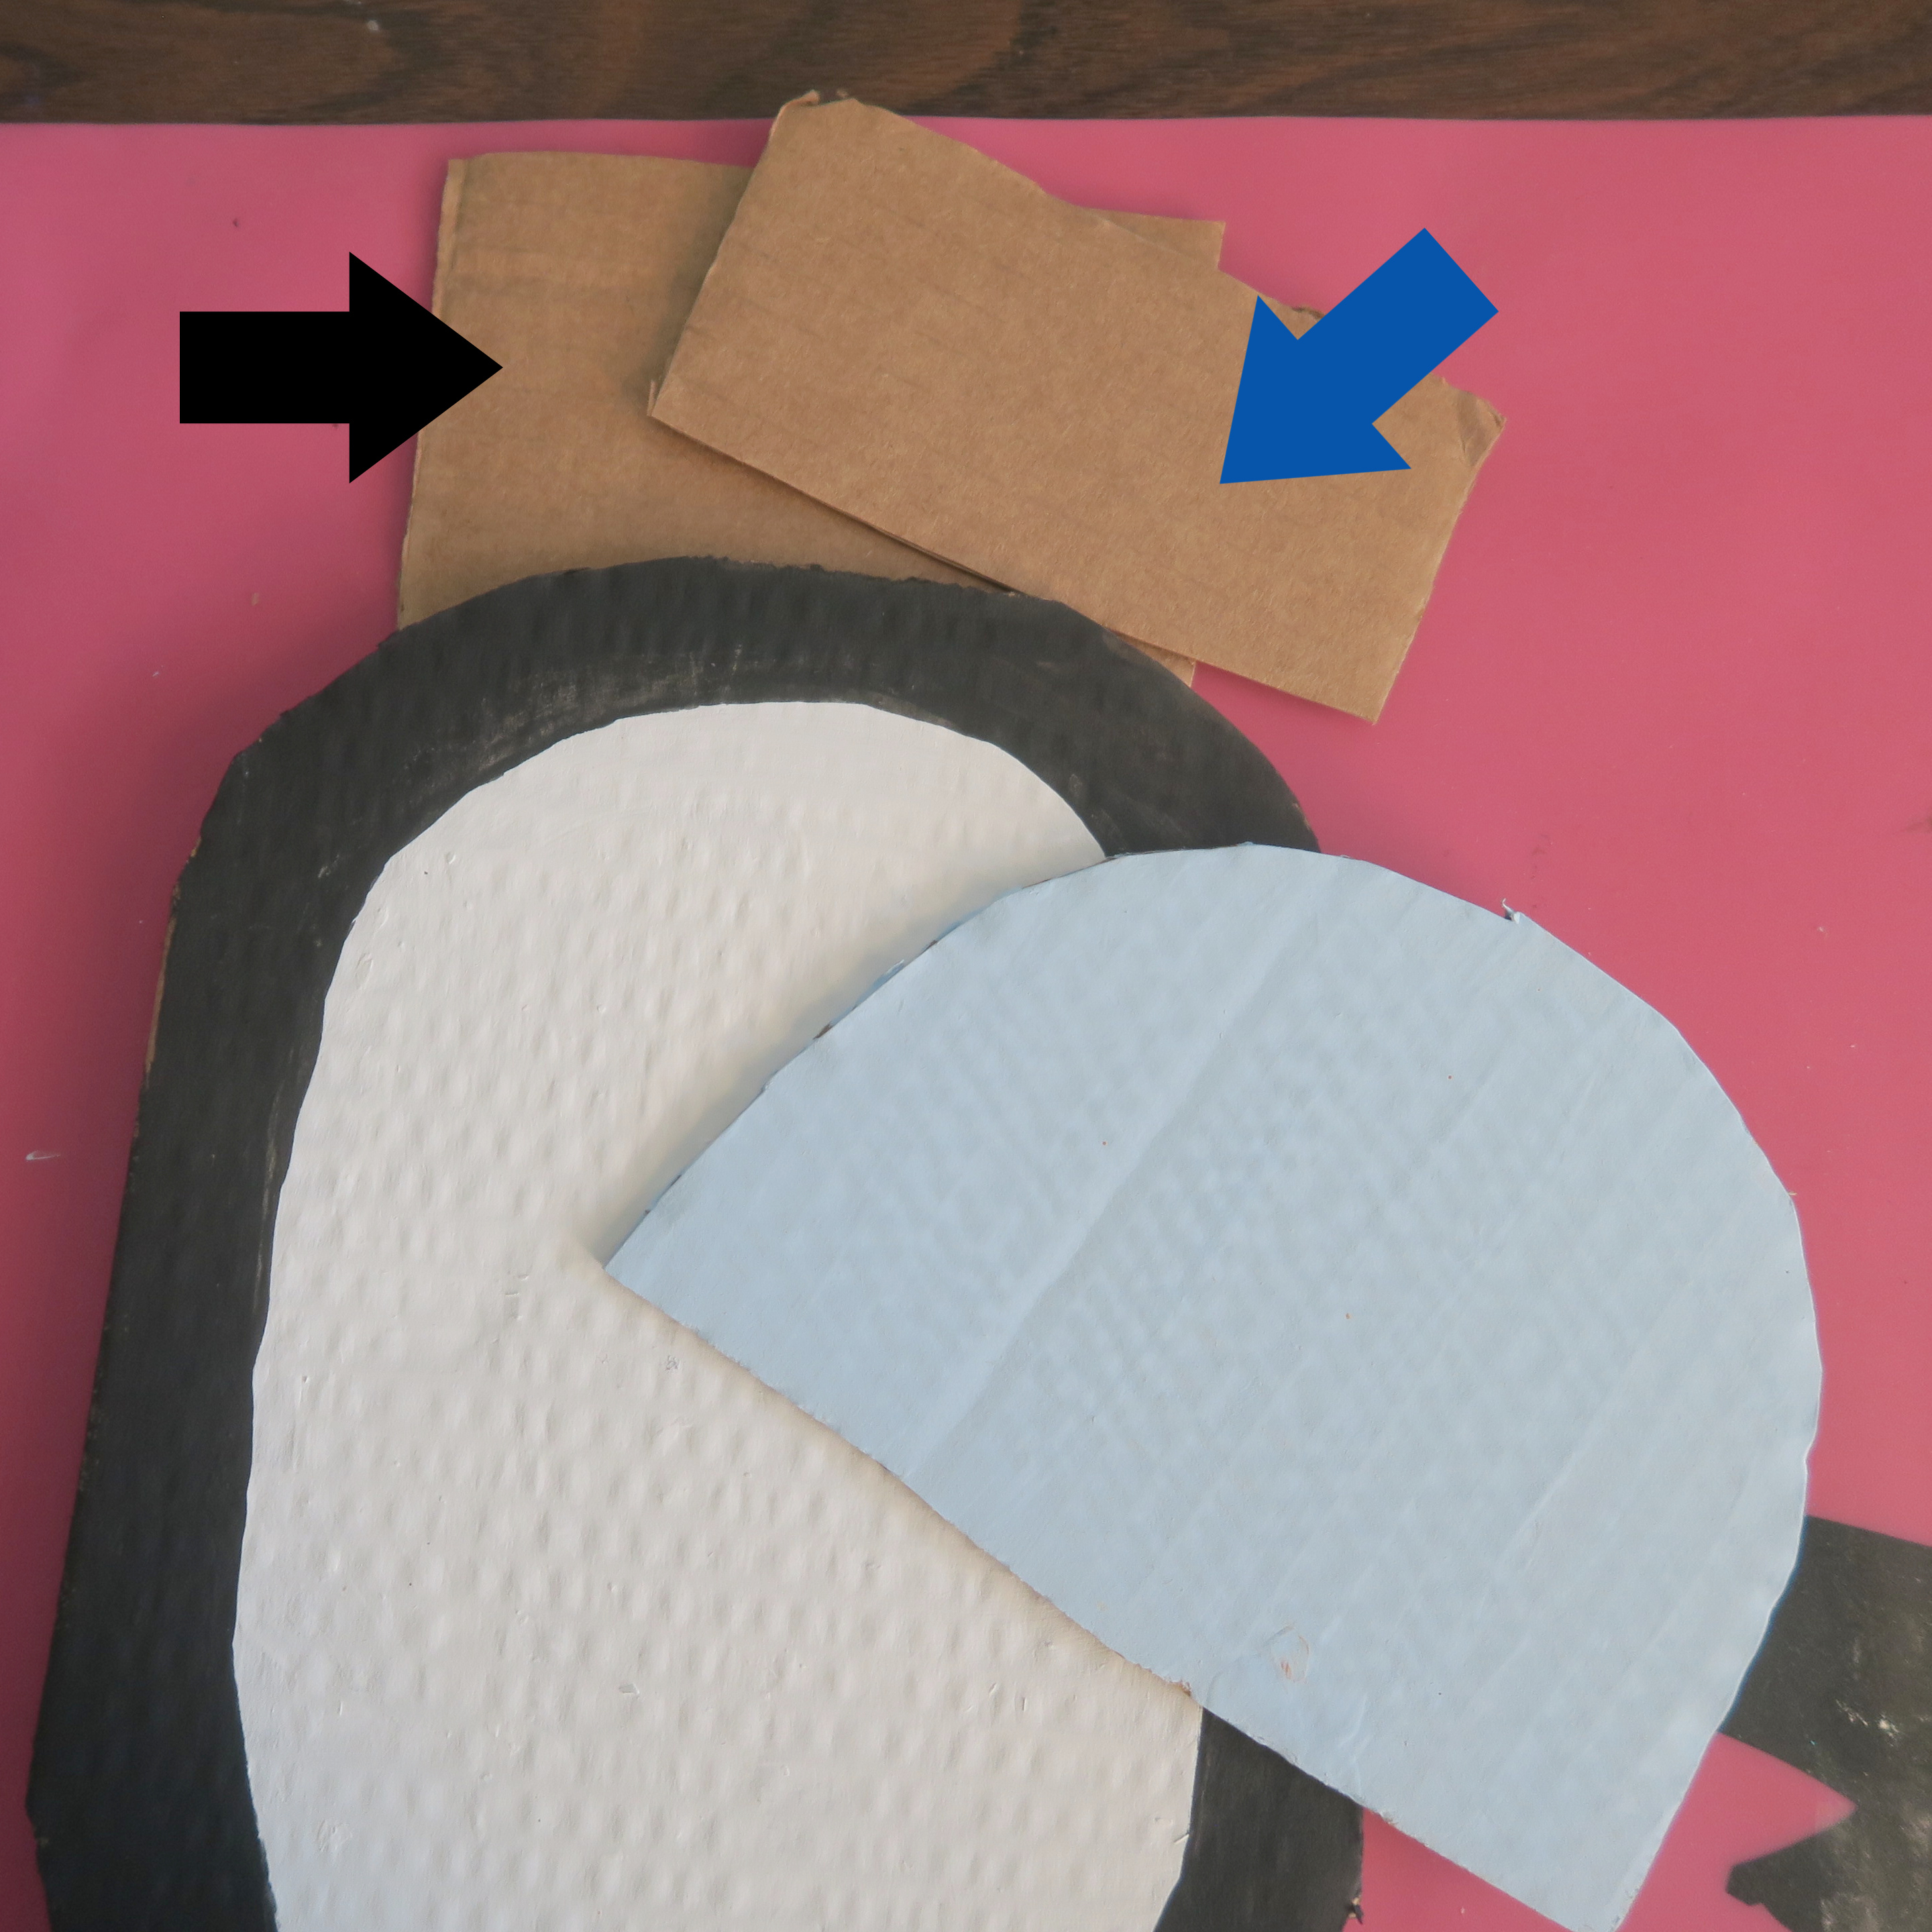
Before using the hot glue gun to assemble everything, I started by figuring out what my base layer would be. It's not the body - the feet are tucked behind the body. If I glued the feet to the body and then the hat and facial features on top of the body, the finished project wouldn't lay flat. I would need to prop up the gaps caused by the thickness of the cardboard. 

So I cut a piece of cardboard (marked by the black arrow below) that was slightly narrower than the penguin's body and positioned it so that it left room for the feet yet extended beyond the head. I glued it in place, then cut a second rectangle (blue arrow) to fill the gap created between the base and the hat.  

 
Here's how my penguin looked after I glued the rest of the pieces in place.  


And here's how it looked after I glued it to a robe-sized gift box. I plan to tuck a gift tag under his wing. 


I love that I repurposed the cardboard box that the gift came in to decorate the gift box I used to wrap it! The recipient can use the box again, giving the cardboard box an even longer life. 

12/8/22

Paper-Pieced Sloth Card

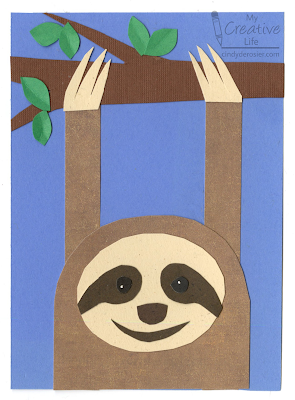
I love sloths. I've seen them at zoos, of course, but I've also seen them in the wild in Costa Rica. They're awesome and the subject of my sixth project in my series based on crowd-sourced responses to ten questions. 

Sloth tied with kangaroo and giraffe for "Name an interesting animal." Giraffe crafts are common; we have a bunch on Fun Family Crafts, four of which are mine. We don't have any sloth or kangaroo crafts, so I checked other places. I found that kangaroo crafts are easier to find than sloth crafts, so I went with the sloth. 


Paper-Pieced Sloth Card


Materials:

  • cardstock or construction paper (white, blue, green, black, tans and browns)
  • scissors
  • glue

Steps: 


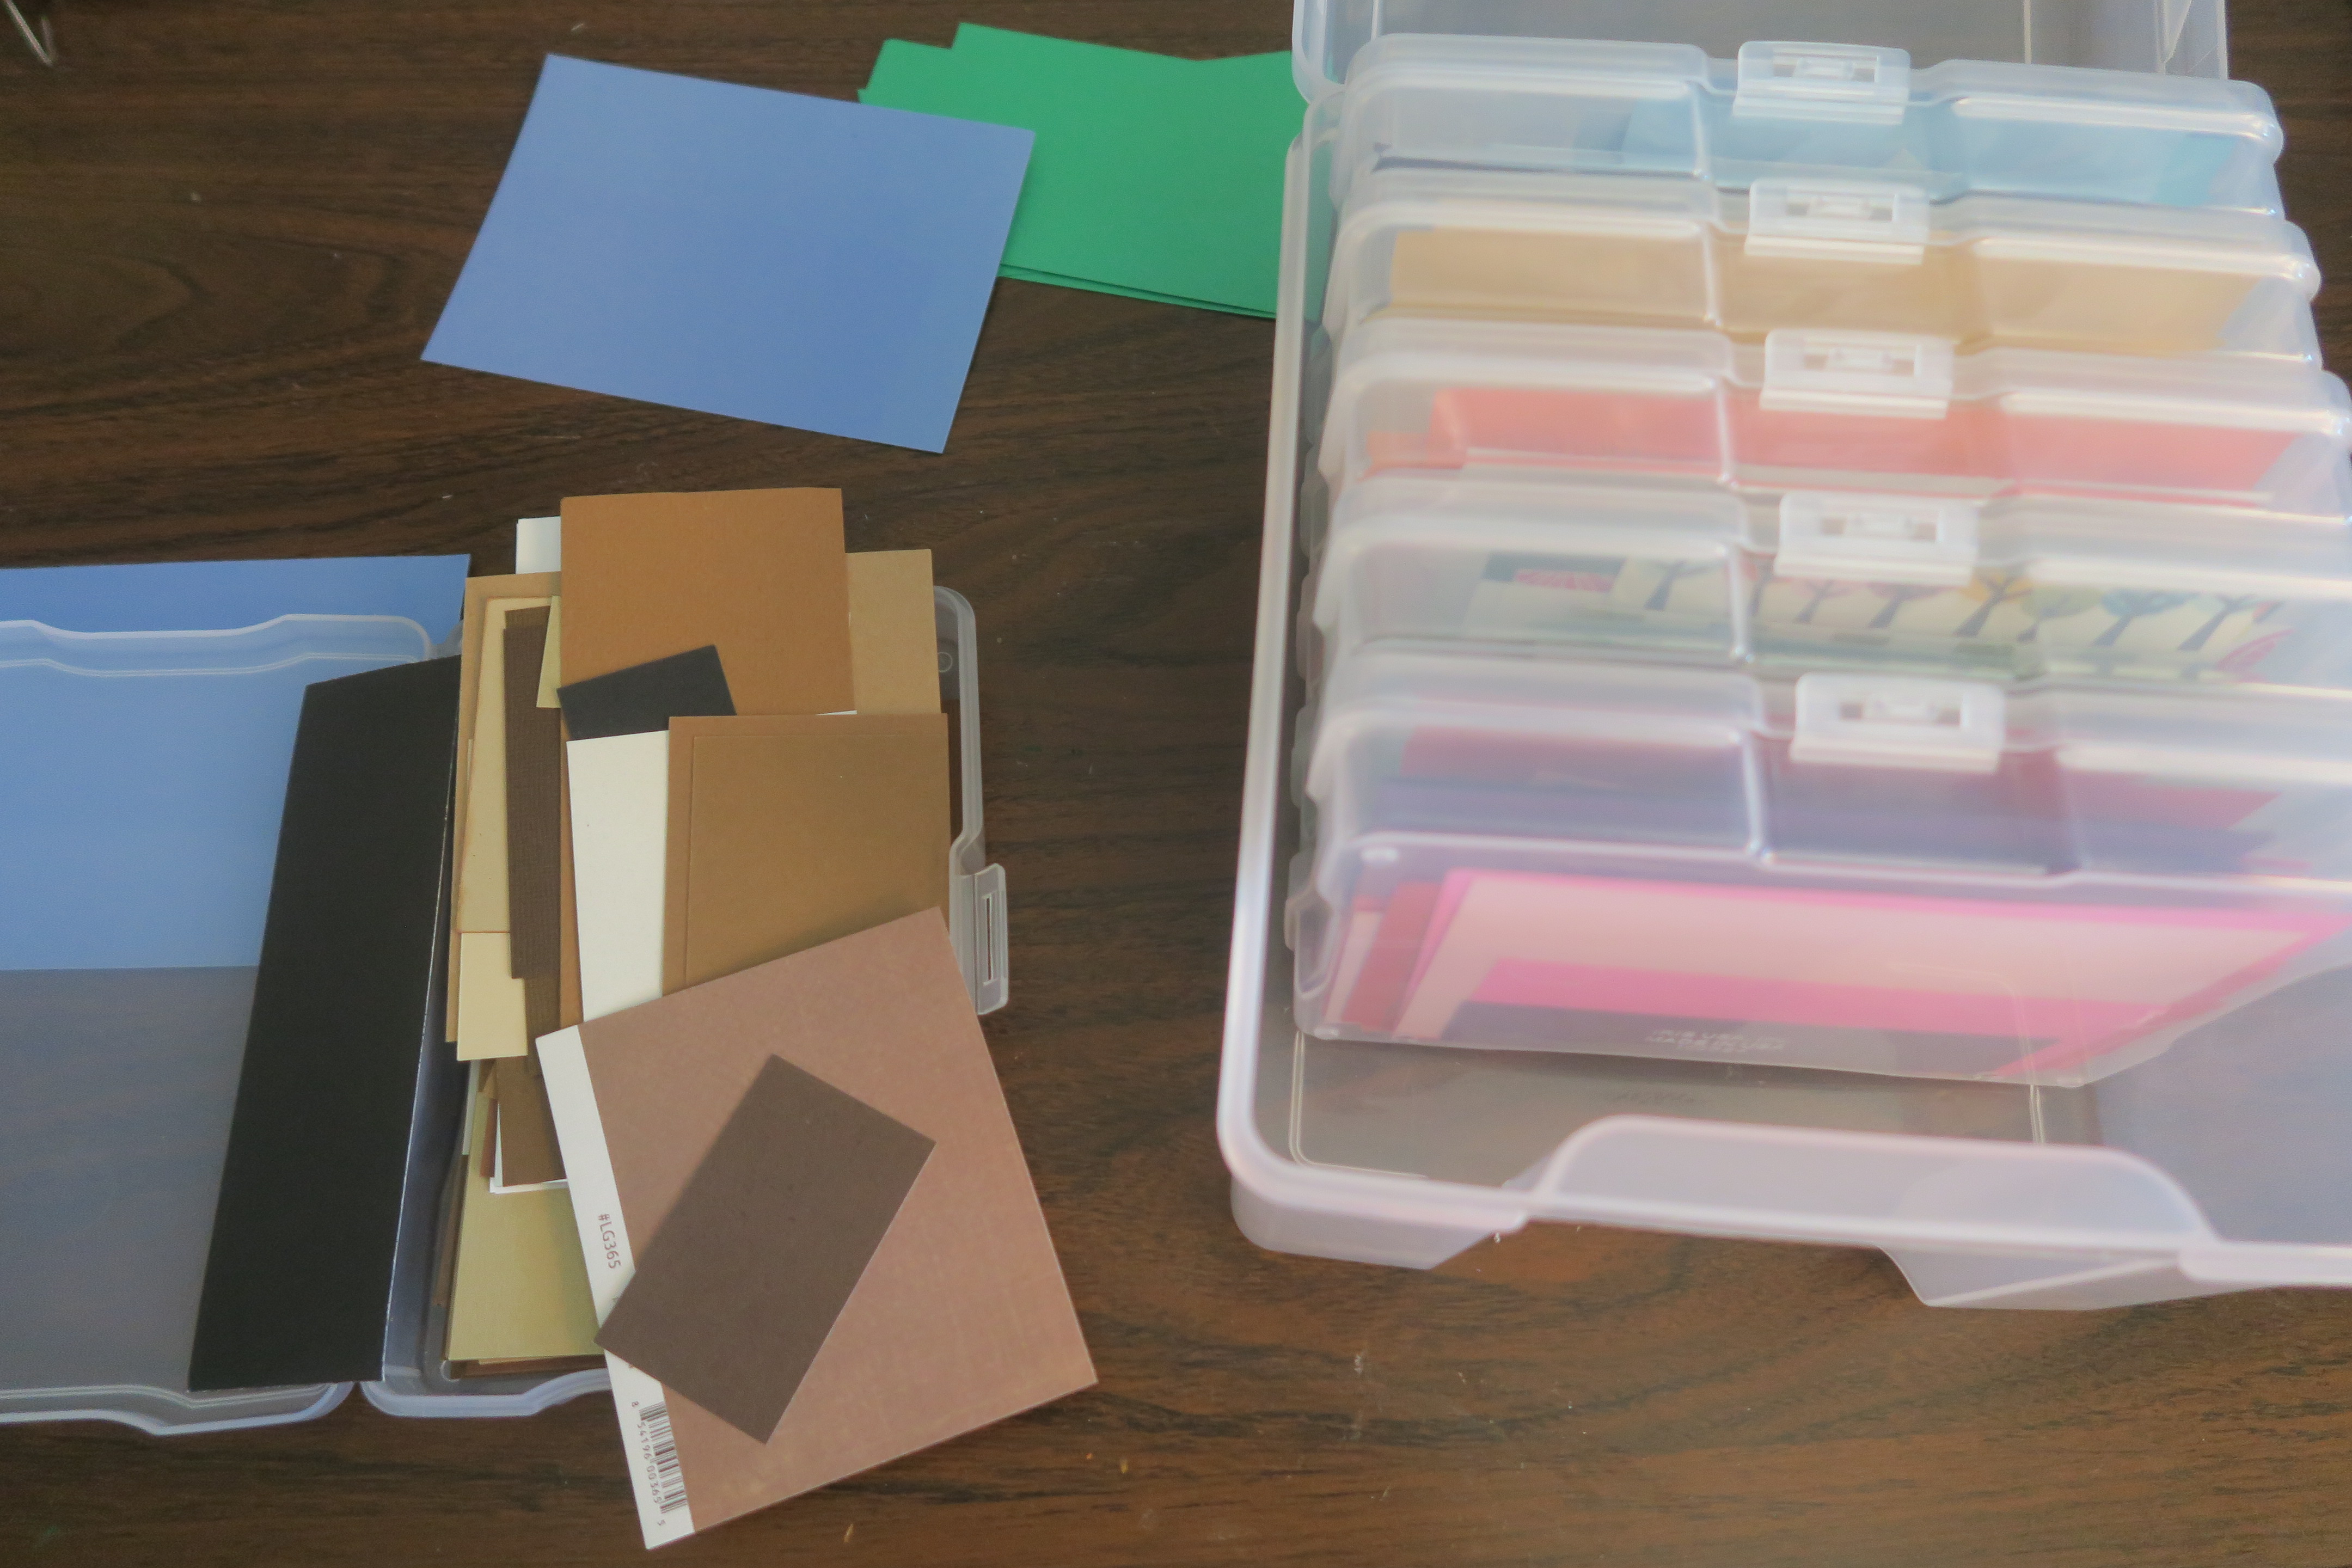
I started by making a white card base, then set it aside. I cut blue cardstock to make the card front, then went through my scraps to find green for the leaves and different browns and creams for the sloth and the branch. 


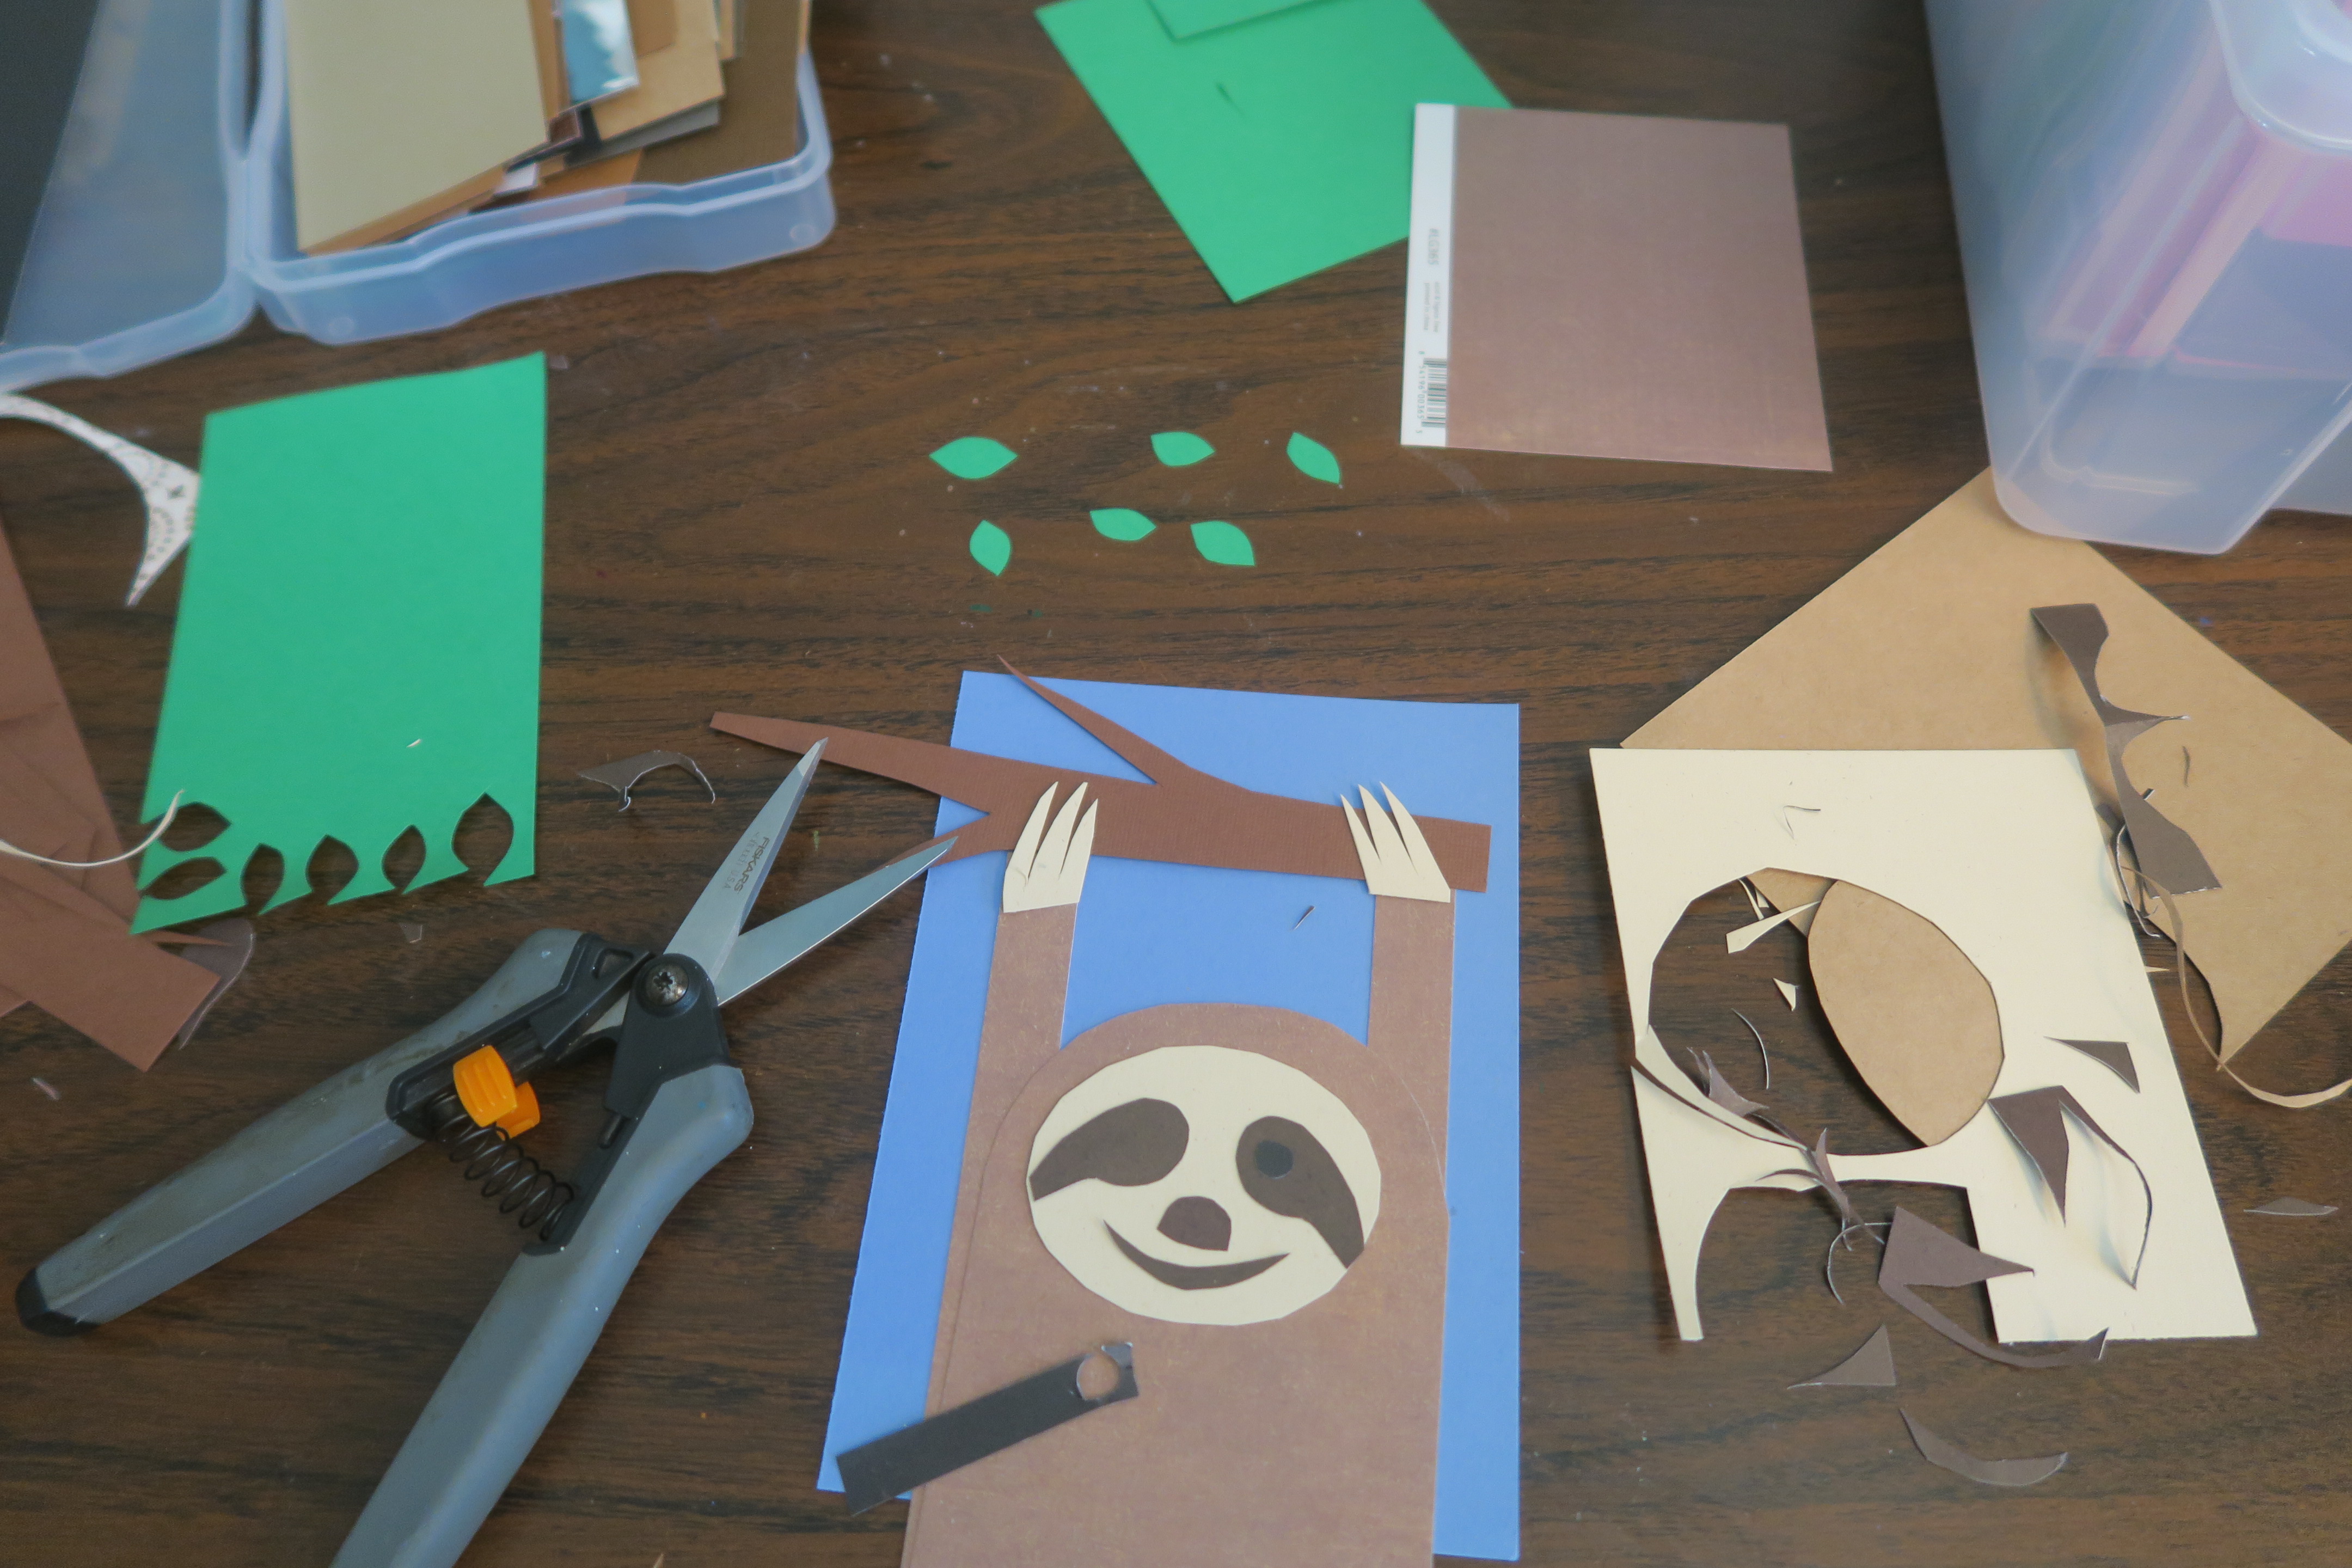
I picked a medium brown rectangle and cut two thin rectangles off the long side for the arms. I rounded off one end of the remaining piece to make the sloth's head. Then I chose a darker brown and cut a branch. I cut out some green leaves, then tackled the sloth's claws (3 on each arm).


I used these National Geographic photos (specifically #4) for my reference. Following the photo, I cut a cream-colored face, then comma-shaped eye markings, a nose, and a mouth from dark brown. I added black eyes.


Once everything was cut, it was time to assemble. I glued all the face pieces in place, then used a white gel pen to add tiny catchlights to the eyes. I glued the face to the body, then moved the body out of the way so that I could glue the tree, arms, and claws. Then I added the body. I trimmed off the excess that hung off the edges, then folded the leaves in half to give them dimension and glued them to the branch. Finally, I glued the card front to the base. 


I haven't added a sentiment to my card yet, but there are lots of possibilities. Send a "Hang in there" card to someone who is struggling, or a "Sorry I was so slow..." card for a belated birthday. Anyone would appreciate "Keep Smiling." For someone who is working toward a goal, remind them that "Great things take time."

4/22/22

Pretzel Raccoon Craft

If you've been searching high and low for an edible raccoon craft, I have good news.


I was sketching a pretzel (as one does) when I noticed that the little nubs at the ends of the arms (do pretzels have arms?) looked like ears. So I dropped what I was was doing and made some raccoons. You'll notice I experimented with different ways to make whiskers on two of them and left the whiskers off the others. I prefer the no whiskers, while Steve says the white whiskers are best. Rather than a tutorial with one or the other, you get both. Affiliate links below. 


Edible Pretzel Raccoons


Materials:


Steps: 


Follow the instructions on the package to prepare the Candy Melts. I used 10 white discs and 3 black to make grey. Dip each pretzel in the melted candy, then transfer it to a sheet of parchment paper. Fill the holes of the pretzel with more melted candy. If the ears aren't prominent, add a little extra candy to emphasize them. Let the candy set. 


Follow the package directions to melt the black candy. Dip the scribe tool into the black, then lay it across the face (angled downward) to make one side of the raccoon's mask. Add a white pearl eye, the repeat on the other side of the face. 


Use more black to color the inner ears. 

If you want to make whiskers, do it now. For the white whiskers, I tried to use the same technique as with the marshmallow bunnies, but it didn't really work (since the marshmallow was convex and the pretzel surface concave), so I just drew them on. I used a clean scribe tool to etch whiskers from the solid grey, but it was really hard to get clean lines. Ultimately, I decided I preferred the raccoons whiskerless. Your call. 

Put a tiny amount of black candy onto the scribe tool, then touch it to the white sugar pearls to add pupils to the eyes. Add a dot at the bottom of the face to adhere the black sugar pearl nose. 

---------


If you're looking for more raccoon crafts, I have two others: a cardboard tube raccoon, inspired by The Kissing Hand, and a Valentine's Day raccoon that you could make with any box of treats, not just conversation hearts. 

Fun Fact: Tennessee named the raccoon its official state wild animal in 1971. 

2/1/22

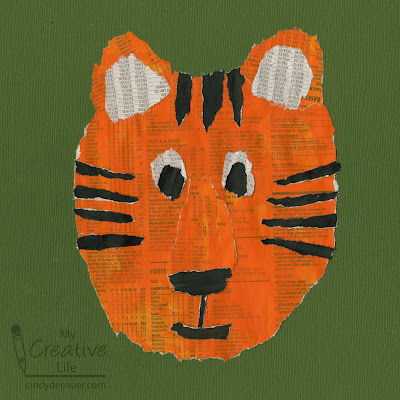
Painted Newspaper Tiger

2022 is the Year of the Tiger! Here's a craft I think you'll enjoy, whether you need a project for Chinese New Year, as an activity for your 1st grade Cub Scouts, as decorations for a zoo-themed party, or to accompany a study of tigers. It starts with a pile of newspaper and is a great way to develop fine motor skills.     


Painted Newspaper Tiger


Materials: 

  • newspaper
  • acrylic paint (orange, black)
  • glue

Steps: 

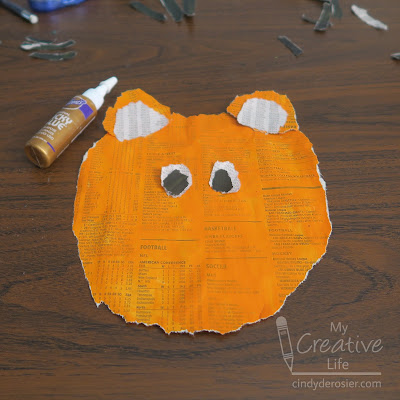
For each tiger, paint one sheet of newspaper orange and one sheet black.  Leave one sheet white. You won't need that much, but it's better to prepare extra. Try to pick a page with just text, like the sports scores, stock information, or classifieds. Just add one coat of paint - part of the charm of the project is seeing the text showing through. 

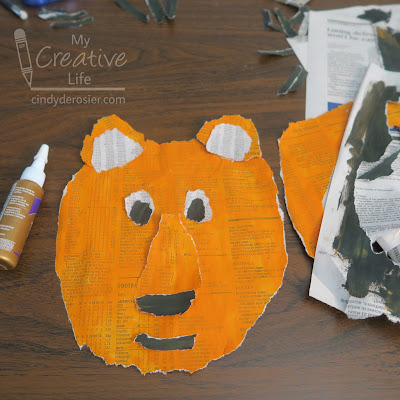
When the paint is dry, tear out a large circle for the tiger's face and two small circles for the tiger's ears. Tear slowly and carefully; newspaper tends to want to rip in just one direction, so you'll have to direct it the way you want it to go. If you mess up, no problem. That's why you painted extra. 

Tear two inner ears and two eyes from white, then two small pupils from black. 


Add a triangular orange muzzle, and a black nose and smile. Glue all the facial features into place. 


Tear strips of black to make the tiger's stripes. I used three thicker stripes along the top of his heat and four thinner stripes on each side of his face. Glue them in place. Add one very thin stripe to connect the nose to the mouth.  You can hang your tiger as is, or mount it onto contrasting paper like I did. 


Obviously, you can use this technique to make all sorts of animals. I may just do exactly that!


9/7/21

Paper Bag Bison

As promised, here is the bison project I made. The entire thing is made with a single paper bag. Affiliate links below. 


Paper Bag Bison


Materials:


Steps:


Carefully open a paper lunch bag. You should be able to peel it open without cutting it. I'm reusing one I got from the store when I bought bagels. It's wrinkled, but that totally doesn't matter because you'll be adding even more wrinkles!


Use scissors to cut out the bison's body from an edge of the paper bag. Then remove the head from the template and use it to cut an extra head. Cut the remaining portion of the paper bag into two long rectangles. 


Trim the horns and beard off the full-body bison. Crumple and then flatten each piece, as shown below. 


Paint one large rectangle with light blue, then add streaks of white to make the sky. Paint the other rectangle golden. Paint the back half of the bison's body light brown and the front half (including the head) dark brown. Paint the horns white. 


When all the paint is dry, glue the pieces together. 


I'm really happy with my bison project!