Showing posts with label Michigan. Show all posts

8/28/25

State Seal Glass Magnets

Today's project is a state-themed twist on a classic Mod Podge craft: glass magnets. Instead of using photos, magazine images, or ephemera for the design, use your state seal. Affiliate links below.  


State Seal Glass Magnets


Materials: 


Steps: 


Paint the wood circles black, then set them aside to dry. Center the sticker on the wood circle. Add a coat of Mod Podge to the back of a glass gem, then position it onto the sticker. Let the Mod Podge dry completely. Adhere a magnet to the back. 

When you use the magnet, pull it by the wooden part and not by the glass gem. 

*Learn from my mistake: Use slightly more expensive glass gems that are specifically made for crafting. I used the cheap ones I had on hand. Not only were they very irregular, but many of them were not crystal-clear. I tried to pick out the best ones for the project, but it's easier to use the better-quality gems to begin with. 


It's really interesting to me what each state has on their seal. Other than those states who have put their seal on their flag (ugh), I wasn't really aware of the details on most state seals. I don't think I have it in me to color all 50 state seals like I did with the state quarters, but I might pick a few of the more interesting ones and color those. 

5/21/25

Standing White-Tailed Deer

Native to North, Central, and South America, the white-tailed deer is one of the most widely distributed land mammals in the world. They are crepuscular, consume a wide variety of plant materials, and are highly adaptable to different habitats. White-tailed deer can sprint at speeds of 40 miles per hour, sustain speeds up to 30 miles an hour, and jump 9 feet high and 30 feet forward. 

The white-tailed deer is culturally important in the US (and beyond). It is the state animal of Arkansas, Georgia, Illinois, Michigan, Mississippi, Nebraska, New Hampshire, Ohio, Pennsylvania, and South Carolina, the state game animal of Oklahoma, and the wildlife symbol of Wisconsin. It appears on the flag of Vermont and is the mascot of the Milwaukee Bucks. Bambi is a white-tailed deer (in the Disney movie - in the Austrian book that inspired the film, Bambi is a roe deer.)

Read on to learn how to make a family of white-tailed deer that stand on their own. Affiliate links below. 


Standing White-Tailed Deer


Materials:


Steps:

You will need four basic shapes to make an adult male white-tailed deer: a body, legs (2), ears (2), and antlers (2). If you want to make an adult female or a baby, you don't need the antlers. Cut the body parts from cardstock, then use colored pencil to add details: a black nose, a black eye, black hooves, black shading on one ear, and white shading around the nose, under the belly, under the tail, and inside the ear. If you are making a fawn, add white dots all over its back. 


For the adult make, fold the legs in half, then glue them to the back of the deer's body. Adjust them until the deer can stand on its own. Glue one ear to the front of the deer and one to the back, then glue the antlers in place. Use the same steps, minus the antlers, for an adult female or a fawn. 

4/28/25

The Best Tour in Every State, Part 3

This is the third part in my series about the best tour I've taken in every state. I recommend reading the first post (Alabama through Georgia) and the second post (Hawaii through Maryland) before this one. 


-------


Massachusetts


I think we've taken more tours in Massachusetts than in any other state besides our home state of California. It was really difficult to pick a favorite, but I'm going to have to go with the Cranberry Bog Tour at the Ward family farm. It was fascinating learning about the stages in growing and harvesting cranberries and trying some of the traditional equipment in the Education Barn. 


Michigan


The best tour I've taken in Michigan was the Ford Rouge Factory Tour at the Henry Ford near Detroit. It's one of the best factory tours I've ever done... and I've done a lot of factory tours. The size and efficiency of the assembly line was amazing. This photo is from the lobby; as with many factory tours, photography of the factory floor is not allowed. 


Minnesota


The Flour Tower at Mill City Museum is the best tour I've done in Minnesota. The tour takes place in a giant elevator with stadium seats. At each floor, you see artifacts overlaid with historic film. Special effects make it feel like you're really there. It's incredible. 


Mississippi


The only tour I've taken in Mississippi was the self-guided tour of the State Capitol. It's done very well, with interesting and challenging activities to do that help teach you about the architecture and history of the building and its occupants. 


Missouri


The best tour I've taken in Missouri was the Gateway Arch Riverboat Cruise. The narrated journey along the Mississippi River provides a great view of St. Louis. We learned all about the history of the city and the importance of the river in the past and now.  


Montana


The best tour we took in Montana was the Last Chance Train Tour in Helena. The open-air, trackless train took us past historic buildings in Montana, as well as a restored miners' village, Last Chance Gulch, and more. It was a great introduction to Montana's capital city. 


Nebraska


The best tour we took in Nebraska was the Bite of Omaha culinary tour. We learned so much about the Omaha food scene and stuffed ourselves with fantastic food. 


Nevada


I've taken several great tours in Nevada, but the best was the tour of the Hoover Dam that Steve and I did in 2003, during our first-ever vacation together. 


New Hampshire


The best tour I've taken in New Hampshire was the Portsmouth Harbor Cruise. Our captain taught us so much about Portsmouth, past and present, as he took us down the Piscataqua River to where it meets the Atlantic Ocean. It was a great tour. 


New Jersey


The best tour I've taken in New Jersey was a guided tour of the Capitol building. In addition to covering the history, our guide provided a detailed look at the art and architecture of the stunning building. The photo below shows my favorite piece of artwork on display. 


If you have any tours you recommend, tell me about them in the comments. I'll be back tomorrow with the next ten states. 

11/13/24

American Robin Diamond Art Ornament

I've been wanting to make a bird ornament using my copious supply of leftover drills from diamond art for a long time. I'm so happy with how this robin turned out! Don't have leftover diamonds in the correct colors? Not a problem! Substitute with what you have, buy a bunch of colors, or get just the colors that you need. Affiliate links below. 


American Robin Diamond Art Ornament


Materials: 


Steps: 


Paint a thin coat of DOTZ Stick onto the wood slice, following the directions on the package. If you use too much, your ornament can crack from the moisture. 

When the adhesive is ready, apply the drills. This is the pattern I made. The stars mark the center of each axis, so the plus sign is the center of the design. 


In order to center the bird on my ornament, I put the center drill onto the center of the ornament... as best I could. The wood slices I used are quite irregular. In retrospect, I could have moved my starting drill over a hair to the left to better center the design. It didn't bother me much, so I left it that way.

Fill in the rest of the drills around that central one. 

Ordinarily, I'd suggest sealing your diamond art, but not on wood like this. Instead, rub cornstarch or baby powder over the uncovered area of the wood to eliminate the tackiness of any extra adhesive not covered by drills. 

-------

The American Robin is the state bird of Connecticut, Michigan, and Wisconsin, making this a great activity for kids (or adults!) in those states. But it's equally great no matter where you live. This interesting songbird is one of the most recognized and most widespread in North America. Pair your craft project with a shaped puzzle featuring the American Robin, then check out these fun facts about this beloved bird. 

10/4/24

50 State Quarters: Coloring Pages Using Folk Art Acrylic Paints

I've finished four more State Quarters coloring pages: Wyoming, Rhode Island, Mississippi, and Michigan. This time, I painted each with Folk Art acrylic paint (affiliate link). Painting in the tiniest letters was a challenge, but otherwise I really enjoyed painting each coloring page. I particularly had fun making the sunset background for Wyoming's quarter.


It's been a lot of fun using different art materials to do these coloring pages. Before this batch, I've used: 

More State Quarters coming soon!

7/2/24

Perler Beads: University of Michigan Logo and the Rhode Island Anchor

Between the ages of 2 and 10, Trevor was obsessed with Perler beads. We spent many, many hours making all sorts of creations. It was something we both loved doing together. We still have a huge supply of beads, so when Jonna came over to visit during my convalescence, we pulled out the Perler beads and made some state-themed crafts. Affiliate links below.  

We each chose a state from the list of four that don't have enough craft tutorials yet. I made the University of Michigan logo, inspired by this design by cdbvulpix


I used two of the large, interlocking square pegboards. The beads are dark blue and yellow. It took forever, but I'm really happy with how it turned out. And I was really close to running out of blue beads. I was so relieved I had enough!

Jonna used graph paper to design a pixelated version of the anchor on Rhode Island's flag. She used the same yellow Perler beads, and a single square pegboard. 


The anchor took a fraction of the time that the logo did. In fact, in the time it took me to finish Jonna made four other small designs, all following the same theme. I'll show you those tomorrow. 

4/5/22

American Robin Nest with Eggs

With Easter approaching, a lot of us will be dyeing eggs with into every color of the rainbow. It's a tradition I really enjoy. But as pretty as the dyed eggs are, I'm fascinated by the naturally occurring colors of birds' eggs. The American robin lays eggs so beautiful that we've named the a color after them: robin's egg blue. Today's craft is all about these gorgeous eggs. Affiliate links below. 


American Robin Nest with Eggs


Materials: 


Steps: 


Paint a 4" square of watercolor paper robin's egg blue, using either paints or watercolor pencils. While the paint dries, cut a square of scratch paper just over 1". Fold it in half, then draw the curve of an egg along the folded side. Cut along the line and unfold the paper to reveal an egg template that is a little bigger than a quarter. (Robins' eggs are 1.1-1.2" long and weigh about the same as a quarter). 

Trace the template four times on the painted paper, then cut out the eggs. 


Take a handful of Spanish moss and form it into a bowl-shaped nest approximately 6" in diameter. Glue the nest to a square of black cardstock. Arrange 3 eggs in the nest, then glue them in place. 

Write AMERICAN ROBIN on a strip of white cardstock, then glue it to the black cardstock below the nest. Glue the final egg to the label. 

---------

If these were real robin eggs, they'd hatch in about 2 weeks and the baby birds would leave the nest about 2.5 weeks after hatching. Your craft won't change though - sorry about that!

Robins are common throughout the contiguous 48 states, so this is a good craft no matter where you live. But if you happen to be in Connecticut, Michigan, or Wisconsin, this is a particularly excellent project since your states have named the American Robin as the state bird. Enjoy!


8/25/20

Michigan Love Mitten Ornament

I was 16 the first time I met someone from Michigan. I was part of the California delegation attending the 1988 National 4-H Congress in Chicago. All 50 states were represented and we were all staying in the same hotel, so every elevator ride was an opportunity to ask the other teens where they were from. Everybody answered in words... except the people from Michigan. One after another, they answered my question of where they were from by silently holding up one palm and pointing to it with the other hand. It was weird and I had no idea what to make of this at first.

It didn't take long for me to learn that if a Michigander held up their right hand and pointed with their left, they were from Lower Michigan. If they held their left hand up sideways and pointed with their right, they were from the Upper Peninsula. The pointing finger told you exactly where. It's actually kind of brilliant, but not until the clueless girl from California was keyed in on the mitten situation.

Michigan was on my list to meet my goal of creating at least two crafts per state. Mittens seemed like a natural choice. My first thought was that it would be awesome to turn a Michigan baby's first pair of mittens into a darling Christmas tree ornament. I don't have a Michigan baby's first mittens, so I used felt. Affiliate links below.


Michigan Love Mitten Ornament


Materials:


Steps:


If you have mittens, skip this step. Otherwise, cut mitten shapes from felt. You will need four identical pieces. Cut one small heart from the scraps.

If you have mittens, stitch a heart on one of the mittens in the location of your hometown. If you're using felt, sew the heart to your hometown. I chose the capital, Lansing, for my sample. We really enjoyed our brief time there.

If you have mittens, skip this step. Sew two pieces of felt together, leaving a hole at the bottom like a regular mitten would have. Do the same for the other two pieces of felt.

Add Poly-fil to both mittens, pushing some into the thumbs. Stitch across the bottom to seal the stuffed mittens.


Arrange the mittens to mimic the shape of Michigan. Be sure the heart is facing toward the front. Sew the Upper Peninsula mitten to the Lower Michigan mitten. Add a loop of embroidery floss to the thumb of the Upper Peninsula mitten. 


This makes me want to return to Michigan to explore the mittens state more thoroughly. Someday, I hope!

7/16/20

Travels in Michigan

Scrapping photos from past trips is keeping me from dwelling on the trips we're not taking right now. If not for COVID-19, we'd be headed out on a multi-state adventure next week. I'm really disappointed, but we had no choice but to cancel. Not only would going put ourselves at risk, but I think it's irresponsible for US travel bloggers to be advocating travel right now. I get that there are a lot of considerations and that many in the travel industry are frantic as the industry suffers more each day, but we need to JUST. STAY. HOME. And wear a mask. Please and thank you. 

Michigan (affiliate link)


Anyway, Michigan. I had a lot of photos from the time we spent in Lansing and Detroit, plus I knew I'd need a huge amount of space for journaling. (I HAD to tell the story of our time at the US Detention Center. I'm still bummed I couldn't take a picture, but if I had, I'd probably still be there.) I cropped my photos into squares and arranged them around the outside, leaving space for the title and journaling inside. It's really plain, but it does the two things I like all scrapbook pages to do: tells the story and keeps the focus on the photos.

8/31/18

Six New Additions to the 50 States Album

I just finished updating my United States Travel Resource with the six new states we visited this summer.


I also added the completed pages from Trevor's 50 State Album. These are the six new pages.


We're at 28 states visited... and counting! I can't wait for the next trip!

8/15/18

Midwest Adventure 2018, Part 3: Detroit, Michigan

This is my third post about our adventure traveling through Illinois, Michigan, Ohio, West Virginia, Kentucky, and Indiana. You can find the first post from this trip here and links to all the other educational US travel our family has done here.

Because I blog about educational travel, I received free admission tickets, discounts, media rates, and other benefits for some of the hotels and attractions we visited throughout the trip. Many attractions we toured are free to everyone. I paid full price for the rest. This has no bearing on my reviews. Everything I'm sharing is something that I whole-heartedly recommend. If you notice any gaps in my narrative, it is because I didn't love a particular hotel, attraction, or restaurant enough to recommend it to you, regardless of how much I paid or didn't pay.


---------

Detroit, Michigan


From Lansing, we drove 90 miles directly to the original location of Buddy's Pizza, famous for their Detroit-style pizza. I'd heard amazing things about it and we were eager to see how it stacked up against the Chicago-style pizza we'd had and loved two days earlier. There are numerous Buddy's locations, but it was clear we needed to go to the original. It did not disappoint. Far from it.


If you're not familiar with Detroit-style pizza, the first thing you need to know is that it is not round. (Though, oddly, Buddy's serves theirs on a round pan.)


The crust is thick, yet light and crunchy. The cheese (Wisconsin Brick) is placed directly on the crust, then they add the tomato sauce and any toppings. Some of cheese oozes out and becomes crispy along the edges of the pizza. Because this is considered the best part, everyone I talked with recommended getting Buddy's 4-piece square as opposed to an 8-square so as to maximize the amount of crispy edges. The 4-piece was plenty big for our family of three, so that worked out perfectly. The pizza was fantastic and worth all the hype.

Buddy's is apparently also known for their ginger ale float. It's made with Verners Ginger Soda, a Detroit original, developed just after the Civil War. We hadn't tried it before, but now we're converts. It was delicious.


Full and happy, it was time to head to our hotel. 


"Why," you may ask, "does heading to your Detroit hotel involve a bridge to Canada?" That is a good question and the answer is two-fold. First, look at this map:


Detroit, Michigan (USA) is separated from Windsor, Ontario (Canada) by the Detroit River. It's not that wide. You can cross it via the Ambassador Bridge or the Detroit-Windsor Tunnel. Technically, you could swim across it, but for a number of reasons that is a very bad idea. But my point is that Detroit and Windsor are so close together that they may as well be one big city, albeit one with an international border in the middle. When I started looking for hotels, I noticed that the hotels on the Detroit side were literally twice the price as comparable ones a mile or two away on the Canadian side. "Hmm...," I thought to myself. "Why would we pay twice the money to stay in Detroit? How much of a pain could crossing the border between Canada and the US be? We have passports, Steve has his Global Entry card, and we've successfully traveled to and from Canada before." I thought maybe there was a catch. Was I messing up the exchange rate and thus wrong about Canadian hotels being cheaper? No. Was there some sort of foreigner fee I'd have to pay in Canada? No. Were the room taxes significantly higher? No. In fact, parking at the Detroit hotels was upwards of $50/night, but free on the Canadian side. Maybe traffic on the bridge and tunnel are horrible and crossing is a gigantic pain? I did a ton of research and learned that the bridge crossing is much faster than the tunnel crossing, that it shouldn't add more than 5 minutes to our drive, and that literally thousands of people zip back and forth between Detroit and Windsor on a daily basis.

With my concerns out of the way, I thought about the positives. Saving a bunch of money is a big one. And we love Canada. Windsor is Canada's southernmost city, which makes it inherently awesome to visit. And there's no better view of the Detroit skyline than across the river in Windsor. Steve and I agreed - two nights at the inexpensive, but perfectly nice Hampton Inn in Windsor for the win!

That first night, we had an uneventful crossing into Canada. The border guard asked where we’d come from and where we were going, why Canada was involved, and if we were meeting any Canadians. He had us roll down all windows, checked our passports, asked about weapons and other contraband, and sent us on our way. Five minutes later and we got to our hotel. Easy.

We had a great night's sleep and woke up earlier than expected. We were headed to 
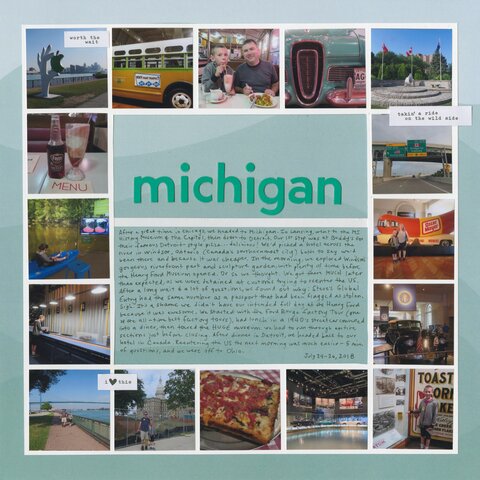
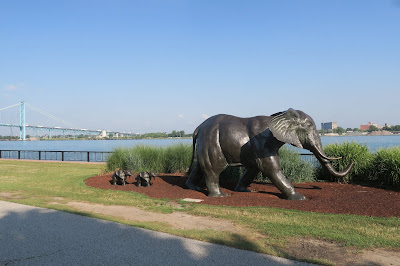
The Henry Ford, about 15 minutes away. It didn't open for well over an hour, so we decided to visit the riverfront in Windsor. Steve and I were thinking 5 or 10 minutes to take photos of the Detroit skyline and the Ambassador Bridge. But the park was fabulous and had a really cool linear sculpture garden, so we had to check it out. Each time I thought about turning around, there was another fabulous sculpture just a little bit farther...


We finally dragged ourselves back to the car after 45 minutes. Even though we would have happily spent much more time walking along the river, enjoying the beautiful weather, the statues, and Detroit's skyline, we needed to get going. We would need every minute to explore as much of The Henry Ford as we could. We were only 13 miles away, so we'd arrive right as it opened! Perfect! 

Well, not exactly. We crossed the bridge and waited in line 10 minutes for customs. That was annoying, since we’d breezed through Canadian customs the night before and we were eager to get going. But it turns out that the 10 minutes we spent in the car waiting in line was nothing compared to the 40+ minutes we spent in the US Detention Center. "Why," you may ask, "would the deRosiers, who are US citizens carrying US passports and Steve's Global Entry card, be detained trying to return to the US, where they had been not 12 hours earlier, after having done nothing in Canada but sleep and look at sculptures?" That is an excellent question, and one we waited 40 minutes to find out. 

But I'll start at the beginning (a very fine place to start). When we drove up to the customs agent, he asked us the usual questions ("Where have you been? Where are you going?"), scanned our passports and Steve's card, then did some typing. He asked if we’d ever reported our passports lost or stolen. “No,” we said. He asked again, and our answer didn't change. “The computer flagged you,” he said, as he slapped a large orange sticker on our windshield. We were asked to drive to an enclosed area, leave everything except wallets and passports in the car, open the hood, trunk and doors, and leave the keys, and then we were escorted into the detention center.

There were a good 40 people in there, the vast majority holding foreign passports. We had to sign in, then wait. I would have loved to have a book, or my phone, or even a scrap of paper and a pencil to pass the time, but none of those were allowed. It goes without saying that we couldn't take pictures. I don't know if we would have been allowed to use the restroom. Fortunately, that wasn't an issue. 

Finally, our names were called. After a lot more questions (including asking again if our passports were ever reported lost or stolen), quite a bit of computer typing, and rescans of our passports and Steve’s Global Entry card, we finally learned what the problem was. It turns out that Global Entry numbers are not linked to passport numbers, but instead have their own series of numbers. There is a glitch where when someone reports a passport number lost or stolen, it flags the Global Entry number as lost/stolen. So Steve was trying to enter the US with a valid passport and a ‘stolen’ Global Entry card. Once they figured that out, we were escorted out and back to the car. And then we were on our way. 

Needless to say, we got to The Henry Ford much later than intended. We decided to do the Ford Rouge Factory Tour first, which was a good decision. 


You have to take a bus to get there; no private cars are allowed. Our group arrived 30 minutes before the assembly line shut down for lunch, so we were able to see everything in action. The next group didn’t. It was one of the best factory tours I’ve ever seen, and I've seen a lot of factory tours. It was so interesting watching such a huge assembly line, starting with basically nothing at one end, then ending up with completed cars at the other. Each worker only has a minute to do their job on the piece in front of them before it moves and another piece comes. No photos allowed, unfortunately, though they rarely are during factory tours.

After touring the line, we watched two movies, one about the history of Ford and one about innovations and the future of Ford. Photos were allowed in the lobby area.


The bus brought us back to the main facility, then we entered the Museum of American Innovation. Our first stop was lunch. There are three restaurants on-site. All sounded tasty, but we wanted the most unique and memorable experience, so we chose Lamy's Diner, an authentic 1940’s streetcar diner moved into the museum. 


The food was delicious and came very quickly.


As you can see, we shared another float. Like the one at Buddy's, this was also made with a local beloved soda we'd never tried, Faygo Rock & Red. It was amazing. We want to try all the flavors now.


We were in and out of Lamy's quickly, which we appreciated. At this point, we had 3.5 hours before the museum closed and it was apparent we'd need every second of that to see everything. 


The Rosa Parks bus. So cool. 


The 1952 Weinermobile. I always wanted to see it when I was a kid, but never did. I finally saw one driving down the road a year or so ago. 


It's hard to pick a favorite exhibit, but I think mine was the presidential cars through the years. It was fascinating to see how the security of the vehicles changed over time. The first ones were just open carriages. Can you imagine that now?


Trevor liked all the hands-on exhibits best.


When you ride alone, you ride with Hitler. Yikes!


Our family had a fantastic time at The Henry Ford. We stayed until the very last minute and would have stayed longer if we could. All three of us were blown away by the museum. We wish we could have seen Greenfield Village, but that just gives us motivation to return there someday!


We headed to midtown Detroit for dinner at the highly-recommended Traffic Jam & Snug. They have their own bakery, brewery, and dairy onsite, as well as a rooftop garden. 


The food was fantastic. 


Of course, we had to try the desserts from their in-house bakery. Fabulous.


I'm happy to report that crossing into Canada that evening was easy, and that entering back into the US the following morning was equally uneventful. We were sad to leave Michigan so soon, but excited to head to our next state, Ohio. Tomorrow I'll tell you all about the fun we had in Toledo and why you should visit The Glass City.