Showing posts with label Tutorials. Show all posts

7/31/12

Fiskateers CHA CHAllenge CHAsers Wrap-up

Each January and July, the major players in the craft industry attend the Craft and Hobby Association (CHA) tradeshow. (I was lucky enough to attend in January 2011.) For those of us who don't go to CHA, the Fiskateers always throw a big online crop. This summer's event was called the CHA CHAllenge CHAsers, or CCC for short. We Fiskateers were challenged to complete 16 projects, in addition to participating in a variety of games. (One had us writing a poem about our favorite Fiskars supplies! Difficult!) Being a pathological overachiever, I always try to complete all the challenges.  

The "Recycle Me" challenge asked us to turn trash into treasure. That was an easy one for me, as I keep a pile of 'trash' items that have potential in the corner of my craftroom. All I had to do was choose one. I dug out an empty hot chocolate container, removed the label, and wrapped it with coordinating patterned papers. I added borders and my initial. I think it's pretty cute!

 
The "Go Ahead and Borrow an Idea" challenge sent us to our friends list. We had to go to the 7th friend on our list and scraplift something from their gallery. My 7th friend was the awesome Cheryl Waters, who just ended 6 years as Lead Fiskateer. Since I've seen all the things she's posted during the time I've been a Fiskateer, I went WAAAAY back in her gallery to before I joined. I chose napkin rings that she made using a border punch. Here is Cheryl's project (posted with permission, of course!)


This is what my version looked like on the table.

 
And here's how it looked on a napkin.  Cheryl's style is about as different from mine as you can get, so I really challenged myself to stay true to her inspiration piece.  I even folded my napkin the same way she did.  :)

 
The "Beautiful Backgrounds" challenge had us get out our mists and play. I spritzed orange and yellow on white cardstock, backed it with orange, then used that same orange to make candles. The flames are coated in Stickles. I liked the card up until the point when I added the sentiment.  I think it looks like a tiny cake with oversized candles, as opposed to candles with a sentiment over them. Oh well!

 
The "Think Outside the Box" challenge was a struggle for me. It shouldn't have been. The directions were simple- alter a box. I found a cool box in my 'trash' pile that I've been wanting to alter. 


I painted it white, then misted it. Ugh. I repainted it white. I stamped it. Yuck! I painted another coat of white, then I did a masking technique. Bleccch. I painted it white again and ended up covering it with a cool black & white patterned paper. Which is what I should have done from the start! I like how it turned out. This picture doesn't really do it justice.   


The "You Spin Me Round and Round" challenge asked us to make anything with circles. I started by punching out a circle and using temporary adhesive to stick it to my cardstock. Then I stamped blue circles on the card.  


I added purple and green circles until the card was covered.


I removed the purple circle, then laid the strip I'd punched it from over the top of the card.  


I added a rub-on to the empty spot, then backed the card with purple and attached it to the card base. I really like how this one turned out!

 
 Tomorrow I'll share more of the projects I made during the CCC event.

7/12/12

Toilet Paper Roll Owls

Ready for more toilet paper roll crafts?!  How about owls?


I made the parents and Trevor made the babies.

I got the idea from A Bird and a Bean.  Materials: toilet paper rolls (whole for adult owls and cut in half for baby owls), acrylic paint, googly eyes, cardstock, scissors and glue.  

 
Begin by folding down half of the top of the toilet paper roll.  Then fold down the other half to form the owl's head.  Next, paint your owls. 
 
While those are drying, cut wings and beaks from cardstock.  

 
Glue the eyes, beak and wings in place and your owls are done.  Trevor immediately named our owls and used them for a puppet show.  

Looking for other toilet paper crafts?  Here are some of the ones we've made in the past:


7/3/12

Mixed Media Lions

When Steve and I went on our anniversary trip to Napa, we made a brief stop at Whole Foods to browse.  At the front of the store, just inside the entrance, was a large display of children's artwork.  I love looking at artwork, especially children's artwork, and it is a rare treat to find it in a grocery store.  I was especially drawn to these mixed media lions, made by Ms. Hattyar's K-2nd graders.  


Trevor and I were inspired to make our own version.  We gathered watercolor paper, acrylic paint, a paintbrush, a pencil, a Sharpie, cardstock, scissors, and glue.

 
The first step was to fill one piece of watercolor paper with a thick layer of tans, yellows, oranges, and reds, blending and mixing the colors as we painted.
Mine:

 
Trevor's:

 
Next, we put our second pieces of watercolor paper onto clipboards and headed to the computer.  We brought up an article about lions, looked carefully at their facial features, and then sketched based on what we saw.  I hadn't realized that the 'whites' of their eyes are actually golden in color.  Nor had I realized that their ears are rounded like a teddy bear's.  

When we were happy with our sketches, we returned to the table and traced over our pencil lines with a Sharpie.  

 
Here's mine.  


And here's Trevor's.  

 
We watered down the acrylic paint to add color to our drawings- brown for the face and golden for the eyes.  

 
By then, our first painting had dried.  We cut the paper into narrow strips, then fanned them out and glued them to a piece of tan cardstock.  This was tedious.  

 
The final step was to cut out the lion's face and glue it on top of the mane.  Here's my lion:


And here's Trevor's.  


While we're both happy with how they turned out, we agree that they might look better with fuller manes.  The piece of watercolor paper we used wasn't big enough to make a fuller mane.  Next time!   

6/28/12

Flag Magazine Mosaics

One of my favorite things about being a fifth grade teacher was teaching United States history. The year started with a study of Native Americans, moved on to Explorers, then Colonial America. We'd study the American Revolution, the Industrial Revolution, and the Civil War and Reconstruction. From there, we'd leap ahead and learn about the present-day United States. I used a variety of games, simulations, and projects to immerse the kids in their learning. They loved it and I did too.

I'm a huge fan of integrated curricula, so I was always on the lookout for ways to incorporate history into math, or science into art, or math into reading, etc. Our study of the 50 States usually fell right around the same time as the Measurement unit in math, which gave me the perfect excuse to mix history, math and art into this cool project.


All you need is a piece of white paper (watercolor weight is best, but cardstock or construction paper will work), a ruler, a pencil, some white glue, and an old magazine or catalog. Start by using the ruler to draw a horizontal line, 9" long, at the bottom of the paper. Next, add vertical lines, 6.5" long, at a right angle to the original line. Connect those two lines with a 9" horizontal line.   

Next, mark every half-inch along the vertical lines. Holding the ruler horizontally touching the top two dots, make a mark at the 4" spot. Draw a line from that spot across to the right, creating the top stripe. Repeat this step for the next 6 stripes. Draw a vertical line to make the edge of the blue field. Return the ruler to the horizontal position and continue drawing the stripes. Here are the measurements:


And here is what the pencil lines will look like. Notice that the flag isn't centered. This doesn't matter, as you'll be cutting it out.  
Go through the magazine looking for large area of red, white and blue. Working with one color at a time, tear small pieces and glue them to the appropriate area of the flag. The pieces should overlap and cover the area completely. It is OK if they go over the perimeter lines of the flag, as this area gets cut off.


Excluding the measurement part, it takes about an hour to complete this project. Here's Trevor finishing up the last stripe. (He's wearing a nametag because he'd just gotten home from VBS. We don't normally wear nametags around the house, being that there's just the three of us and we know each other pretty well.)


And here he is with the mosaic part completed.


When the whole thing is filled in, use a paper cutter to trim the excess paper. You can hang your art as is, or extend its life by sealing it in a laminator, using contact paper, or brushing on a coat of Mod Podge. Enjoy!

6/15/12

Marbled Paper Thank You Notes

I am a firm believer in thank-you notes.  If someone gives you a nice gift, the least you can do is write a note telling them that you appreciate their kindness.  (This is especially important if the gift came by mail.  Otherwise, how does the giver even know that it arrived?)  For the record, I don't think there's anything wrong with an emailed thank-you. And a thank-you phone call is obviously great too.  But in this household, we usually send thank-you notes.  And we make them ourselves.  

Here are the thank-you notes Trevor sent to the family and friends who helped him celebrate his birthday.


If you've never tried paper marbling, you should!  This method is so easy and fun.  It features one of my all-time favorite crafting materials, Sta-Flo liquid starch.  (If you're not familiar with it, I blogged about it when Trevor and I made tissue paper carrots last year.)

Materials: Sta-Flo liquid starch, acrylic paints, white cardstock, wooden skewer or toothpick, and two pans, each larger than the size of your paper.

 
Begin by filling one pan with water.  Pour liquid starch in the second pan.  It should be about an inch deep.  Squirt several drops of paint onto the surface of the starch.  Ideally, the paint should rest on the surface.  If it sinks (like the dark green did in this picture), dilute the paint slightly with water before adding more drops.  

 
Draw the skewer through the paint to create a marbeled look.  Don't stir, as this will muddle the colors.  

 
When you are satisfied with how it looks, it's time to apply it to the paper.  Hold the paper with one hand on each side and bend it so that the middle touches the starch first.  Then lower the sides gently so that the paper floats on the surface.

 
Gently remove the paper and move it to the pan of water.  Swirl the water around VERY gently to wash off the starch.  Don't touch the paint or it will smear.    

 
Carefully remove the paper from the water and lay it onto a flat surface to dry.  (We put ours on the warm pavement.)  If your marbled paper curls once it's dry, either press it under a heavy book or iron it on a very low setting.  


After our marbled papers were dry, Trevor started with the writing portion of the thank-you notes.  He was fortunate to have many friends and family help him celebrate his birthday, which meant lots of notes to write - a difficult task for someone who just turned six.


I made the task a little bit easier by introducing Trevor to a cool tool, the Fiskars Stamp Press.  We put the words "Thanks so much for the" on the Stamp Press and he stamped them onto each card.


Then all he had to do was write the person's name and what gift they gave him.  At the end, he stamped "Love" and signed his name.


Stamping six little words saved him a lot of writing over the course of many cards.  And he enjoyed the stamping so much he was happy to finish a card and move on to the next!  Can't beat that!

6/11/12

Lego Cake

When we were planning Trevor's Lego party, he announced he wanted a cake that looked like a blue Lego with six bumps because he was turning six.

As I've stated many times, I am not an especially competent cake decorator and I don't really know what I'm doing. Every year, Trevor dreams up a fabulous cake to match his party theme and I do my best to make it happen. Sometimes, the cake turns out pretty awesome (if I do say so myself), like last year's giraffe cake. Other years, meh. Fortunately, Trevor has always been thrilled with what I've made. (Here are his first four birthday cakes, if you are interested.)

I spent a long time thinking about how to make an attractive Lego cake. I did some Googling and found some amazing cakes from bakers far more talented than myself. I also found quite a few that made me cringe. My goal was to land somewhere in the middle.

The awesome cakes all seemed to have one thing in common: fondant. I don't have the skills, tools, or patience for fondant (plus I hate the taste), so I knew I wanted to go fondant-free. But getting buttercream perfectly smooth is beyond my skills. So I got it in my head that an ice cream cake was the way to go.
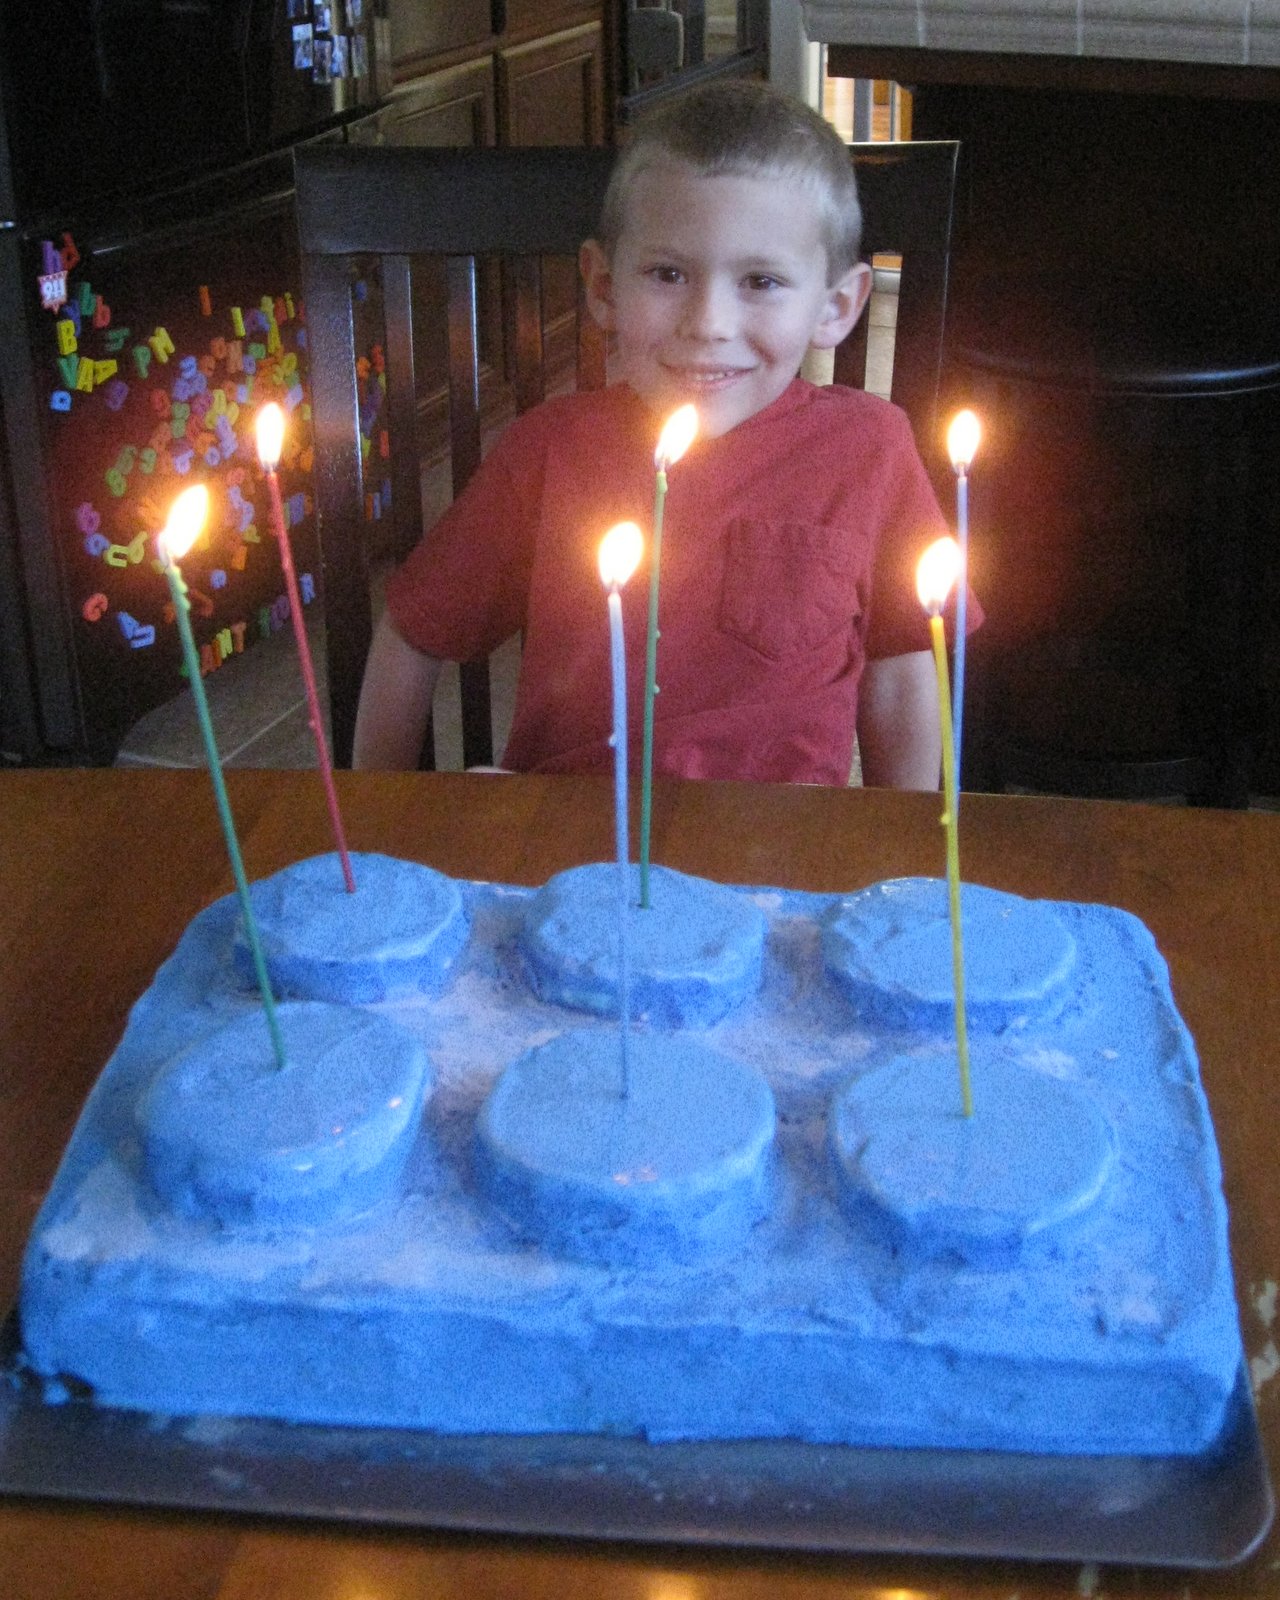
Here's the Birthday Boy with his Lego cake.


And here's how we made it. Two days before the party, we made chocolate cake and divided the batter between two rectangular pans. This gave us two thin cakes, which was much easier than trying to cut one into even layers! (I set the timer for half the time and watched carefully for doneness.) When the cakes had cooled, we used a biscuit cutter to cut 6 circles from one of the cakes. 


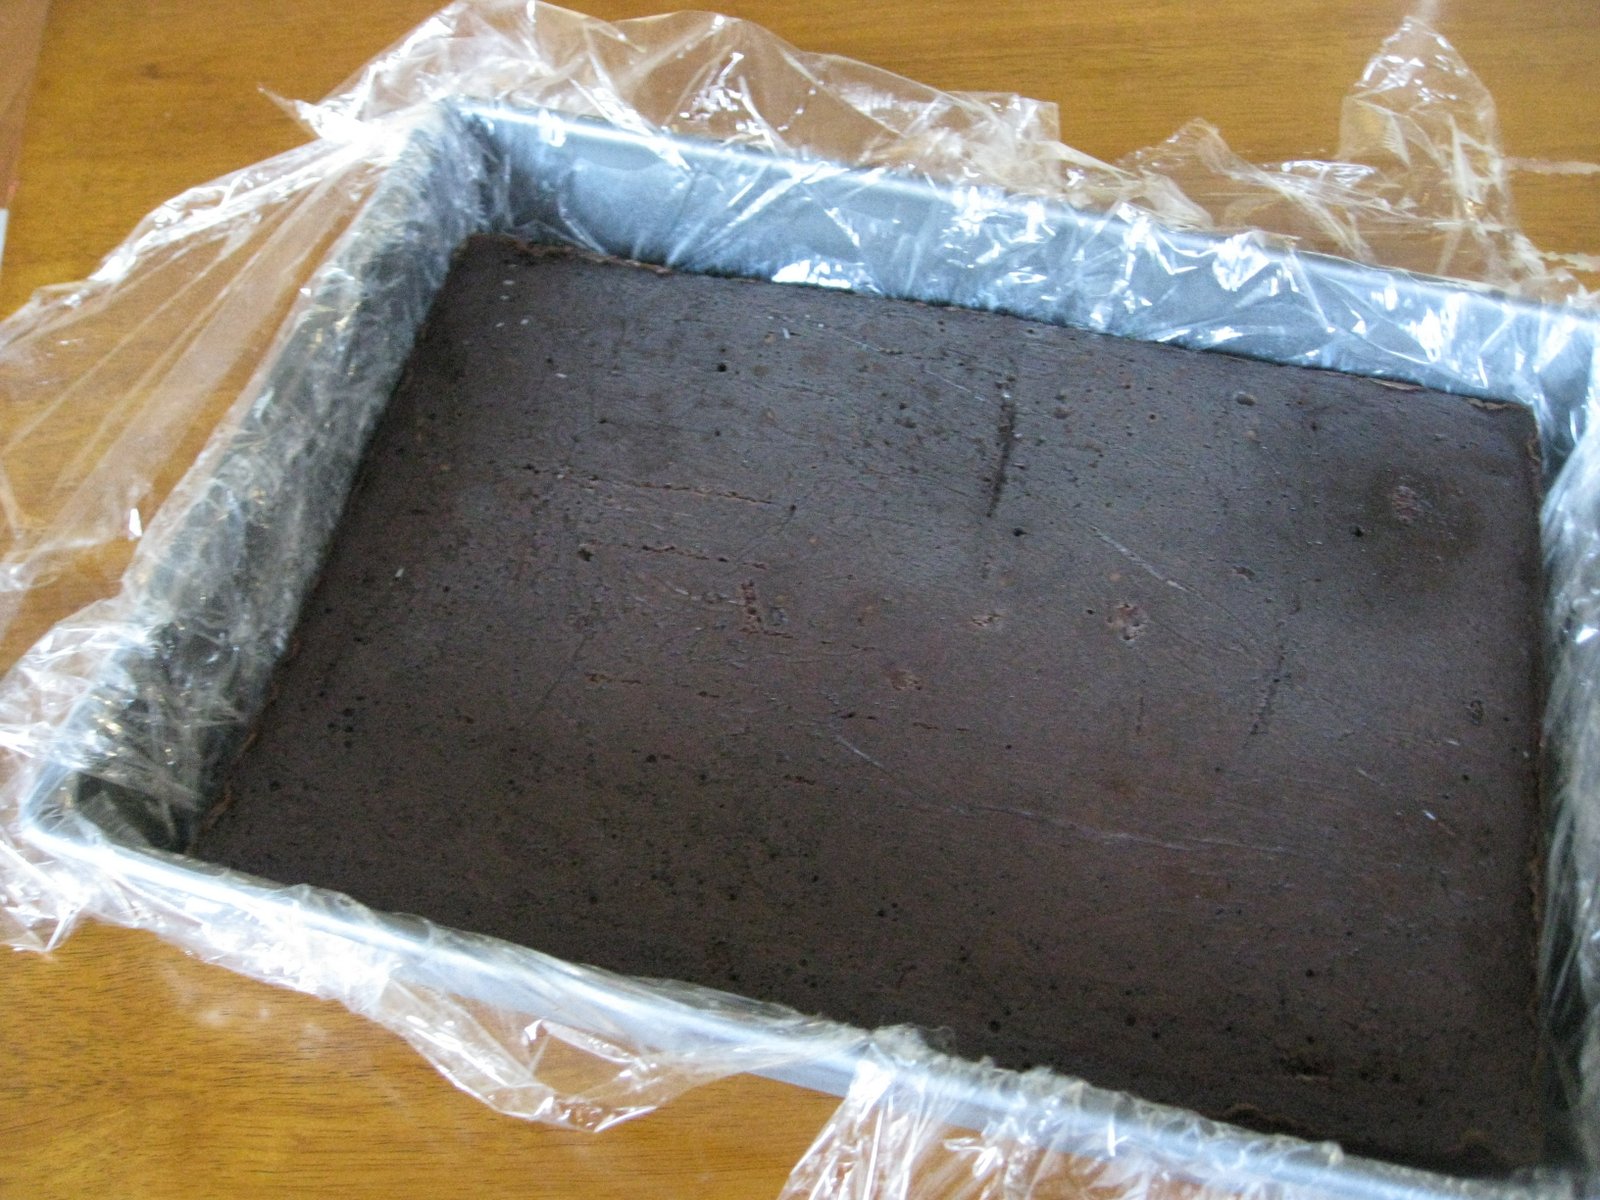
Then we carefully wrapped the uncut cake and the six circles in plastic wrap and put them in the freezer.

 
The next morning, we unwrapped the main cake, making sure to drape the plastic wrap over the sides of the pan.

 
We spread softened mint chip ice cream in an even layer over the cake. Then we stuck it back in the freezer.

 
When the mint chip layer was solid, we added a second layer of ice cream (mint chocolate cookie) on top. We covered it with plastic wrap and put it back in the freezer.

 
When the ice cream was solid, we removed it from the pan and put it on a flat cookie sheet. We unwrapped the cake circles and used chocolate frosting to "glue" them to the cake. Back to the freezer.  

 
Then we softened vanilla ice cream and added enough food color to make Lego blue.  


We gave the cake a quick crumb coat.

After that hardened, I did a final coat of blue ice cream over the whole thing. It was EXTREMELY frustrating because I had to keep returning the cake to the freezer every five minutes. Every time I got one area perfect, another area would start to melt and droop. Aargh! If I had access to a walk-in refrigerator or freezer, this cake would have been so awesome. But I don't, so eventually I decided it was good enough. Trevor thought it was "GREAT!" so I'm calling this cake a success.  
 
It looked pretty neat when we sliced it.  

 
And it was delicious!


We kept things far simpler for the party with his friends. I'd bought a Lego ice cube tray when we were at Legoland last year and it worked perfectly to make the chocolates on top of our cupcakes.  


We had quite a surprise when Trevor bit into his though... his tooth came out with it!