Showing posts with label Home Decor. Show all posts

4/26/13

April Flamingo Four

It's time for another Flamingo Four!  This month, three other designers and I worked with these products:


                   1) Pink Paislee 'Parisian Anthology' Corrugated Alphabet
                   2) Prima Raja Sequin
                   3) Maya Road Kraft Mini Calendar
                   4) Graphic 45 Metal Clothespin

This is my 7th time doing the Flamingo Four and I am definitely used to working with challenging items.  But my fellow designers and I agree that the metal clothespin in this month's Flamingo Four has been the most difficult item to date by far.  It is extremely heavy... much too heavy for most of the common uses of clothespins.  The fact that it has a word printed on it means you pretty much have to use it horizontally.  Quite a challenge!

I experimented with the clothespin.  If I put paper over it, could I do a rubbing and get a decent print of the engraved word?  Nope.  If I inked the clothespin and treated it like a stamp, would the word show?  Nope.  What would happen if I took the clothespin apart? Hmmm....

While I mulled over possibilities with the clothespin, I got right to work with the rest of the supplies.  I decided that I was going to use the packaging from the alphabet as the base of my project.  The clear window would be perfect for a picture, so I printed out one of my new niece, Allison and inserted it behind the window.  The box would be ideal for holding those little momentos that don't fit in a photo album, like her hospital bracelet.  

Next, I chose one of the round calendar shapes, then punched a circle from black cardstock.  I selected an A from the corrugated letters, covered it with lavender ink, and then brushed gold ink over the top.  I pulled out two of the sequins.

When I layered them all together, it looked like this.  

 
Here's the finished project:

 
Did you notice the clothespin?  I ended up dividing the two halves and gluing them toward the bottom of the box.  With the weight cut in half, the pieces weren't too heavy for glue to hold.  


To see what the other three designers made with these four items (and how they dealt with that crazy clothespin), head over to Flamingo Scraps.  It's always so fun to see how four people can use the same products with such different results!

3/22/13

March Flamingo Four

It's time for another Flamingo Four!  This month, three other designers and I worked with these products:


          1)  4x4 canvas
          2)  6x6 paper pad - Pink Paislee "Indigo Bleu"
          3)  Wendy Vecchi Art Parts - Pocket Watch
          4)  Maya Road Acrylic People keychain

As usual, there were some tricky components in this set of items!  The 4x4 canvas makes a natural base, but its small size means that it would be very difficult to fit the other items onto it.  But a solution came to me quickly this time.  I love when that happens!  

I cut a yellow piece of the paper to just under 4x4 then dug through my stamps.  I found a Fiskars "enjoy..." stamp and a Scenic Route "TODAY" and stamped them together on the upper left hand corner of the paper.  I used matte Mod Podge to attach the paper to the canvas. While I was waiting for that to dry, I painted the pocket watch black.

 
I took apart the keychain and selected the woman.  I peeled the protective film off the acrylic, then put the acrylic back on the chain for a future use.  I put spray adhesive all over the protective film and pressed it to a sheet of type paper.  Then I fussy-cut out the shape.  I pulled out two different prints - a blue for her dress and yellow floral for her hair.  I cut the hair by using a scallop circle punch, then shifting the shape and punching the other side.

 
I layered these together and let them dry.  Then I used the Mod Podge to add a few more shapes to the canvas.  When that was dry, I turned the canvas over and attached the pocket watch.

 
Here's my finished project.  Enjoy today - an important reminder for us all.  

 
To see what the other three designers made, head over to Flamingo Scraps.  It's always so fun to see how four people can use four products with such different results!

2/22/13

February Flamingo Four

It's time for another Flamingo Four!  This month, three other designers and I worked with these products:


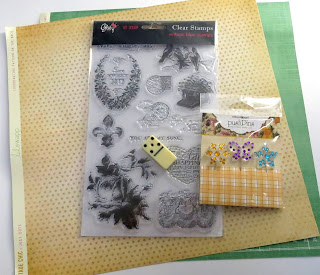
           1.  Heidi Swapp patterned paper - "Vintage Chic"
           2.  Webster's Pages Push Pins
           3.  Glitz Design stamps - "Vintage Blue"
           4.  a domino

As usual, I was stumped when I first saw the 4 items.  The paper would be easy, as would the stamps.  The domino would be tougher, as it violates my "no lumps on layouts" policy.  The stick pins were lumpy too.  So a layout was out.  
I wasn't especially inspired by the 5 of the domino (we're a family of 3, Trevor is 6, married 8 years... no 5's come to mind), but the smooth and empty back seemed like the perfect place for a sentiment.  Would a rub-on stick to a domino?  I was nervous to try, as I only had the one domino.  And I hadn't decided what my final project would be, so I couldn't select a sentiment yet.  
Maybe the stick pin would provide inspiration.  As I was playing around with it, I noticed that the decorative head nestled nicely with the domino.  Hmm... could I remove the flower part from the pin part?  Yes!  Piece of cake.  At this point, I knew exactly what I was going to do.
Back in my ballroom dance days (which I will blog about eventually), I kept framed pictures of me with all my partners in all our various costumes on the wall of my office.  They were all in gold frames.  When I married Steve and we moved into this house, I put my dance pics into an album, which resulted in dozens of empty gold frames.  Over the years, I've found uses for most of them, but there are still a few empties.  I used one of the smaller frames to make this: 
(Glass + shiny metal = nearly impossible to photograph well.) 
I started by choosing a rub-on for the domino.  It went on perfectly!  Yea!  I used the dotted paper as a background, added a photo of Steve and me to the left of center, then created a cluster of papers and the stamped image on the right hand side.  Finally, I nested the flower to the domino and glued the domino to the outside of the frame.  Here's a closer look:

 
To see what the other three designers made, head over to Flamingo Scraps.  It's always so fun to see how four people can use four products in such different ways.

9/21/12

Disney Name Wall Hanging

Anyone remember the Disney name art I made?  I used Picasa to create collages from photos I took at Disneyland and California Adventure, printed them out, mounted them on cardstock, added grommets, and gave everyone in my family.  (You can see the completed projects here.)  Everyone brought their name art to Disneyland and had a great time trying to find the letters in their names.  I was happy to see that the name art held up really well.  Since then, I've made Disney name art for aunts, uncles, cousins and family friends.  It's such a fun and unique gift for any Disney fan.  

Recently, I used my name art for another purpose.  This is now hanging in our dining room:


What do you think?!

7/31/12

Fiskateers CHA CHAllenge CHAsers Wrap-up

Each January and July, the major players in the craft industry attend the Craft and Hobby Association (CHA) tradeshow. (I was lucky enough to attend in January 2011.) For those of us who don't go to CHA, the Fiskateers always throw a big online crop. This summer's event was called the CHA CHAllenge CHAsers, or CCC for short. We Fiskateers were challenged to complete 16 projects, in addition to participating in a variety of games. (One had us writing a poem about our favorite Fiskars supplies! Difficult!) Being a pathological overachiever, I always try to complete all the challenges.  

The "Recycle Me" challenge asked us to turn trash into treasure. That was an easy one for me, as I keep a pile of 'trash' items that have potential in the corner of my craftroom. All I had to do was choose one. I dug out an empty hot chocolate container, removed the label, and wrapped it with coordinating patterned papers. I added borders and my initial. I think it's pretty cute!

 
The "Go Ahead and Borrow an Idea" challenge sent us to our friends list. We had to go to the 7th friend on our list and scraplift something from their gallery. My 7th friend was the awesome Cheryl Waters, who just ended 6 years as Lead Fiskateer. Since I've seen all the things she's posted during the time I've been a Fiskateer, I went WAAAAY back in her gallery to before I joined. I chose napkin rings that she made using a border punch. Here is Cheryl's project (posted with permission, of course!)


This is what my version looked like on the table.

 
And here's how it looked on a napkin.  Cheryl's style is about as different from mine as you can get, so I really challenged myself to stay true to her inspiration piece.  I even folded my napkin the same way she did.  :)

 
The "Beautiful Backgrounds" challenge had us get out our mists and play. I spritzed orange and yellow on white cardstock, backed it with orange, then used that same orange to make candles. The flames are coated in Stickles. I liked the card up until the point when I added the sentiment.  I think it looks like a tiny cake with oversized candles, as opposed to candles with a sentiment over them. Oh well!

 
The "Think Outside the Box" challenge was a struggle for me. It shouldn't have been. The directions were simple- alter a box. I found a cool box in my 'trash' pile that I've been wanting to alter. 


I painted it white, then misted it. Ugh. I repainted it white. I stamped it. Yuck! I painted another coat of white, then I did a masking technique. Bleccch. I painted it white again and ended up covering it with a cool black & white patterned paper. Which is what I should have done from the start! I like how it turned out. This picture doesn't really do it justice.   


The "You Spin Me Round and Round" challenge asked us to make anything with circles. I started by punching out a circle and using temporary adhesive to stick it to my cardstock. Then I stamped blue circles on the card.  


I added purple and green circles until the card was covered.


I removed the purple circle, then laid the strip I'd punched it from over the top of the card.  


I added a rub-on to the empty spot, then backed the card with purple and attached it to the card base. I really like how this one turned out!

 
 Tomorrow I'll share more of the projects I made during the CCC event.

6/20/12

Glass Marble Magnets

So, I had this idea to make glass marble magnets.  (Click here to see a zillion examples: glass marble magnets.)  I've seen at least a hundred tutorials for them and I see the finished marbles everywhere.  However, being me, I decided to ignore the way every single person who made a tutorial said to make them.  

I decided to make mine with Stickles instead of using a paper image.  I've never seen anyone make them that way.

 
Trevor and I put a big glob of Stickles on the back of a glass marble, then gently set a magnet into it.  We repeated this with a bunch of other colors, then let them dry thoroughly.

 
My concern had been that the Stickles wouldn't be strong enough to hold the magnet in place. I did not anticipate this problem: 

 
For some reason, the Stickles seeped out from under the magnet during the drying process. Darn.  Time for a different technique.  This time, we put the Stickles on the marbles and let that dry overnight.  The next day, we added a second layer of Stickles and gently placed the magnet on top.  After another night of drying, we checked on them.   
 
Definitely better, but you can still see the magnets through the Stickles if you look hard enough.  Plan C is to apply the Stickles and back it with a piece of matching cardstock (in other words, use the paper technique that everyone else has used in their tutorials, but try Stickles first).  I'll let you know how it turns out! 

2/3/12

I Might Not Have Been Trendy Before...

We've already established that, in the past, I have not been the trendiest scrapper. I have been woefully neglectful in using washi tape and baker's twine. My projects are devoid of happy woodland creatures and there's nary a mustache in sight. I've ignored doilies and shunned paint chips. I never put a bird on it. Until now!

I present to you... the trendiest project I've ever made! 


So what do you think? Trendy, huh?? (Nodding enthusiastically.) Here's a closer look.


My project is so chock-full of trendy awesomeness that I'm entering it in a challenge. Ah, but which one? After much searching, I found the perfect one at Crafterminds.

Just in case you didn't notice exactly how trendy I am now, I've provided this:


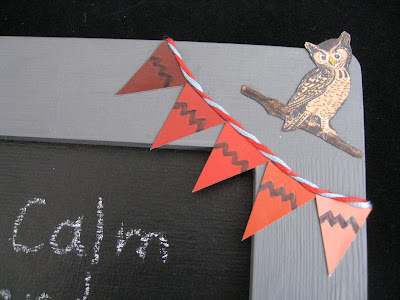
For the record, there are 20 trends on my fabulously fantastic project, including: turning a picture frame into a jewelry hanger (1), red/grey/blue (2), "Keep Calm and Carry On" (3) on chalkboard paint (4), pennant banner of paint chips with chevron patterns (5, 6, 7) strung with baker's twine (8), owl (9), washi tape (10), a doily (11), geometric and ruffled ribbon (12, 13), a book page (14), a canvas ombre bird (15, 16, 17), burlap (18), and my personal favorite- a happy woodland creature with a mustache (19, 20). Nailed it!

12/12/11

My Stackable Snowman

About 15 years ago, I noticed nesting paper mache boxes showing up in craft stores.  I bought out all they had and made snowmen for practically everyone I knew.  I kept one for myself:


Even all these years later, it is still one of my all-time favorite Christmas decorations.  I smile every time I see it on our mantel.  And it is even more wonderful when I see them on display at the homes of my friends and family. 

I've made a few more over the years, for my inlaws and close friends I've met recently.  I can't tell you how many people have been shocked to learn my stacking snowmen are handmade.  They're really very easy to make.

You need: three round paper mache boxes with lids (different sizes so that they nest), black and white paint, orange Model Magic or Sculpey, ribbon, holly berries and leaves, buttons, and a q-tip.


Step 1: Form a nose from the Model Magic or Sculpey, following manufacturer's instructions about drying time.  Make sure the nose is small enough that when it is attached to the medium box, that box will still nest in the largest box.  

Step 2: Paint the largest box and its lid white.  Paint the medium sized box white.  Set aside to dry.  Paint the lid of the medium box black.  Paint the smallest box and its lid black.  Set aside to dry.

Step 3: Wrap a piece of ribbon around the base of the smallest box and secure.  Decorate with holly.  This completes the hat. 

Step 4: Dip the q-tip in black paint to make the eyes and smile of the snowman on the medium sized box.  Glue the nose in place.  This completes the face.

Step 5: Wrap a ribbon around the rim of the largest lid and secure.  Add a bow.  Glue buttons to the front of the largest box.  This completes the body.

Here is a view of how it looks for storage.  As you can see, there is a small amount of clearance between the holly and the nose and the next largest box.

To make this an even more special gift, consider adding a small gift inside the hat.  Your recipient will love it!

6/23/11

Photographing 3-D Projects

As I mentioned yesterday, I am attempting to become a better photographer.  Slowly but surely I am making progress.  Something that has made a huge difference:


This is my light tent by CowboyStudio.  I love it.  I got it as a Christmas present (thanks Jonna!) and have used it almost daily ever since.  It folds up for easy storage, but since I use it so often I don't put it away.  It's huge and sometimes in the way, but it is so convenient to be able to throw something in the light tent and take a picture of it.  Shadows are almost non-existent, glare is significantly reduced, and the soft light looks great. 

When I first started taking pictures of the projects I make, I would just put them on the carpet, wait for the afternoon light, stand above them, and snap.  I cringe a bit when I see these photos- they certainly don't enhance my projects.  Here's one of the better ones:

Altered clips, before and after. 

It wasn't long before I realized that beige carpet is not the best background for my artwork.  I graduated to using a piece of white posterboard.  I would prop the posterboard up against a wall so it curved, wait for acceptable light, then set the object on it and snap away.  Much better.

Thank-you gifts for MOMS Club volunteers.

When I couldn't get decent light indoors, I'd head outdoors.  Sometimes I took my posterboard with me, while other times I just put my project in the grass.

The bag from my DIY Scavenger Hunt.

Both indoors and out, I really struggled with glare and shadows.  If I didn't take the picture during the right time, it looked terrible.  Unfortunately, it isn't always convenient to take pictures during one short time period each day.  Enter the light tent.  Now I can take pictures of my projects from dawn until dusk.

The photo tent comes with four backgrounds.  95% of the time I use the basic white:


A thank you card and gift bag for Trevor's preschool teacher.

The remaining 5% of the time I use black:


The other two backgrounds are blue and red, but I haven't used them at all. 

I still scan all my flat projects, but the light tent has revolutionized the way I photograph anything dimensional.  It's so easy and the results speak for themselves. 

6/15/11

June Flamingo Four

Each month, Flamingo Scraps presents the "Flamingo Four"- a challenge where four designers use four identical sets of products to create something.  It's always fascinating to see how incredibly different the end results are!

I first participated back in September when I was on the Flamingo Scraps Guest Design Team.  Back then, they featured five designers and five products.  I really struggled to use products that were outside my comfort zone.  You can see what each of us made here:  September Flamingo Five

I was really anxious for my Flamingo Four package to show up.  Would I like all four items?  Would they be as challenging as last time?  Would I have an idea right away?  I opened the package and found this:


I really liked the black glittery ribbon and the Prima embellishments.  The patterned papers were OK, but more vintage and busy than I prefer.  I took a deep breath and turned the papers over, hoping as hard as I could that they were two-sided.  

YES!  Not only were they two-sided, but I absolutely LOVED the reverse of the papers.  Now these are totally me!


I had so many ideas!  I decided to alter an unfinished wooden box that I had laying around, then create a coordinating card.  I started by painting the box black (actually "Licorice").  I painted right over the gold hinges.  Then I added a coat of Folk Art's Black Extreme Glitter.  Here's what the box looked like when I was done painting:


I cut the two Prima papers to fit in the center area and attached the ribbon across the top.  I used about a dozen coats of Mod Podge to seal it.  Finally, I used one of the Prima embellishments on top.  I whipped up a coordinating card.


Here's a closer look at the box:


I'm really happy with how it turned out!  I still have quite a bit of the paper, ribbon and embellishments left, so I'll definitely whip up a bunch more cards- stay tuned for those!

1/11/11

Heather's Housewarming Gift

I wrote this post as a member of the Guest Design Team at Flamingo Scraps and wanted to share it here.

We are not military, but one of the sad realities of living in a military community is that friends move away, often with little notice. One of my close friends was recently transferred across the country to the Florida panhandle. They'd always rented in the past, but this time they bought their first home. I decided to make them a housewarming gift.


I knew I wanted to make some sort of wall hanging that could hang either indoors or outdoors. I found a ceramic heart from Provo Craft and painted it a creamy neutral. I cut their last name (Brown) from some BasicGrey cardstock (brown, of course!) and adhered the letters using Mod Podge. Then I gathered the following supplies:

  
I used the Key Lime Pie Glimmer Mist to dye the cord a nice leaf green color, then I glued the cord around the perimeter of the heart. I covered the whole thing with about 10 coats of Outdoor Mod Podge, waiting at least 15 minutes between coats. I'd never used the Outdoor variety before, but I'd heard that it dries tacky, even with the proper drying time. This was indeed the case, so I gave the heart a quick spray of Krylon to seal it. Perfect!

I really wanted to use a Prima flower on this project, but I wasn't sure how to weather-proof it in case Heather decided to hang this outdoors. Time to experiment! I got a test flower and brushed on a coat of the Mod Podge. Quite a bit of yellow came off on my brush. I tried dabbing (rather than brushing) and it worked much better. I was able to apply a thin coat that sealed the color in. I applied multiple coats to both front and back. The Mod Podge behaves differently on paper than on ceramic, as the flower wasn't tacky to the touch when I finished. It did have a very interesting texture- it almost felt like a rubbery plastic! I brushed the yellow ink pad over a pearl and added it to the center of the flower, then attached the whole thing to the heart. It looked pretty cute, but was definitely missing something. I found some leaves, but the color was wrong. The color was wrong... would the Glimmer Mist solve the problem? Yes! They ended up exactly as I'd hoped. It's so satisfying when that happens! I used the same technique of dabbing on a primer coat of Mod Podge front and back, then added a bunch more finishing coats. For good measure, I sprayed the whole thing with two more coats of Krylon.


Here's the finished wall hanging:


Miss you, Heather!