Showing posts with label pineapple. Show all posts

8/18/26

Summer Creative Retreat: Inspiration Treasure Hunt

Last year, I took six classes during The Pigeon Letters Summer Creative Retreat. (This one was my favorite. Or maybe this one.) Summer Creative Retreat is billed as the world's biggest free online art event, with 60 classes and over 20, 000 people attending. I really enjoyed it last year and was eager to participate again. Unfortunately, I didn't get home from Idaho until this year's Summer Creative Retreat was half over, and then I had to do all those annoying things like laundry, groceries, bills, and catching up with work that come after a trip. I did manage to watch four of the classes on replay before the event ended and I crafted along with two of them. 

The first was Inspiration Treasure Hunt: A Playful Process for Creating Art, by Mel Rye


Mel began by asking us to go on an Inspiration Treasure Hunt to find random objects on our workspace. We looked carefully at the items we found to discover shapes and textures. For example, a simple pencil has a round eraser that might inspire dots, a metal ferrule with vertical lines, and a wavy pattern where the pencil was sharpened. 

We used the shapes we found to doodle the shapes they inspired onto plain paper. It was fascinating how many different patterns I was able to make using found items sitting on my desk. I did most of my doodles with a ballpoint pen, then switched to a Sharpie in order to get darker shapes for contrast. After creating a bunch of patterns, we cut those apart and arranged them on a colorful background. As you can see in the graphic above, Mel made abstract designs. I made fruit. The watermelon, pear, and apple each use three different patterns and the pineapple has two, so there are 11 different doodles represented below. 


This was a really fun activity and a great way to stretch creatively. It's something you could do anywhere, since it uses so few materials. Such a fun class!

2/16/23

Finger Painting Pineapple

Until yesterday, I had never done an entire painting using just my fingers. Well, maybe I did when I was a toddler. I don't remember. I've done a lot of fingerprint and handprint art over the years, but with those I used a brush at some point, decorated the painted part with pens, or otherwise did something other than just painting with my fingers.  

I challenged myself to paint a pineapple in my sketchbook (next to the gouache strawberries) using nothing but my fingers. Actually, I put a few more restrictions on myself. Because I would be taking process photos, I needed one hand to stay paint-free so I didn't mess up my camera. I also wanted to finish the painting without interruption, which meant I couldn't get up to wash my hands, nor could I set the project aside to let a layer dry. I intentionally didn't put anything nearby on which I could wipe my hands. I did allow myself to do a rough pencil sketch before I started. 

What you see here is a pineapple painted wet-on-wet with the four fingers of my left hand, which I didn't clean or wipe even when changing colors. It was a challenge, which was the whole point. 


Finger Painting Pineapple


Materials: 

  • sketchbook
  • acrylic paint (green, yellow, brown, and turquoise)

Steps: 


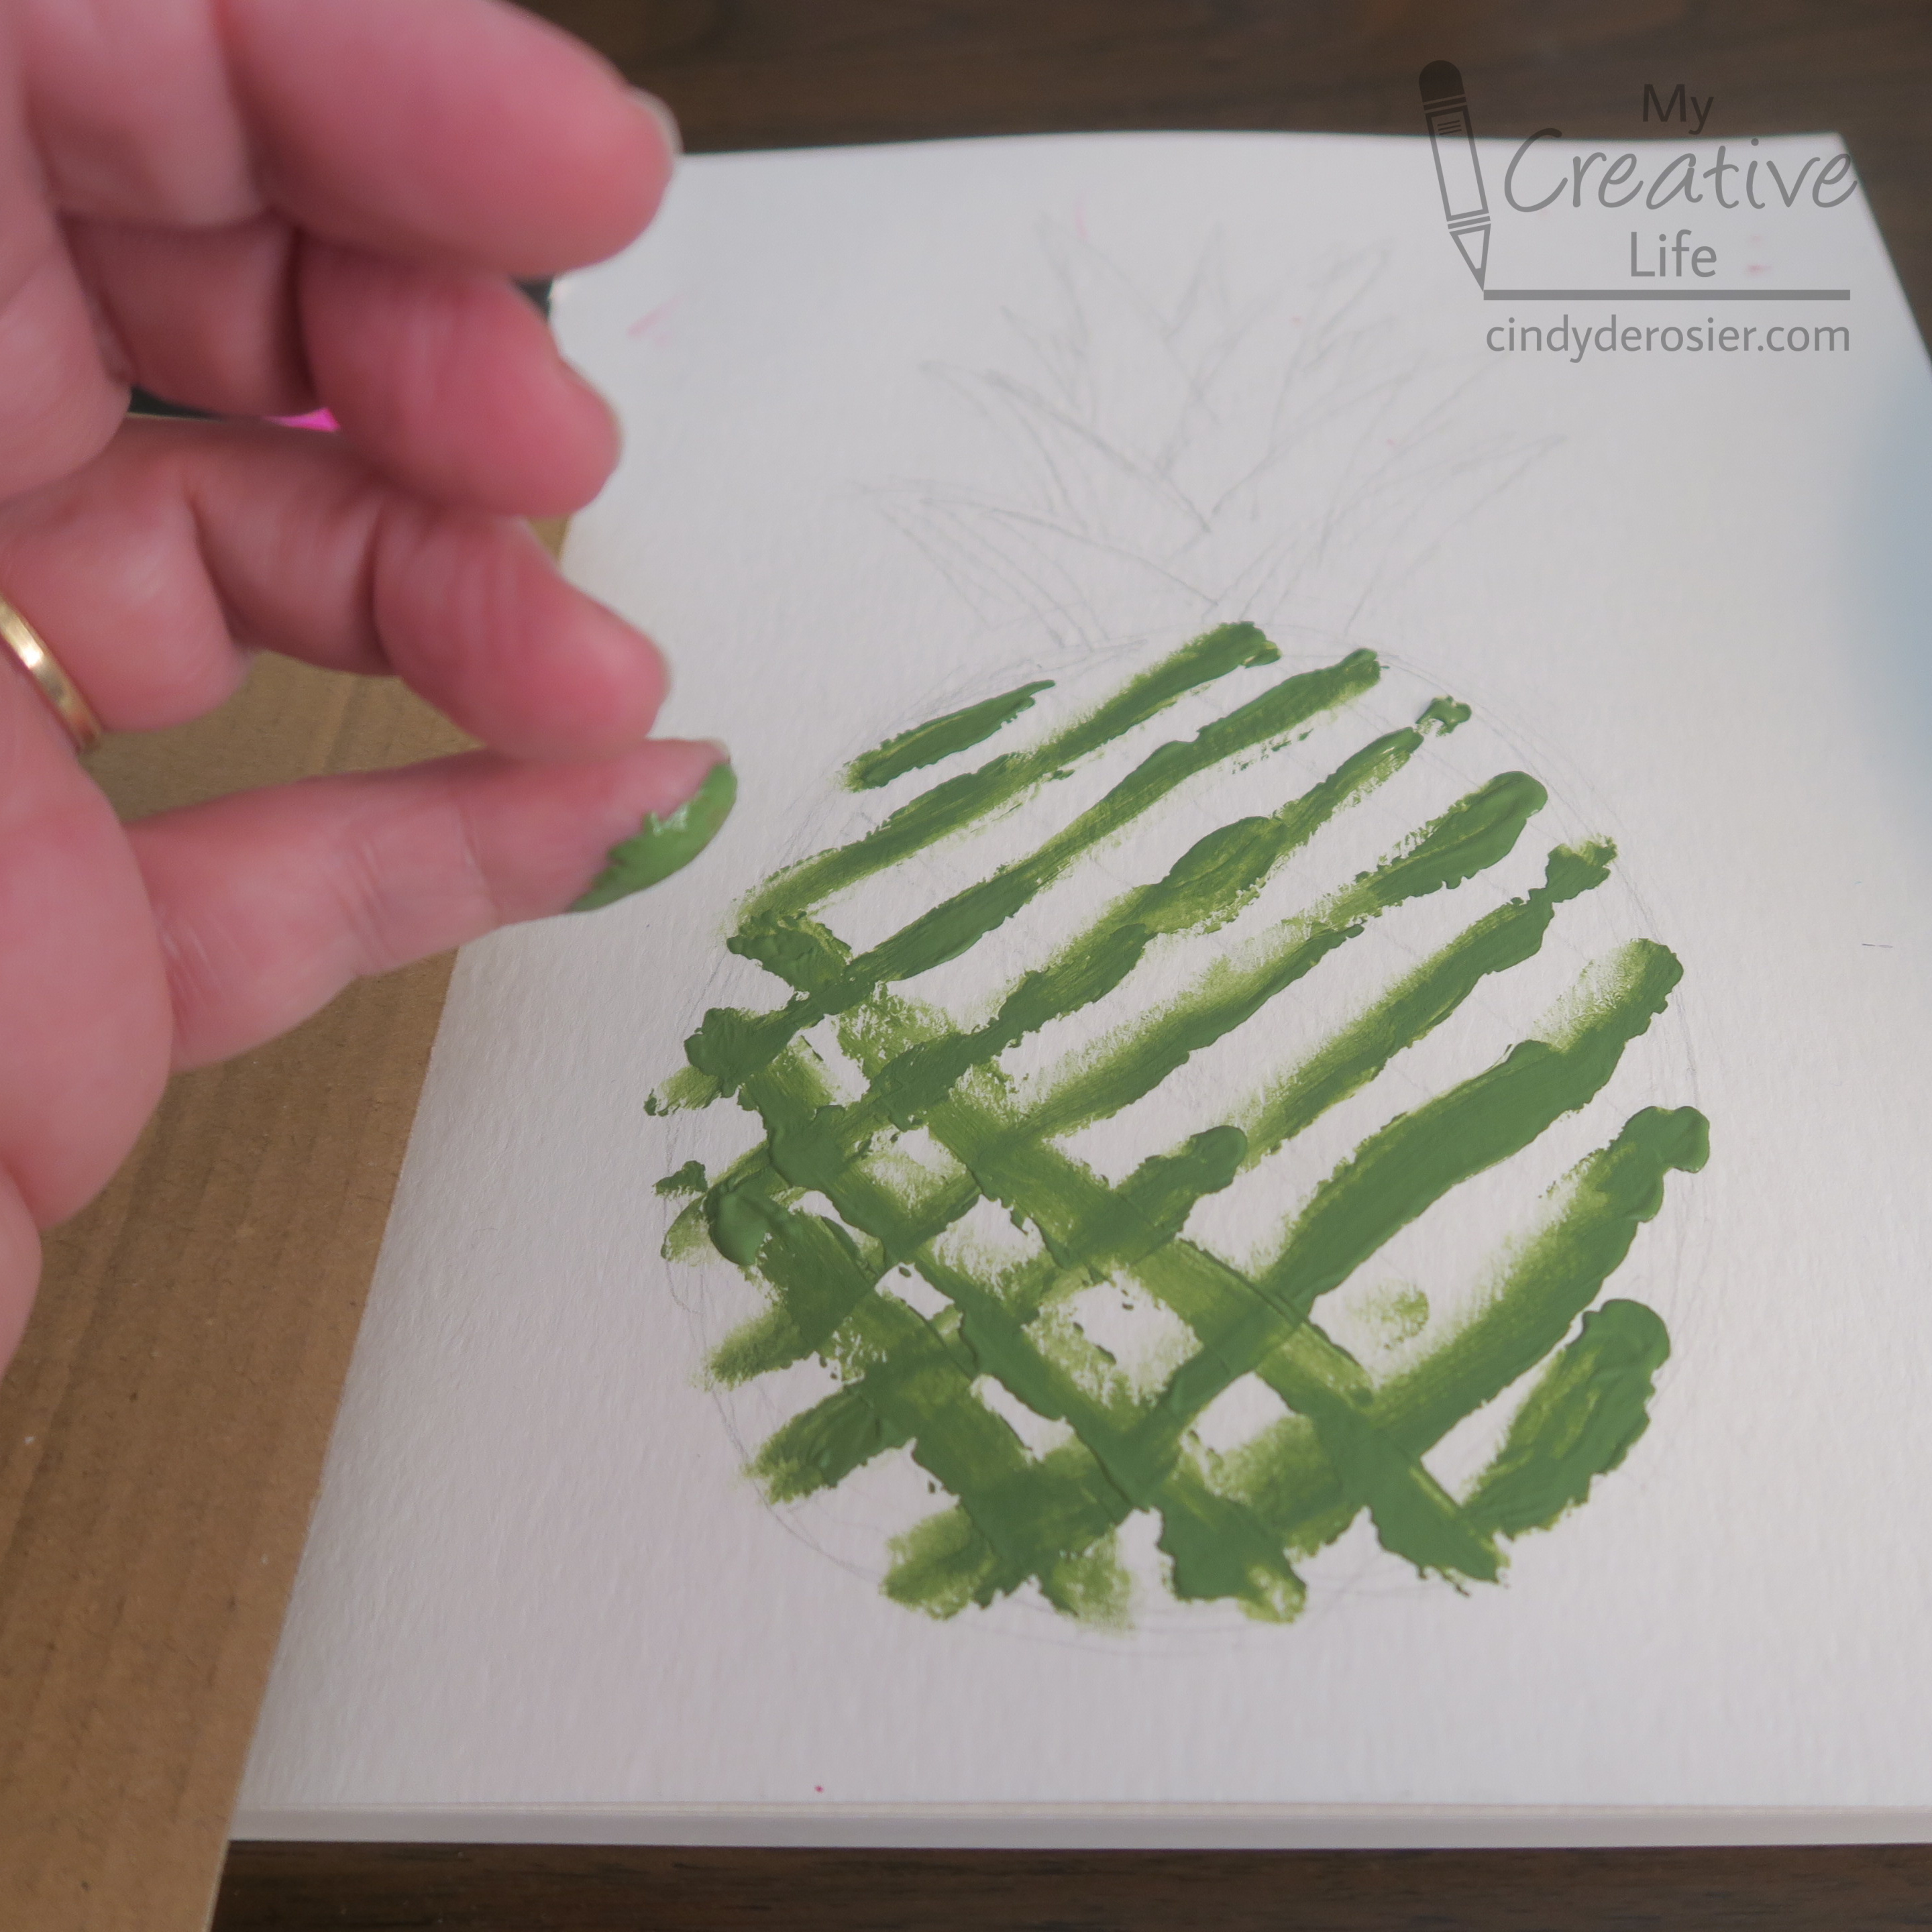
I used my pinky finger and some green paint to draw diagonal lines onto the pineapple, first one direction and then the other. This was really difficult. I don't have good pinky control (possibly due to the fact that I've broken that finger a couple of times, or maybe I just have a weak pinky). Fortunately, most of this would be covered, so it didn't really matter. 
 

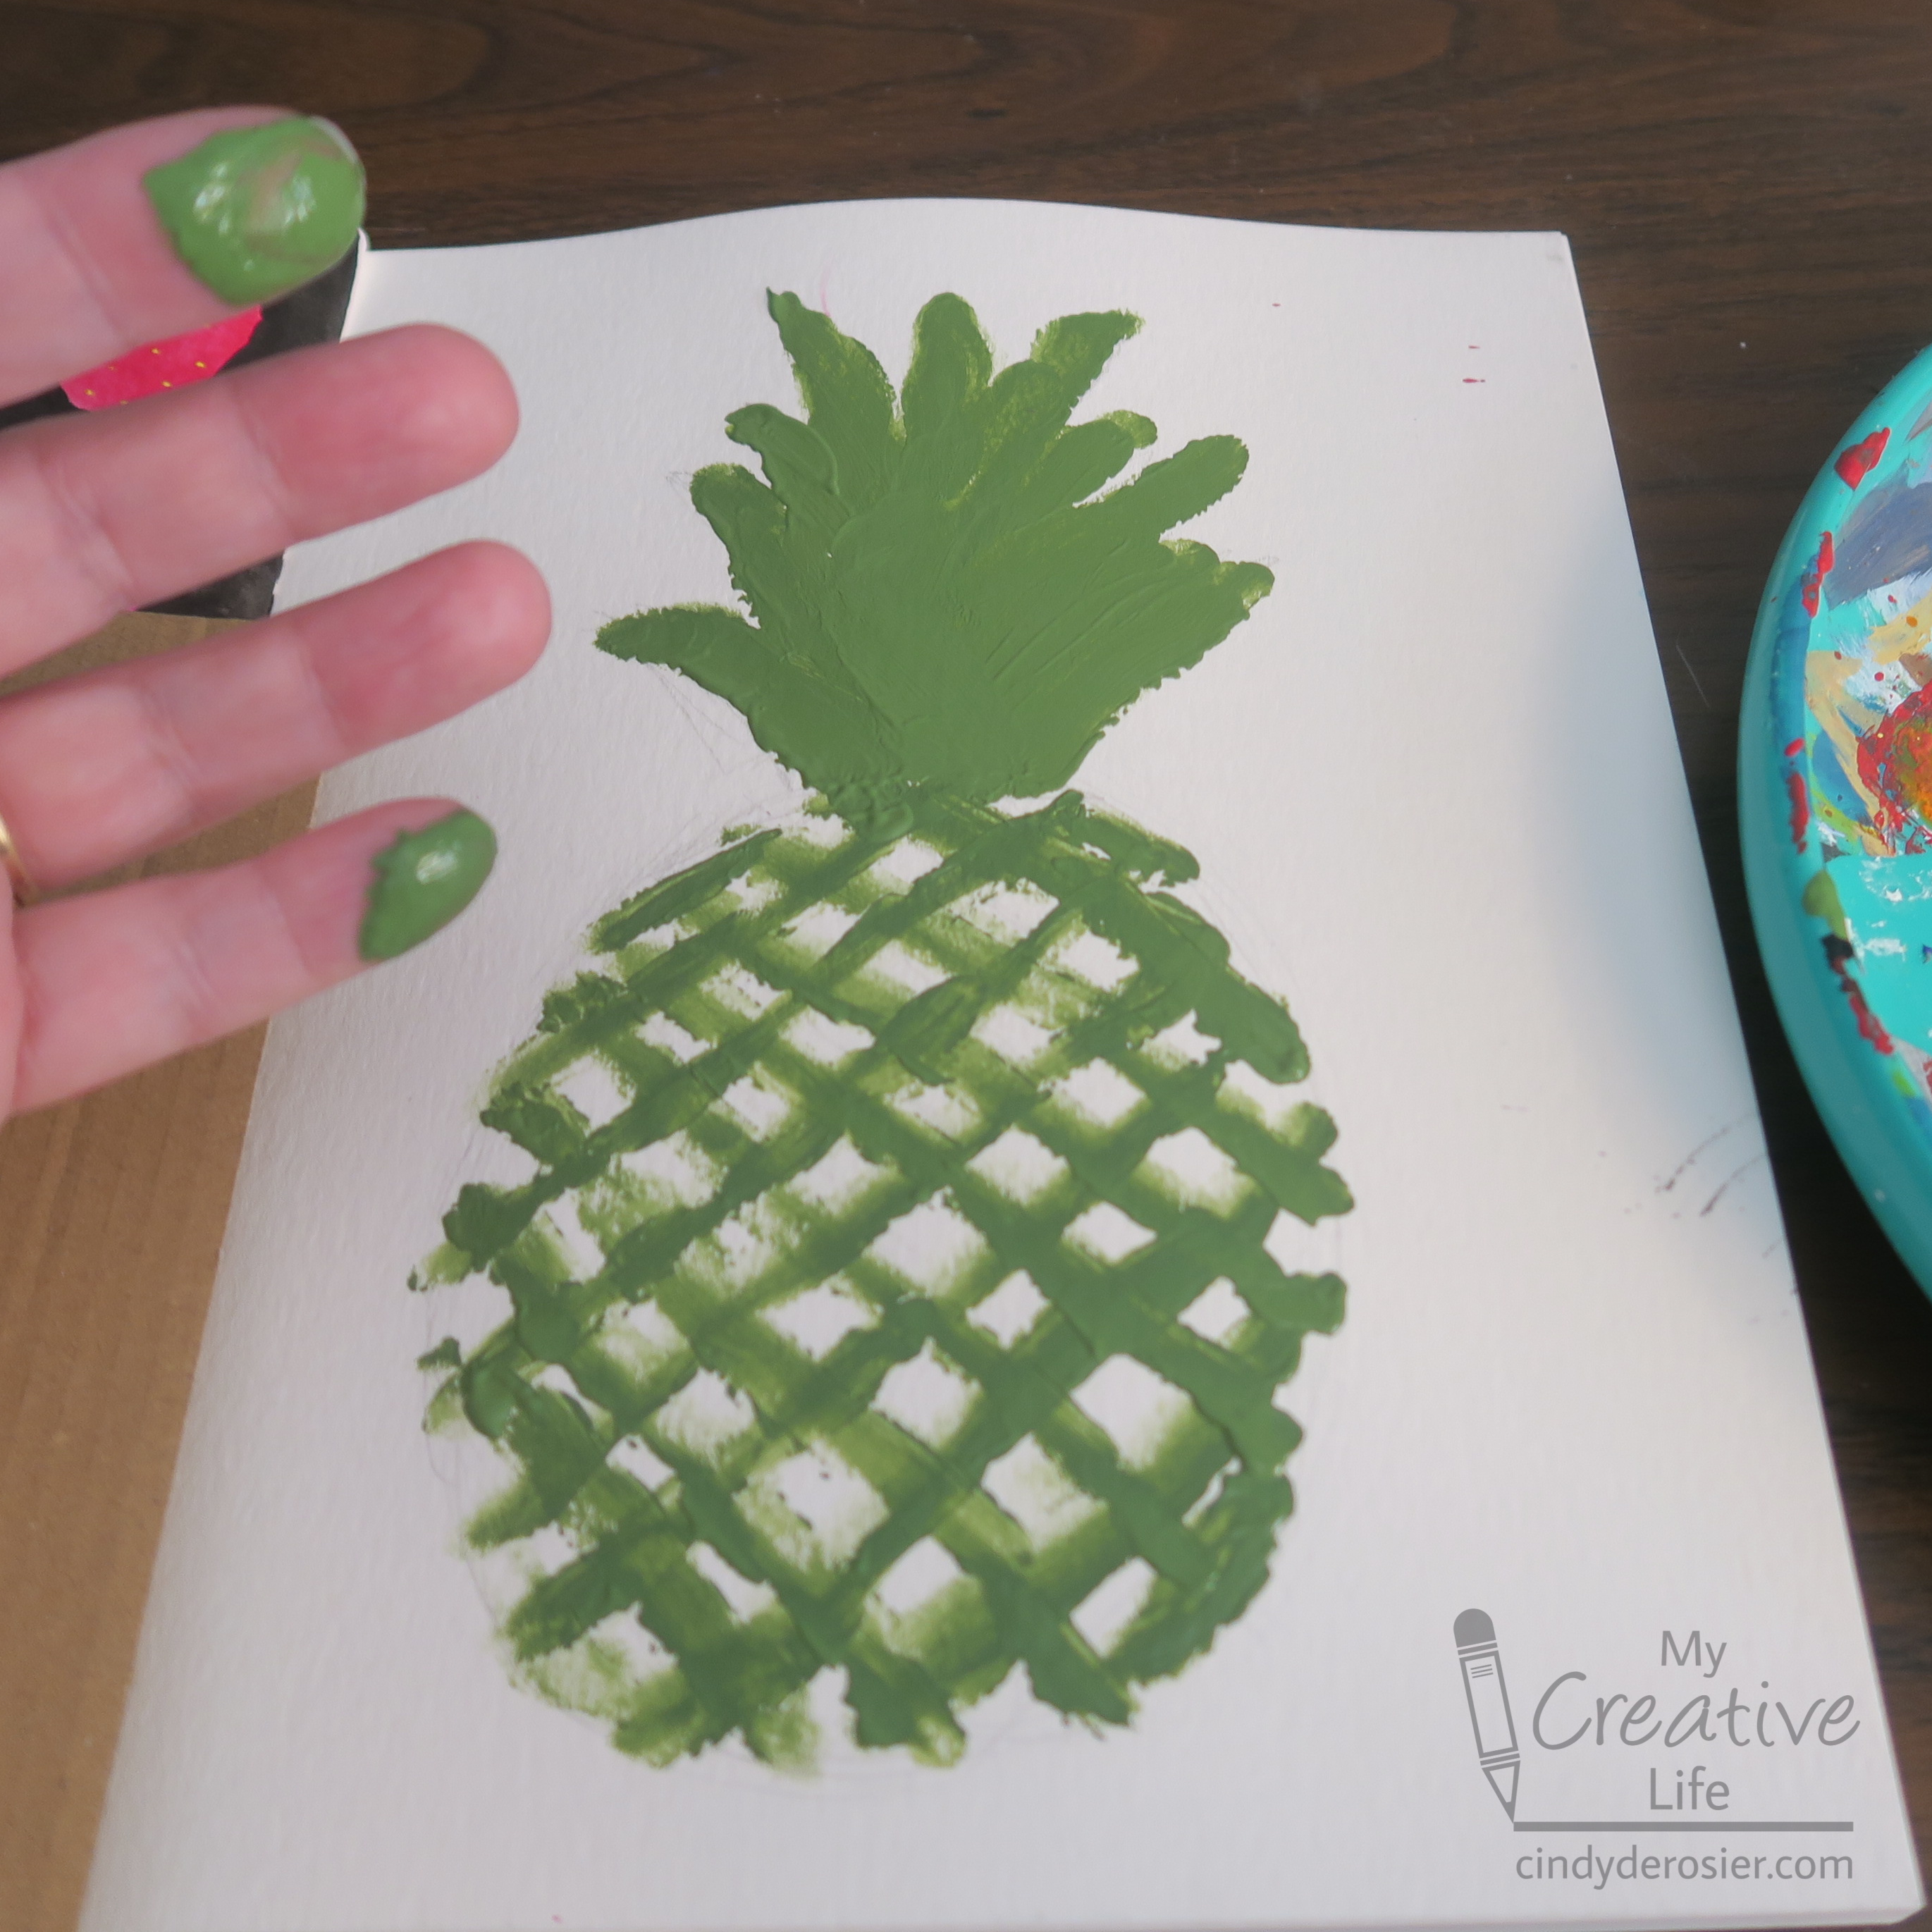
I switched to my index finger for the crown. I made swooping motions in green from the base outward, which is what you see below.


I added a bit of brown to the crown, trying to get some shadow. After that, I dunked my index finger into the turquoise in a surprisingly effective attempt to dilute the green and the brown already on my finger. Then I painted the background. It was really hard getting between the leaves of the crown; quite a few got covered, as you can see. It was also hard to get right up to the edge of the paper without getting any paint on the strawberry side. I did my best, but had to mop up small mistake with my ring finger. 


I mixed a little bit of brown into the yellow (yes, with my finger) and stamped fingerprints into each of the white gaps between the original green lines. Then I dipped into plain yellow and re-stamped the areas in the upper right to add a subtle highlight. I touched up the crown with my pinky finger, which actually worked better than my index finger had. I mixed a small amount of yellow into the green to add some highlights on the left. 


The last step was (finally) washing my hands. This was such a fun challenge and definitely something I'd like to try again. 

www.dickblick.com

10/13/22

Pineapple Sunflowers

One of my all-time favorite treats is a wedge of fresh pineapple dipped in dark chocolate. It's a must-have at the Dole Plantation in Hawaii. My latest edible craft takes that amazing flavor combination and adds a salty component and an unexpected crunch from sunflower seeds. Because the pineapple rings are dried, this delicious dessert is easy to make year-round but is especially beautiful on a fall table. Affiliate links below.    


Pineapple Sunflowers


Materials:


Steps: 


Put a piece of parchment on your work surface, then arrange the pineapple rings on the parchment. Put a lollipop stick behind each pineapple ring. Follow the directions on the package to melt the chocolate wafers, then spoon a small amount of chocolate into the holes in the pineapple rings. Add a generous amount of sunflower seeds on top of the chocolate (as shown in the bottom right), then cover the seeds with more chocolate. Allow the chocolate to set completely. 


I experimented with different methods of making these and recommend the directions above. You can make the sunflowers without sticks if you prefer and/or make wedges to accompany the sunflower treats. Enjoy! 

6/5/20

Rice Krispie Treat Pineapples

Summer is almost here, so I've been crafting up pineapples.

rice krispie treat pineapple

Rice Krispie Treat Pineapples, that is! I had so much fun making them and they're surprisingly easy to do. Give them a try! (Affiliate links below). 


Rice Krispie Treat Pineapples


Materials:


Steps: 

Use a sharp knife to cut each rice krispie treat into thirds. Gently round the corners and edges to make the pineapple shape, as I've done with the one on the left below. 


Follow the directions on the Candy Melts packages to prepare a dish of yellow and a dish of dark green. Dip each rice krispie treat into yellow Candy Melts, then move them to parchment paper to set. Then place a glob of green on the parchment paper and drag a spoon (or a toothpick) through it to create the leaves of the pineapple. 


Add a single dark cocoa Candy Melt to the leftover yellow candy. Reheat, then stir until you get a uniform honey color. Use a toothpick to draw diagonal lines across each pineapple. 


Gently peel the pineapple tops from the parchment and turn them upside down. Remelt the green candy and put a glob on the back of each pineapple top. Roll a toothpick in the melted candy, then lay it flat in the center. Let the pineapple toppers set up.


By the way, if you prefer not to have to keep remelting the candy, you can keep it warm while you work with a simple warming tray on its lowest setting. It's really handy, particularly if you're new to candy or tend to work slowly.

When the pineapples and the toppers are completely set (pop them in the fridge to speed up the process if your work area isn't cool enough), use a clean toothpick to poke a hole into each pineapple (much like you'd drill a pilot hole into wood). Remove the toothpick, then gently slide a pineapple topper into the hole. Arrange them on a plate and serve!


3/26/20

Hand-Carved Pineapple Stamp

Two of my best crafty friends (BCFs) and I had a craft day on Saturday, each in our own craft spaces, using Zoom. We chatted while we crafted and it was awesome. I mostly worked on scrapbook layouts during our 6+ hours together, but I also did a few other crafty things including hand-carving a stamp for the first time.

I've been following Julie Fei-Fan Balzer's #CarveDecember project for years. I love seeing what she makes and marvel each year that she can create an entire month's worth of hand-carved stamps during what is the busiest time of the year for many people. I find her repeating stamps particularly awesome. For my first-ever stamp, I went with something that I thought would be much simpler: a pineapple. Affiliate links below.


---------

Hand-Carved Pineapple Stamp


Materials:


Steps: 


Sketch your design on a piece of carving rubber. Using shallow cuts, remove the excess rubber around your design. You can always cut more off, but you can't add back what you've already cut away. Oh, and always cut away from yourself - these tools are sharp! 

I started by removing material around the edges to get used to the feel of the tool. Then I worked on the pineapple itself. Through trial and error, I learned that when cutting curves, it's easier to rotate the rubber than the tool. I held the knife vertically to create the notches on the surface of the pineapple. 


When you have carved away the entire background, ink up your stamp. If any ink shows on the background, you need to cut away more material.


Finally, it's time to stamp! I used juicy ColorBox cat's eyes for the yellow and green areas. I added a dot of brown to each notch using a Tombow brush pen. Huff your breath on the stamp to make sure the ink is moist, then stamp it on white paper.  


I'm very pleased with how my first carved stamp turned out! Have you ever carved your own stamps? Any tips? 

7/18/19

Gallery Glass: Unicorn Sun Catcher

Check out my unicorn sun catcher! 


The Plaid Ambassadors each received the Gallery Glass Sun Catcher Kit (affiliate link here and throughout the post) to play with. I'd never tried Gallery Glass before. The verdict? Super fun!


To make your own sun catcher, you need Simulated Liquid LeadingGallery Glass Window Color, and Stencil Blanks. It also helps to have the design you want drawn out. The Sun Catcher Kit comes with a large idea book so I used that, but you can use coloring pages or draw your own designs instead. 

Place a stencil blank over your design. Trace the lines with Simulated Liquid Leading. There is a learning curve to this. At least, there was for me. You can see my first attempt here. Obviously, I wasn't keeping the pressure steady, nor letting gravity work for me.  


I did some more practicing before moving on to the pineapple, my fifth shape and the first that turned out well. The key was to think of the leading like frosting a cookie. Pipe with even pressure, holding the tip just above the surface, and let the leading fall gently into place. 


I drew a few more shapes, including the unicorn at the top of the post. In all, I made a dozen window catchers and there's hardly a dent in my 8 oz. bottle. 

Let the leading dry for at least 8 hours. I left mine overnight. Then fill in the spaces with the Window Color. It is much more fluid than the leading, but not enough to self-level. You want to fill in all the spaces so that they're almost overflowing. It looks like I filled in the pineapple completely...


... but once it dried, it's obvious that I didn't quite fill it all in.


Anyway, fill in all the spaces as full as you can get them. If any bubbles show up, poke them with a pin or a toothpick. Let the Window Color dry for at least 8 hours. 


When it is dry, gently peel the design off of the Stencil Blank. Then attach it to a window. You can remove it and reposition it as often as you want. 


Oh, the possibilities! I'm imagining all sorts of holiday and seasonal window catchers decorating the windows at Casa deRosier. Any suggestions for other things you'd like me to make with Gallery Glass? Better yet, try it yourself!

7/1/19

Tissue Paper Pineapple

It kills me to see people throw out tissue paper after unwrapping gifts. There are so many good uses for it. You can reuse it to wrap more gifts (iron it if the wrinkles bother you). Or use it for crafting! I made this dimensional pineapple with a piece of tissue paper I rescued from a birthday party. It makes me happy. 


Tissue Paper Pineapple


Materials:

  • construction paper (yellow, green)
  • scissors
  • yellow tissue paper
  • wax paper
  • white glue
  • unsharpened pencil


Steps:


Cut an oval from the yellow construction paper and pointy leaves from the green construction paper. Put a glob of glue on the wax paper.


Cut the tissue paper into 1" squares. (No need to measure. It's fine if they're uneven or the sizing is inconsistent.) Wrap a tissue paper square onto the end of the pencil, then dip it in glue. Touch it to the yellow construction paper and lift straight up. The tissue paper will stay in place. Repeat this process, placing each tissue paper square as close as possible to the ones that are already glued down. 


When you've filled the oval, let the glue dry completely, then give your pineapple a haircut. Trim up the edges, then taper it so that the middle section is slightly higher than the edges to make the pineapple look round. 


Glue the leaves behind the yellow oval and your pineapple is ready to display!

7/30/18

Roundups

Ready to see more of the roundups I've been creating for Fun Family Crafts?

Let's start with my favorite... pineapples! I love the taste and the look of pineapples. I had great fun choosing the images to use in this roundup. I played around with using one of the ten images in the title block and love how it turned out. 


Picnic Crafts was a fun one too. I love the mosaic in the upper right. And those hot dog cookies. And the ants. So obnoxious at a picnic, but so cute as a craft. 


One of these Paper Bag Crafts is mine. It should be no surprise which one that is. I'd say any roundup which includes a pirate, a peacock, and Frankenstein is a success, so I feel good about this one.


We have more football crafts than all the other sports combined, so I had to work to find a good variety for this roundup. I'm happy with how it turned out.


Here's the roundup I made for the special days in July (and the horizontal version for Facebook). I hope you celebrated Macaroni Day (7/7), Barn Day (7/14), and National Camping Month.


Mark your calendars for the special days in August. You won't want to miss Snoopy's birthday (8/10), Play in the Sand Day (8/11), National Aviation Day (8/19), or National Dog Day (8/26). 


As always, I made all the graphics with PicMonkey. I find it ridiculously fun. Do you have any suggestions for roundups I should make? I have a huge list going, but I'd be happy to pop your ideas to the top if there's something you'd like to see.