Showing posts with label fruit. Show all posts

9/2/26

Cherry Craft for Kids - Practicing Shadows and Highlights

The United States is the second-largest producer of cherries in the world (Turkiye is #1). We grow two main types: sweet cherries and tart cherries. The top cherry-producing states for sweet cherries are Washington, California, and Oregon (in that order). Michigan dominates tart cherry production; Traverse City is called The Cherry Capital of the World and home to the National Cherry Festival. Interestingly, only one state has named the cherry as its state fruit and it's not any of those four. It's Utah, which is the only state in the top 5 producers of both sweet and tart cherries. Cherry proponents in Michigan have attempted to name the cherry their state fruit, but the powerful blueberry lobby has thwarted their efforts. 

Today's project allows young creators to practice adding shadows and highlights to their artwork. It starts with a basic pair of cherries cut from cardstock and uses student-grade Crayola colored pencils. Affiliate links below. 


Cherry Craft: Practicing Shadows and Highlights


Materials:


Steps: 


Cut two cherries from red cardstock. Start with rounded shapes, then add a dimple on one side. Cut two skinny green stems and a green leaf. Finally, cut a tiny green square shape that connects the two stems. Glue everything to a piece of white cardstock. 


Find a reference photo of cherries and look closely at the shadows and highlights on them. Cherries are quite reflective, so you'll see shiny white highlights on them. Notice the shadows as well. Drawing in a tiny circular motion, use a white colored pencil to add the highlights to your cherries. Then use a grey pencil to add shadows, using the same circular motion. 

Don't forget the stems and the leaves! Draw veins on the leaf, then shade the lower half with grey and the upper half with white. Add a shadow to each stem. Finally, color the little rectangle brown. 


It only takes a few minutes to add so much dimension to your project. For additional practice, you can choose another reference image with the light source coming from a different direction and repeat this activity. Or, switch to a coloring an apple. Like cherries, apples are glossy and provide great practice for highlights and shadows. 

9/11/24

Crayon Melt State Fruits: Pear, Peach, Strawberry, Watermelon, and Tomato

It's been almost four years since I've pulled out the warming tray to do a crayon melt project. I'm surprised it's been that long, since it's one of my favorite techniques. I love the painterly effect it gives on these, each of which is an official state fruit.  


Pears are the state fruit of Oregon. 


Peaches are the state fruit of Alabama, Georgia and South Carolina. (Technically, peaches are Alabama's state tree fruit.)


Strawberries are the state fruit of Delaware, Louisiana, North Carolina (technically, the state red berry), and Oklahoma.


Tomatoes are the state fruit of Arkansas, Ohio, and Tennessee.


OK, I lied. Watermelon is not a state fruit. It is the state vegetable of Oklahoma. If you think a tomato should be considered a vegetable and watermelon a fruit, don't take it up with me. Botanically, tomatoes are fruit and so are watermelons, but Oklahoma has valid arguments for considering watermelon a vegetable


I didn't make crayon melts of all of the state fruits. Others include oranges, apples, huckleberries, blackberries, plums, blueberries, grapes, cranberries, chokecherries, grapefruit, cherries, and pawpaws. Feel free to make those, or anything else, using the technique below. The materials list includes affiliate links. 

---------


Crayon Melt State Fruits


Materials:


Steps:


Plug in the warming tray. and put a sheet of paper on top. Scraps are perfectly ok. Use crayons to color in the fruits you'll be making. You can blend and layer colors as much as you want. 


I recommend removing the wrappers from the crayons and laying them on their sides for faster, more even coverage. When you do that, you're going to get wax that transfers to the crayon, but that's not a problem. Here you can see that I put the white crayon into an area I'd colored dark green, which blended and transferred to the crayon. To clean it off, just color on a clean area of paper. 


You have two choices when adding details to your project. For the watermelon seeds, I just dotted black crayon directly onto the hot red wax. Since the black shows up really well on red, this is a good option. 


If I'd tried to add the yellow strawberry seeds on top of the red wax while it was hot, they would have blended in too much. Instead, I removed the strawberry, let it cool completely, cut out my shape, then returned it to the warming tray for just long enough to warm up. Then I was able dot on little bits of yellow. 


Don't forget to color the stems and leaves that you'll be using on your fruits. When you've colored everything, unplug the warming tray and let the wax set. Then cut out the shapes using scissors. Glue the leaves and stems to the appropriate fruit. Have fun!

2/16/23

Finger Painting Pineapple

Until yesterday, I had never done an entire painting using just my fingers. Well, maybe I did when I was a toddler. I don't remember. I've done a lot of fingerprint and handprint art over the years, but with those I used a brush at some point, decorated the painted part with pens, or otherwise did something other than just painting with my fingers.  

I challenged myself to paint a pineapple in my sketchbook (next to the gouache strawberries) using nothing but my fingers. Actually, I put a few more restrictions on myself. Because I would be taking process photos, I needed one hand to stay paint-free so I didn't mess up my camera. I also wanted to finish the painting without interruption, which meant I couldn't get up to wash my hands, nor could I set the project aside to let a layer dry. I intentionally didn't put anything nearby on which I could wipe my hands. I did allow myself to do a rough pencil sketch before I started. 

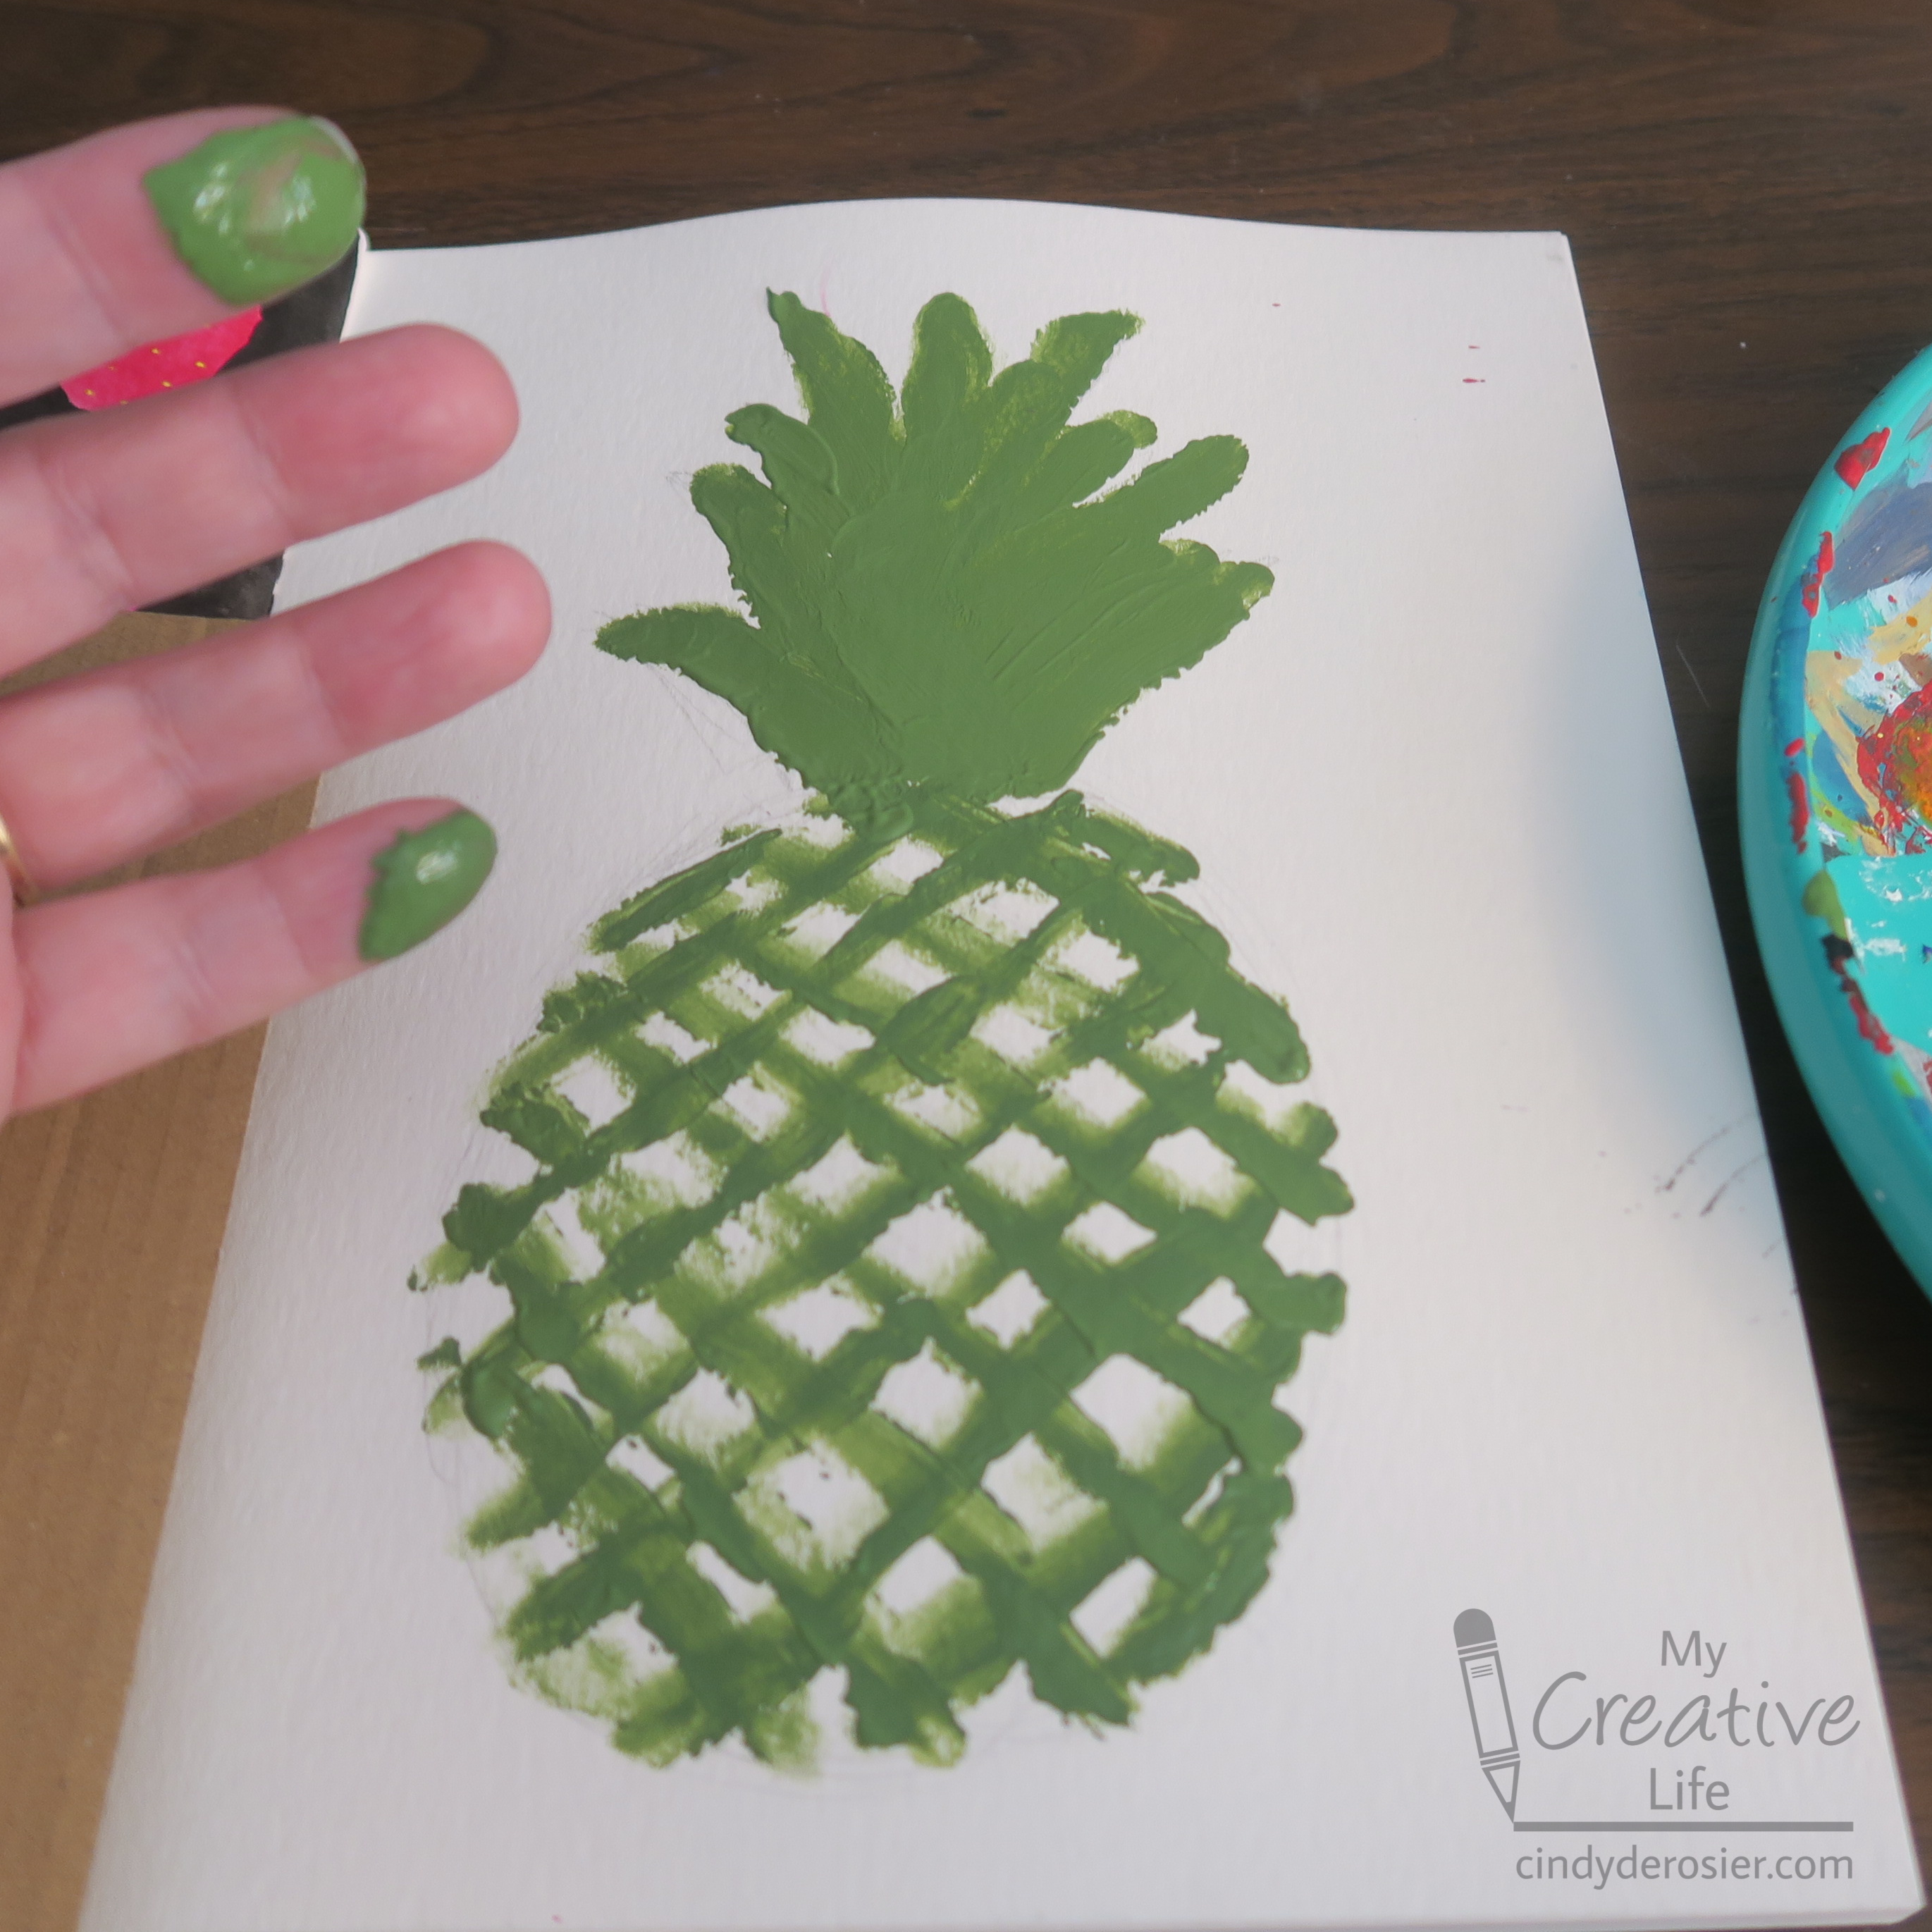
What you see here is a pineapple painted wet-on-wet with the four fingers of my left hand, which I didn't clean or wipe even when changing colors. It was a challenge, which was the whole point. 


Finger Painting Pineapple


Materials: 

  • sketchbook
  • acrylic paint (green, yellow, brown, and turquoise)

Steps: 


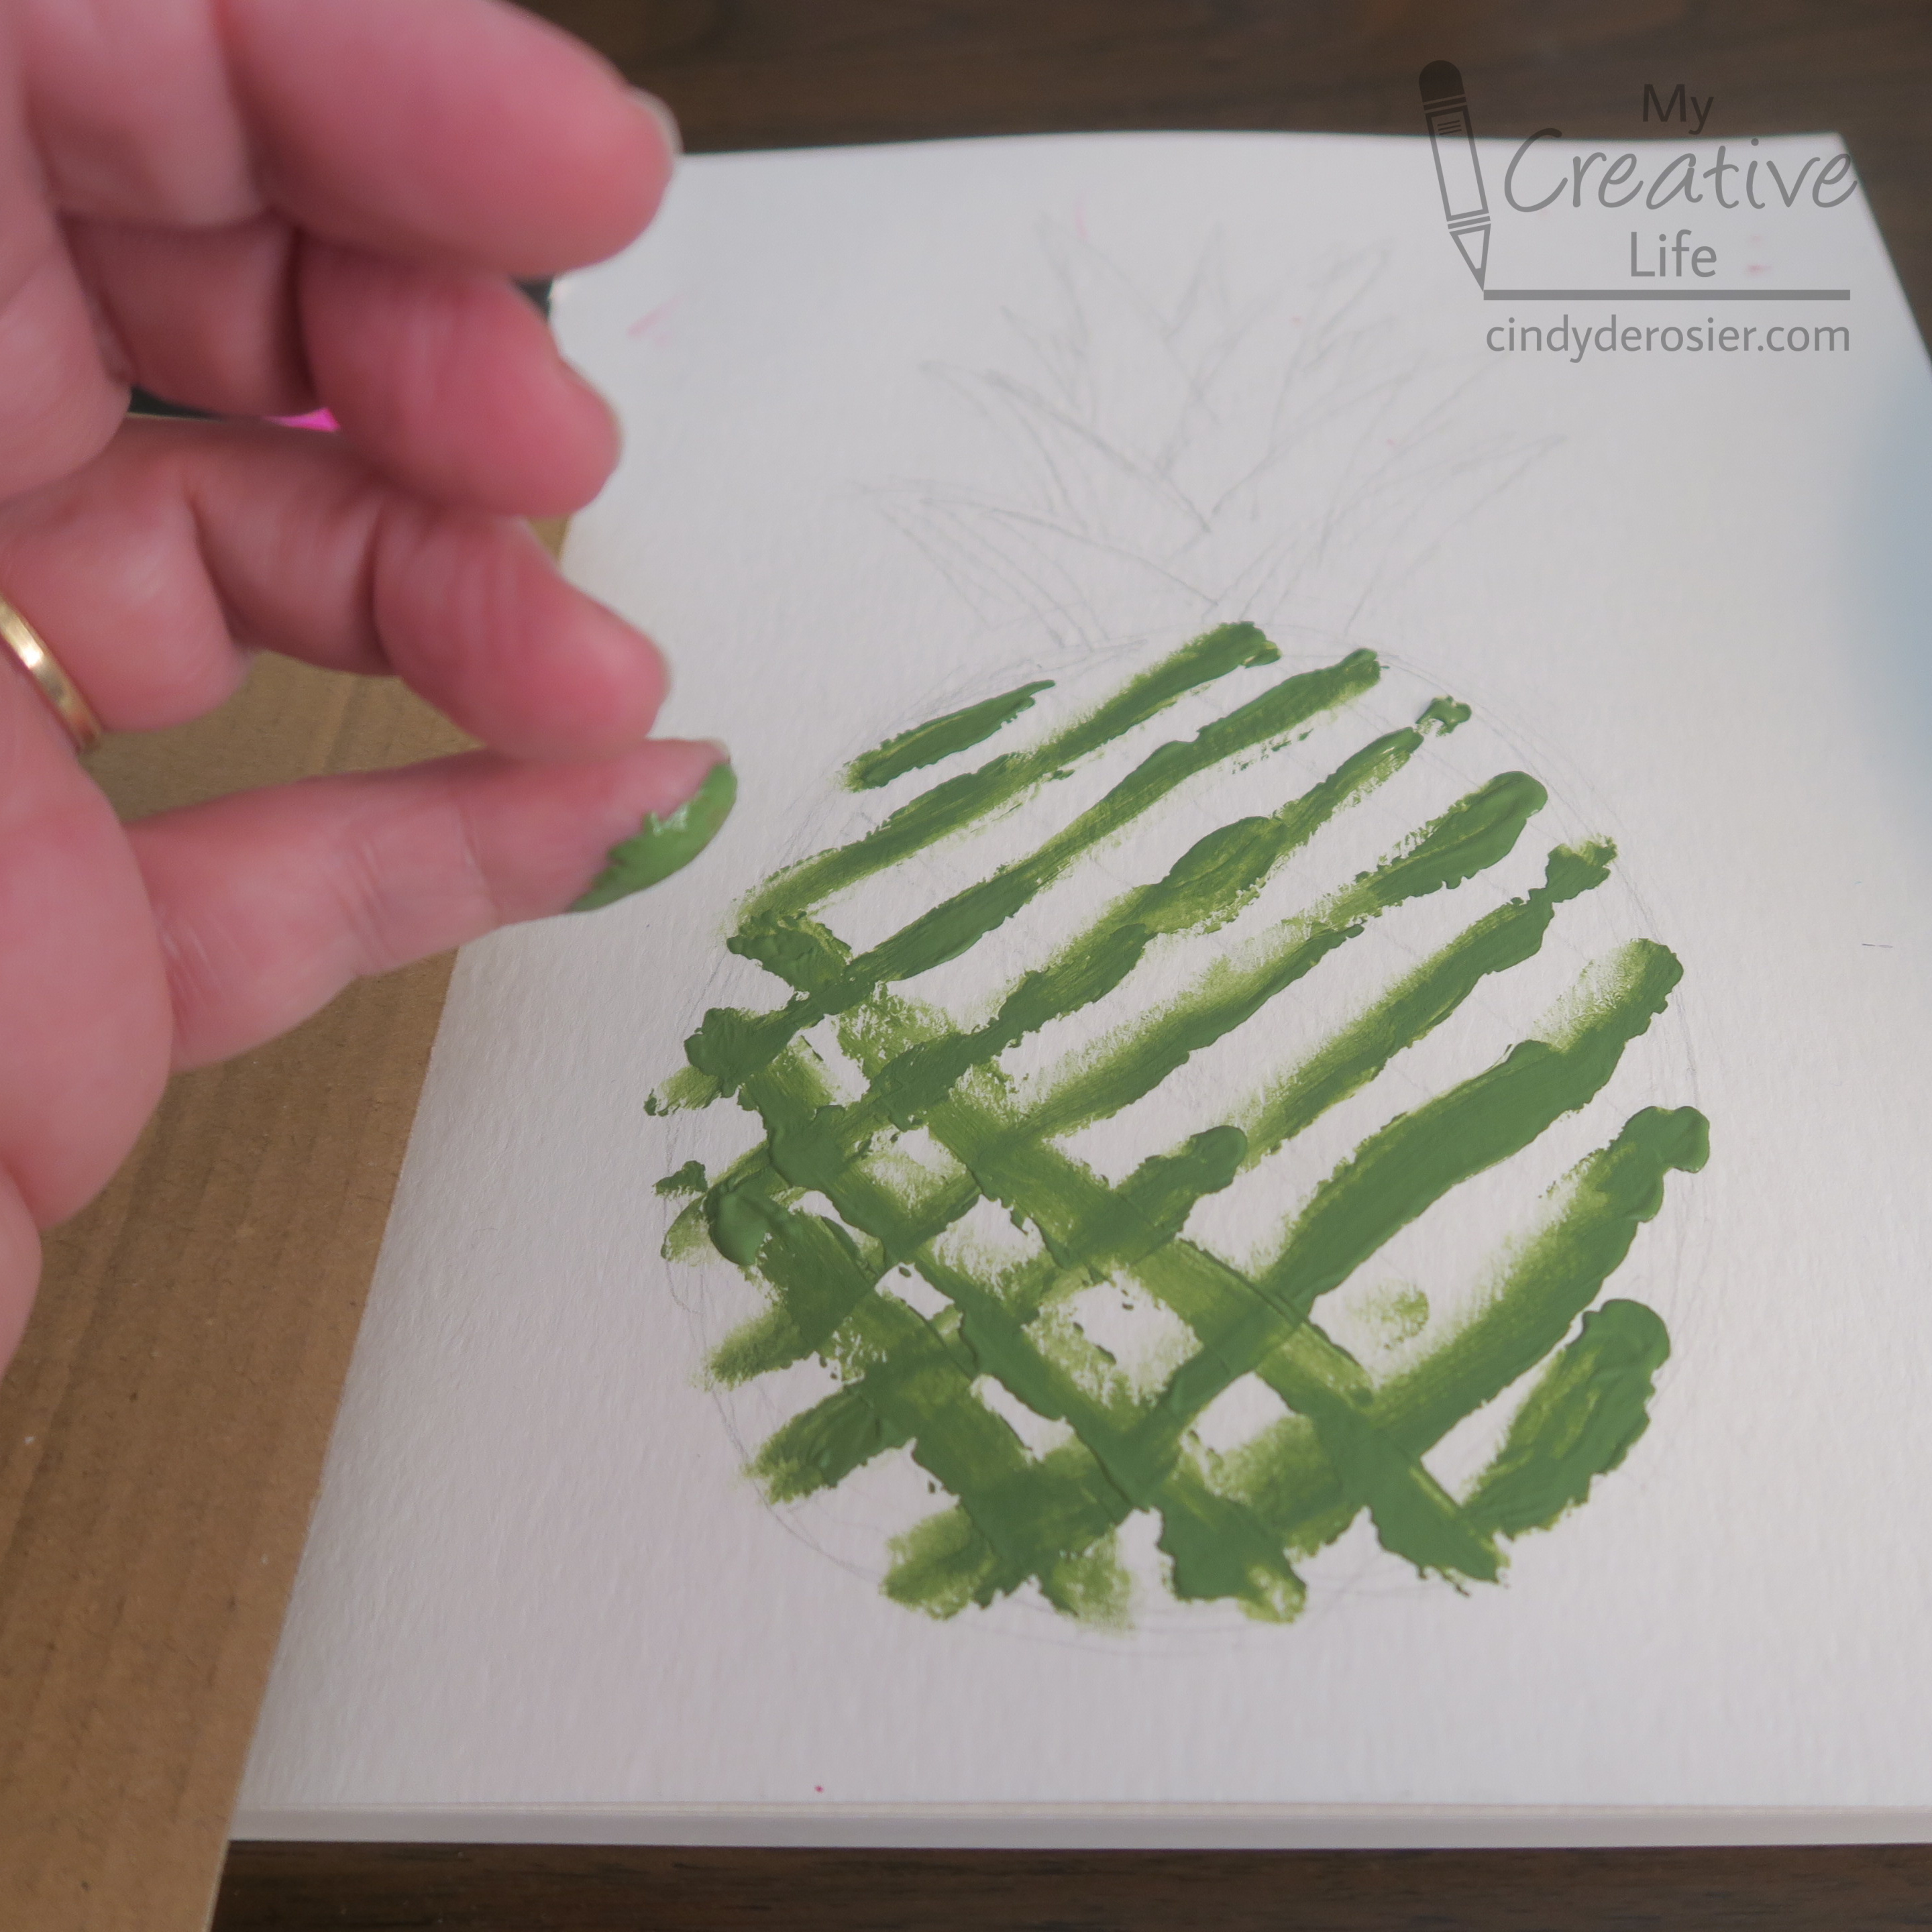
I used my pinky finger and some green paint to draw diagonal lines onto the pineapple, first one direction and then the other. This was really difficult. I don't have good pinky control (possibly due to the fact that I've broken that finger a couple of times, or maybe I just have a weak pinky). Fortunately, most of this would be covered, so it didn't really matter. 
 

I switched to my index finger for the crown. I made swooping motions in green from the base outward, which is what you see below.


I added a bit of brown to the crown, trying to get some shadow. After that, I dunked my index finger into the turquoise in a surprisingly effective attempt to dilute the green and the brown already on my finger. Then I painted the background. It was really hard getting between the leaves of the crown; quite a few got covered, as you can see. It was also hard to get right up to the edge of the paper without getting any paint on the strawberry side. I did my best, but had to mop up small mistake with my ring finger. 


I mixed a little bit of brown into the yellow (yes, with my finger) and stamped fingerprints into each of the white gaps between the original green lines. Then I dipped into plain yellow and re-stamped the areas in the upper right to add a subtle highlight. I touched up the crown with my pinky finger, which actually worked better than my index finger had. I mixed a small amount of yellow into the green to add some highlights on the left. 


The last step was (finally) washing my hands. This was such a fun challenge and definitely something I'd like to try again. 

www.dickblick.com

10/13/22

Pineapple Sunflowers

One of my all-time favorite treats is a wedge of fresh pineapple dipped in dark chocolate. It's a must-have at the Dole Plantation in Hawaii. My latest edible craft takes that amazing flavor combination and adds a salty component and an unexpected crunch from sunflower seeds. Because the pineapple rings are dried, this delicious dessert is easy to make year-round but is especially beautiful on a fall table. Affiliate links below.    


Pineapple Sunflowers


Materials:


Steps: 


Put a piece of parchment on your work surface, then arrange the pineapple rings on the parchment. Put a lollipop stick behind each pineapple ring. Follow the directions on the package to melt the chocolate wafers, then spoon a small amount of chocolate into the holes in the pineapple rings. Add a generous amount of sunflower seeds on top of the chocolate (as shown in the bottom right), then cover the seeds with more chocolate. Allow the chocolate to set completely. 


I experimented with different methods of making these and recommend the directions above. You can make the sunflowers without sticks if you prefer and/or make wedges to accompany the sunflower treats. Enjoy! 

9/29/22

Cinnamon Spice Caramel Apple Popcorn with Felt Apple Tag

Tis the season for Pumpkin Spice Everything, but personally I don't get it. Pumpkin is fine, but for me fall is all about apples. Apples are sweet, sometimes tart, crisp, and full of flavor. They are delicious on their own, as juice or cider, mashed up as applesauce, baked with savory dishes (like pork), and excellent in desserts of all sorts. I like squash (though pumpkin is not even one of the best squashes), but there's no comparison. Virtually everyone agrees that Apple > Pumpkin. Spices definitely improve pumpkin, but I firmly believe Apple Spice > Pumpkin Spice. Don't even try to argue. 

If you're tempted to argue, make some cinnamon spice caramel apple popcorn first. Then get back to me and tell me that pumpkin spice is better than apple spice. Affiliate links below. 


Cinnamon Spice Caramel Apple Popcorn

  
Ingredients:                                                           


Steps: 


There is no right or wrong when making your own flavored popcorns. It's not like baking a cake where chemical reactions mean that quantities matter. You can add more or less of any ingredient. I was hesitant to even put quantities above, as I didn't measure when I was making mine. Those are my best guesses. 

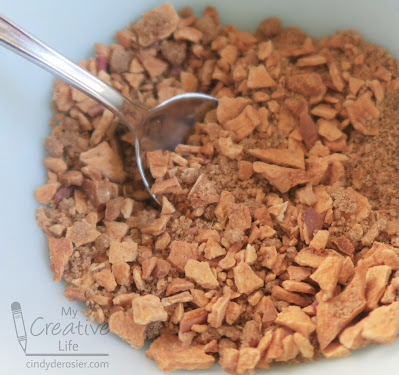
Start by crushing some crisp dried apples until about half of the apples are powder and the rest is pea-sized bits. Stir in some brown sugar and cinnamon, then add a dash of nutmeg. Mix thoroughly. 


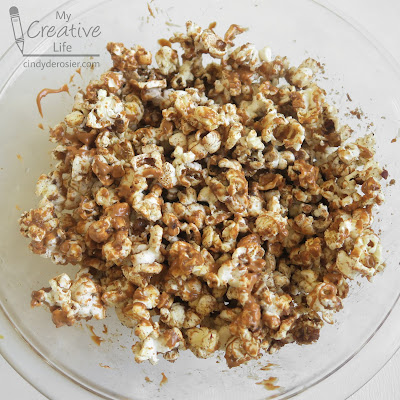
Pop and generously butter approximately 10 cups of popcorn. Immediately pour the apple mixture over the popcorn and stir well. Some of the apple mixture will remain at the bottom of the bowl instead of stuck to the popcorn, but that's not a problem. 

Follow the directions to melt the Salted Caramel Candy Melts. Drizzle half of the melted candy over the popcorn and immediately stir well. Repeat with the remaining candy. Most of the apple mixture should now be stuck to the popcorn. 


If you eat the popcorn immediately, the tiny apple bits are still crispy. If you let the popcorn sit for a while, or bag it up, the apple bits will soften, but remain equally delicious. 

I made a cute felt apple tag to label my bagged popcorn. It's a quick and easy project. 

-------


Felt Apple Tag


Materials: 


Steps: 

Cut out an apple from the red felt, using pinking sheers. Cut the leaves and stem from green felt with regular scissors. Apply green Stickles to the leaves and set them aside to dry. 

Use two strands of black embroidery floss to backstitch a smile and two eyebrows.

Cut a piece of red cardstock that is slightly smaller than the felt apple. Glue it to the back of the apple, covering the knots from your stitching. Write a message to your recipient. 

Glue the googly eyes and the leaves to the front of the apple. 

9/9/20

Grapefruit Slice Felt Coaster: The Last (?) in the Set

I've had so much fun making and sharing my fruit coasters. With the addition of today's, which is a grapefruit, I'm up to seven. 

I think this coaster will be the last one (mostly because the rest of the common fruits aren't recognizable - or aren't round - when cut in half). Seven is a weird number for a set, but since we have a family of three, it's actually not all that uncommon for us to serve a meal for seven. Well, before COVID-19, that is. Now it's always dinner for three. 

Here are the tutorials to make the watermelon, orange, lime, applelemon, and kiwi coasters. Read on for the instructions to make the grapefruit coaster. It's not grapefruit season (approximately December to May here in Northern California) so I don't have a new recipe to share, like I have with many of the previous coasters. But if you're looking for the best-ever thing to make with grapefruit, you can't go wrong with this amazing grapefruit sorbet. Affiliate links below. 


Grapefruit Slice Felt Coaster


Materials:


Steps: 


Cut out a circle of pink felt, approximately 4" in diameter. Cut out a circle of white felt that is slightly smaller than the pink circle. Then cut out another pink circle that is slightly smaller than the white one. 

Set the large green circle and the white circle aside. 

Fold the smaller pink circle in half, then cut along the fold. Fold each half again and cut so that you have four pieces total. Cut each piece into thirds, giving you a total of 12 triangles. The triangles don't need to be identical in size. Snip the edges of each triangle so they are rounded, then space them evenly on the white circle. If necessary, trim them until they resemble the segments of a grapefruit. 

Use pink thread and a very short running stitch to sew the grapefruit segments to the white circle. It is easiest to start at the tip of one segment, work around it until you reach the tip again, and then move over to the next segment. 

When you have attached all the segments, use white thread and the same short running stitch to sew the white circle to the large pink circle.

7/30/20

Kiwi Felt Coaster

I love kiwis. So does Trevor. Steve doesn't like them, which is weird because they are totally delicious. But him not eating them means more for Trevor and me, so I can't complain. We used to get our kiwis from a kiwi farm three miles from our house, but they closed up operations a few years back. As far as I know, no one else local is growing kiwis commercially, which is a shame since they grow well here. It's also a shame because they are ridiculously expensive at the grocery store compared to what they cost directly from the farmer. 

We're not in kiwi season right now (late October through December in Northern California) so I don't have a recipe to share with my latest fruit coaster, which is (obviously) a kiwi. Affiliate links below. 


Kiwi Felt Coaster


Materials:


Steps: 


Cut out a circle of brown felt, approximately 4" in diameter. Cut out a circle of light green felt that is slightly smaller than the brown circle. Cut an irregular oval from cream felt for the center of the kiwi. 

Use cream thread to sew the cream center to the green felt. Divide the embroidery floss into three strands, then make two circles of small stitches pointing in toward the center. Don't aim for perfection; in a real kiwi, the seeds are irregular. When you've competed the seeds, use green thread to sew the green felt to the brown felt. 

7/15/20

Felt Apple Coaster and Apple Pie Slushie Recipe

Once I started making felt coasters, I couldn't stop! (Here are the tutorials for the lemon, lime, and orange.) They're such a quick and satisfying project. Today I have a felt apple coaster and a delicious, refreshing Apple Pie Slushie. It has all the wonderful flavor of fall in an icy version that's perfect for summer. Affiliate links below. 


Apple Pie Slushie


Ingredients:

  • 2 c. apple juice
  • juice of one lemon 
  • 1 tsp. cinnamon
  • 1/4 tsp. nutmeg
  • 1/4 tsp. cloves


Steps:

Combine all ingredients, then pour them into an ice cream maker. (This is the one we have and I LOVE it.) Churn for approximately 15 minutes, then transfer to glasses. Garnish with whipped cream and cinnamon. 


---------


Felt Apple Coaster


Materials:


Steps: 


Cut out a circle of red felt, approximately 4" in diameter. Cut out a circle of cream felt that is slightly smaller than the red circle. Cut five teardrop-shaped seeds from brown felt. 

Use brown thread and a very short running stitch to sew the seeds to the cream circle. When all the seeds are attached, use cream thread to sew the cream circle to the red circle.


6/25/20

Lime Slice Felt Coaster (and a Return to Brazilian Lemonade)

Since the lockdown started, we've been getting a produce box every ten days from our local beloved farm/market. Every box has been a delight, stuffed with beautiful fruits and veggies with a value that far exceeds the price we pay. Our latest box has some gorgeous limes, which reminded me of exactly how bad my previous photos of Brazilian Lemonade were. So I made a batch and took a new photo. 


If you've never had Brazilian Lemonade, it's definitely worth a try! Particularly if you like limes, since there aren't actually any lemons in Brazilian Lemonade

As you can see from my photo, my Brazilian Lemonade is sitting on a lime slice felt coaster. It is the second of many fruit slice coasters I've been sewing. This one is very similar to the lemon coaster, but there is an important difference (besides the color). Did you know that while most lemons have 8 or 9 segments, most limes have 10 to 12? I made my lime with 10 segments. Affiliate links below. 


Lime Slice Felt Coaster


Materials:


Steps: 


Cut out a circle of light green felt, approximately 4" in diameter. Cut out a circle of white felt that is slightly smaller than the green circle. Then cut out another green circle that is slightly smaller than the white one. 

Set the large green circle and the white circle aside. 

Fold the smaller light green circle in half, then cut along the fold. Cut each half into 5 triangles. They don't need to be identical in size - they aren't in nature! Snip the edges of each triangle so they are rounded. Space them evenly on the white circle, trimming if necessary until they resemble the segments of a lime. 

Use a light green thread and a very short running stitch to sew the lime segments to the white circle. Start at the tip of one segment, work around it until you reach the tip again, then move over to the next segment. 

When all the segments are attached, use white thread and the same short running stitch to attach the white circle to the large green circle.

2/7/20

Family Faves, Fruit Edition

For a long time, I've wanted to make a layout comparing the foods that everyone in our family likes and dislikes. (Yes, of course Trouble is a member of the family.) When my friends at Paper House Productions sent me sheets of fruit stickers, I made this. 

Family Faves (affiliate link)

I started by digging through the bin of printed photos that I never scrapped to find a picture of each of us that I could cut into a square. Then I arranged the fruits in the proper places below the little thumbs up and thumbs down stickers. As you can see, all four of us are fans of apples, pears, and strawberries. (And pineapple, but that wasn't on the sticker sheet.)

I think this might be the first layout I've ever made that has 'journaling' in the form of stickers. I didn't write a single word on this page, yet there's a lot of information there. I'm really happy with how it turned out. 

9/4/19

Fingerpaint Watermelon Paper Plate Wreath

Summer isn't over yet! If you're not quite ready to leap into fall, here's a fingerpaint craft that celebrates the warm weather and long summer days. 


Fingerpaint Watermelon Paper Plate Wreath


Materials:

  • two paper plates
  • Folk Art acrylic paint (red, white, green, black)
  • scissors
  • glue
  • ribbon


Steps:


Use your fingers to smear red paint in the center of one of the paper plates. Without cleaning your fingers, add a band of white paint around the edge of the red. It will mix slightly and give you pink. Wipe your fingers, then add green around the outside of the plate. When the red is dry, make fingerprints of black randomly in the red section. 


When the paint is completely dry, cut the plate in half. Then cut each half in half, and each half in half again, forming 8 wedges. Cut out the center of the second plate to make the base for your wreath. 


Arrange the watermelon wedges so that they cover the wreath. Glue them in place. 


Add a ribbon to make a hanger, then display your wreath!


How fun would this be to make at a watermelon-themed party? I totally want to plan one!

6/13/19

Guilt-Free PB&J Sundae

We're in the middle of a heat wave here in Northern California. You know what's REALLY refreshing on a hot day? A homemade peanut butter and jelly sundae. Even better, it's guilt-free. 


Believe it or not, you can actually serve this as a meal and not feel like the worst mom ever. With homemade frozen yogurt (literally frozen yogurt - no added sugar), naturally sweet ripe berries, a homemade peanut butter sauce, and plenty of nuts, it's not all that different than serving a PB&J with a glass of milk, nutritionally speaking. The fancy glass makes all the difference. Affiliate links below.

---------

Guilt-Free Peanut Butter and Jelly Sundae


Materials:


Steps:


Follow the manufacturer's instructions to freeze the Greek yogurt in the ice cream machine. 

Meanwhile, remove the berries from the freezer so they can thaw and then make the peanut butter topping. In a small saucepan, combine 1 c. sugar with 1/2 c. water. Bring the mixture to a boil, then allow to boil for one minute. Remove from the heat and stir in 1/2 c. peanut butter. Let the topping cool. Chop the peanuts and set them aside.


To assemble your sundaes, put a large scoop of berries in the bottom of the glass. Add a generous dollop of peanut butter topping, then add a scoop of frozen yogurt. Repeat the layers until the glass is full, then sprinkle chopped peanuts on top. 

The result is amazing. Trust me.