Showing posts sorted by relevance for query handprint. Sort by date Show all posts

3/27/13

Bunny Week, Day 3: Bunny Handprint Cards

What better way to say "Happy Bunny Week!" than with a card?  

 
I am a huge fan of handprint crafts, so it's no surprise that I would have Trevor make a set of bunny handprint cards.  They are so quick and easy to make.  Use a brush to paint the palm, pointer finger and ring finger.     


Press the painted hand to the card, then lift straight up.  Let the handprint dry, then draw on a mouth and whiskers using a Sharpie.  Add googly eyes and a construction paper nose, add your message inside, and that's all there is to it!

Here's a grey version Trevor made after he finished the white ones.

These would also be adorable on a canvas to bring out each spring!  Here are a few other handprint crafts you might want to try:

Enjoy!

2/23/22

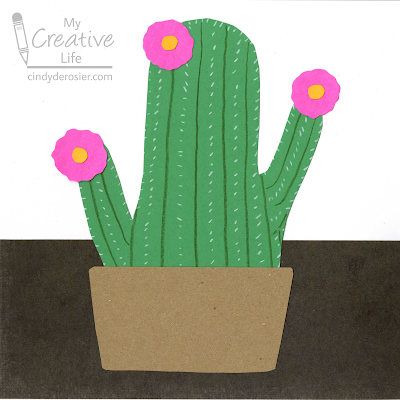
Handprint Saguaro Cactus

It's been awhile since I've shared a handprint craft. Did you recognize that the cactus is a handprint? 


Handprint Saguaro Cactus


Materials:

  • construction paper
  • scissors
  • colored pencils
  • craft glue

Steps: 


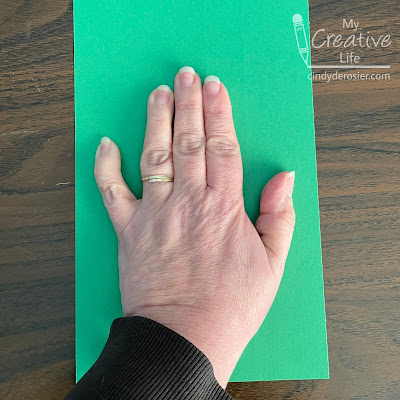
Position your hand on a piece of green construction paper with your three middle fingers together and your thumb and pinkie separate. Bend your thumb and pinkie slightly so they point upward like the arms of a cactus. Trace around your hand. 


With a pencil, lightly round off the top of your handprint so that you have one barrel-shaped cactus instead of three distinct fingers. Cut out the handprint. 

Use a green colored pencil to draw the ribs of the cactus. Then use a white colored pencil to draw little tick marks between the ribs for the needles. 

Cut a piece of tan construction paper into a pot that is slightly wider than your handprint. Then cut three wavy circles from bright pink and three small circles from yellow to make the flowers. 

Glue a strip of brown construction paper to white to make the background. Then glue the cactus into place. Add the pot and the flowers. 


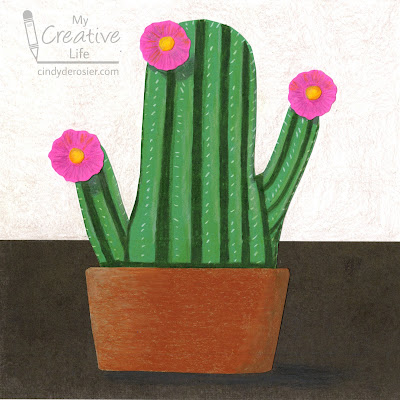
You can stop there, but I wanted to see what I could do to turn this simple preschool craft into something more challenging for older kids. Here's what it looked like after I thickened the ribs, added shadows to the flowers, colored the pot to look more like terra cotta, and added a little bit of color to the background to mimic a textured wall.  


If you're going to enhance the craft with colored pencils, do so before you glue everything together. I felt limited in what I could do since everything was already glued down. Still, it was a fun challenge for me. 

12/7/20

Sledding Dog Handprint Craft

Have you seen the video of Secret, the dog who takes herself sledding? It's adorable. It was filmed in 2018 but is making the rounds again as we approach winter. If you haven't seen the video, go watch it now. 

Today's craft is inspired by Secret, although I chose to change her from her black-and-white self to brown. Her proportions are a little different as well, because I used my handprint to make her. Affiliate links below. 


Sledding Dog Handprint Craft


Steps: 


Trace your handprint onto brown cardstock. Carefully cut it out, then use the scraps to cut ears, a fluffy tail, and tree trunks. Glue the googly eye, the ears, and the tail to the handprint, then color the tip of the nose black. 

Cut two slopes from white cardstock, then cut the snow for the tops of the trees from the scraps. Cut out a blue sled and some green trees. Assemble the trees by gluing the trunks and the snowy tops to the trees. 

Glue the slopes to the background paper. Glue the dog in place, then glue the sled over the fingertips so it looks like the dog is standing in the sled. Finally, glue the trees in place.

10/27/21

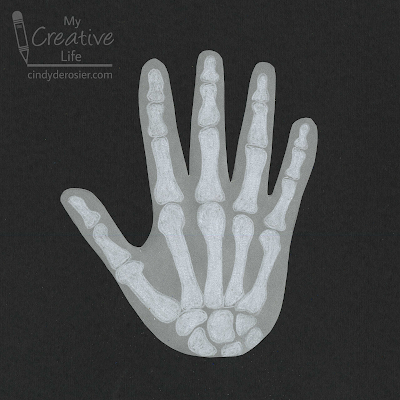
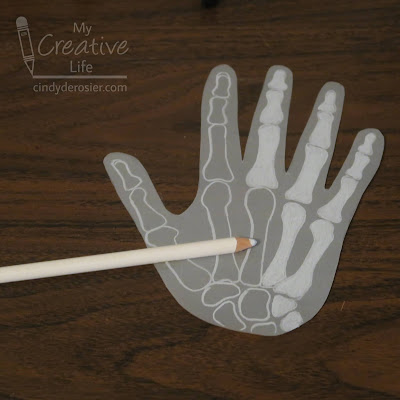
Skeleton Handprint for Halloween

Halloween Hand #4 is a skeleton version of my hand. I've done a skeleton hand (and arm) before, but using a completely different technique. Affiliate links below. 


Skeleton Handprint


Materials: 


    Steps: 

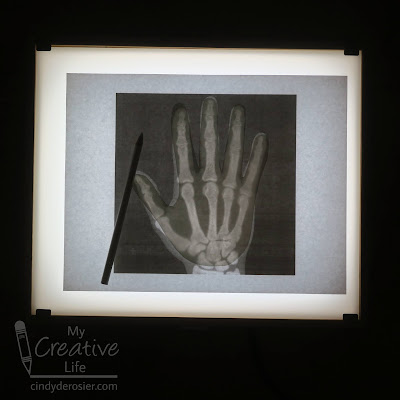
    Trace your hand onto vellum and cut it out with the scissors. Put the printed x-ray onto the light box with your handprint cut-out on top of it. Trace each of the bones onto the vellum. 


    Remove the handprint from the light box and color in each of the bones. 


    Quick and easy and super cool. Tomorrow I'll be sharing my fifth (and final) Halloween handprint craft. Any guesses?

    11/15/21

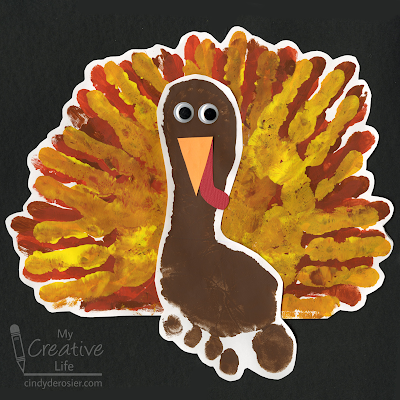
    Handprint and Footprint Turkey

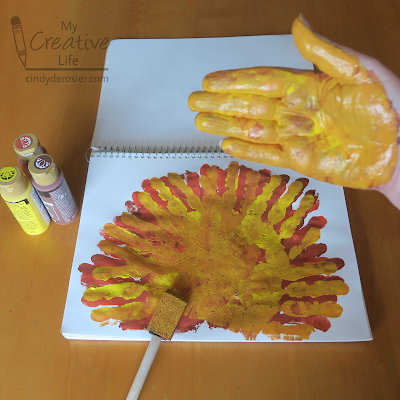
    We're fifteen days into November and I haven't posted any turkey crafts yet. Time to change that! Today's project is a turkey made from handprints and a footprint. 


    Handprint and Footprint Turkey


    Materials:

    • construction paper or drawing paper (white, red, orange)
    • paint (brown, rust, orange, yellow)
    • foam brush
    • scissors
    • googly eyes
    • glue

    Steps:


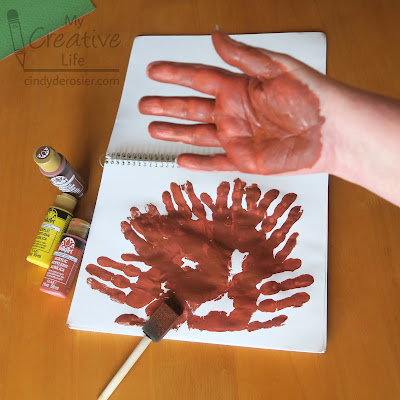
    Put a sheet of white paper onto a hard floor (not carpet). Use brown paint and the foam brush to apply paint to the bottom of one foot, then step onto the paper to get a good footprint. Set the paper aside to dry, then wash your foot but not your paintbrush.
     
    Put a second sheet of white paper onto a hard surface, like a table. Or the floor. Paint rust-colored paint onto one hand (it will mix with the brown already on the brush), then stamp it on the bottom left of the paper with your fingers pointing to the left. Add more paint to your hand and stamp five more times, rotating your hand 20°(ish) each time. You'll end up with a semi-circle of red-brown turkey feathers. Don't worry if there are gaps; they'll be filled with the next two layers. 


    Without cleaning your hand or the brush, paint your hand orange. Stamp it the same way as with the rust- a total of 6 times, with each handprint rotated 20° clockwise. Do the same thing with yellow. Since all the layers are still wet, the colors will blend.  


    Now you can wash your hand and the brush. Take a break; the footprint and handprints need to dry completely before you can continue. 

    When the paint has dried, cut out the footprint, leaving a small border of white around the edges of the print. Do the same with the handprint feathers. Then cut out an orange triangular beak and a red wattle. Glue the footprint to the feathers, then add the googly eyes, beak, and wattle. 


    Tomorrow I have a fun edible turkey craft to share. 

    7/9/21

    Handprint Monarch Butterfly

    I'm a huge fan of handprint (and footprint) crafts. If you ever see me staring at my hand while twirling it slowly around, I'm probably thinking about a potential handprint craft. Today's is a monarch butterfly. Affiliate links below.


    Handprint Monarch Butterfly


    Materials: 


    Steps:


    Paint a clothespin black, then set it aside to dry. 

    Dip one hand into orange paint, then use the paintbrush to add black lines on top of the orange paint. Work quickly so that it doesn't dry. 


    Press your hand onto the blue paper. Pay attention to which hand you are stamping - the right hand goes on the left and the left hand goes on the right. Repeat the process with the second hand, leaving a small gap between the two handprints.


    Use the tip of the paintbrush handle to add tiny white dots along the edges of the handprints. Let the paint dry completely. 

    Wrap a length of pipe cleaner around the clothespin and then bend the ends gently to make antennae. Glue the clothespin to the center of the paper between the two handprints. 


    The monarch butterfly is the official state insect of Alabama, Idaho, Illinois, Minnesota, Texas, Vermont, and West Virginia, but no matter where you live it's a great craft to make.

    3/13/17

    'We Are All God's Children' Rainbow Handprint

    Why do just one rainbow handprint craft when you can do two? Affiliate links below. 


    'We Are All God's Children' Rainbow Handprint Craft


    Materials: 


    Steps:


    Squirt craft paint onto your hand in rainbow order, starting with red at your fingertips and ending with purple on your thumb and lower palm. Use a foam brush to spread the paint evenly, taking care not to mix the colors too much. 

    Stamp your hand onto the center of a piece of white cardstock. Wash your hands and let the paint dry completely.


    When the paint is dry, trim the white cardstock so that it has an even margin around the handprint. Use the blue cardstock to make a mat. 


    Punch a heart from the scraps of white cardstock and write your message on it. You can use the same message I wrote or something else.

    8/10/15

    Project CAT - Challenge #6: Handprint Campfire

    Hello! This is Trevor again! Welcome to Week 2 of Project CAT! Today is National S'mores Day! So we decided to make a handprint campfire with a roasting marshmallow.

    This was our inspiration. We saw it at the fair. It was a preschooler who made it. We decided to make our own version. 


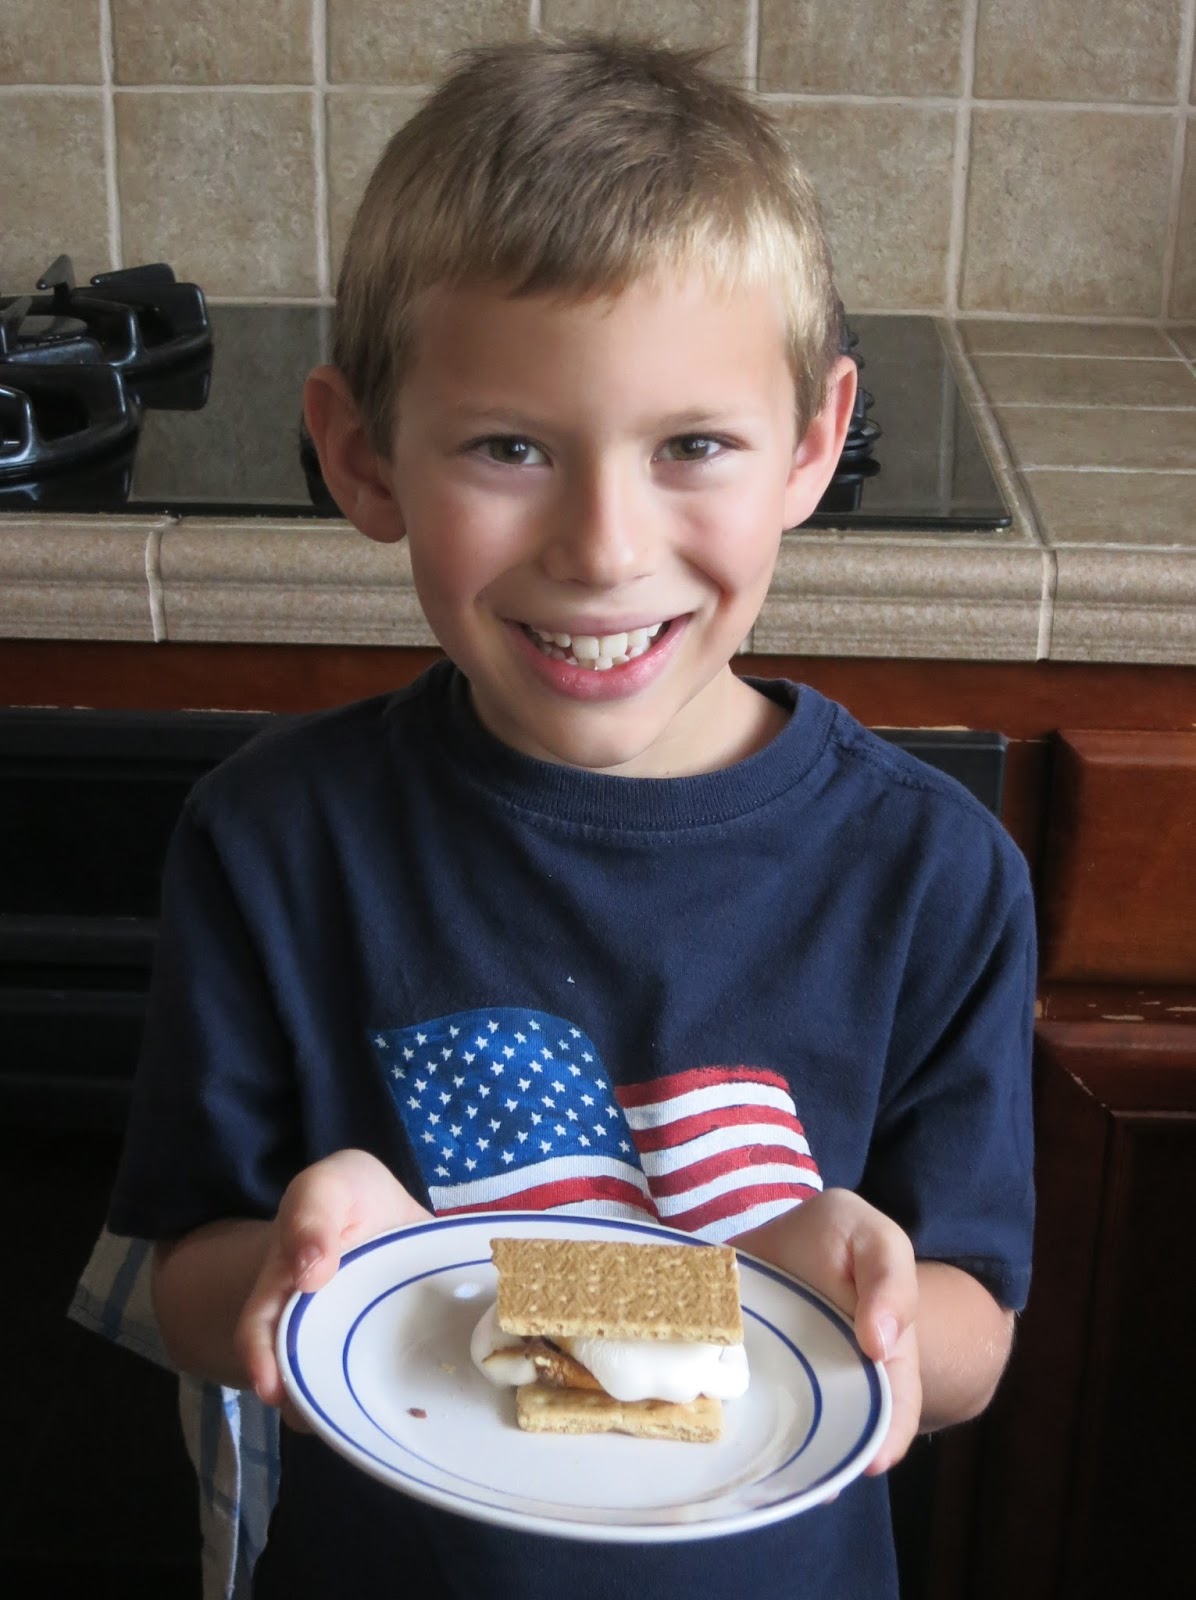
    But before we got started, we ate s'mores. Did you know you can make them indoors? Just put a marshmallow on a skewer and put it over the stove! This is great for me because I cannot cook outside on a campfire because I am allergic to wood smoke and get really, really bad hives.


    Yummy! Delicious! 


    Now, it's time for the craft! This is what our version looks like:


    Materials: white paper, craft sticks, brown color pencil, cotton ball, wooden skewer, glue, brown chalk, paint (yellow, orange and red), a foam brush and wire cutters. 

    Step 1: Start by making your marshmallow. Using the chalk, color the marshmallow to make it look toasted. Then poke the skewer through the cotton ball. This might be a little bit hard. Add glue to the inside of the cotton ball so that the skewer stays in place. Set it aside.

    Step 2: Color the craft sticks to make them look like logs. Add lines and circles to look like wood grain and knots.


    Step 3: Paint your hand with yellow, orange and red paint. 


    Step 4: Press your hand onto paper. If you want to, wiggle your fingers around to make it look more like a flame. (I did this.)


    Step 5: Trim the skewer to make it even with the paper. We used wire cutters.

    Step 6: Glue the skewer with the marshmallow on it and the craft sticks in place. You have a completed campfire!


    Now it's your turn! Make a handprint campfire or something inspired by this handprint campfire. And have some s'mores, since it's National S'mores Day! Here are some recipes you might want to try:


    3/8/19

    Basketball Handprint Painting

    A second basketball craft in one week?! It's like I don't even know me! 


    Before I get to the tutorial, let me give you a glimpse into how this basketball craft came to be. I sat down on Wednesday morning to work on Fun Family Crafts:
    (opens Fun Family Crafts Pinterest account)
    Let's see... good traffic on St. Patrick's Day. Spring is picking up. Oh wow - basketball is doing really well. We should do something with that. I wonder if we have enough good basketball crafts to do a roundup.
    (opens Fun Family Crafts and searches the basketball tag)
    Scroll, scroll... OK, we have some good stuff, a lot of it edible. Some simple, some more difficult, good. I could do a roundup, but I should probably see if I can find one more solid craft. Something unique.
    (googles "basketball craft")
    Scroll, scroll... hm. Cool idea, terrible photo. Ugh, seen that one a million times. Nice, but that's more generic sports than basketball. Cute referee craft. Are those basketball referees though? What to basketball referees wear? Are they even called referees, or do they have a special name? 
    (googles "basketball referees")
    OK, standard stripes. I don't think that referee craft screams basketball though. 
    (returns to "basketball craft")
    Let's see... scroll, scroll... wait, that's cool! Love the texture on that basketball. How did she do that?
    (opens blog with cool textured basketball craft)
    Oh wow. That's so clever! I'm going to feature this!
    (returns to Fun Family Crafts, writes and schedules post)
    OK, we're pretty good for a basketball roundup now. I should get started on it before.... You know, we don't have a handprint basketball craft... 
    (drops everything and makes basketball craft)

    And I still haven't done the basketball roundup. But now I have a basketball handprint craft that I can add to it when I do!

    ---------


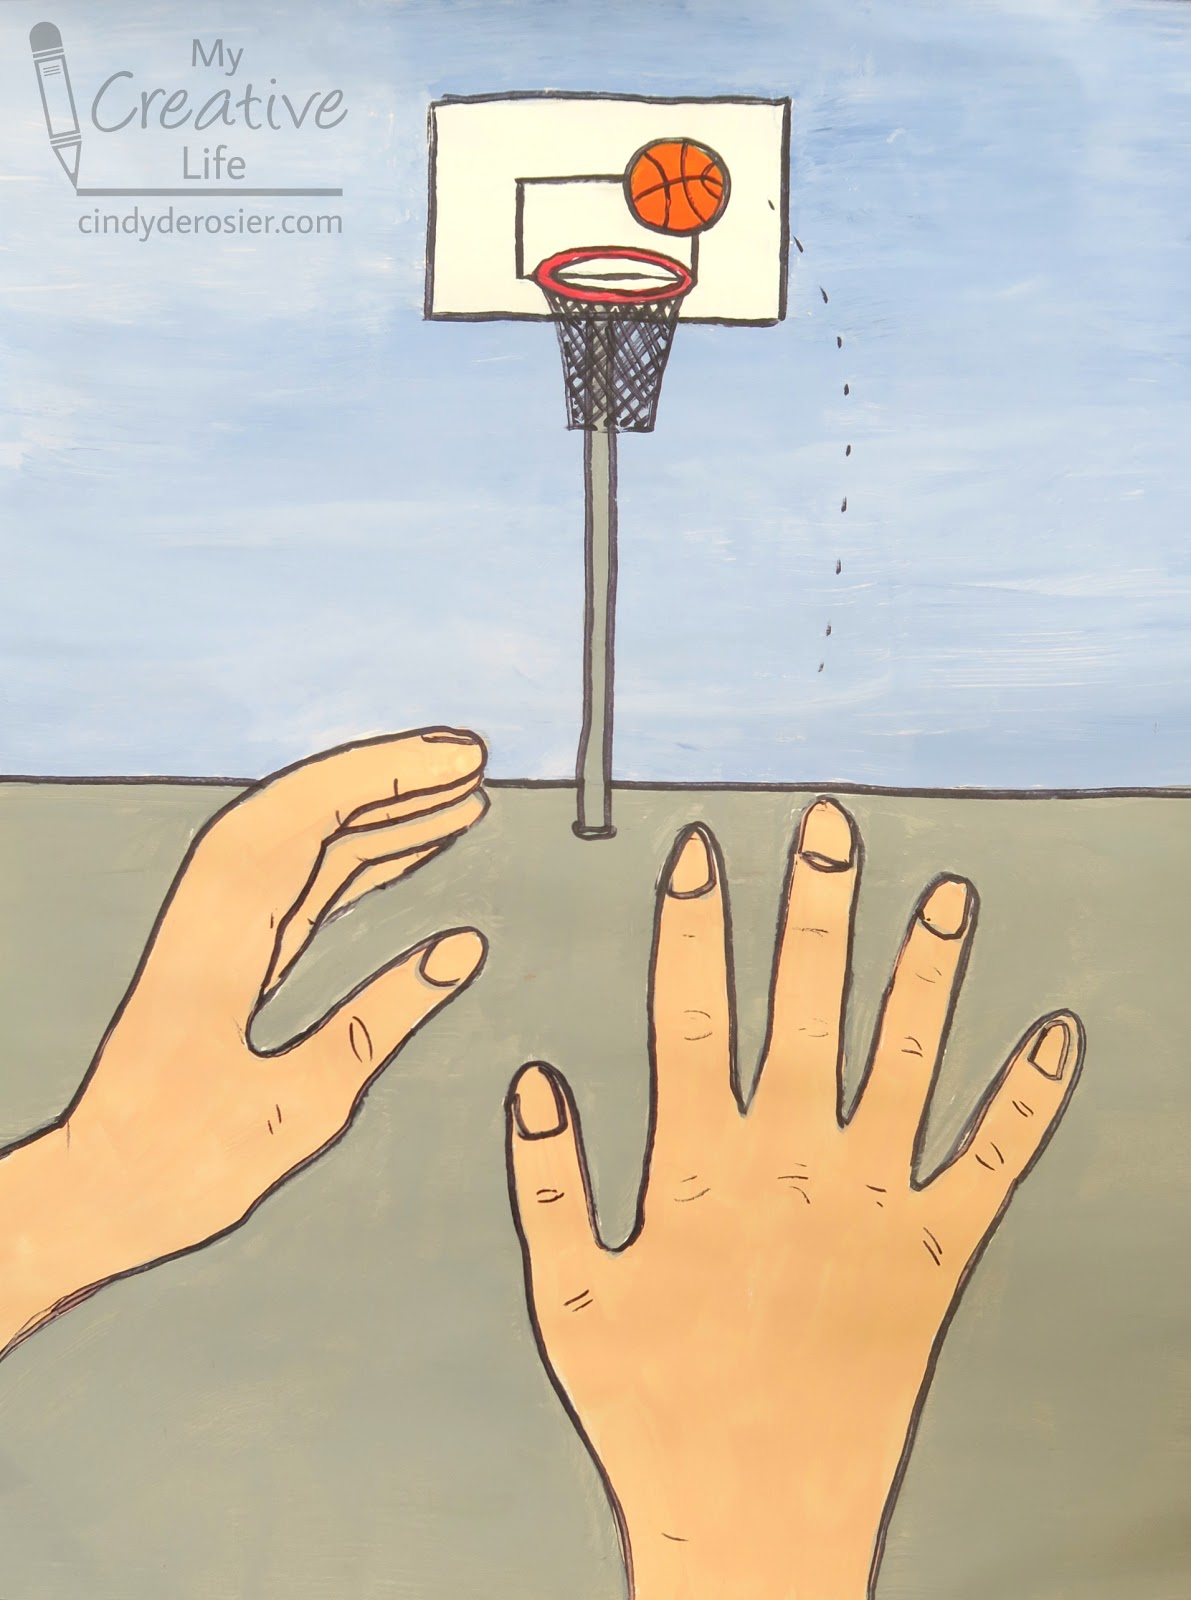
    Basketball Handprint Painting


    Materials:


    • large white drawing paper 
    • pencil
    • black Sharpie
    • Folk Art paint (I used Dark Hydrangea, Winter White, Medium Gray, Lipstick Red, and Pure Orange)
    • Delta Creamcoat Paint (I used Soft Peach)


    Steps:

    Orient the paper vertically. Using the pencil, lightly trace your dominant hand in the lower center of the paper. (I used Trevor's hands - he's home sick from school- because mine didn't fit as well on the paper, which is why my art project is right-dominant instead of my usual left). Draw the non-dominant hand to the side, where it would be after shooting a basketball.

    Draw a horizon line near the middle of the paper. Trace all lines with the Sharpie.


    With the pencil, draw a rectangular backstop near the top of the paper. Draw the inner rectangle lightly, then add a circle for the basketball. Add two vertical lines to make the pole, then a skinny oval for the hoop. Add the net. Trace your lines with Sharpie, being careful not to draw the line of the backstop through the basketball. 


    Put some Dark Hydrangea and Winter White on a palette. Mix them together, leaving streaks. Use a large brush and horizontal strokes to paint the sky. 

    Rinse the brush, then paint the pavement and the pole with Medium Gray. 


    Switch to a smaller brush. The sky should be dry, so paint the backstop Winter White, the basketball Pure Orange, and the rim Lipstick Red. 

    Fill in the hands with your choice of skin tone. The last time I tried to match skin tone, I failed miserably, but using Soft Peach directly out of the bottle without mixing was actually a pretty close match to Trevor's hands. Good enough, anyway!  


    Let the paint dry completely, then retrace all of the lines with the Sharpie. Add lines to the basketball, plus small lines to the hands for the knuckles.


    I don't suppose any of you can relate to having dozens of tabs open on the computer while you work, interrupting your own thoughts to Google something, or dropping everything to make a craft? Yeah, that's what I thought!

    10/15/21

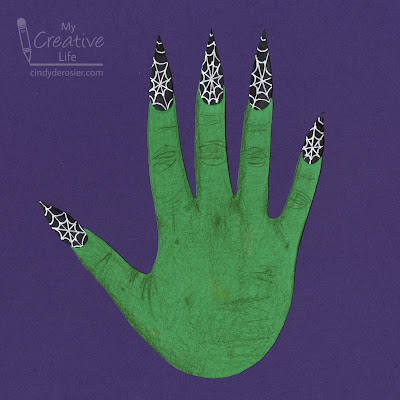
    Witch Hand with a Spiderweb Manicure

    I love handprint crafts. It's so much fun thinking of clever ways to transform a handprint into something entirely different. This time, I turned my handprint into....  a hand.  


    A witch hand, to be specific. So it's not the most clever transformation of all time, but it was really fun to make. Affiliate links below. 


    ---------

    Witch Hand with a Spiderweb Manicure


    Materials:


    Steps: 


    Trace your hand on green construction paper and cut it out with microtip scissors. Cut a pointy nail for each finger from black cardstock. (I used white and ended up coloring the fingernails black with a Sharpie. Save an unnecessary step and start with black cardstock.)


    Use the back of your hand as a guide to draw knuckles, lines, and shadows on the witch's hand. Add texture to the skin by lightly coloring in small circles over the lines you've drawn. Add moles/blemishes as desired. Draw a spiderweb pattern on the fingernails using the white pen, then glue the fingernails to the hand. 

    I love the way it turned out. I'm tempted to make enough for a banner, which is exactly how I'd display them if I had a classroom's worth of witch hands. 

    12/17/13

    Plans Derailed

    From December 7-9, we were dealing with this:


    Trevor was back to 100% on Tuesday the 10th and went to school.  On the evening of the 11th, Trevor's eyes both swelled shut and he could not see at all.  It was terrifying, both for him and for me.  We treated it as an allergic reaction, though it turned out to be a severe bacterial infection in both eyes.  By Thursday morning, with compresses applied, he was able to open his eyes enough to see a tiny sliver of the area by his feet.  In order to see straight ahead, he needed to point his face toward the ceiling.  Here he is at the doctor's office on Thursday the 12th with his eyes opened as wide as possible.


    With antibiotics, compresses, and lots of rest, he was able to resume activities yesterday, thank goodness.  It is horrible when your child is sick, particularly when he couldn't do any of the typical sick-kid activities that require vision.  He couldn't see the TV, he couldn't read, he couldn't play games, he couldn't do anything on his own.  We had to miss multiple parties and other activities that we had been looking forward to attending.  I spent a lot of time reading out loud to him.  

    Unfortunately, I got a bad cold (as well as a mild infection in one eye) right as Trevor was improving from his own cold and eye infections.  Obviously, we also didn't do any crafting while Trevor's vision was compromised or when I was under the weather.  All of the projects that have been running on my blog this past week were prescheduled.  The projects we'd planned to do didn't happen.  Now that we're both healthy, we're working furiously to finish our handmade Christmas gifts.  I'm going to share one of those tomorrow.

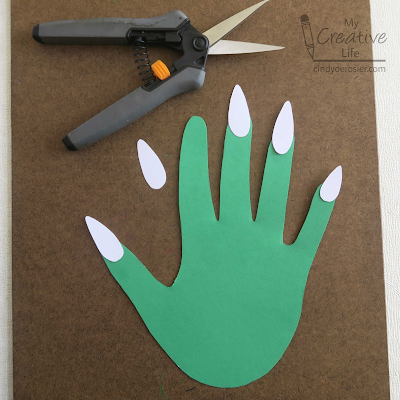
    In the meantime, I wanted to share a project I finished awhile ago and finally delivered. Remember the Handprint Owl canvas I'd made back in February?  I showed it to my sister on the day her baby was born, with the promise to handprint her two kids and make her a canvas.  It ended up taking awhile to get the handprints done, due to a combination of me not seeing them all that often and my niece being extremely uncooperative about having her tiny, wiggly, clenched hand painted and pressed onto canvas.  Then it took a very long time for me to finally paint in the details to turn two handprints into two owls.  And then, it took another long time for me to see my sister somewhere that didn't involve travel and the nuisance of packing a canvas into luggage.

    But now she finally has her canvas so I can finally share it.  Here are the handprints of then-12 year old Timothy and 1 month-old Allison.  In retrospect, I would have had Timothy put his hand closer to the center.  Because his hand was so far to one side, I couldn't put the tree trunk next to it.  But I'm happy with how it turned out and so is she.


    I have another handprint art project in the works that involves my sister's family... more on that after Christmas!
    2/27/13

    Handprint Owl

    Back in January, I shared a Disney-themed card I made to coordinate with the Mickey Mouse outfit Trevor picked out for his future baby cousin. I mentioned that I'd be making a creative gift to give after the baby was born. I'm thrilled to announce that the baby is here - my first niece! She's absolutely beautiful and such a joy.

    Here's Trevor holding Allison Kate, who is about 6 hours old in this picture.


    Here's the gift I made for her:


    Well, not quite. This one has Trevor's handprint and I am keeping it. (Fortunately, my sister thought nothing of me handing her a gift, watching her unwrap it, then taking it back from her.) The one I make for my sister will have her two children's handprints on it - 12 year old Timothy and newborn Allison. 

    To make one, you need: a canvas, gesso, foam brush, acrylic paint (brown, white, black, yellow, green), pencil, baby wipes.

    • Begin by priming the canvas with gesso. After that is dry, add a blue sky. I started by putting white paint on the canvas and adding streaks of blue over that until I had the look I wanted. Let it dry thoroughly.  
    • Use the foam brush to cover the child's hand with brown paint. Make sure the hand is completely covered and that the paint is even. Stamp the hand firmly on the canvas. Lift straight up when removing the hand. Use baby wipes or warm soapy water to clean the child's hand. Let the handprint dry.
    • Paint a tree branch horizontally across the canvas so that the palm of the hand is above it and the fingers extend below. Add the trunk of the tree off to one side.  
    • Use the pencil to lightly draw circles where the eyes will be, then fill in completely with white paint. This will take two or more coats to get good coverage. Let everything dry.
    • Use the yellow paint to make talons. Add a yellow triangle beak. Paint pupils in black. Finish by painting green leaves on the branch.  

    Easy as pie! At least, it is with a cooperative 6 year old. It might be a totally different story when I go to make this with a newborn's curling little hand. Anyone have any tips?!

    7/5/11

    Introducing Trouble

    For years, Trevor has been asking for a pet bunny. At first, I thought it was a phase he'd outgrow, but no- he consistently put "bunny" at the top of his wish list every Christmas and birthday. Last year we told him that we would get him a bunny for his fifth birthday. 

    After much research, we adopted Trouble from Contra Costa Rabbit Rescue. Trouble's mom had been rescued from a filthy house that had hundreds of rabbits running loose. Two days later, Trouble was born. He is very energetic, extremely curious, and adventurous. He reminds me of a silent toddler- bursts of high energy with naps in between, into EVERYTHING, and riveted by anything new or different. Despite his name, he hasn't caused any trouble. We adore him.

    Meet Trouble.

    Isn't he beautiful?

    He has a perfect little cotton tail.

    He loves to explore.

    He also loves to lounge on the hardwood floor.

    Trevor wanted to make some art to welcome Trouble to our family. I remembered seeing a handprint bunny craft around Easter. A quick Google search led me to Activity Village

    Step One: Paint the palm and fingers of one hand. Do not paint the thumb. 


    Step Two: Make one vertical handprint for the head (index/middle finger slightly separated from ring/pinkie). Make one horizontal handprint (fingers together) for the body. 

    Step Three: Make a white thumbprint at the back of the body to create a cottontail.


    Step Four: When the paint is dry, use pens to outline the bunny and add features.

    Trevor's.

    Mine.

    Trevor was thrilled with the finished art and immediately hung it over Trouble's enclosure.


    Trevor wants to do more rabbit art to decorate what he's now calling "Trouble's Wall." Stay tuned!