Showing posts with label fingerprint. Show all posts

5/6/24

Fingerprint Heart Magnet for Mother's Day

On Friday, I shared an idea for a homemade Mother's Day heart magnet for one child to give to Mom. Today's idea, featuring fingerprint hearts, can be made by a group of siblings (for Mom) or cousins (for Grandma). Or, you can do like I did and include Mom and Dad to make a family heart. Affiliate links below. 


Fingerprint Heart Magnet for Mother's Day


Materials:


Steps: 


Paint the background - a blue sky and green grass. 


When that is dry, add fingerprint roses floating above the grass. To make the rose, add one fingerprint at a 45° angle to the left, then add a second fingerprint at a 45° angle to the right. It is easiest to do with a pointer finger. Use a pinky finger if you need smaller hearts to fit in more people. 


When the fingerprints are dry, paint stems and leaves under each flower. Then use a Sharpie to write each person's name above their flower. I added a dashed border around the edges to finish my heart. 


The final step is adding magnet tape to the back. Display your art on the refrigerator for everyone to enjoy. 

5/3/24

Fingerprint Flower Magnet for Mother's Day

Every mom I know loves gifts that are handmade by their children. This heart-shaped refrigerator magnet features a child's fingerprints, turned into roses. Affiliate links below. 


Fingerprint Flower Magnet for Mother's Day


Materials:


Steps: 


Paint the background of the heart with your desired colors. I made a blue wall and a white tabletop, but you can choose whatever colors you want. Then add a vase toward the right side of the heart. Mine is yellow.

When that is dry, add fingerprint flowers in the space above the vase. If a young child is doing this, they can use their pointer finger. If the child is older with fingers that are less petite, you might want to use the pinky finger. Then use a brush to paint a heart onto the vase.


When the fingerprints are dry, paint medium green leaf shapes in and around the flowers. Don't fill in all the spaces at first. Leave room to add dark green shapes. While I was waiting for the green paint to dry, I added a grey shadow and some texture to the tabletop. This is optional. 

When all the paint is dry, write "Happy Mother's Day!" on the left side using a Sharpie. I added a dashed border around the edges as a final touch. Then turn the heart over and add a strip of magnet tape.


This project is easily adapted for many other holidays and occasions. Birthdays, Valentine's Day, and even graduation come to mind. Just change out the message!

2/16/23

Finger Painting Pineapple

Until yesterday, I had never done an entire painting using just my fingers. Well, maybe I did when I was a toddler. I don't remember. I've done a lot of fingerprint and handprint art over the years, but with those I used a brush at some point, decorated the painted part with pens, or otherwise did something other than just painting with my fingers.  

I challenged myself to paint a pineapple in my sketchbook (next to the gouache strawberries) using nothing but my fingers. Actually, I put a few more restrictions on myself. Because I would be taking process photos, I needed one hand to stay paint-free so I didn't mess up my camera. I also wanted to finish the painting without interruption, which meant I couldn't get up to wash my hands, nor could I set the project aside to let a layer dry. I intentionally didn't put anything nearby on which I could wipe my hands. I did allow myself to do a rough pencil sketch before I started. 

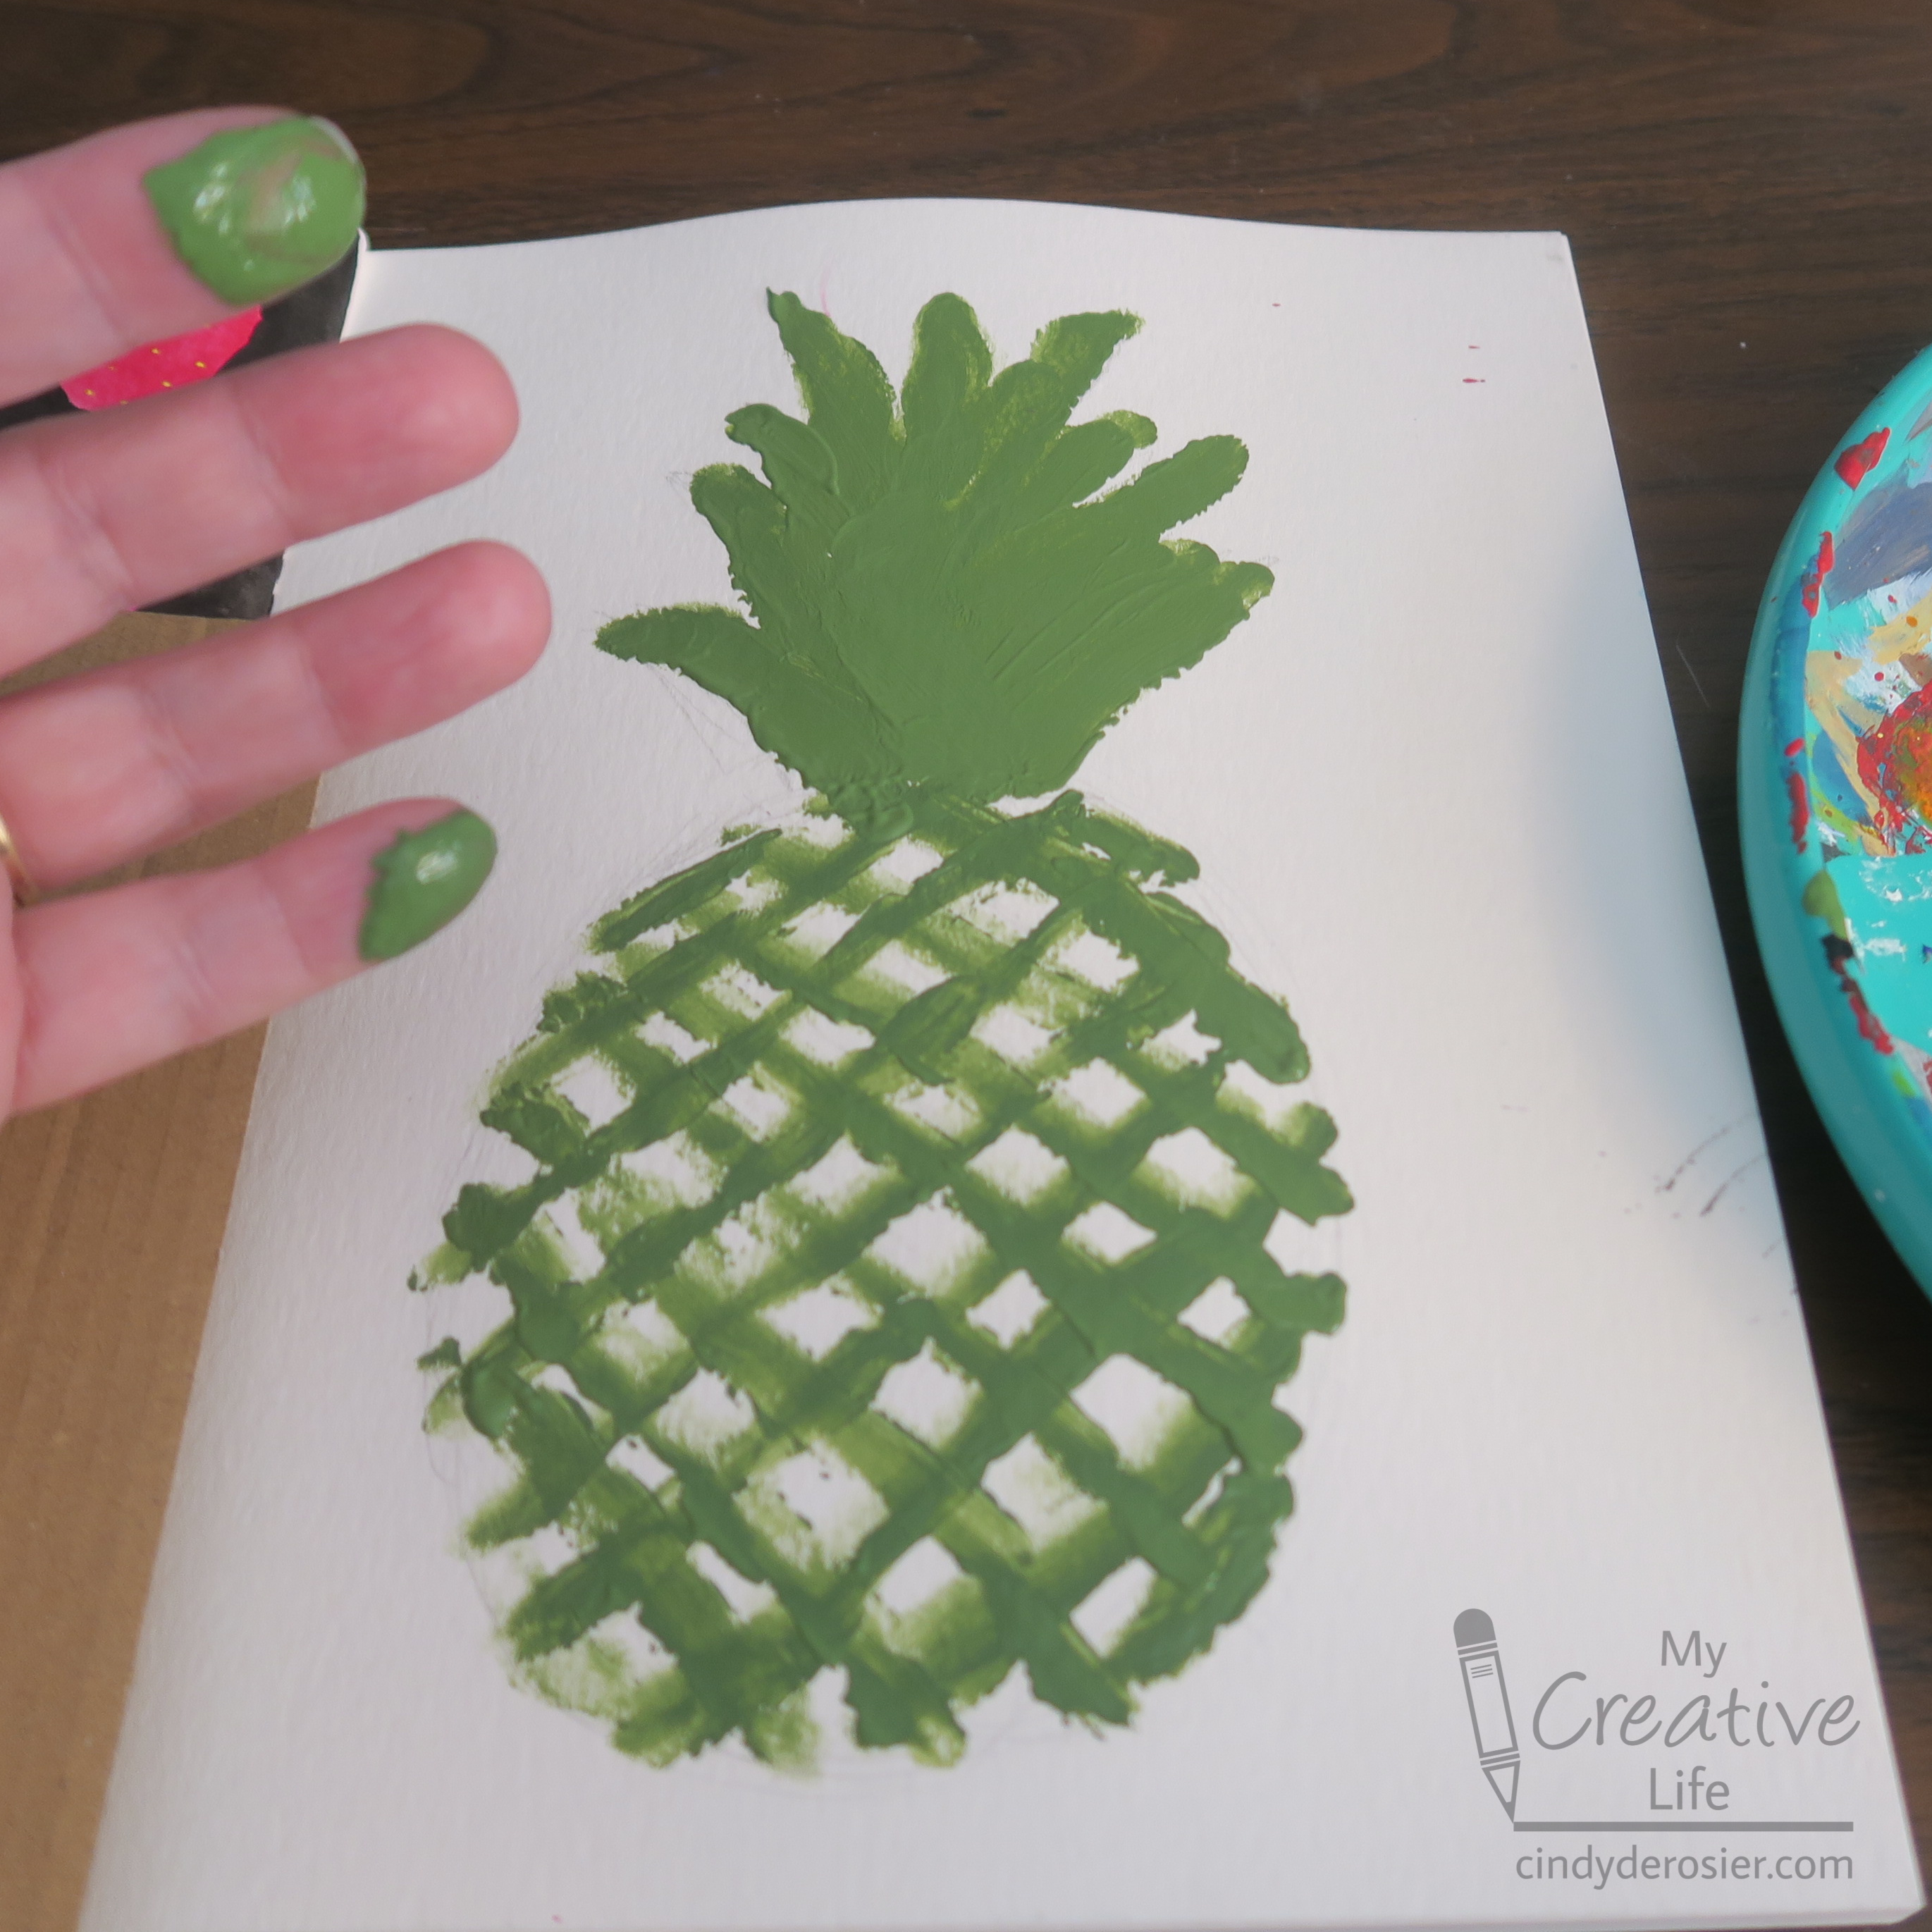
What you see here is a pineapple painted wet-on-wet with the four fingers of my left hand, which I didn't clean or wipe even when changing colors. It was a challenge, which was the whole point. 


Finger Painting Pineapple


Materials: 

  • sketchbook
  • acrylic paint (green, yellow, brown, and turquoise)

Steps: 


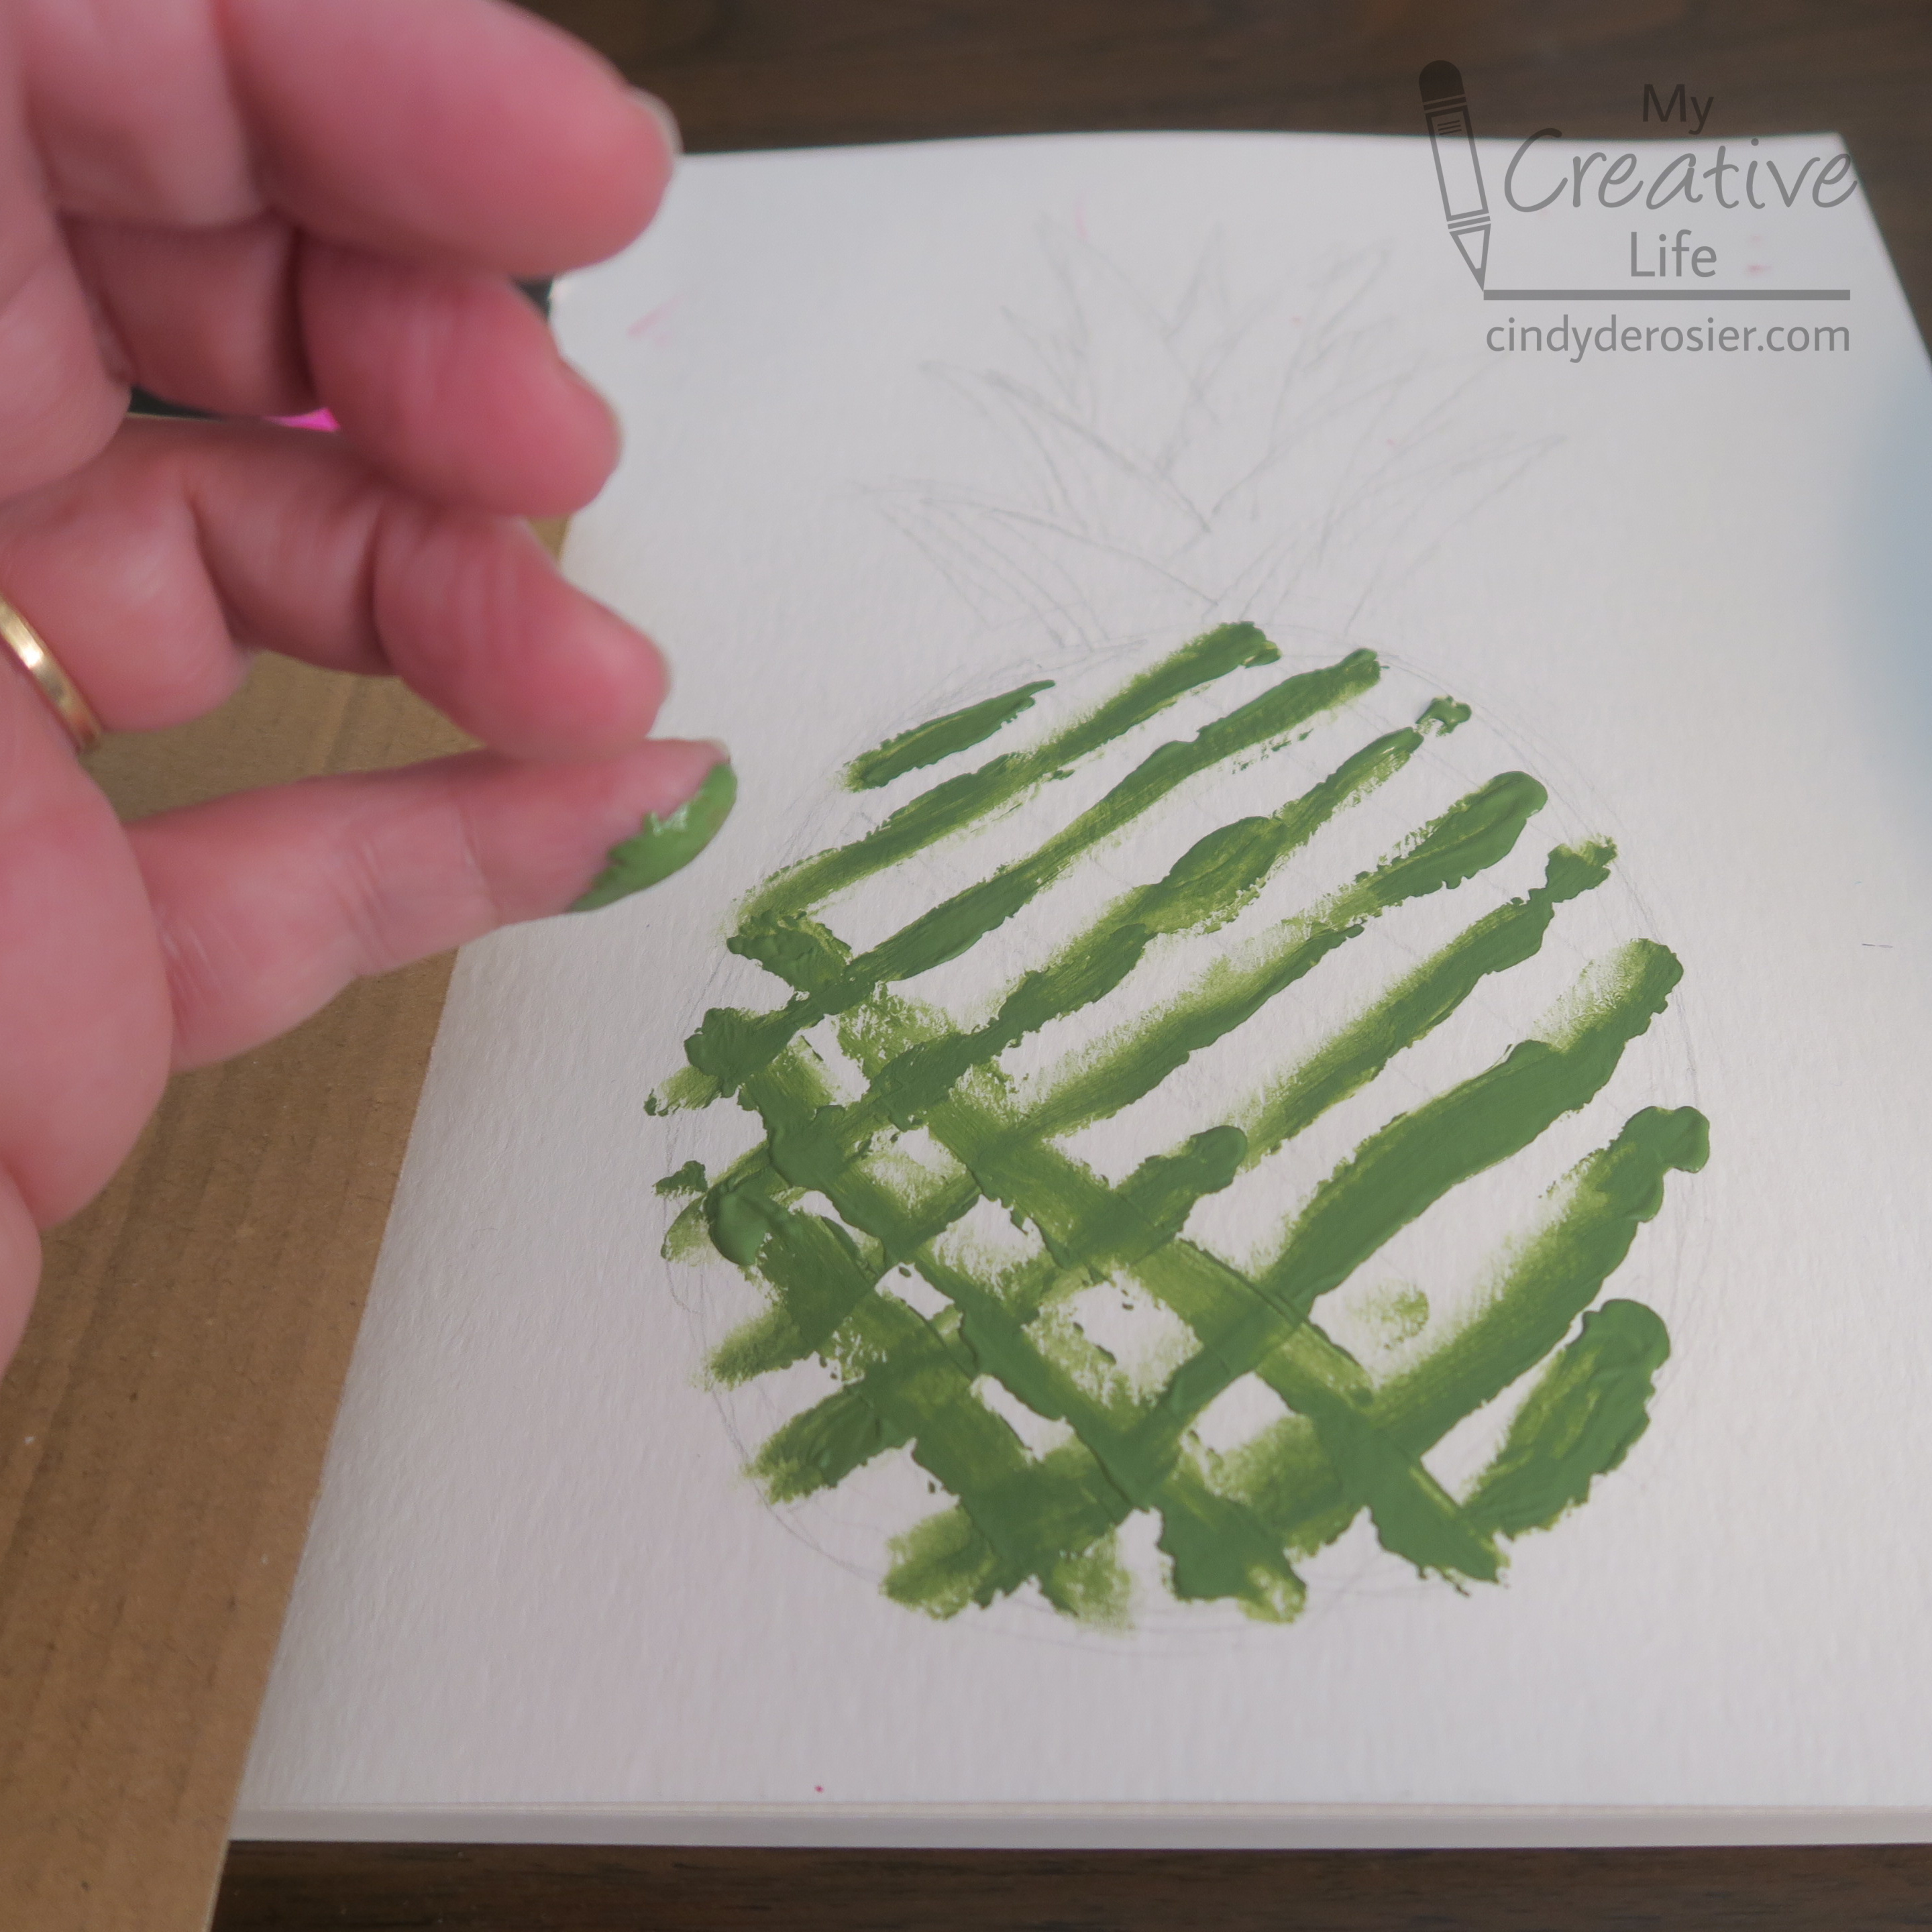
I used my pinky finger and some green paint to draw diagonal lines onto the pineapple, first one direction and then the other. This was really difficult. I don't have good pinky control (possibly due to the fact that I've broken that finger a couple of times, or maybe I just have a weak pinky). Fortunately, most of this would be covered, so it didn't really matter. 
 

I switched to my index finger for the crown. I made swooping motions in green from the base outward, which is what you see below.


I added a bit of brown to the crown, trying to get some shadow. After that, I dunked my index finger into the turquoise in a surprisingly effective attempt to dilute the green and the brown already on my finger. Then I painted the background. It was really hard getting between the leaves of the crown; quite a few got covered, as you can see. It was also hard to get right up to the edge of the paper without getting any paint on the strawberry side. I did my best, but had to mop up small mistake with my ring finger. 


I mixed a little bit of brown into the yellow (yes, with my finger) and stamped fingerprints into each of the white gaps between the original green lines. Then I dipped into plain yellow and re-stamped the areas in the upper right to add a subtle highlight. I touched up the crown with my pinky finger, which actually worked better than my index finger had. I mixed a small amount of yellow into the green to add some highlights on the left. 


The last step was (finally) washing my hands. This was such a fun challenge and definitely something I'd like to try again. 

www.dickblick.com

11/26/19

Fingerprint Family Christmas Tree

This festive Christmas tree centerpiece is a special keepsake because each portion is decorated with a different family member's fingerprints! Look closely at the base - each person signed their name. Since the two wood pieces come apart, the tree is really easy to store. I wasn't able to find the same tree I used, but there's one I like even better in the materials list. Affiliate links below. 


Fingerprint Family Christmas Tree


Materials:


Steps:


Paint the wood tree pieces and let them dry completely. 

There is space for up to 8 family members to participate per tree. Each tree is made up of two wooden pieces, each with a front and a back, each of which can be divided into left and right. Below, you can see that I signed my name at the left-hand side of one base, then used my fingers to add dots of paints only on the left-hand side of the tree. Someone else will fill in the right-hand side, while two other people do the same with the other wooden piece. 


After those front four sections are dry, the last four family members can complete the left and right sides of the backs of the two trees. 


After all the paint is dry, assemble it to create an 8-sided tree with each family member's name at the bottom. 


I suggest buying multiple trees to allow for your family to expand. As inlaws, children, or others join the family, have them add their signature and fingerprints. Over time, you'll have a priceless keepsake that preserves wonderful memories of those with whom you've celebrated Christmas. 

9/4/19

Fingerpaint Watermelon Paper Plate Wreath

Summer isn't over yet! If you're not quite ready to leap into fall, here's a fingerpaint craft that celebrates the warm weather and long summer days. 


Fingerpaint Watermelon Paper Plate Wreath


Materials:

  • two paper plates
  • Folk Art acrylic paint (red, white, green, black)
  • scissors
  • glue
  • ribbon


Steps:


Use your fingers to smear red paint in the center of one of the paper plates. Without cleaning your fingers, add a band of white paint around the edge of the red. It will mix slightly and give you pink. Wipe your fingers, then add green around the outside of the plate. When the red is dry, make fingerprints of black randomly in the red section. 


When the paint is completely dry, cut the plate in half. Then cut each half in half, and each half in half again, forming 8 wedges. Cut out the center of the second plate to make the base for your wreath. 


Arrange the watermelon wedges so that they cover the wreath. Glue them in place. 


Add a ribbon to make a hanger, then display your wreath!


How fun would this be to make at a watermelon-themed party? I totally want to plan one!

7/18/13

Kidding Around: Fingerprint Art

Trevor was so excited to get the email from Kidding Around saying that Day 13's activity was Fingerprint Art. I've mentioned before how much he LOVES fingerprint art. I love it too!

We used Ed Emberley's Complete Funprint Drawing Book for ideas (affiliate link). I love how Trevor's artwork turned out.  My favorite part is that he replaced the R's in his title with fish.  So cute!


Here's mine:


Even though we've done fingerprint art dozens of times before, it's been awhile. I love that the Kidding Around prompts are leading us to both try new things and revisit old favorites.