5/30/23

Celebrating with Balloon Cards

Today, Steve and I are celebrating our 19th anniversary! I used our wedding colors to make him a card. I'm really happy with how it turned out. It's a simple design and I'm especially pleased to have made the entire thing from scraps. 


After I finished the card, I remembered that one of the spaces on this year's BASH-O card is "Celebration." With the rules allowing two cards to count as one layout, I decided to use the same balloon design to make a second card. And this time I took some photos along the way to show you how I made it. Affiliate links below. 


Celebrate Balloon Cards


Materials:


Steps:


Cut a blue background to fit your card blank. Punch six cardstock circles. I used scraps, which meant that some of the circles weren't complete. This is fine. There's only one complete circle on the finished card; the rest get trimmed down.

Use a die cut machine to cut your sentiment. I used white for one card and black for the other. 


Arrange the circles on the blue background. If you have any incomplete circles (like the blue one below), line up the straight edge with the edge of the card back. Use the tape runner to secure the circles in place. Use liquid adhesive to glue the sentiment to a contrasting background. 


Trim off any circles that are hanging over the edge of the card. The easiest way to do this is to turn the card upside down and use a trimmer (this is my favorite) to get nice, straight edges. Use the microtip scissors to fussy cut around the sentiment. 

Mark a dot in the lower center of your card, in an area that will be covered by the sentiment. Draw lines extending from the balloons to that dot. Draw lots of lines to imply that there are more than just the six balloons showing. 


Extend some of the lines below the dot. Don't include the outermost lines, as those strings would not naturally be sticking out at an angle. 

Cut tiny triangles in the same colors as the bottom three balloons. In my example below, that's blue, yellow, and green. 


Glue the sentiment in place, then glue the triangles below their corresponding balloons. Use the black pen to draw curly ribbons coming from each. Finally, use the Posca marker to draw the reflections on the balloons. 

Here's a look at both cards together.


Because today is a Tuesday, Steve and I did our traditional anniversary getaway over the weekend. I'll tell you where we went tomorrow. 

5/29/23

Prepping for BASH-O 2023 and Thoughts on Media vs. Mediums

June is almost here, which means it's time for the 2023 BASH-O competition at Bash Your Scrapbook Stash! I had a great time participating in BASH-O 2022 and am eager to jump in again. I don't anticipate completing very many pages, but I'll do my best!

BASH-O is a month-long bingo-style challenge. To play, we choose 24 of the 36 possible items and place them on the BASH-O card in whatever order we want. The center is a free space. Here's what my 2023 card looks like: 


These are the 36 possibilities, with six items in each of the six categories. I highlighted the ones I chose in green. 


No surprise - I chose all of the options in the photos category and all but one in the tools, shapes, and themes categories. I only chose one of the textures (specifically because I use chipboard letters and die cuts regularly). I only chose two of the mixed mediums.

Excuse the digression, but does anyone else cringe at the word "mediums" in reference to art materials? Most people use media as the plural, which is my strong preference. Britannica says that both media and mediums are both correct for "the materials or methods used by an artist" and Merriam-Webster agrees. I checked in case it was an American vs. British thing. Nope. Dictionary.com also says you can use either one. Personally, when I see the word "mediums" in any context, I am much more likely to assume you mean the people associated with the photo on the top rather than the supplies shown below. 


And then there is social media, which we treat as a singular thing ("social media is" not "social media are") despite media being unquestionably plural. It would sound really odd to refer to a single social medium even though that's technically correct. English is weird. 

Anyway... BASH-O. There's a new rule this year (or if it isn't new, I missed it last year) which is that you can make two cards in lieu of one layout to mark off a square. That is really good news, as I don't have many printed photos right now, plus I need to build up my card supply. 

Are any of you playing BASH-O? Depending on when you're reading this, it may not be too late to start. Good luck to all who are participating!


5/26/23

Pipe Cleaner Cake Sun Catcher

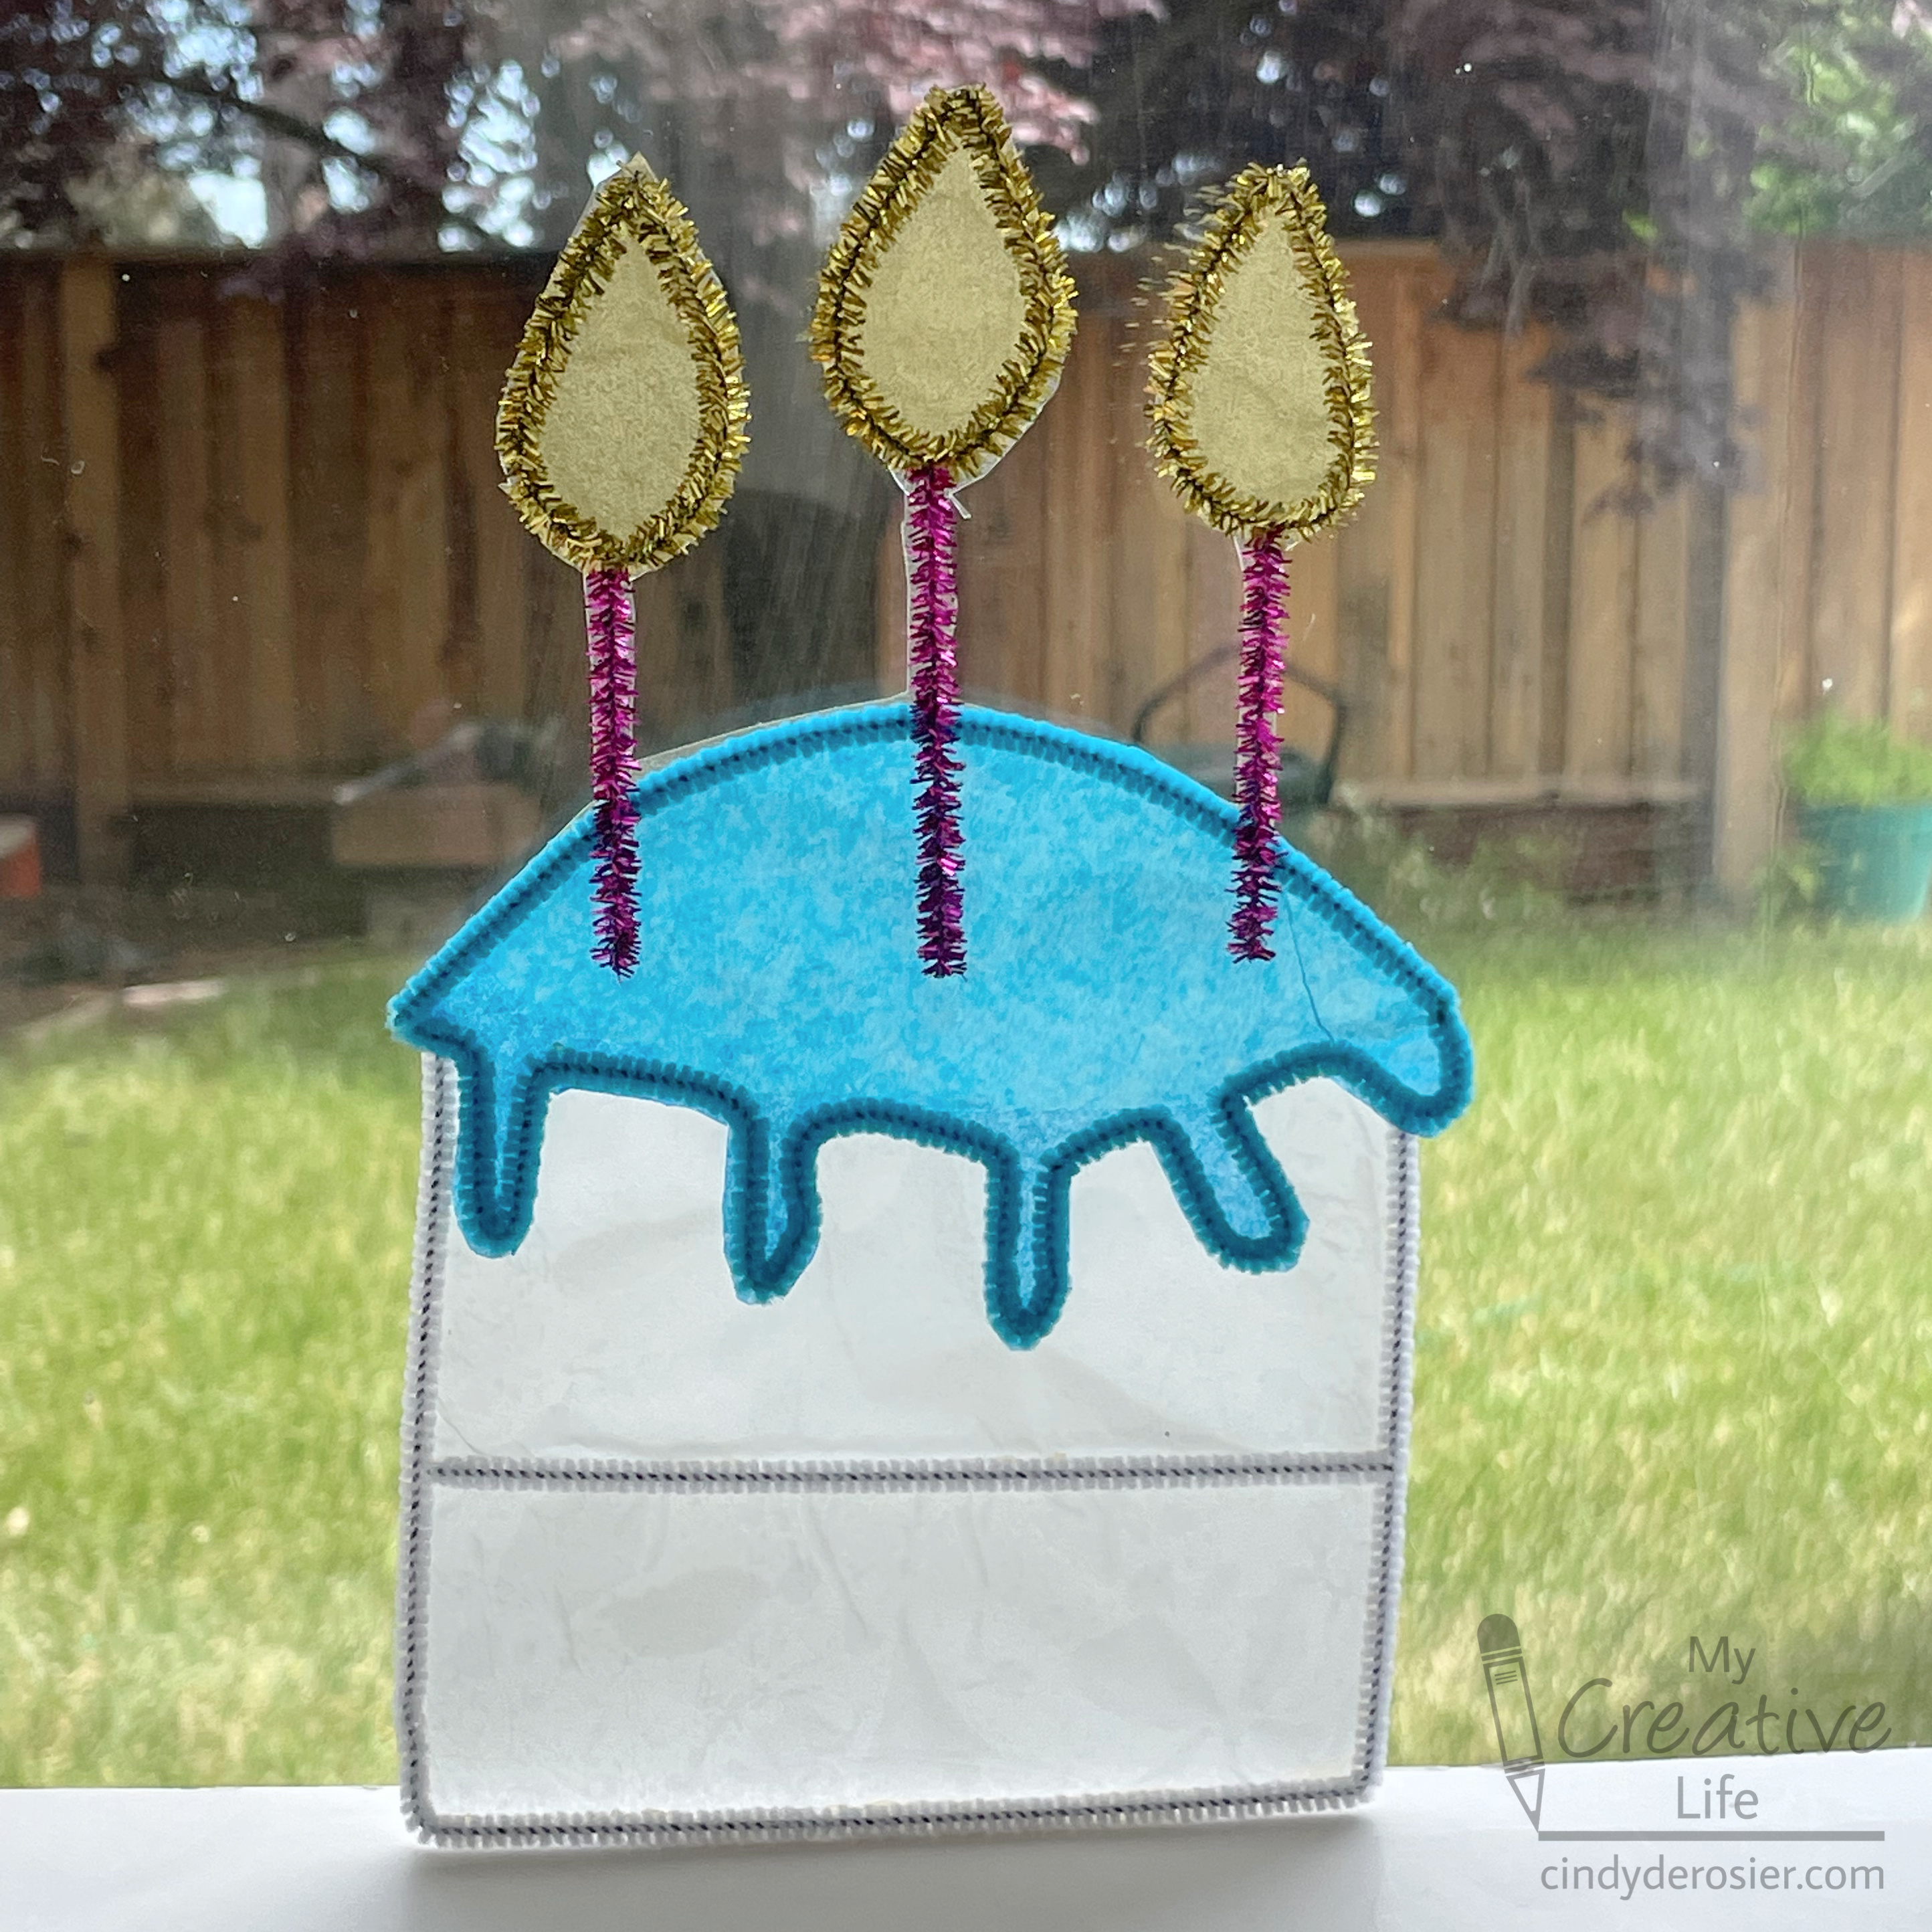
It is so satisfying when I try something new and it works. It took some experimenting to make this sun catcher out of pipe cleaners and tissue paper, but I'm really happy with the results. It looks so pretty sitting in the window. Affiliate links below.


Pipe Cleaner Cake Sun Catcher


Materials:


Steps:


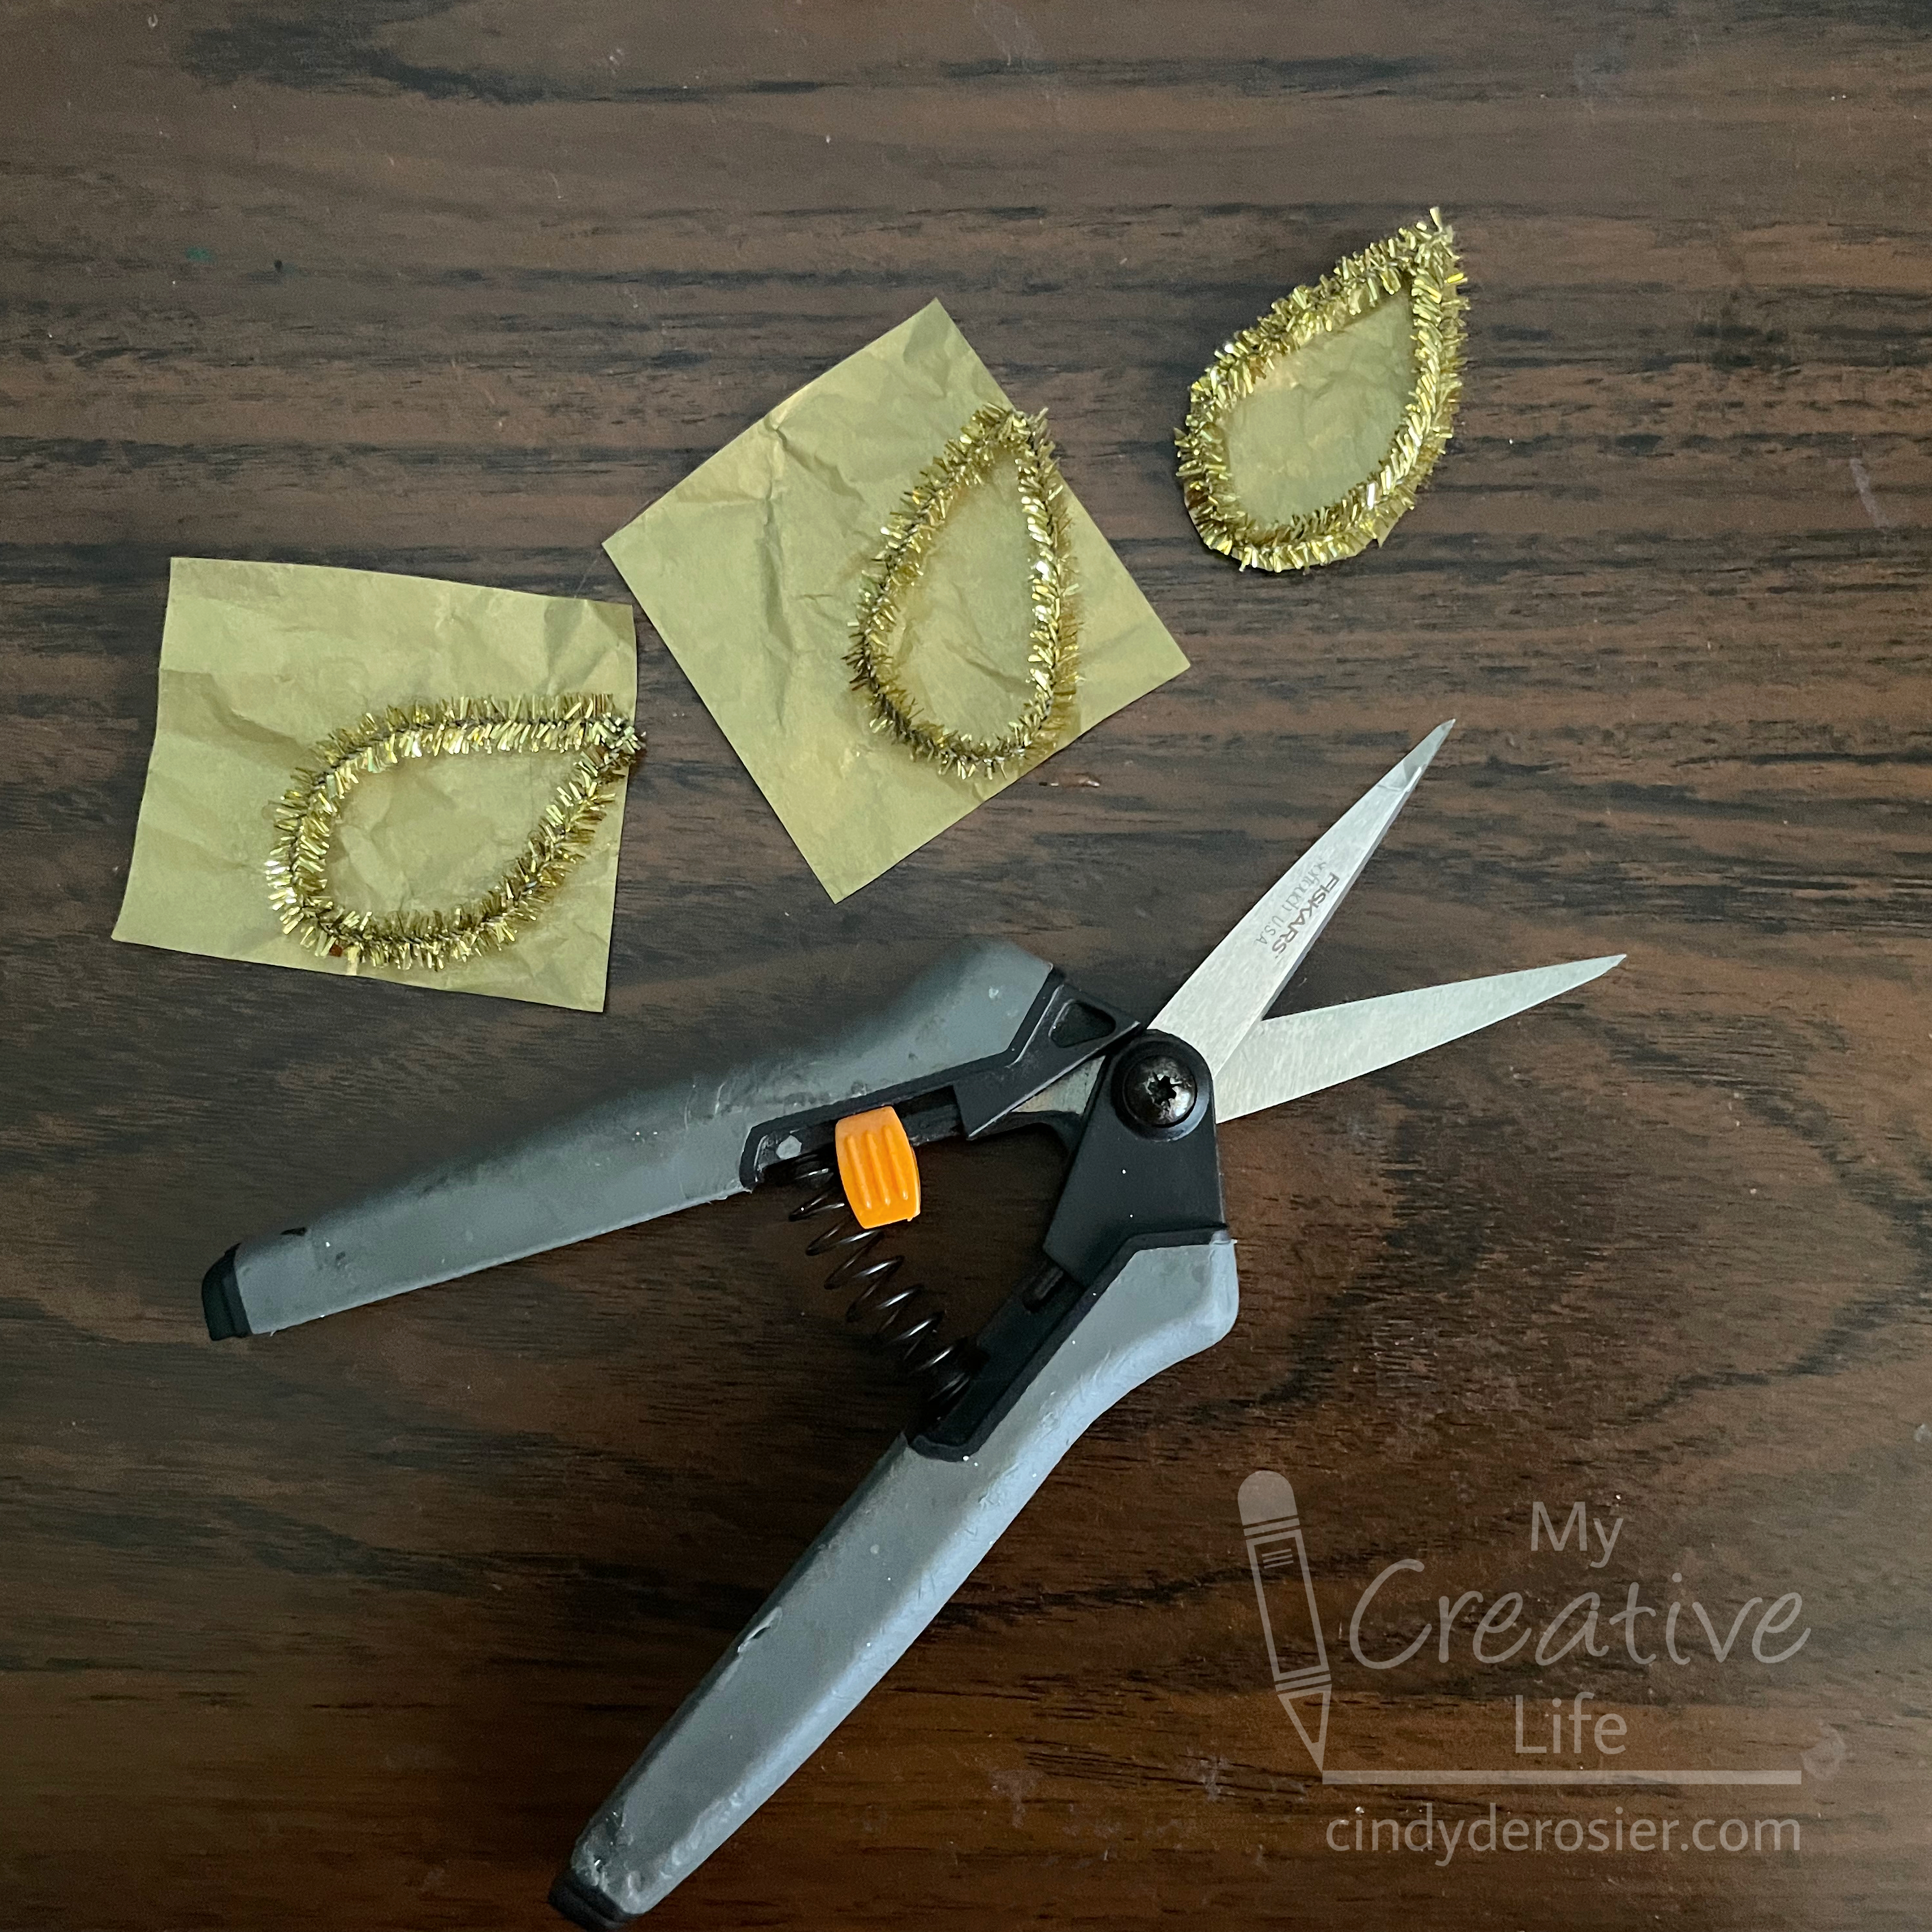
I started with the easiest part of this project, the flames of the candles. Cut a gold pipe cleaner into thirds (use the wire cutters - don't ruin your scissors), then bend each to form a teardrop shape. There's no need to twist the ends together; the bend should hold. You can put a drop of glue between the ends if you want. Put glue onto one side of each teardrop, then place them on pieces of gold tissue paper. Hold them in place for a minute to let the glue set. When the glue is dry, carefully trim away the excess tissue paper. 


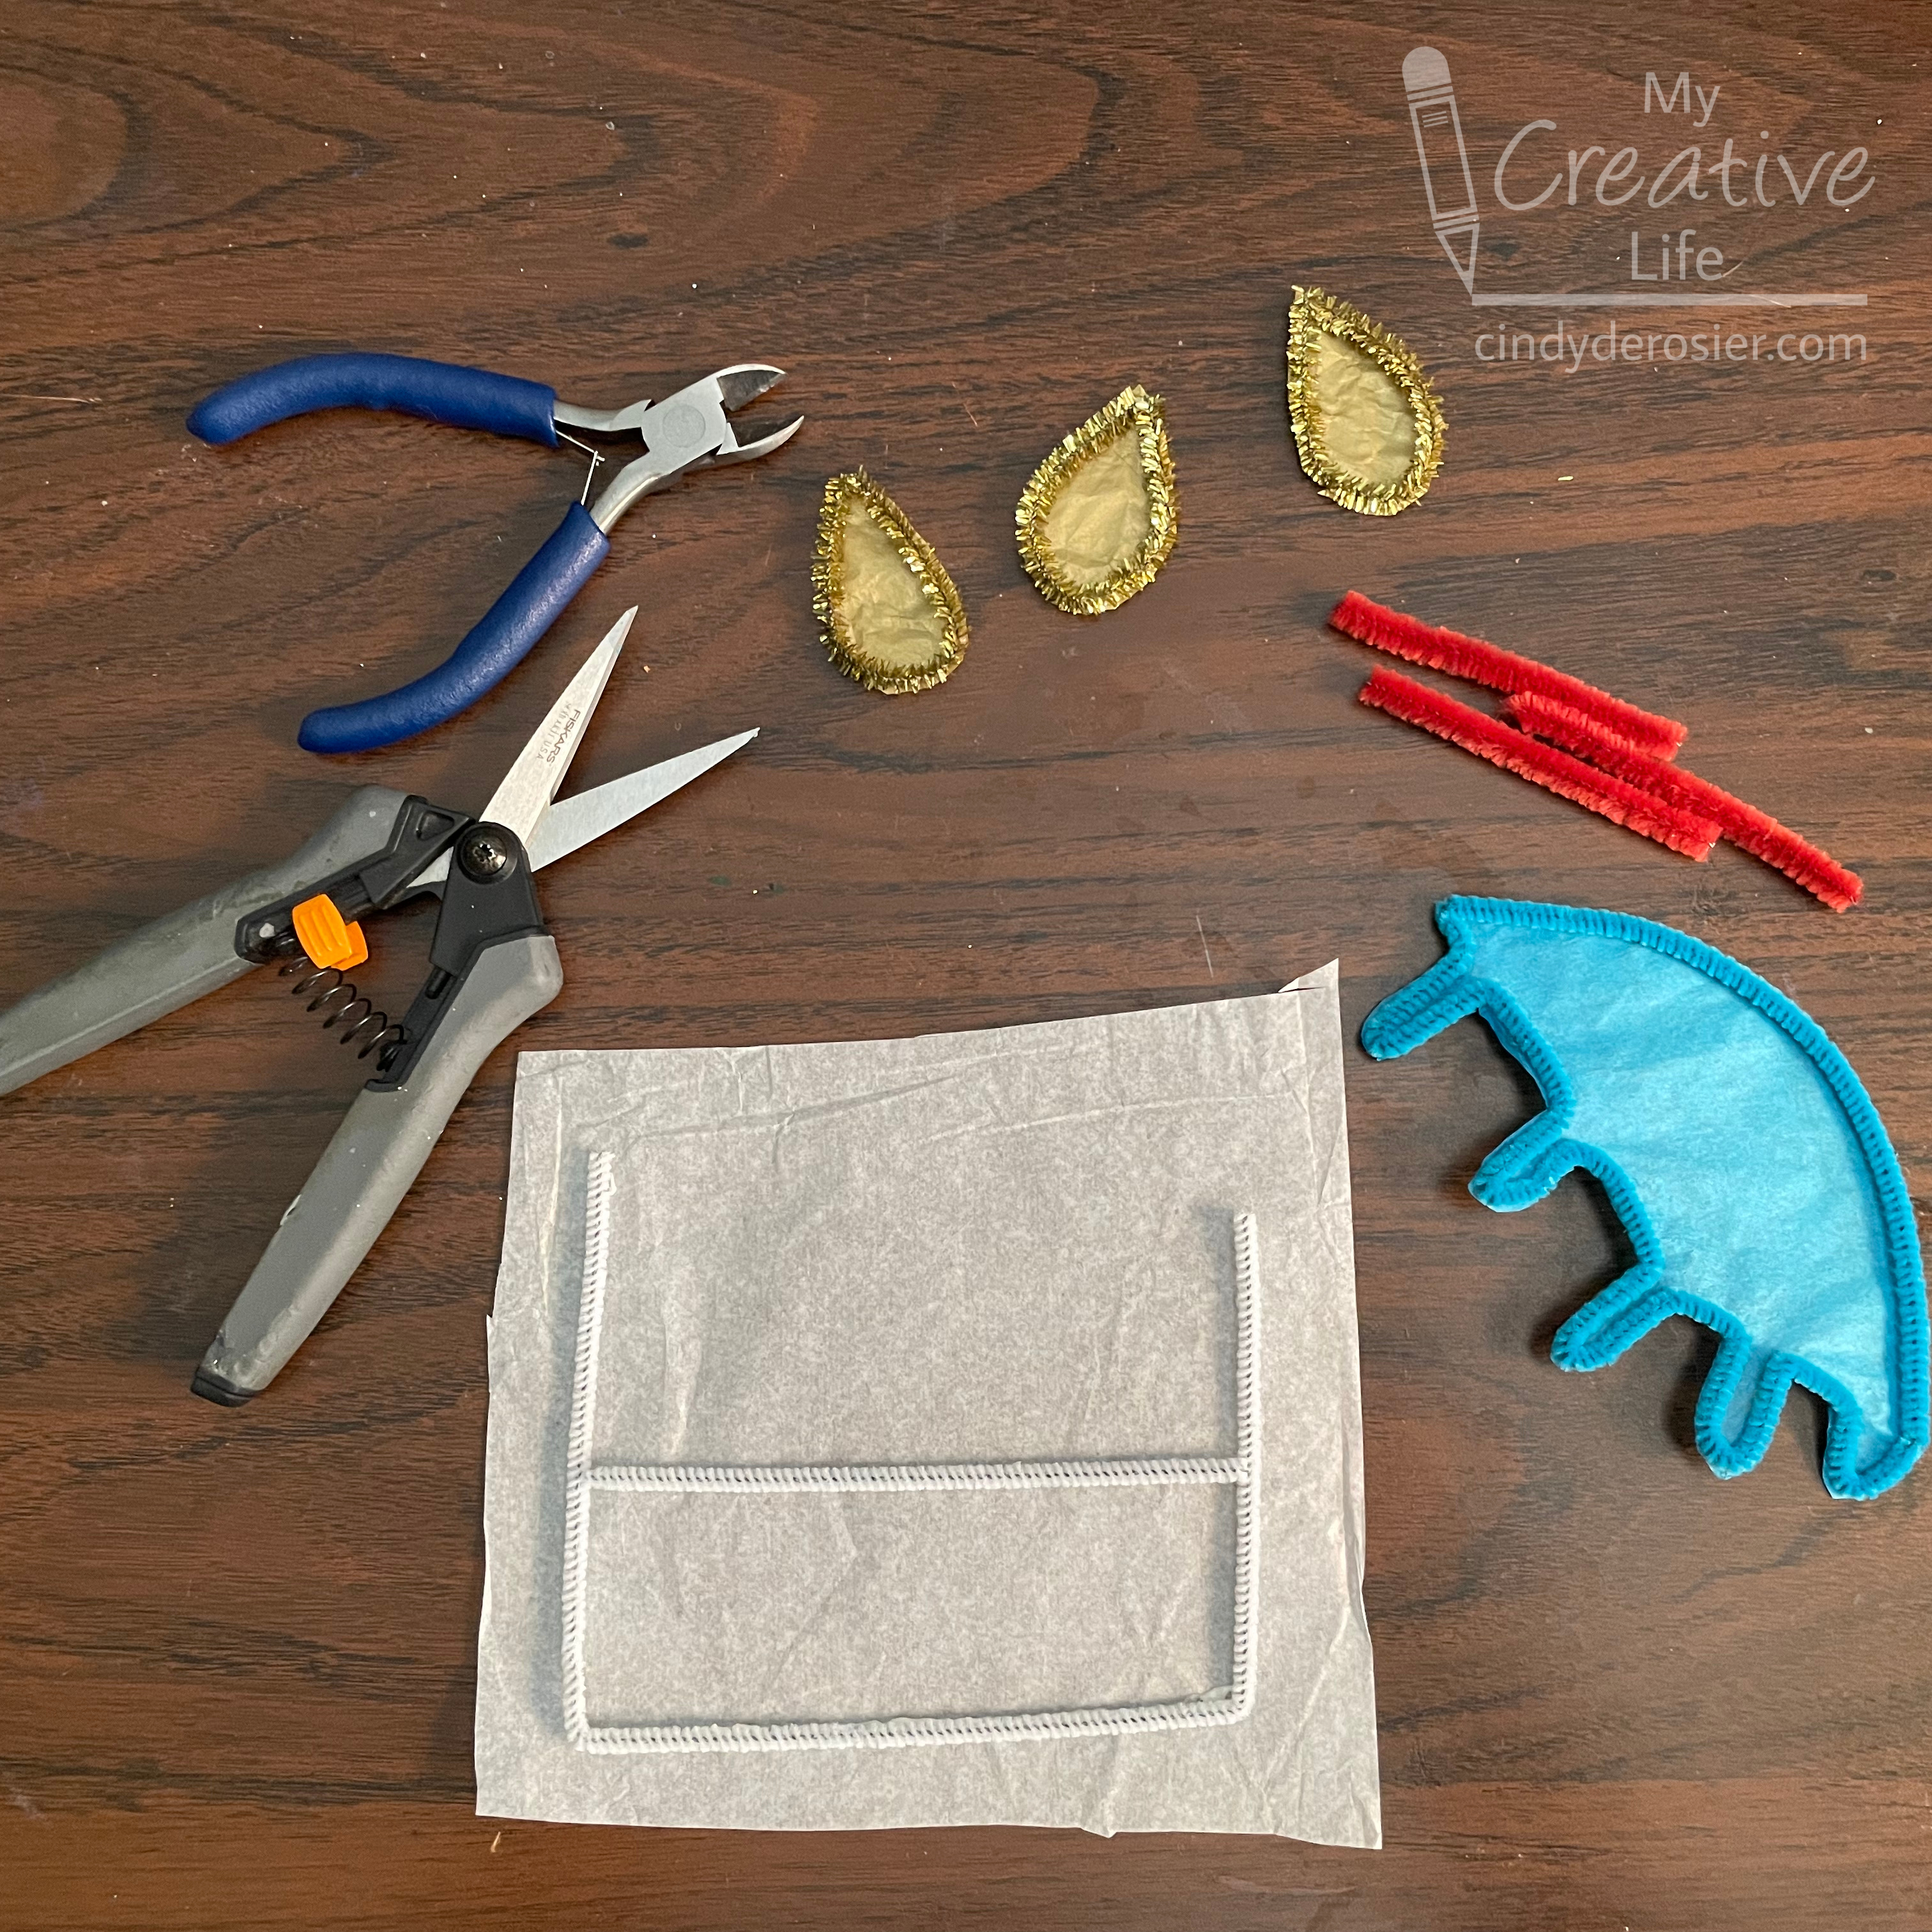
Use the same technique for the base of the cake and the frosting. For the cake, bend one white pipe cleaner into rough thirds to make a U-shape. Glue this to a piece of white tissue paper. Use a second white pipe cleaner to cut the piece that forms the layer of the cake. Glue it in place. 

Bend one blue pipe cleaner into an arc that will be the top of the frosting. Use a second pipe cleaner to make the frosting drips. Unless you are extremely lucky or skilled, the frosting won't fit perfectly on the cake the first time you try. Just make adjustments until it's correct, then glue it to blue tissue paper. Again, hold it in place for a minute while it sets so that it doesn't spring out of position.


Cut three lengths of pipe cleaner for the candles. As you can see above, I originally planned to use plain red pipe cleaners. I decided purple glitter candles would look better. 

Trim the cake and frosting. Fit everything together on the table, then cut a piece of contact paper that is slightly larger than the width and height of the assembled project. Peel away the paper backing with the sticky side of the contact paper facing up. Move the cake base to the contact paper and press it down firmly.    


Put glue along the edges of the frosting drips, since they will be touching the cake and not the contact paper. Put the frosting in place. Add glue to the bottom portion of the candles (where they will be touching the frosting) but not to the upper portions (where the contact paper will hold them) and place them where they belong. Then adhere the flames to the contact paper. Let the glue dry completely. 

Not all designs will require this, but because the candles have such narrow attachment points, they could flop forward if not better supported. Through experimentation, I found that adding a second layer of contact paper eliminated the problem without affecting the translucency. Do this by peeling away the backing paper on a second piece of contact paper and placing the assembled cake on top of it. 
 
Carefully cut away the excess contact paper.  


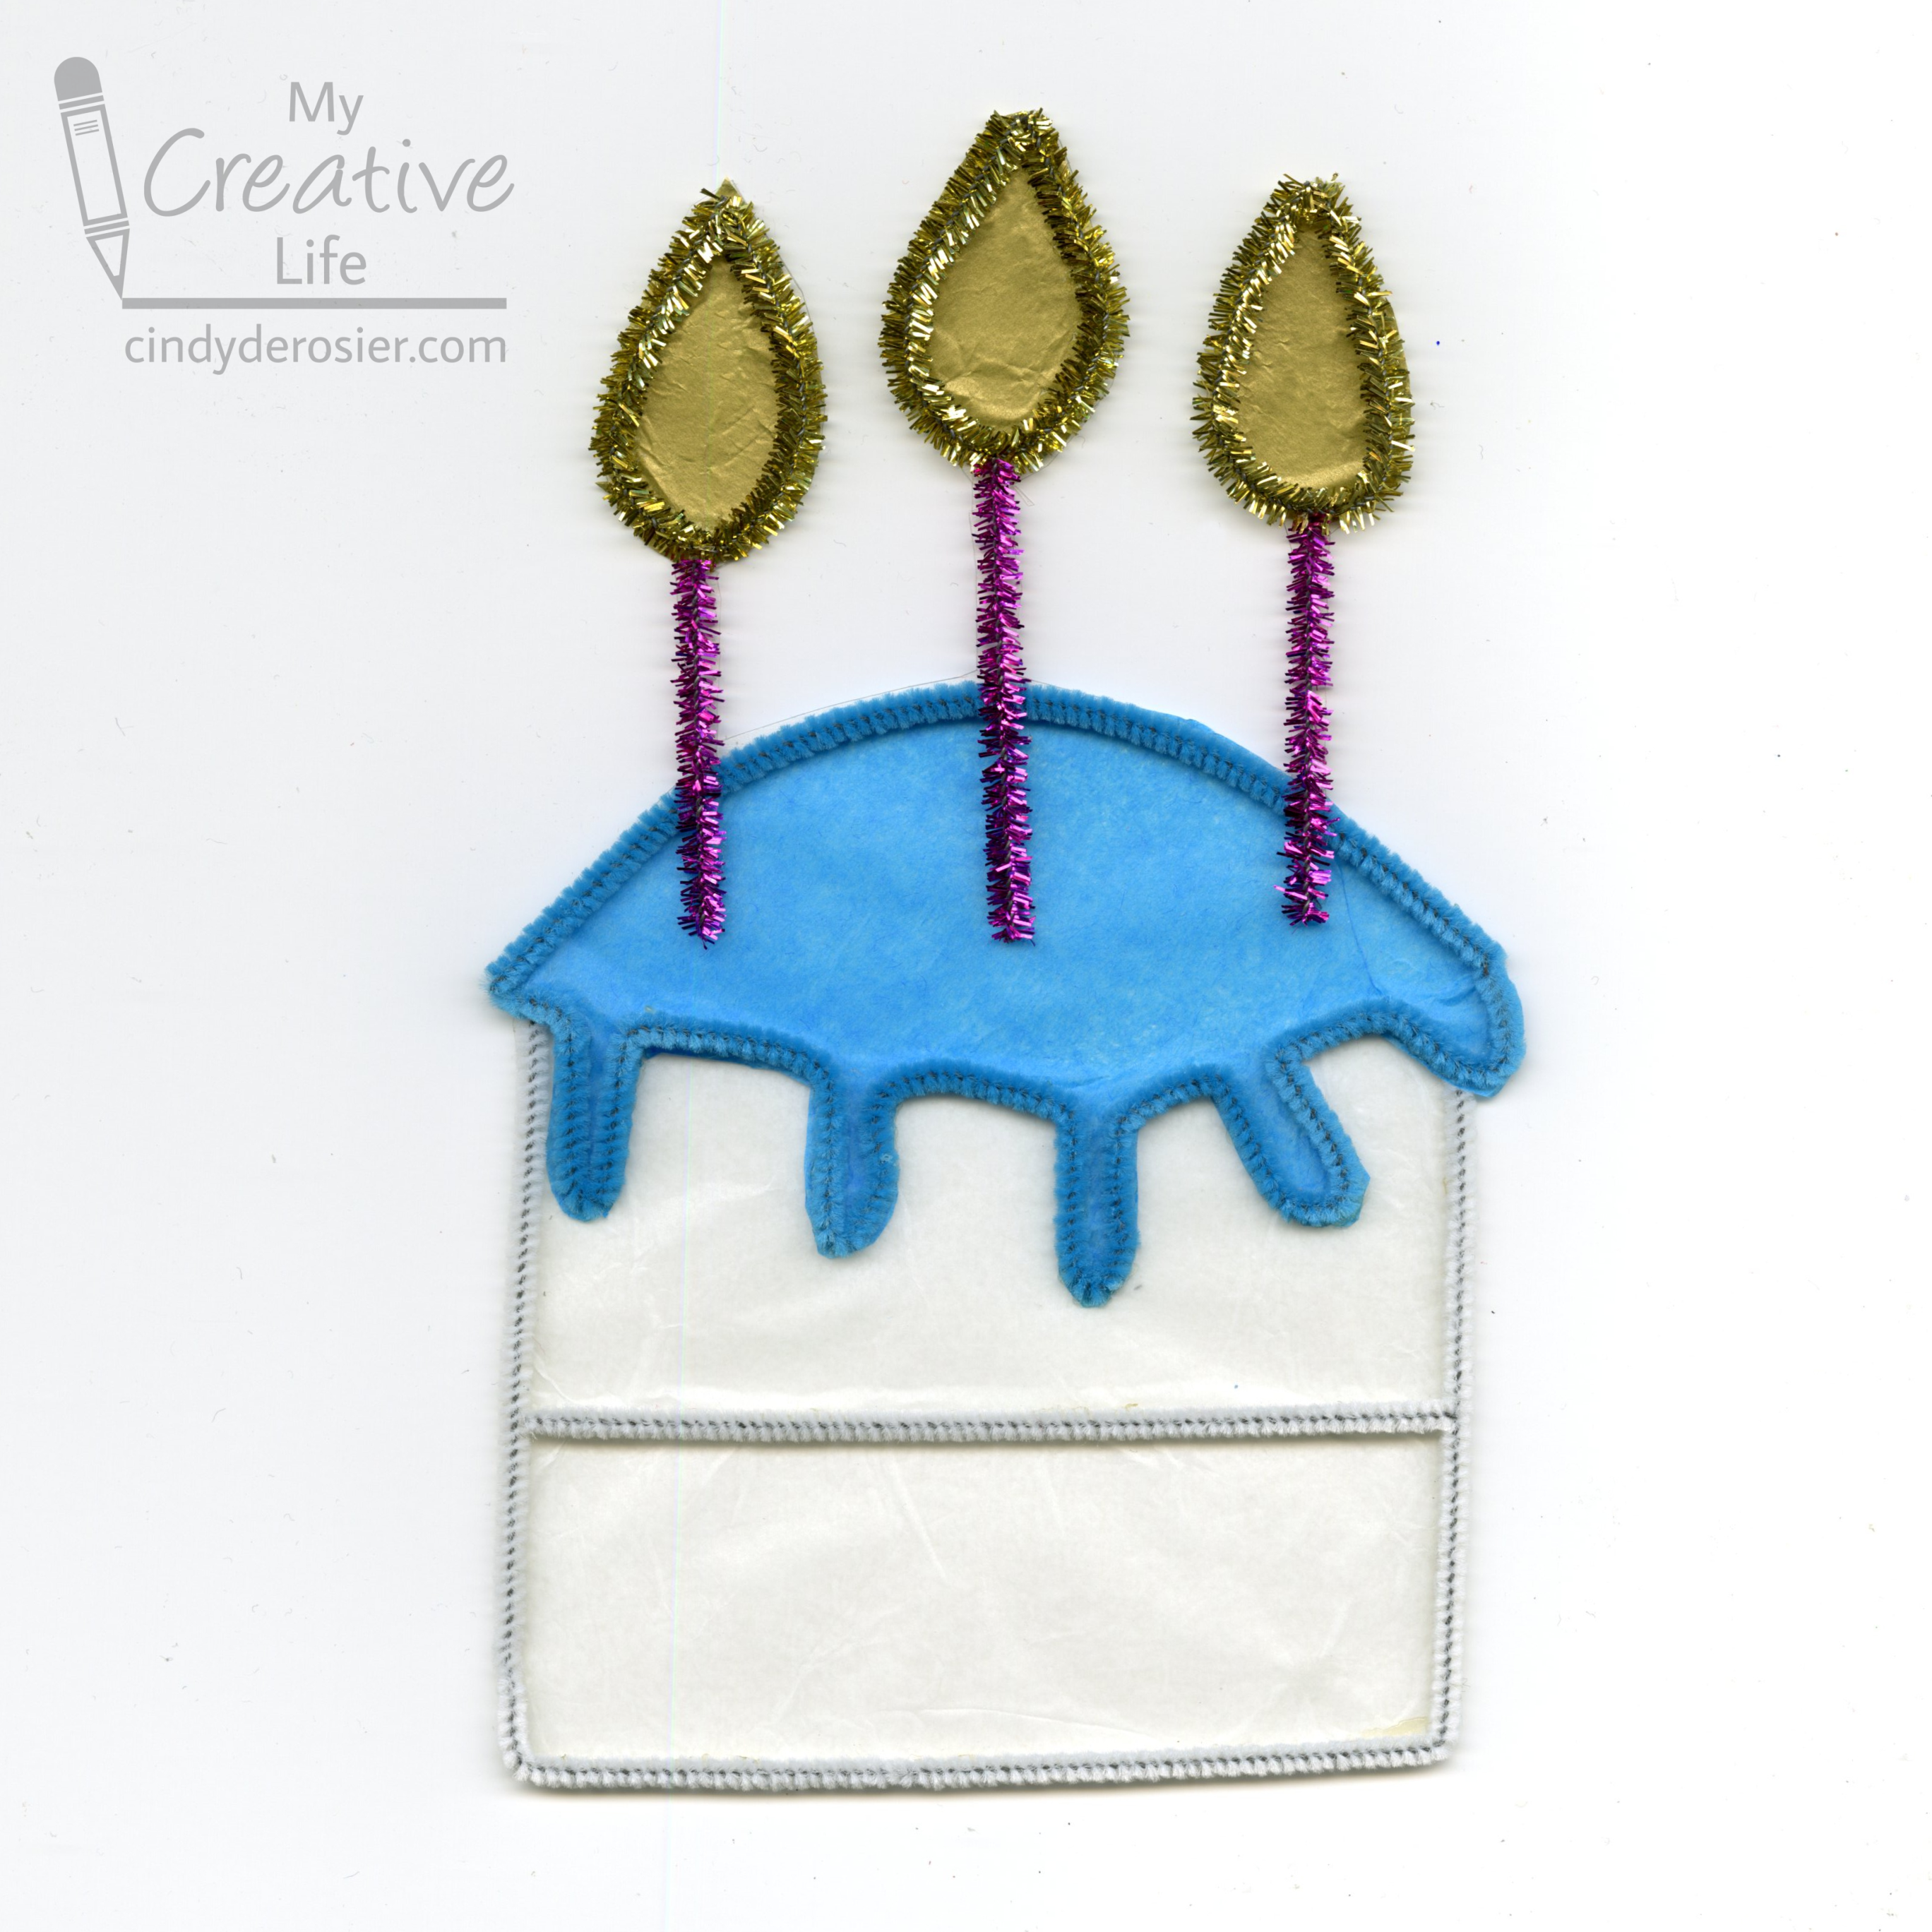
I showed you what it looks like in a window at the top of the post. This is how it looks against white paper.


Obviously, you can use the same technique for any design. I have some ideas I'm eager to try!

5/25/23

I Love Cats Photo Frame

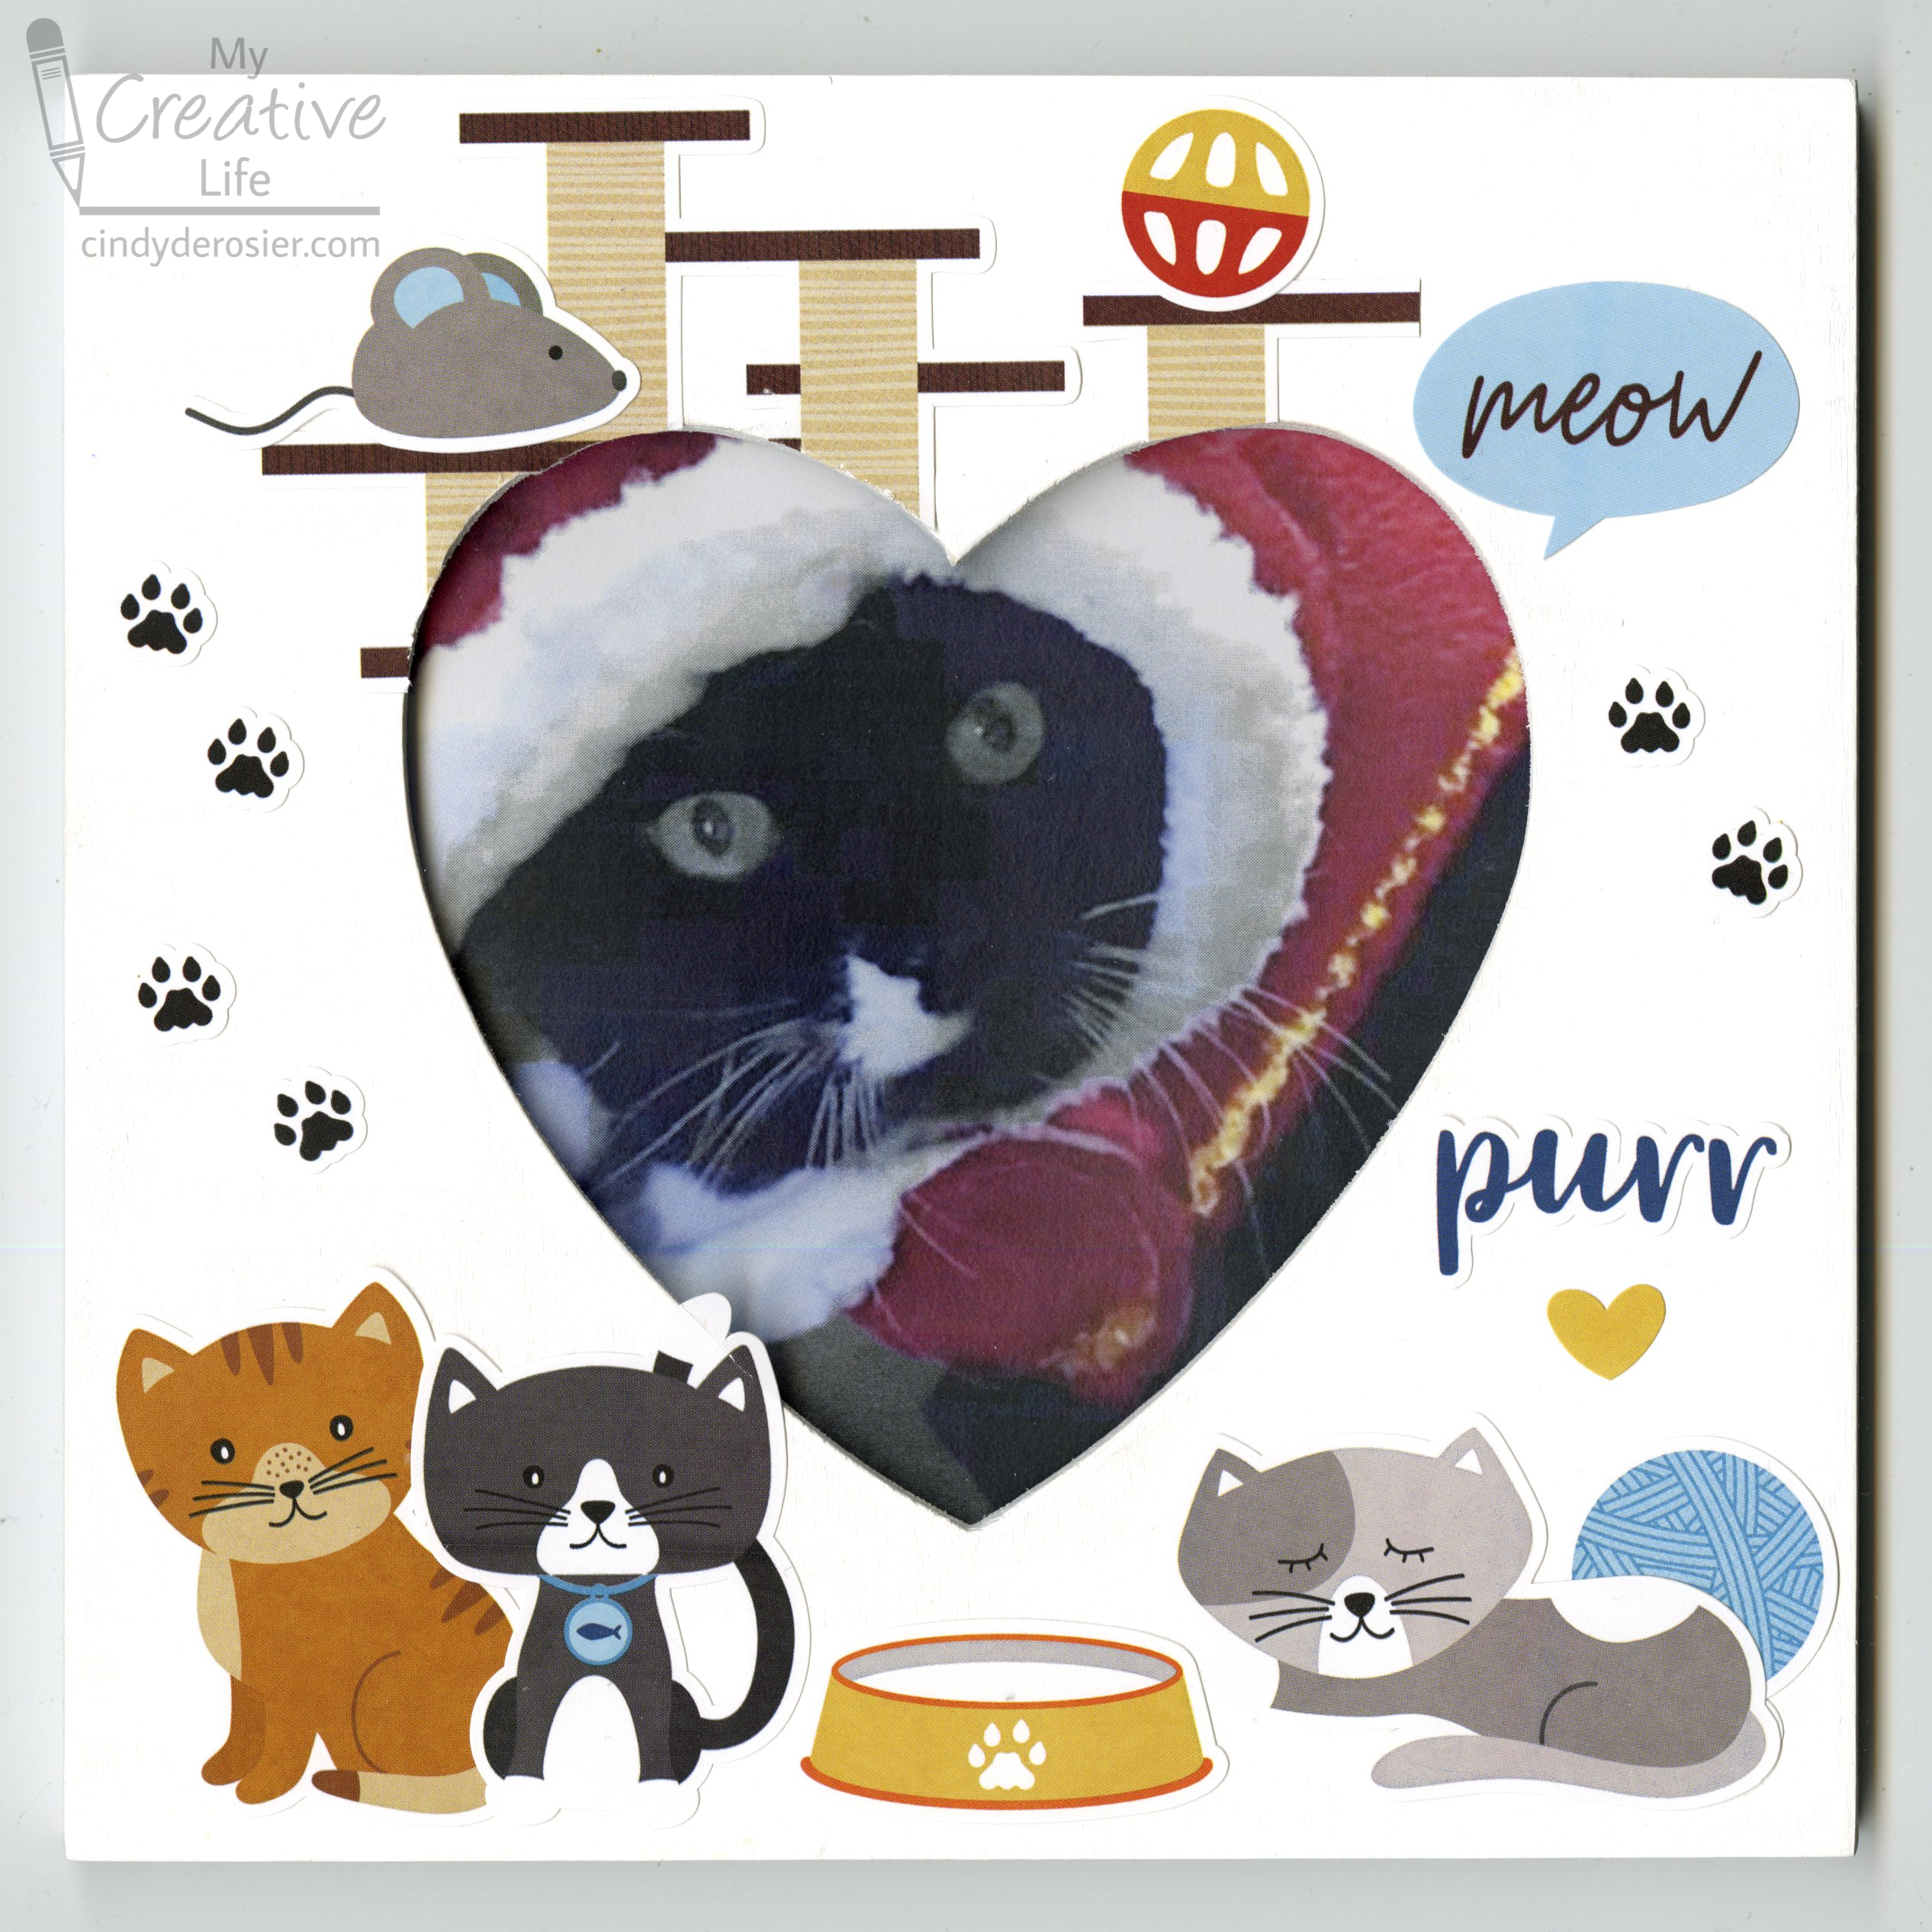
Today's project is a cat-themed photo frame with a heart-shaped opening. I'm calling it the "I Love Cats Photo Frame," but I feel compelled to say that I don't love cats. I don't hate them or anything, but I don't love them. For starters, they're not nearly as awesome as rabbits

Evidence: 
  • Rabbits never bring you dead stuff like cats do. 
  • Cats eat cat food, which is one of the worst smelling substances ever, while rabbit food smells like a fresh-cut lawn. 
  • Cats have the uncanny ability to cough up hairballs in the worst places. Rabbits physically can't vomit.   

Despite the clear superiority of rabbits, there are plenty of people who love cats. My niece, Allison, is one of them. I made this frame for her, featuring a photo of her favorite cat, Tips. Tips does not belong to Allison, but that doesn't stop her from dressing her up. Affiliate links below. 


I Love Cats Photo Frame


Materials:


Steps: 


Paint a thin coat of gesso on the wood frame. Let it dry completely, then use a very fine grain sandpaper over the whole surface. You could technically skip this step, but it makes all the difference in having a smooth surface for adhering stickers. Wipe the frame clean so no dust remains, then paint it white. 

When the paint dries, adhere the stickers. I started with the cats at the bottom, then positioned the cat tree at the top, to make it look like it's in the background. I had to do some minor snipping to fit it in, which you can see by comparing my results with the original sticker sheet. I added the toys next, then the word bubbles, then filled in the extra space with paw prints. 

Because I used high quality stickers on a perfectly smooth surface, I didn't bother to seal the finished frame. If I had, I would have done a test of Mod Podge Ultra on an extra sticker to make sure it would hold up before spraying the actual frame. 

5/24/23

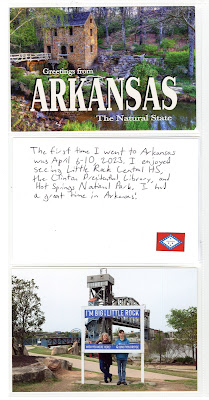
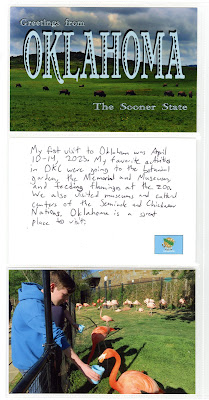
50 State Album: Arkansas (#43) and Oklahoma (#44)

Trevor completed the 43rd and 44th pages in his 50 State Album, following our recent time in Arkansas and Oklahoma


I love seeing the album nearly full. Only 6 pages to go! With Arkansas now in the album (which is arranged alphabetically), the first blank page is page 7, Connecticut. That trip is coming up soon and I'm really excited.

When I posted the most recent pages before these, I asked for your thoughts about arranging the pages alphabetically or chronologically in a slideshow. I'm leaning towards chronological for a number of reasons. For now, I'm continuing to put the images alphabetically side by side below the flags on my US Travel page. Having both might be the answer.