
If this group of marshmallow bunnies doesn't make you smile, I don't know what will! These were so much fun to make. I'm particularly pleased with how the whiskers came out. That was a spontaneous addition and I think they make a big difference. Give them a try! Affiliate links below.

Marshmallow Bunnies
Materials:
Steps:
Draw a pair of rabbit ears on a piece of scratch paper. You'll be using this as a guide to keep the ears in proportion with the marshmallow.

Slide the ear sketch under a piece of parchment paper, then prepare the pink and white Candy Melts following the instructions on the packages.
Spoon the white candy onto the parchment paper so that it fills the pattern you made for the ears. Immediately use the scribe tool to drizzle a thin line of pink candy on top of the white candy to make the iner ears. Fix any stray bits or lumps with the scribe tool. I found it easiest to keep two scribe tools handy (one for each color).
Carefully slide the parchment paper over so that the pattern is under a clean area. Repeat the steps to make the next set of ears. Continue until you have all the sets of ears you'll need. Set them aside to harden completely.

Use the Food Writer to draw mouths on each marshmallow. Pick out enough pink and black confetti sprinkles to give each bunny two eyes and one nose.

Remelt the white candy. Dip the scribe tool into the melted white candy and use it to draw whiskers onto each bunny. Then add dots of melted candy to adhere the black sprinkle eyes and pink sprinkle nose in place.

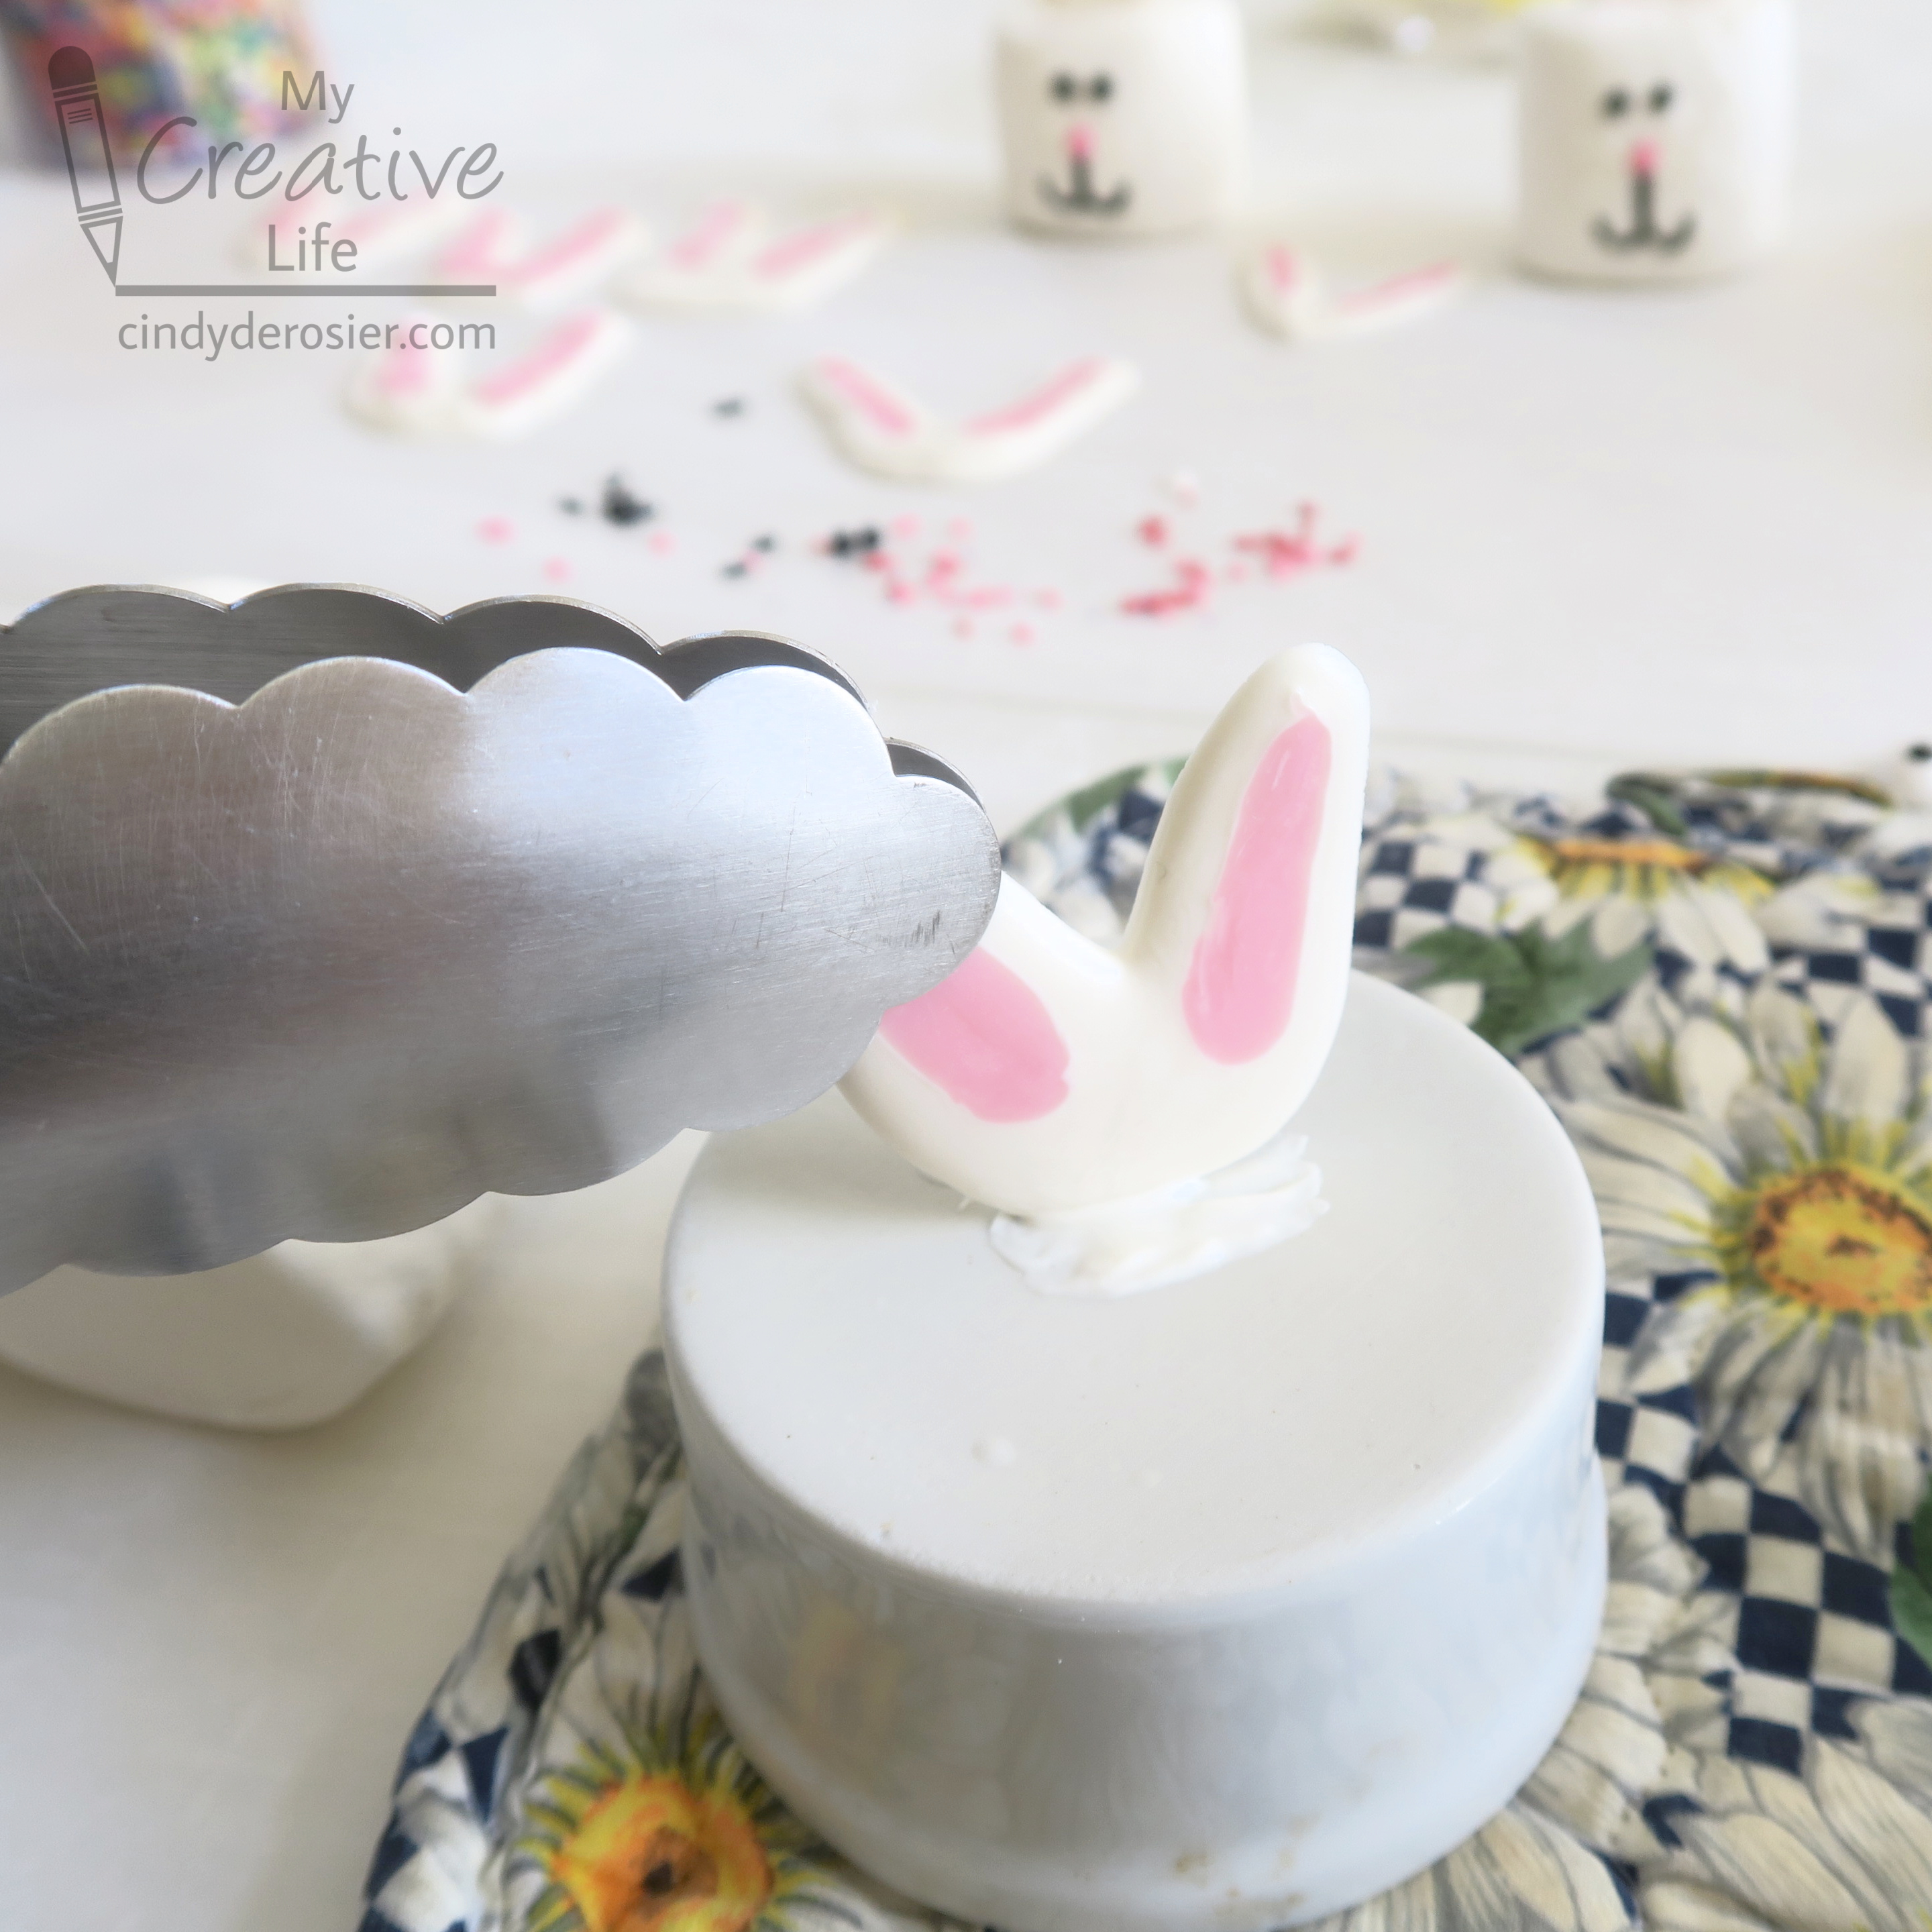
To attach the ears to the bunnies, you'll need a warm, flat surface. Something like a frying pan would work, but I just used a small ceramic dish. I filled it with water, then put it in the microwave until the water was boiling. I poured out the water, then inverted the dish on a potholder.
I picked up a pair of ears using kitchen tongs (so my warm fingers wouldn't melt them) and pressed them gently against the bottom of the hot dish. Then I placed them onto a marshmallow. The candy solidified almost instantly, so I didn't even have to worry about propping the ears up as they dried.
Each bunny looks a bit different from the rest. Marshmallows surprisingly irregular; I tried to find six that were sort of the same size and shape, but gave up and just picked any six. The fact that the marshmallows differ took away any pressure I might have felt to try to make the ears and faces look identical.
If you make your own marshmallow bunnies, I'd love to see them. For that matter, I always enjoy seeing any crafts made from my tutorials. My email address is right above my picture - send me a photo of your creations!

Awww....super cute!
ReplyDeleteCan you eat these afterwards? They are sooooo Cute
ReplyDeleteThanks! And yes, we did eat them.
Delete