
It's been raining a lot in California. Perhaps you've heard? I understand that our weather has made not just national, but international, news. It's been relentless. We need the rain, of course; we've had so many years of drought. But the soil can't absorb this much at once. The areas with burn scars are the most vulnerable. This series of rainstorms has been devastating and they're expecting storm damage to top a billion dollars. Fortunately, our family has not been negatively impacted beyond mere inconvenience.
I've been spending a lot of time watching the rain, driving in the rain, running errands in the rain, being woken up by the rain, checking the forecast for any breaks in the rain, receiving alerts from the city and the county about the rain, following the news about the rain, and talking about the rain. It only stands to reason that I would craft about the rain.

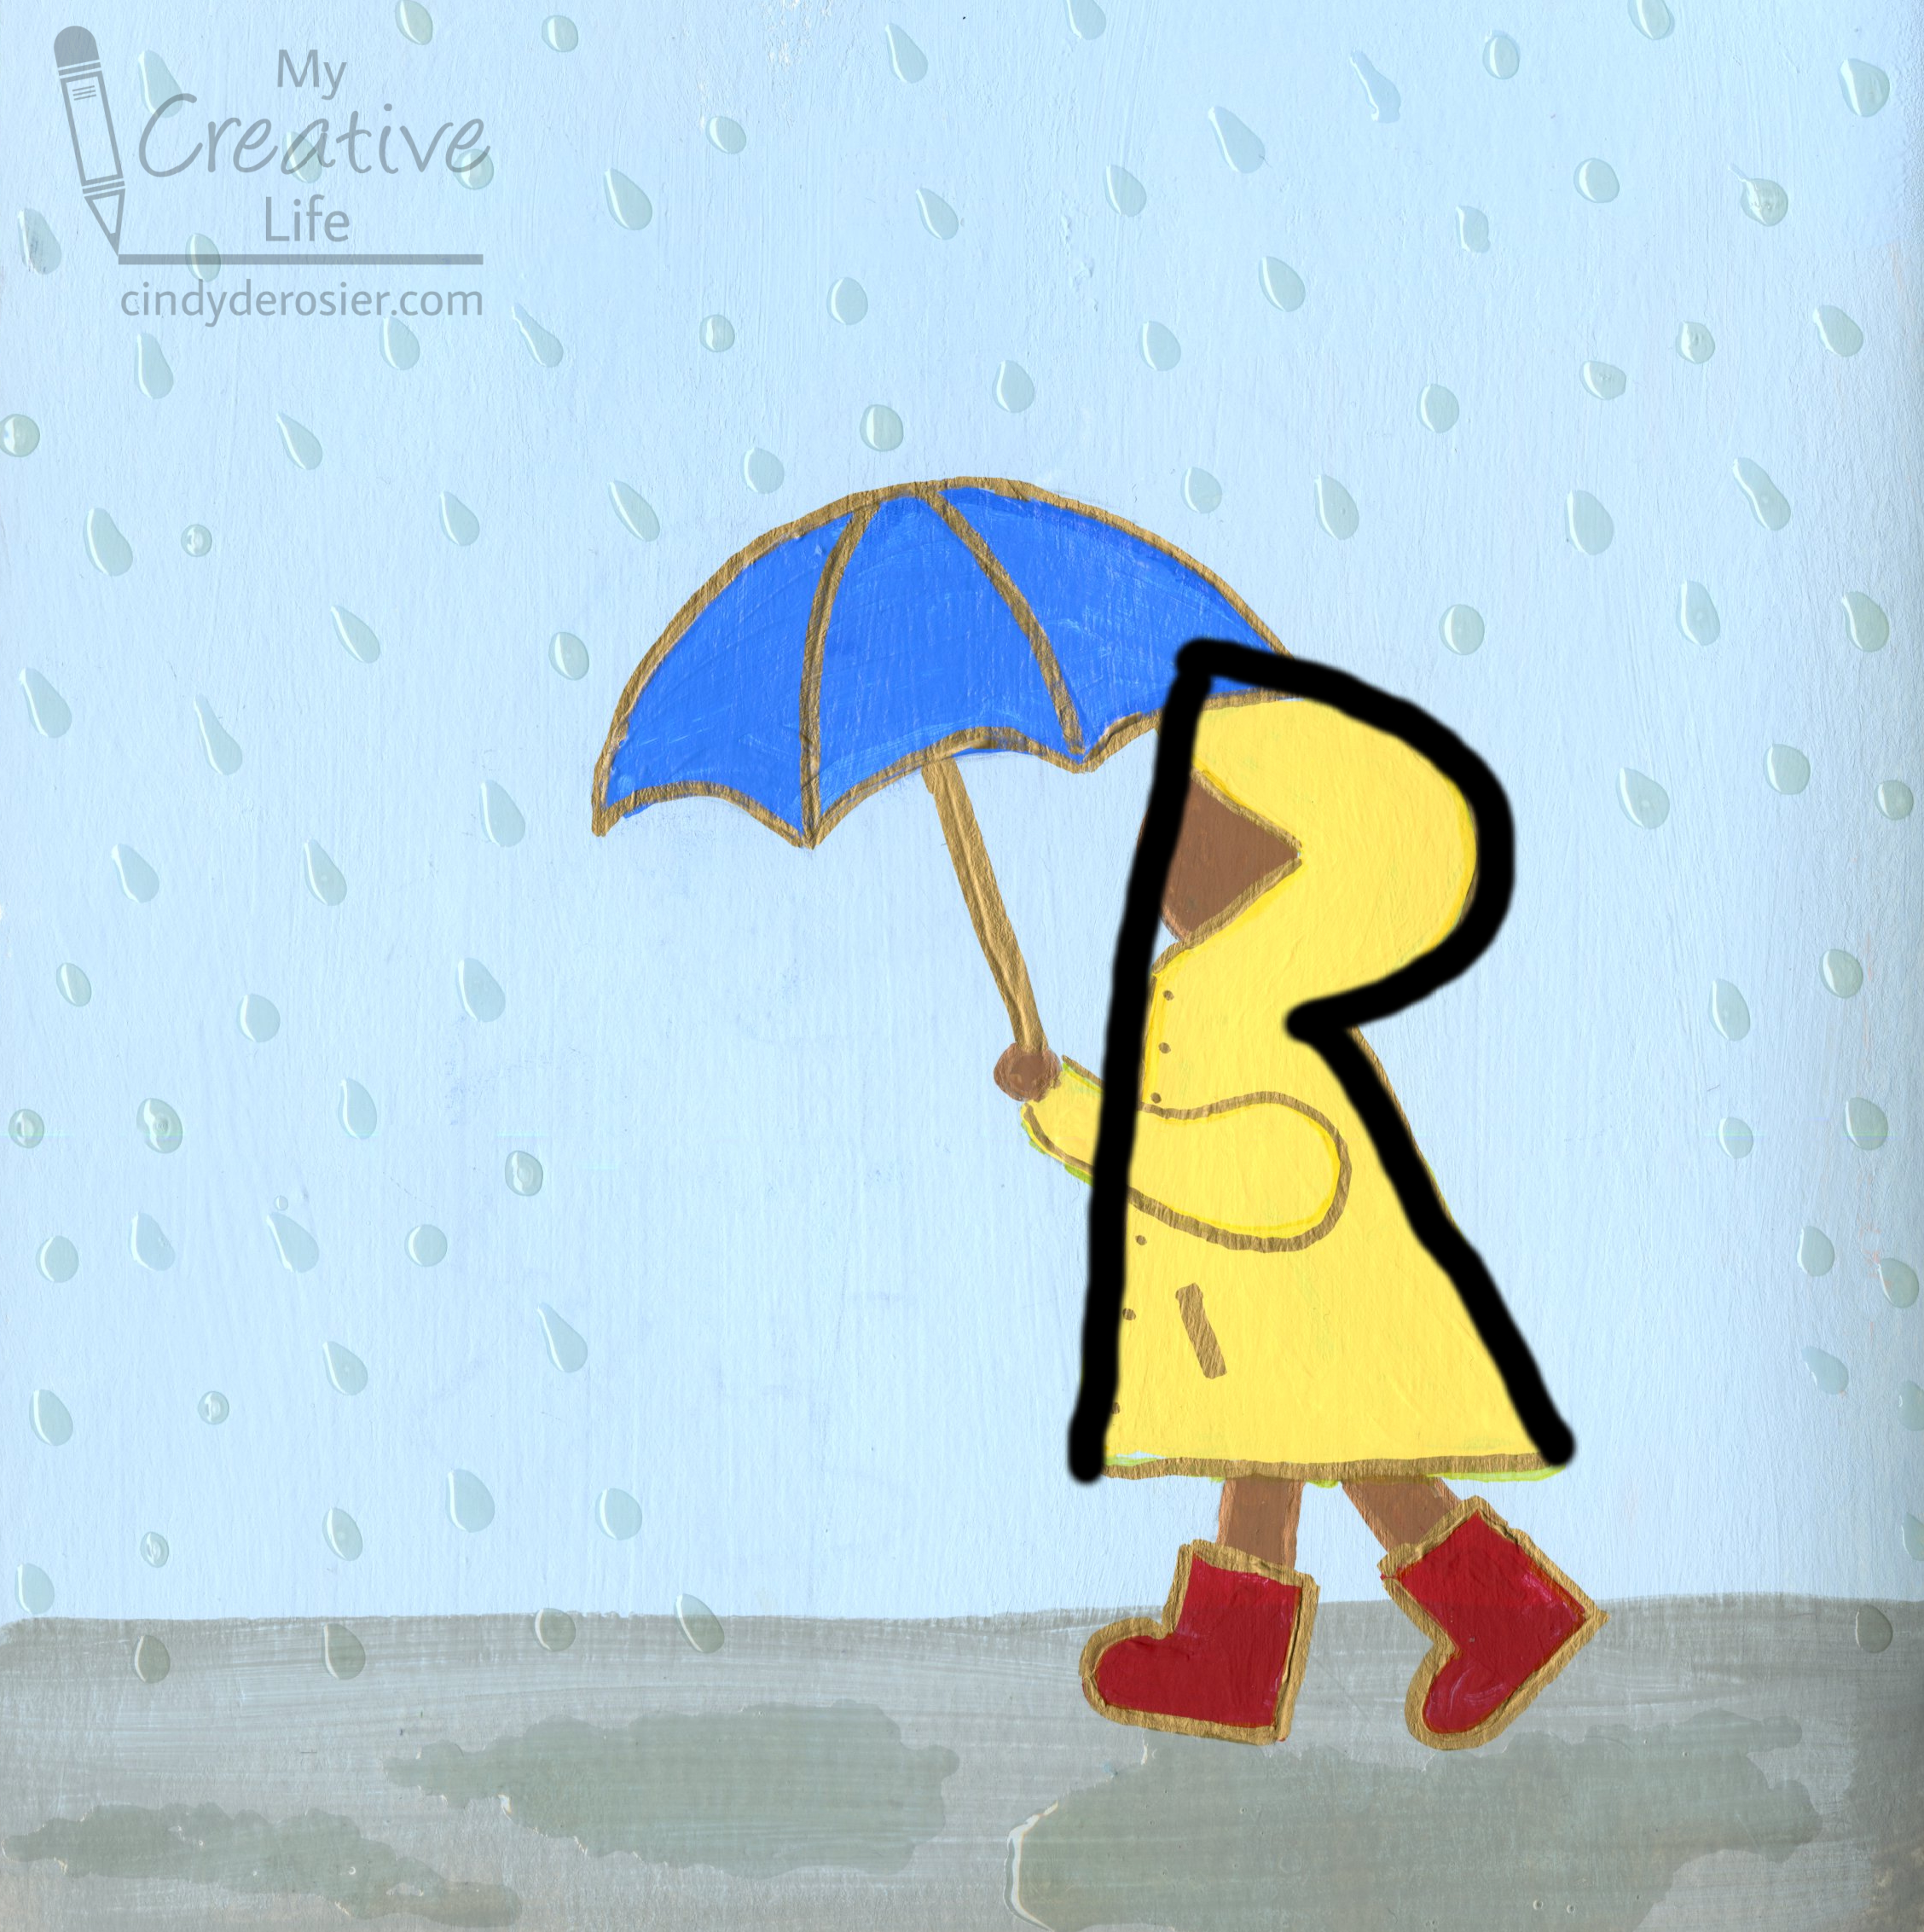
I'm calling this project "R is for Raincoat." Can you tell why?
---------
R is for Raincoat
Materials:
Steps:
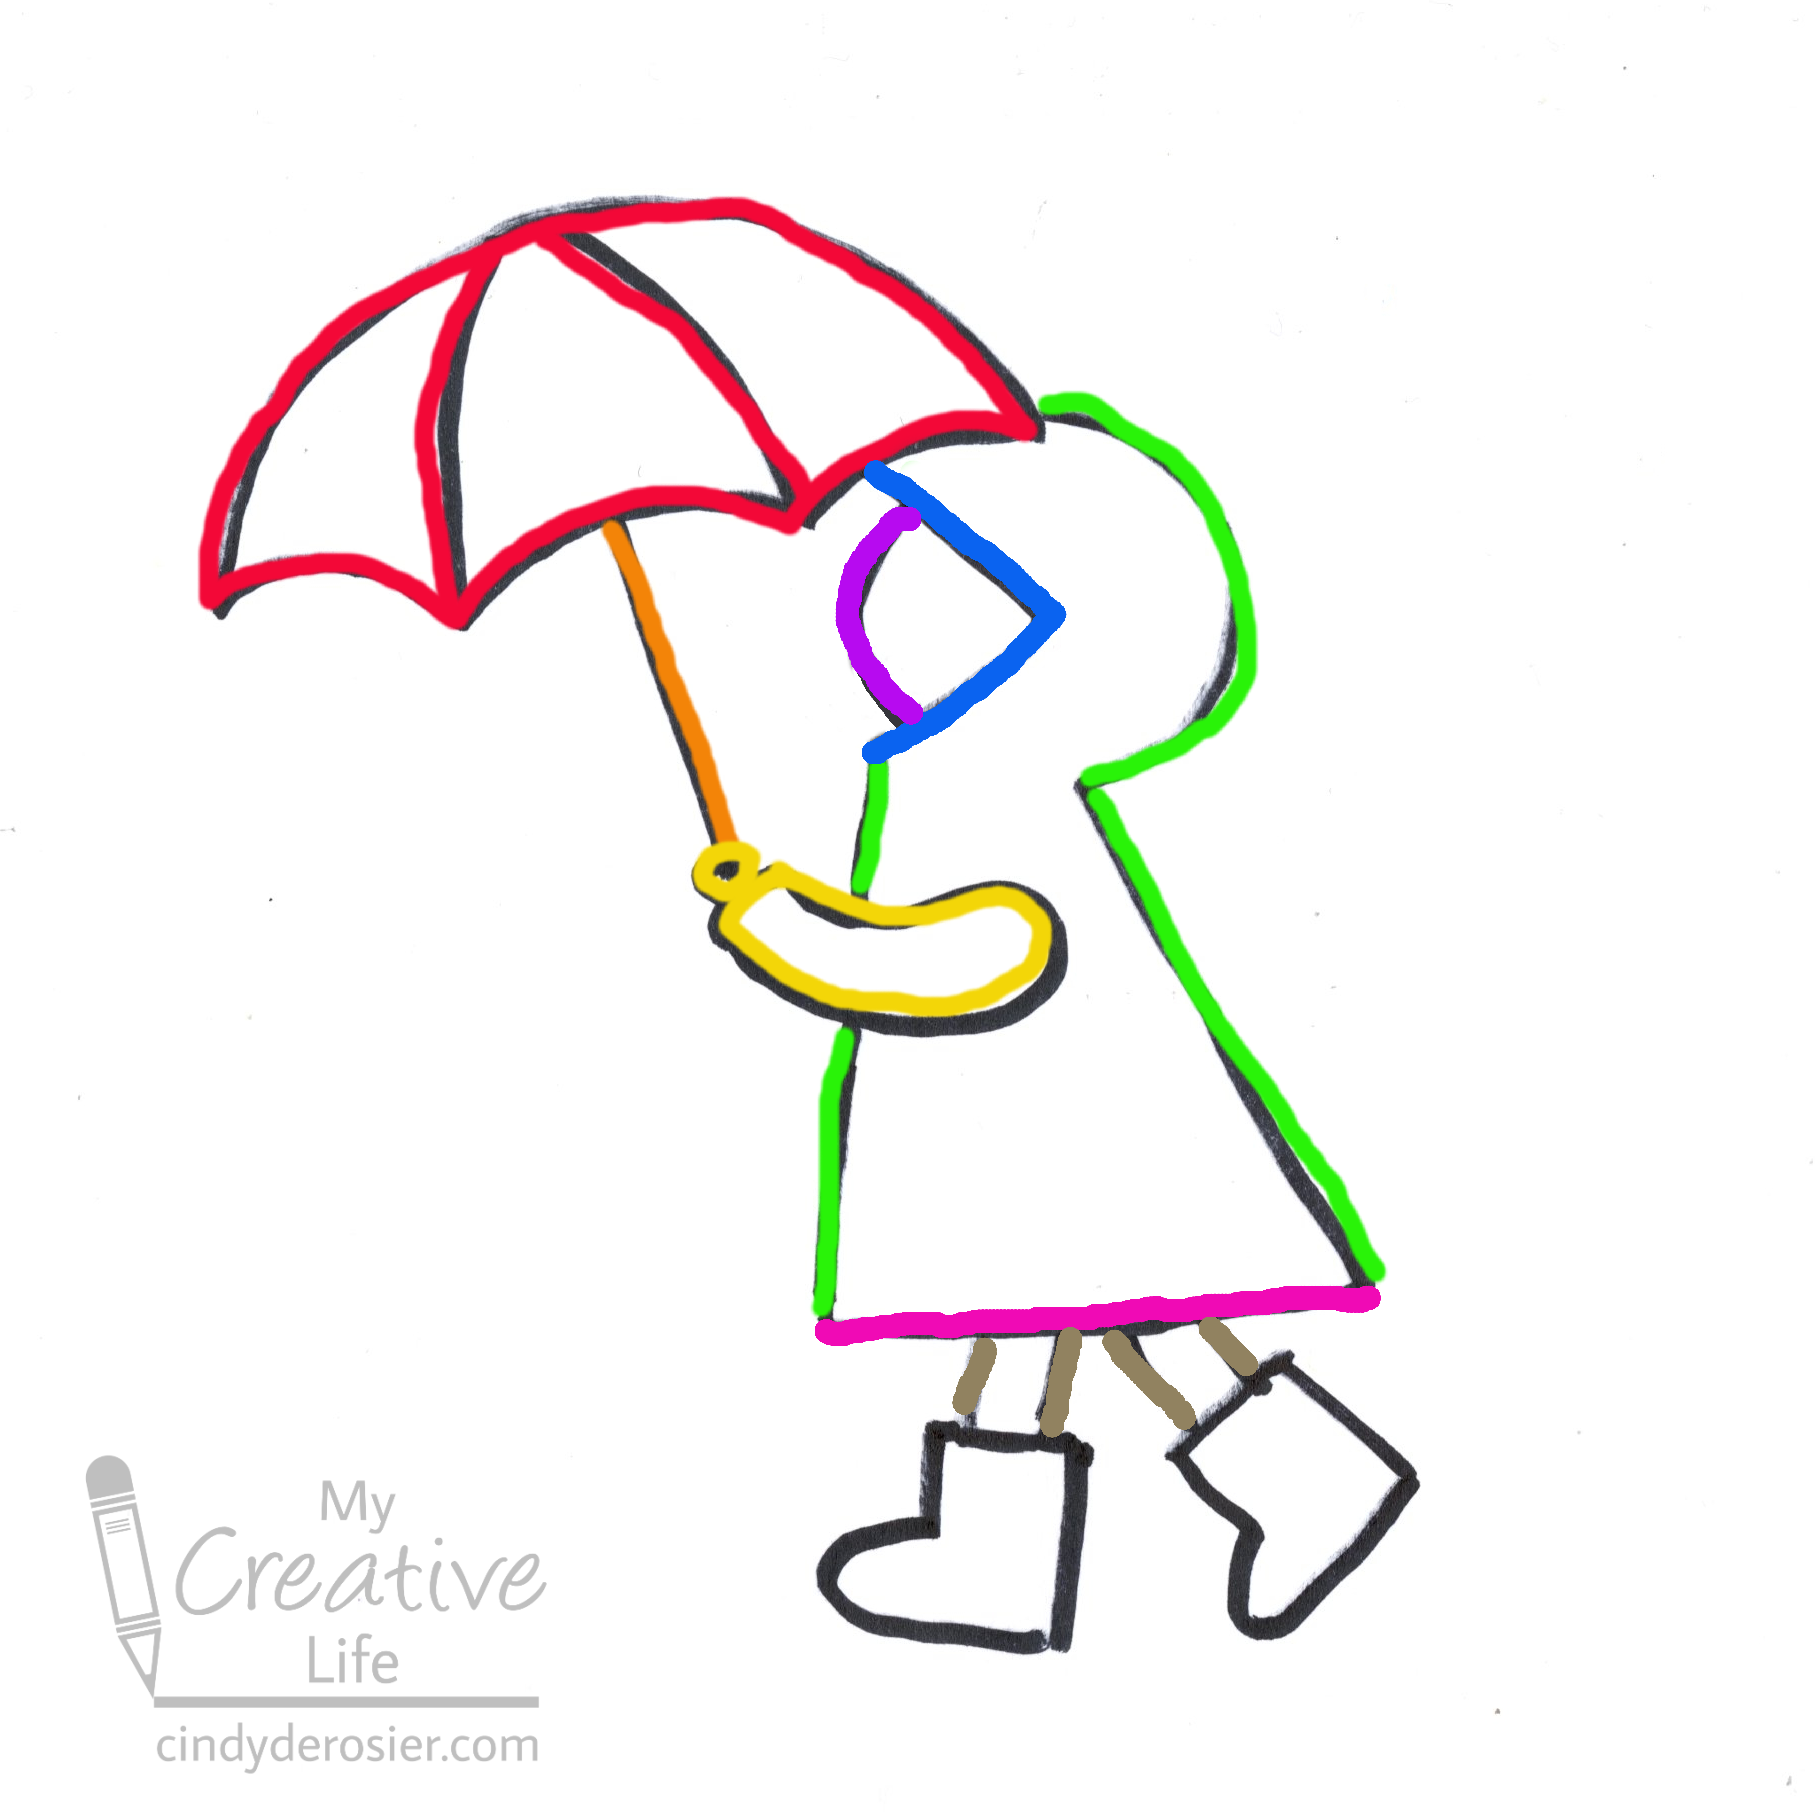
Paint the background of your paper with a pale bluish-grey sky and a grey sidewalk. While the paint dries completely, draw the image of the child in a raincoat on a piece of scratch paper. Rather than draw each step and then scan that, I decided to draw the entire thing and scan it, then digitally trace over the lines in the order I recommend making them. This is the finished drawing:

I've color-coded the steps in rainbow order: red, orange, yellow, green.
Step 1 (red): In the upper right corner, draw an arc for the top of the umbrella. Draw two lines down from the center to make the umbrella's ribs. Draw upward-curving lines between each of the ribs.
Step 2 (orange): Draw the handle of the umbrella.
Step 3 (yellow): Draw a circle for the child's hand at the base of the umbrella handle, then add an arm.
Step 4 (green): Draw a capital R, lifting your pencil for the face and the arm.

Step 5 (blue): Draw a greater-than sign to define the edges of the raincoat's hood.
Step 6 (purple): Draw an arc inside the greater-than sign for the child's face.
Step 7 (pink): Draw the hem of the raincoat.
Step 8 (brown): Draw the child's legs.
Step 9 (black): Draw the child's boots.
Scribble on the back of your drawing, using this technique to transfer it to your painted paper. Using the pencil lines as a guide, paint the child in the colors of your choice. When the paint is dry, use a Sharpie to outline the shapes and add the details, like the ribs of the umbrella and the buttons and pocket on the raincoat. I normally would do this in black or brown, but randomly decided to use gold just to be different.
The last step is adding drops of Diamond Glaze to the sky and some drizzles of Diamond Glaze to the sidewalk. The sidewalk puddles will take a long time to dry; give them at least 24 hours before touching them. The long wait is worth it though - it really looks like puddles.
What's the weather like where you are?

This is cute! I see the dimension even in the scan, though I can imagine it looks much better IRL! As for this rain, wowzers! Poor California, it needs it but it cannot handle it!
ReplyDeleteReally cute! It's been raining a lot here too.
ReplyDelete