Showing posts with label Harry Potter. Show all posts

2/20/23

Bash Bowl 2023: Ravenclaw Pride

Unfortunately my team, Twisted Scissors, was slaughtered by the Scrappin Banshees in last week's Bash Bowl game. But that only makes me more motivated to contribute to my team this week. This is the first layout I made. 

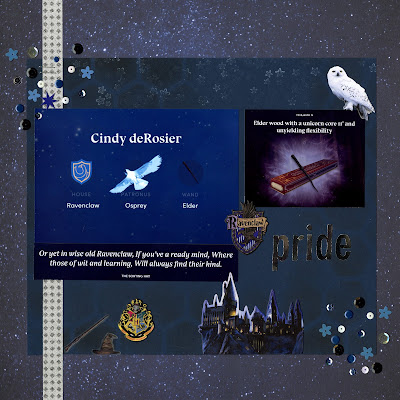
Ravenclaw Pride (affiliate link)

This is the playbook for Week 2: 


This challenge wasn't quite as hard for me as last week's, mostly because there aren't any required lumpy items. It took some effort, but I did score a touchdown. The white/silver washi tape has staples (metal) holding it in place. There are a bunch of sequins, including some that are flower-shaped. (There's a "no double-dipping" rule, but this works because the flowers aren't the only sequins.) The hexagons are on the cardstock, using the same stencil/technique as on my Bumblebeast layout. (If I'd known hexagons were coming, I wouldn't have put the stencil away!) For the stamped images, I did 3rd generation stamping with white ink onto the background cardstock. I like that it's really subtle. 

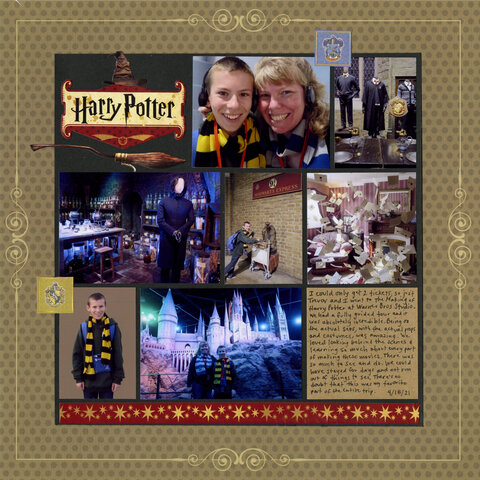
About the layout itself: I've identified strongly as a Ravenclaw since I read the first Harry Potter around age 28. I'm still a big fan 25 years later. The transphobia of JK Rowling bothers me significantly; it also confuses me. She literally wrote the story that starts with a boy who is different than everyone else, doesn't know why, and isn't allowed to be who he really is. Vernon and Petunia try to suppress the wizard behaviors, but that doesn't change who Harry really is. Call me crazy, but I see parallels. Anyway, while JK Rowling is the author, the world of Harry Potter has become bigger than her and I'm a fan. Ravenclaw Proud! 

9/2/21

The Making of Harry Potter

In April 2019, Trevor and I experienced The Making of Harry Potter at Warner Bros. Studio in London. It was absolutely incredible. We loved every minute. I'd go back in a heartbeat. 

The Making of Harry Potter (affiliate link)

As usual, I really struggled trying to decide which pictures to include on the scrapbook layout. I used 75+ photos for the blog post about the visit, so you can imagine how hard it was to narrow those down to the seven I used!

Once I picked my photos, the layout came together easily. I made my photo grid, constructed the title using three stickers, added a journaling box, and anchored the layout with the sticker strip across the bottom. The last touch was adding the Hufflepuff sticker next to Trevor and the Ravenclaw sticker by me. 

I'm so happy with this layout and thrilled to have it in the album. Only two more pages to go before I've finished scrapping our 2019 Europe trip

8/20/19

Harry Potter Travel Game Holder

In addition to their annual framed layouts, I made Harry Potter themed travel game holders for my goddaughters' birthdays. Paper House Productions sent me some adorable Harry Potter goodies (affiliate link here and throughout the post) and I couldn't wait to dive in and try them! I made a Hufflepuff tin for Ellia and a Griffindor for Kylinn. 


Inside each: a Magic deck, curated specifically for each girl by Trevor; Tant Fant, and the materials for a Native American stick game. There's plenty of room if they want to add dice, cards, or other game pieces. 


---------


Harry Potter Travel Game Holder


Materials:


Steps:


Cut a strip of black cardstock the length of the lid. Apply red line tape and secure it in place. Punch a black circle and apply the desired house sticker to it. Use the dies to cut a label from gold cardstock. Attach the black circle to the center. Add narrow washi tape to the center of the black cardstock, then edge it with wider washi. Attach the label in the center. 


Obviously, you can change up the decorations any way you'd like. For Ellia's Hufflepuff tin, I put the narrow washi on both edges of the black cardstock, then added the wider washi below. I used a different label die and adhered it horizontally instead of vertically.  


Fill the tin with games (or collectibles, money, or anything else) and your gift is ready to give!