Showing posts with label cardboard. Show all posts

12/9/22

Recycled Cardboard Box Penguin

This penguin project is the seventh craft in my series based on crowd-sourced responses to ten questions. Can you guess what the question was? 
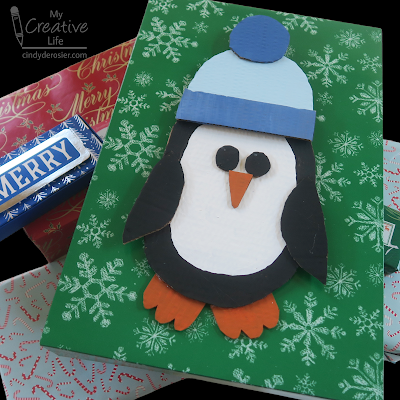

Here's a hint:


I asked, "Name something you recycle." I chose the answer of cardboard boxes as the inspiration for my craft. And, in fact, that specific box pictured above helped guide my thinking. When I saw 'made with less material' printed on it, I guessed (correctly!) that it would be easy enough to cut into shapes with scissors. Standard cardboard is best cut with a utility knife, which is great for straight edges, but not for cutting out small, circular items. I designed today's penguin to test how difficult it would be to cut rounded shapes from this thinner-than-usual corrugated cardboard.

The answer? Not difficult at all! In no time, I had cut out an oval body, circular eyes, a triangular beak, a pair of wings, a pair of feet, a hat, the hat's trim, and the hat's pom-pom.  


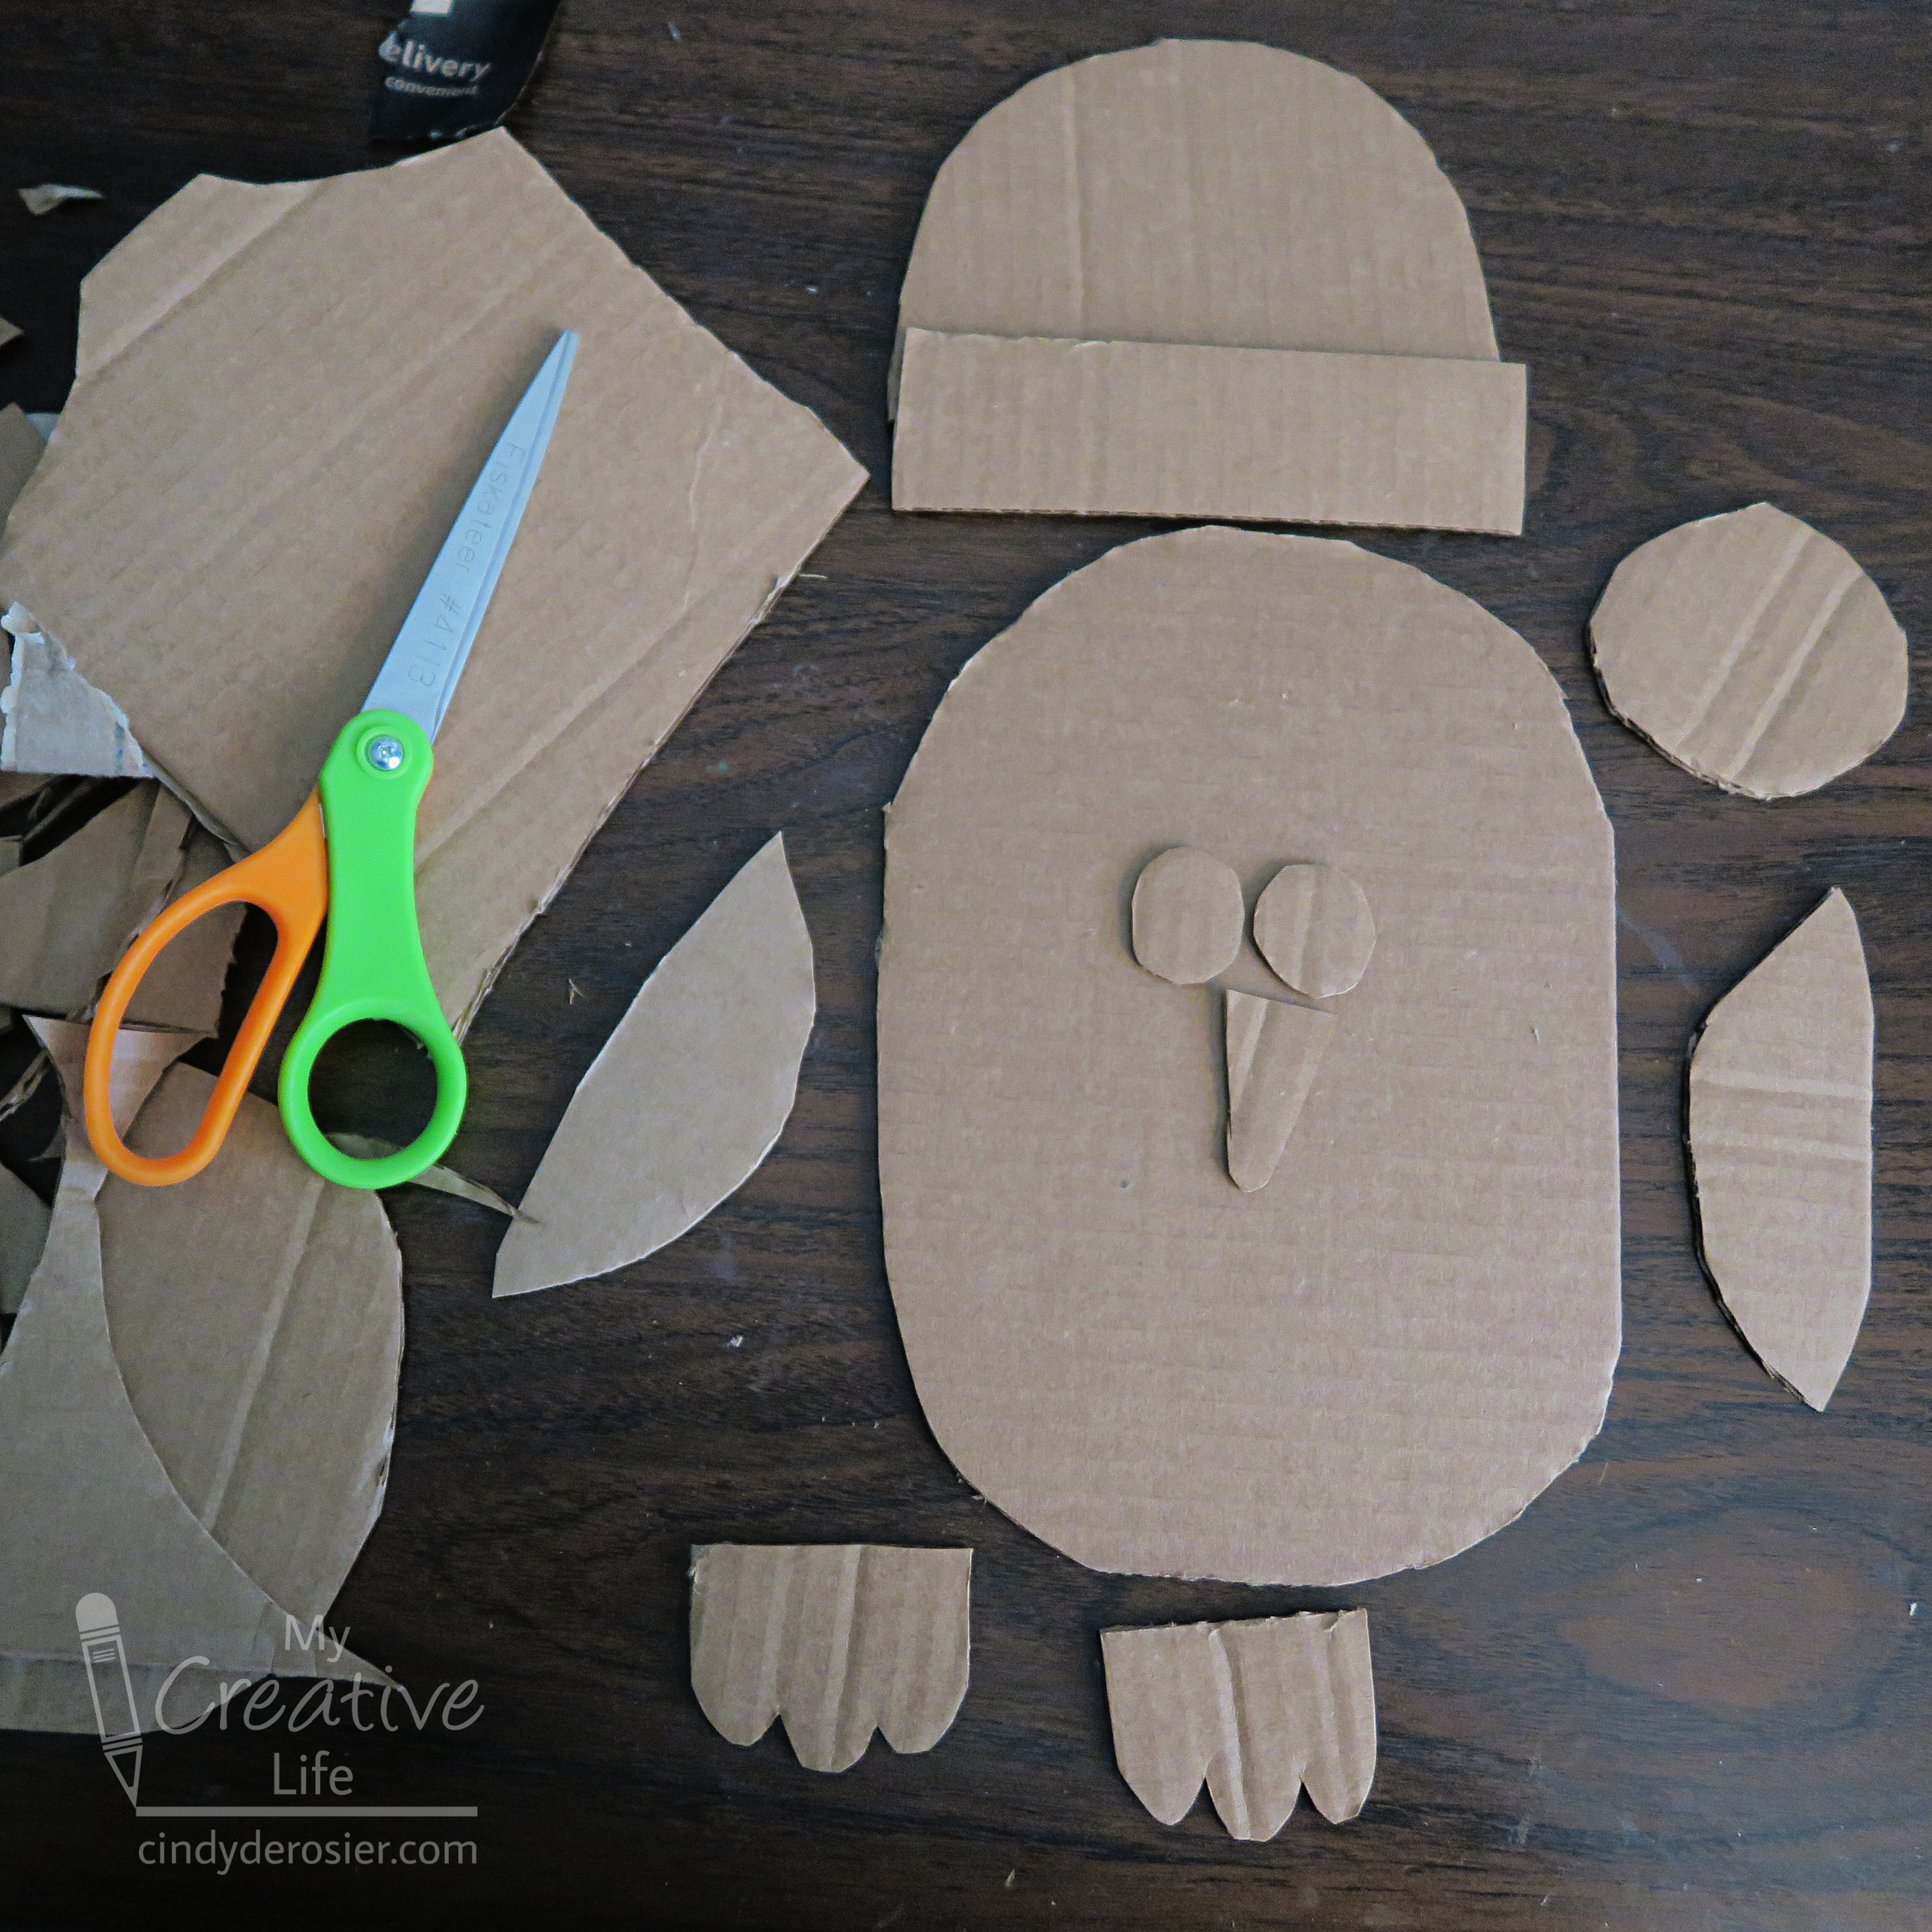
I painted all the pieces with acrylic paint and let them dry. Incidentally, I thought it was really interesting how this thinner cardboard reacted to the paint. Look at the slightly lumpy texture. That didn't change when the paint dried. 


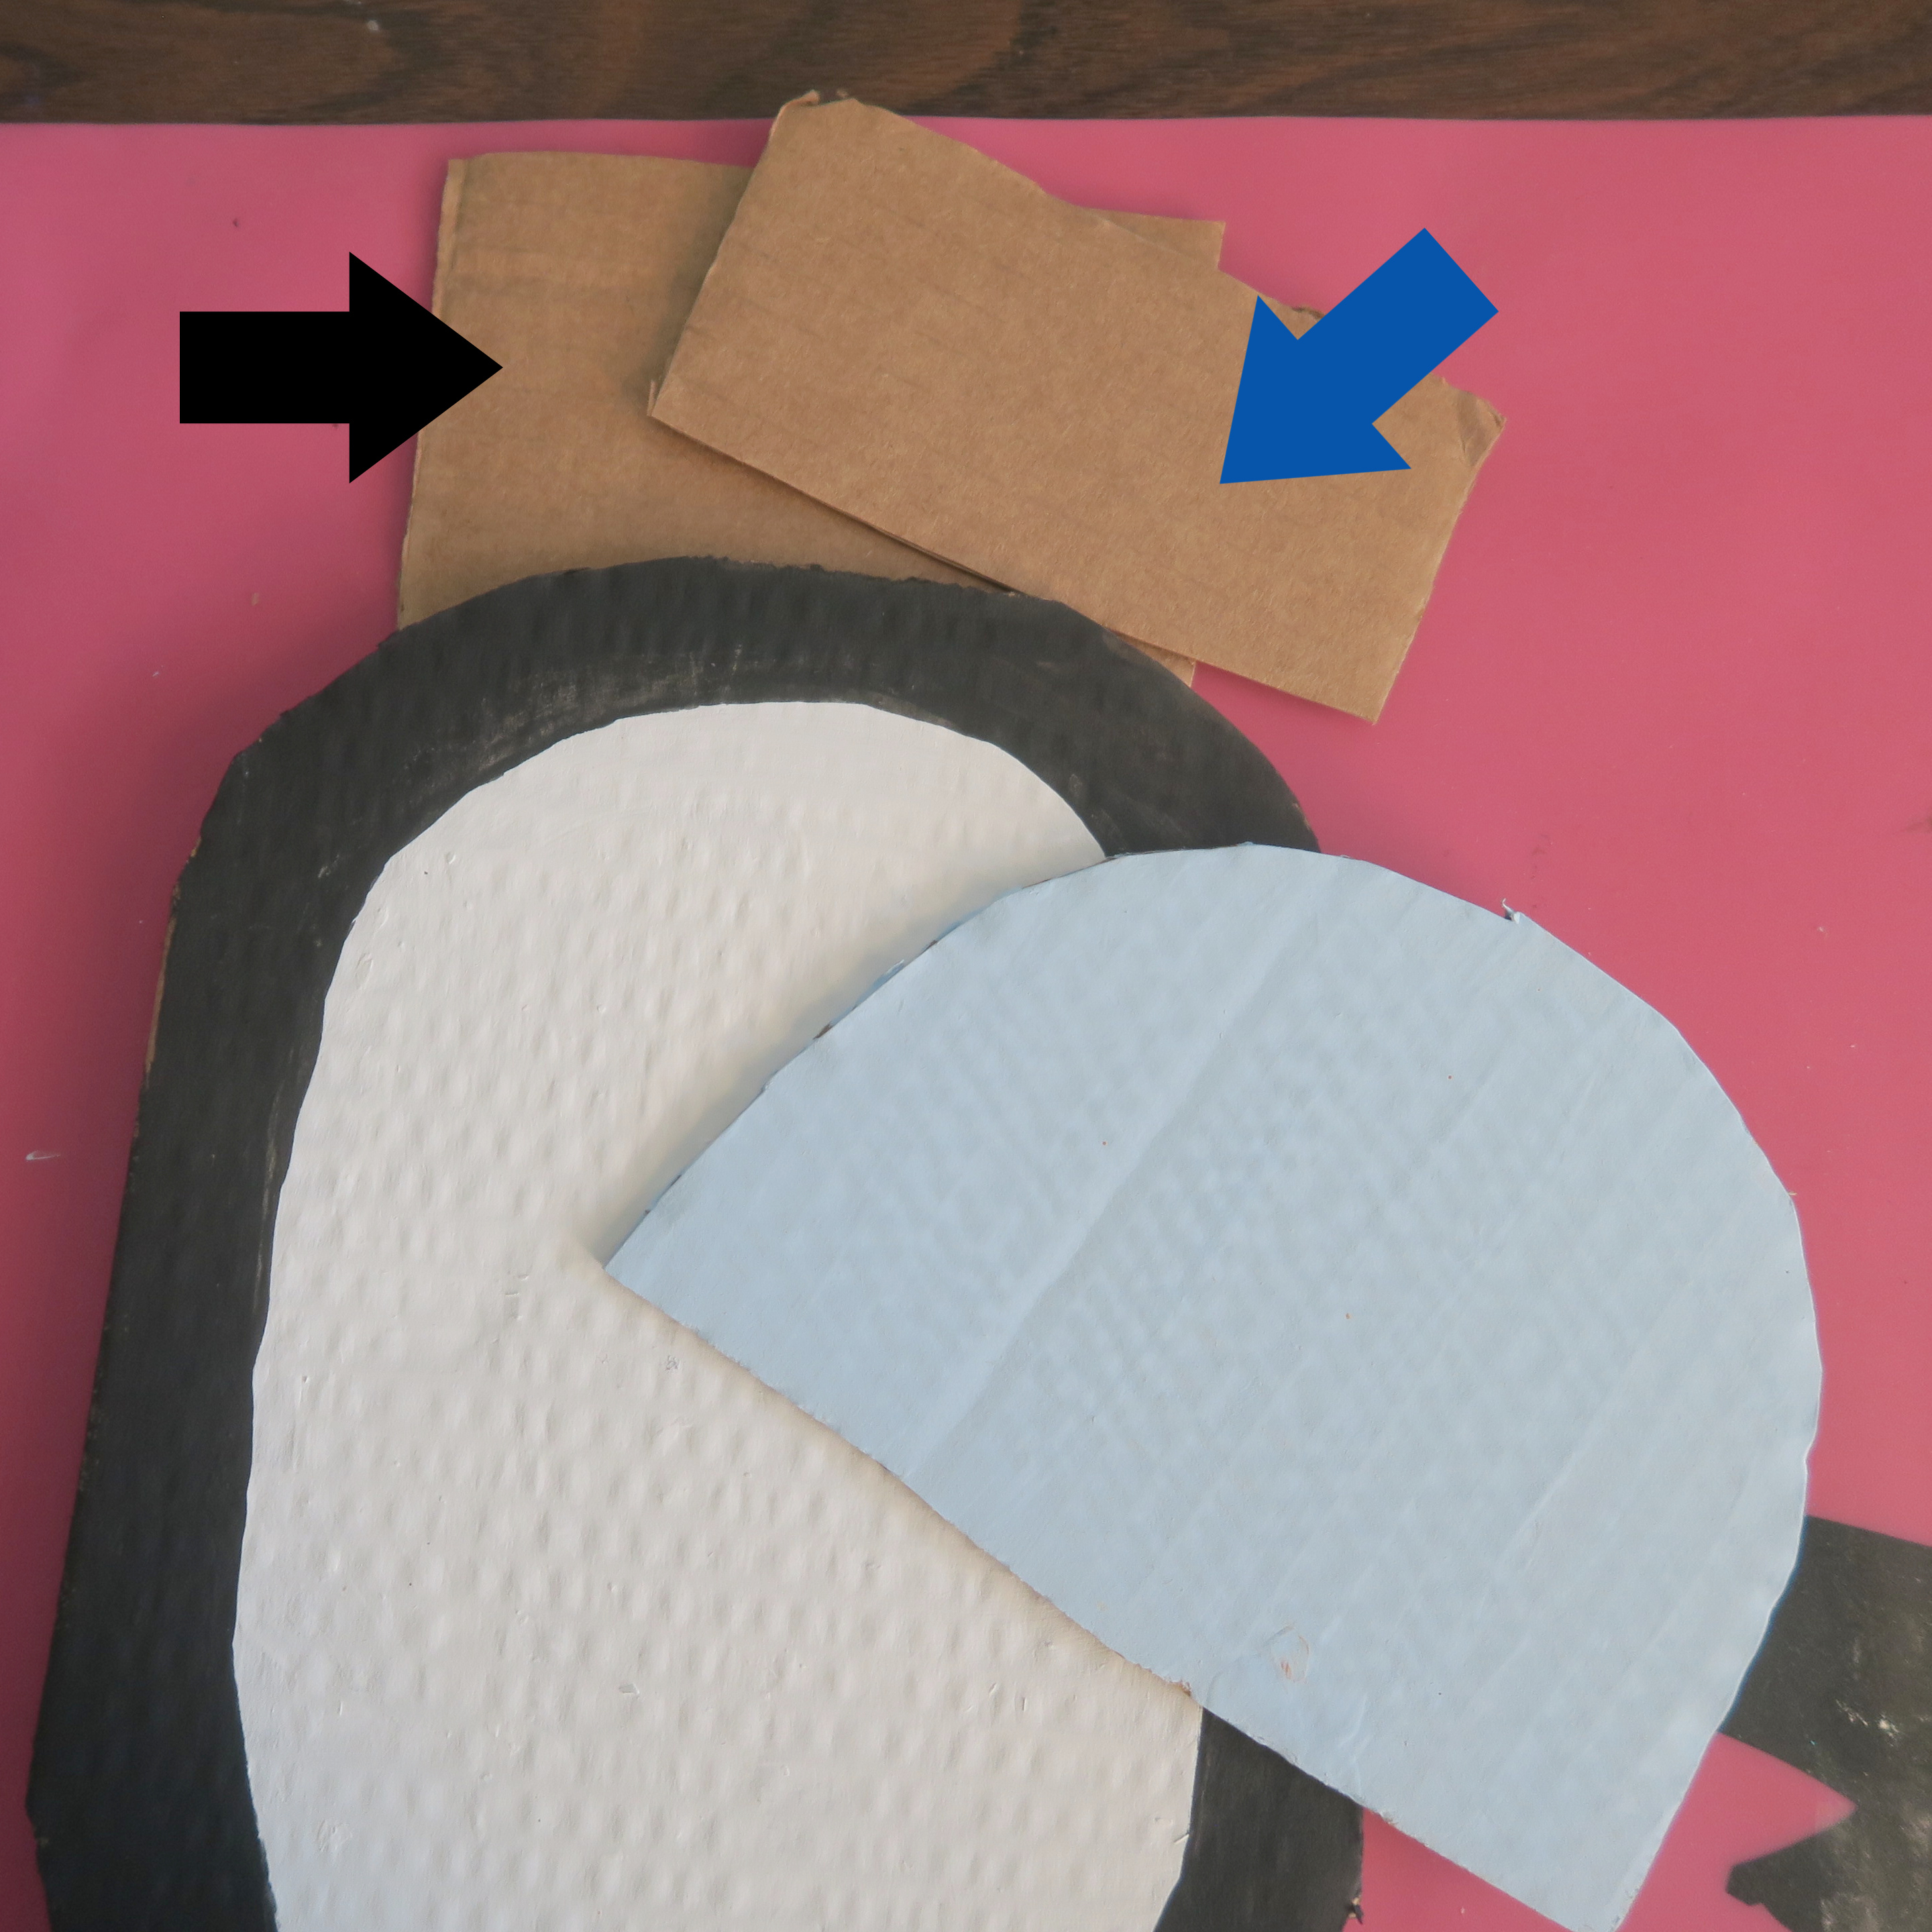
Before using the hot glue gun to assemble everything, I started by figuring out what my base layer would be. It's not the body - the feet are tucked behind the body. If I glued the feet to the body and then the hat and facial features on top of the body, the finished project wouldn't lay flat. I would need to prop up the gaps caused by the thickness of the cardboard. 

So I cut a piece of cardboard (marked by the black arrow below) that was slightly narrower than the penguin's body and positioned it so that it left room for the feet yet extended beyond the head. I glued it in place, then cut a second rectangle (blue arrow) to fill the gap created between the base and the hat.  

 
Here's how my penguin looked after I glued the rest of the pieces in place.  


And here's how it looked after I glued it to a robe-sized gift box. I plan to tuck a gift tag under his wing. 


I love that I repurposed the cardboard box that the gift came in to decorate the gift box I used to wrap it! The recipient can use the box again, giving the cardboard box an even longer life. 

4/28/21

Recycled Items Hot Air Balloon

I keep a jar of lids in the craft room because you never know when you'll need one. I was putting a metal lid from a cylinder of orange juice concentrate into the container when I realized the red plastic screw-on lid from a tub of mixed nuts would make an awesome hot air balloon. I dug out a few more recycled items and made this:


Every time I look at it, it makes me laugh. The idea of my parents taking their three grandkids on a hot air balloon ride is improbable enough, but the fact that I positioned the photo so that Allison would be visible makes me imagine the impossibly long legs everyone appears to have. The picture was actually taken indoors at my sister's house in December 2018, not in a hot air balloon. Everyone had just come in from the snowy backyard, which explains the jackets but not why Mom is wearing her fanny pack and Dad is clutching a cold drink protectively. 

The main supplies in today's craft all are recycled, if you can count a photo I printed but didn't end up using for the scrapbook as recycled. I'm counting it. Affiliate links below. 
 

Recycled Items Hot Air Balloon


Materials:


Steps:


Decorate the plastic lid with Sharpies and gel pens. Obviously, you can use whatever colors and patterns you want. 


Cut a piece of chipboard about the size of an index card. Use a score board to create the basket texture, first by scoring the chipboard in one direction, then rotating is 90° and scoring again. It's difficult to get precise lines when working against the existing score marks, but that actually makes the basket texture most realistic. 


Rub brown ink on the scored chipboard. The transformation is amazing!
 

Score the sides and bottom of the chipboard so that you can fold them to make a dimensional basket. Use microtip scissors to cut the photo, separating the people from the background. Glue the people to the basket.


Turn everything upside down. Assemble the basket by folding the bottom under and the sides back, then gluing them into place. Cut two lengths of single-strand embroidery floss and glue the middle of the strands to the bottom of the plastic lid. 

When that is dry, stretch the pieces of floss so they are taut. Glue two to the back of the photo and two to the basket. 


When everything is dry, add glue to the edges of the lid and the basket, then carefully turn it over and place it on the cardstock. Let it dry completely before hanging. 


Up, up, and away!

8/30/13

Cubanapolis 2013

Trevor is in his second year of Cub Scouts. We started the year in a new-to-us Pack and they have blown us away with their awesome activities. This week was their Cubanapolis.

We'd never heard of a Cubanapolis before. We were told that each boy creates a vehicle from a cardboard box and wears it during a race... a Cub Scout Indianapolis. The boys have "pit stops" during the race where they have to do various tasks. We were given a cardboard box and told to have Trevor wear safety goggles to the event.

With only that information, we headed home to design a car. Trevor sketched out a blue racecar with a pointy front and a spoiler with the number 7 on the side. Steve and I helped him build the shape (he's not safe with a box cutter yet), but the design was totally his. We had green spray paint at home but no blue, so he decided to make it green. We added paper plate wheels (painted black and silver), #7 (his age and birthdate), and a cool license plate. The last step was adding straps to the car so that he wouldn't have to hold it while he ran. Here's the proud builder:     


After the opening flag ceremony and other business, it was time for the race. The Tigers (first graders) went first, then it was time for Trevor and the rest of the Wolves (second graders) to race.  


The three pit stops were very clever. At the first pit stop, each boy had his "windshield" cleaned with a spray bottle and paper towel. Ah, so that was the purpose of the safety goggles!

I wasn't able to get pictures of the 2nd or 3rd pit stops. At the second one, the boys had their tires checked. They had to get out of their cars, lay on their backs, and have the bottom of their shoes 'inspected.' At the 3rd pit stop, they had to fuel up by drinking a glass of water. Here's Trevor about to cross the finish line.


Once all the Wolves had finished their race, they cleared the track for the next age group. Here's Trevor walking away to park his car in the designated parking lot.  

 
My favorite part was seeing the amazing creativity of all the boys. There were approximately 50 boys racing and each vehicle was completely unique. 

Trevor had a blast building and racing his Cubanapolis car. Can't wait until next year!