12/7/12

Chess Pie

It's been almost 9 months since I turned 40 and I'm making great progress with my list of 40 Things!  This week, I accomplished Goals 33 and 34 within a few hours of each other.  I'll tell you about Goal 33 (and how it relates to the Rotato) on Monday.  Today, it's Goal 34 - trying chess pie.

Chess pie is a beloved Southern dessert.  It is also known as vinegar pie.  Basically, it is a single-crust custard pie with vinegar and cornmeal in the filling.  Intriguing!  There are a few different interesting theories as to where the name chess pie came from.  This article by Southern Living has a good summary.

Chess pie is virtually unknown outside of the South.  I first learned about it when President Clinton was in office and mentioned that it is among his favorite foods.  When I made my list of 40 Things, I knew I wanted to try chess pie.  After nearly 9 months of actively looking for it in restaurants and bakeries, both around here and as I've traveled, I realized that if I was ever going to try chess pie, I'd need to make my own.  

I read through at least two dozen recipes and articles about chess pie and learned that there are several different varieties.  The tastiest-sounding were the citrus versions (lemon, clementine, and tangerine are all common variations), but decided that to really understand chess pie, I should try the classic.  Here's the recipe I used, also by Southern Living.  I followed the directions precisely.  My finished pie looked like this: 

I've been making an effort to include as many different people as possible in my goals, so rather than serve it to my family, I brought it to our MOMS Club brunch. But first, I had some fun. I posted the following on Facebook: 
I baked a popular Southern dish that is mostly unknown outside of the south. I first heard about it when Pres. Clinton was in office and he mentioned that it was one of his favorite foods. I'm super excited to try it. I'm curious- with no information other than that, would you be willing to try it with me?
It was fun to see who was willing to try it, no questions asked!  It was also fun having my Southern friends try to guess what I was talking about.  The friends who'd be at brunch were (with one exception) totally open to trying it, whatever it might be.  There were various suggestions about blindfolding them before they tried it, but I decided that wouldn't be necessary.  Instead, I ambushed each person as she arrived, pushed a plate toward her without telling her what it was, and took her picture as she tried it.  I'm glad my friends are such good sports.  
Our hostess Sheena doesn't eat eggs, so she was in charge of taking my picture.  Here I am, trying my first bite of chess pie.  
 
Kristen looks a bit nervous.

 
Miriam loved the chess pie and went back for seconds.

 
Courteney and Rina both liked it enough to finish their pieces.

 
Kelly was barely in the door before I made her try a piece.


Not a single one of them had heard of chess pie before.  After everyone had tried it, the consensus was that it was fairly tasty.  Some really liked it, most thought it was ok.  One person declared it "acceptable."  There were positive comments about the mild sweet corn taste (and negative ones about the slightly gritty texture).  No one could taste the vinegar.

Thanks to Kristen, Miriam, Courteney, Rina, and Kelly for playing along!  (And Sheena for hosting!)  I think next month when we get together for brunch, I'll bring some lemon chess pie....   

12/6/12

The Rotato

When I went to my sister's house at Halloween, she gave me a Rotato.  No, we don't exchange Halloween gifts, and no, she didn't pay for it.  It was on the giveaway table at work and she passed it along to me.  


While we do have a largish kitchen, we don't have infinite storage so I'm somewhat picky about what I'm willing to keep.  I was skeptical about whether the Rotato would make the cut because I don't peel a ton of vegetables and, in general, I am not a fan of unitaskers. Still, I decided to give it a go. 


Actually, Trevor gave it a go.  He's been DYING to try the Rotato ever since Aunt Kari gave it to us.  
 
The pros: It was very easy to assemble and held the potato securely.  It peeled the potato cleanly in a long, continuous peel.  It was easy enough for a child to work it and much safer than a knife or traditional vegetable peeler.  The cons: It did not peel the top nor the bottom of the potato.  The directions said to put a paper towel under the Rotato to catch the peel, but that meant that the Rotato's non-stick feet didn't cling to the table as they should.  It peeled considerably deeper than a standard vegetable peeler, potentially resulting in more waste.  

I say "potentially" because I couldn't stand wasting all that potato.  I sliced the long potato peel into pieces and threw them into some hot oil.  I pulled them out, sprinkled them with salt, and served them with ketchup on the side.  Delicious!   

 
I haven't made a final verdict about the Rotato.  I still need to try it with a few other of the suggested fruits and vegetables before I decide if it has earned a spot in the cupboard.  By the way, the potatoes that we peeled?  I made something awesome with them, which I'll tell you about on Monday.  A little hint: they were part of Goal 33.

12/5/12

Cinnamon Stick Tree Ornaments

About a week ago, I saw some adorable cinnamon stick tree ornaments made with fabric scraps on the Cosmo Cricket blog.  (Click here to see them.)  Since I have a huge vase of cinnamon sticks just waiting to be turned into a fabulous craft, I decided to make my own version of these trees.


---------


Cinnamon Stick Tree Ornaments


Materials:


  • 6" cinnamon sticks
  • fine-grit sandpaper
  • green fabric
  • scissors
  • chipboard or wooden stars
  • yellow paint
  • yellow Stickles
  • twine
  • hot glue    


If the cinnamon sticks you have are longer than 6", trim them with a hacksaw (pruning shears shatter the cinnamon rather than making a fresh cut). If the cinnamon does not have a strong scent, gently sand each stick with fine-grit sandpaper.

Paint the stars yellow. After a few minutes, add a coat of yellow Stickles, then set them aside. While they are drying, cut strips of fabric approximately 3/4" wide and 8" long. (I didn't measure.) You'll need five per ornament. Tie the fabric strips to the cinnamon stick, making sure the right sides face front.


Notice how uneven the strips are? Like I said, I didn't measure. Use the scissors to cut a diagonal line to form the shape of the tree.  


Cut a piece of twine and tie it to make a hanger. Attach the star and a hanger to each ornament using hot glue. Here's the finished ornament, which smells even better than it looks.  


I'm strongly considering having Trevor make a bunch of these for family members. For any family members reading this... if you get a cinnamon stick tree for Christmas from us, act surprised. OK?


12/4/12

Some of my Favorite Snowman Crafts

Now that Advent is here, we've been busy decorating, crafting and baking in the deRosier household. I'll be sharing all our various projects in the upcoming weeks, but for now I wanted to do a wrap-up of some of our favorite snowman crafts from last year.

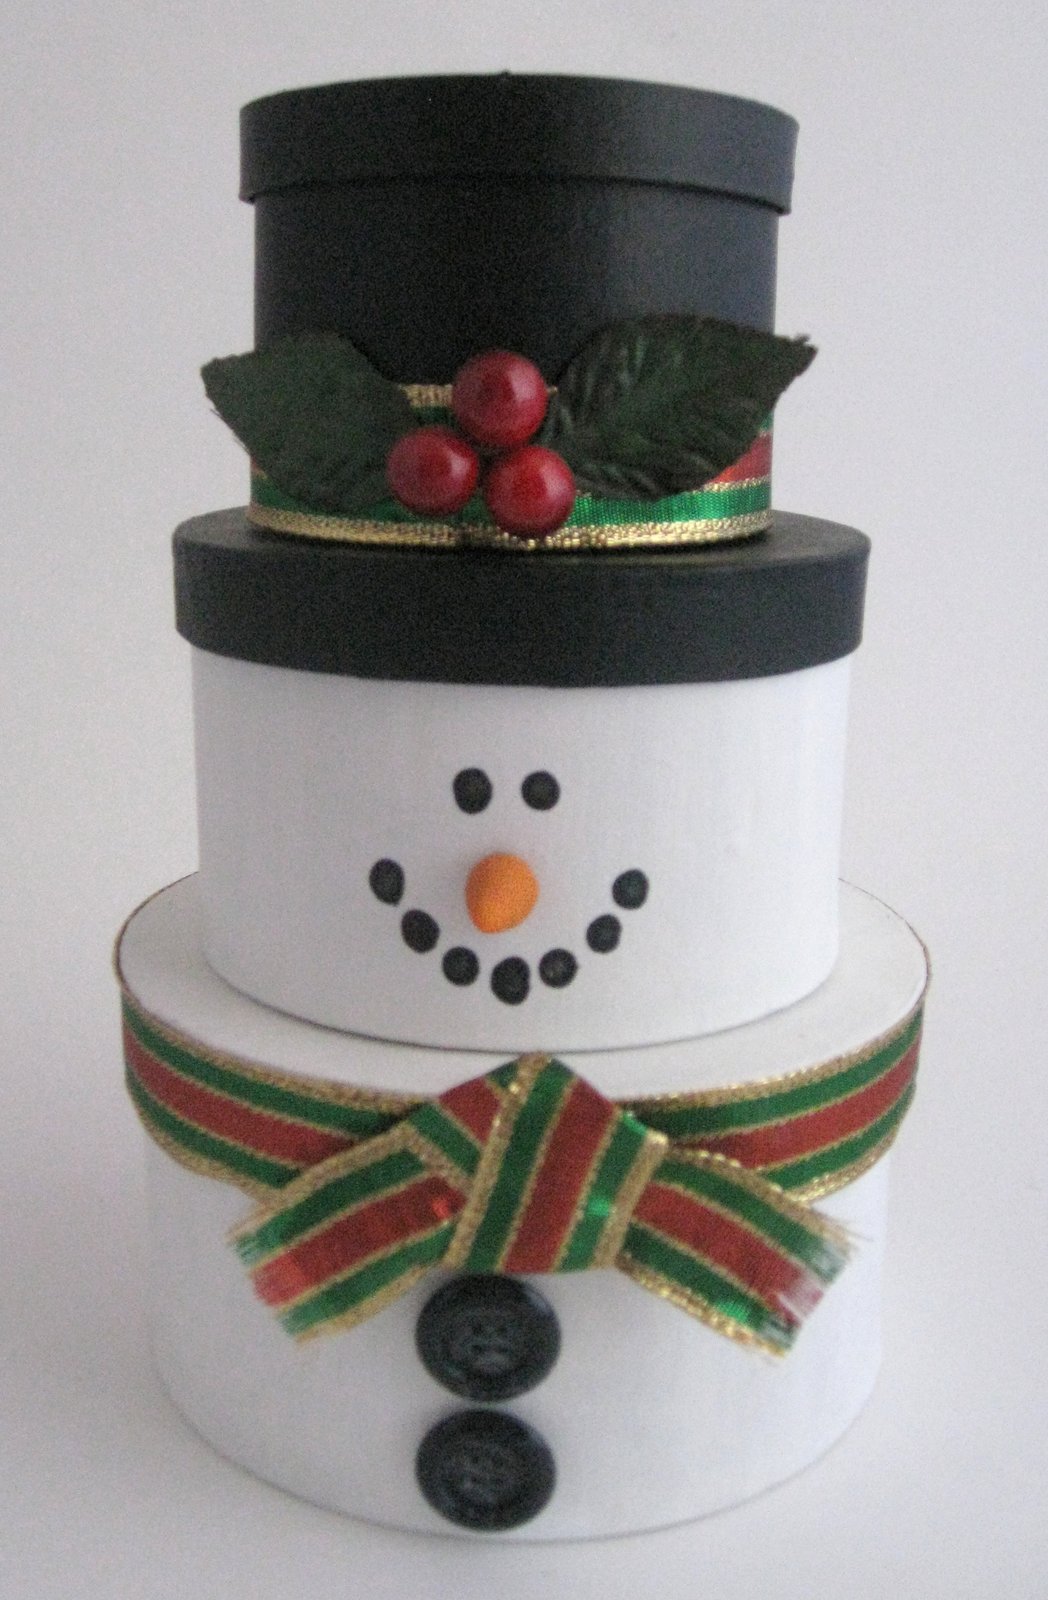
Stackable Snowman: I'm a huge fan of snowmen. Huge. This stackable snowman is one of my absolute all-time favorite Christmas decorations.  


Snowman Gift Tags: As I said, I'm a huge fan of snowmen and these gift tags make me smile every time I see them.  When I whipped them up, I knew they'd be cute on our packages, but I had no idea how many other people would love them too.  They've been pinned and repinned countless times, they've been featured several places, and they are responsible for almost 3500 blog page views!


Enamel Accents Snowman Gift Tags:  Here is another style of snowman gift tag that I made last year. I love the texture of the snow and the dimension of the snowman.


Donut Snowmen:  I thought I blogged about these last year, but apparently I didn't!  They're not my original idea (I've seen them at craft fairs many times over the years) but they made a fun and easy gift for Trevor to give to family.  


Hot Glue Snowmen:  As we pulled these out of the ornament container this year, Trevor and I giggled about how crazy and lumpy they turned out.  But we had so much fun making them!   
Trevor's Snowman Craft: I absolutely LOVE when Trevor plans a craft and teaches me how to do it.  It made me smile to pull these out of storage and put them back up on the wall.   


Marshmallow Snowmen: One more edible snowman.  Marshmallows, candy and snowmen- what could be a better combination?  

There are at least a dozen more homemade snowmen that we pulled from the Christmas boxes, so I'll have to photograph and share those in a future post.  

12/3/12

Taming Gift Bows

While I absolutely LOVE my scraproom, I don't especially like that it doubles as gift wrap storage. If I ever design a zillion dollar dream home, it will have a dedicated gift wrap room. (No, I'm not kidding.) In the meantime, the gift wrap stuff will stay in my scraproom.

I have a dresser in my scraproom that holds the bulk of our gift wrap stuff. One drawer is for present bows.  

 
I should mention that I don't buy these bows. All of these were either reclaimed from presents we've received or were given to me by people who know I save and reuse them. Unfortunately, despite the fact that we put bows on most gifts that we give, the number I have no longer fits in this drawer. The extras are sitting in a basket. I really wanted to consolidate the bows into a single space. Bonus points if I could free up the drawer in the dresser.

Then I remembered that my mom had given me an empty Costco caramel corn container awhile ago. (Many of my friends and family know to give me interesting containers and other cast-offs.) I'd tried unsuccessfully to remove the label for a previous project. When the label proved way too stubborn, I put it into the craft closet, waiting for inspiration.  

 
I dug through my OLD birthday paper and found a piece that covered the label beautifully. I added velvet rickrack to trim the edges.

 
I started adding the bows, hoping they would all fit. They did! Yea! Not only did I free up a dresser drawer, but the basket is empty now too.  

 
I added letter stickers as a final touch.  

 
My bow container is now back in the craft closet, in the same spot where the empty container had been waiting for me to repurpose. Hurray! Trash to treasure!