3/14/18

Everything's Coming Up Oranges

This post contains affiliate links.

It's orange season, the delightful time of year when the tree in our backyard goes nuts and produces oranges faster than we could possibly consume them. We are enjoying fresh-squeezed orange juice and oranges with most meals. It's a good problem to have.

We've also been making Whole Orange Bread. We've made it a bunch of times and it's still the weirdest recipe ever. Well, maybe this one is. They're both weird. But delicious! Anyway... I remembered that my new favorite coloring book, Edible Wonders Color Art book by Leisure Arts had a page with oranges on it. How cute would it be to turn the coloring page into labels for the orange bread that we give away?! (Answer: very cute.)


Coloring Page Gift Label


Materials:


Steps:


Color the page with the oranges on it. Use the scissors to cut out the oranges and some leaves (which are actually connected to the pears, but work just fine with the oranges). Glue an orange and a leaf to the strip of cardstock. 


Wrap the cardstock strip around the bread and glue the ends together. Your gift is ready for someone special!

3/13/18

Skiing with the Scouts

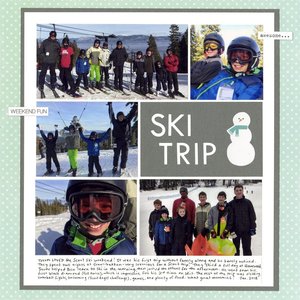
Trevor's Boy Scout troop went on a ski trip in January and had a blast. It was the first trip he'd done without Steve or me along, so we really treasured the photos that the leaders sent to us. In every picture, it was clear Trevor was having the time of his life. The day after he got home, he blogged about the ski trip and all the fun he had. 

Ski Trip (affiliate link)

I only had a few photos to choose from to scrap the trip, but I am so grateful for those. I'm especially happy for the group shots. My favorite photo is the one with the four boys lifting their poles after conquering the black diamond run. I'm so proud of Trevor for keeping up with the older scouts and challenging himself!

3/12/18

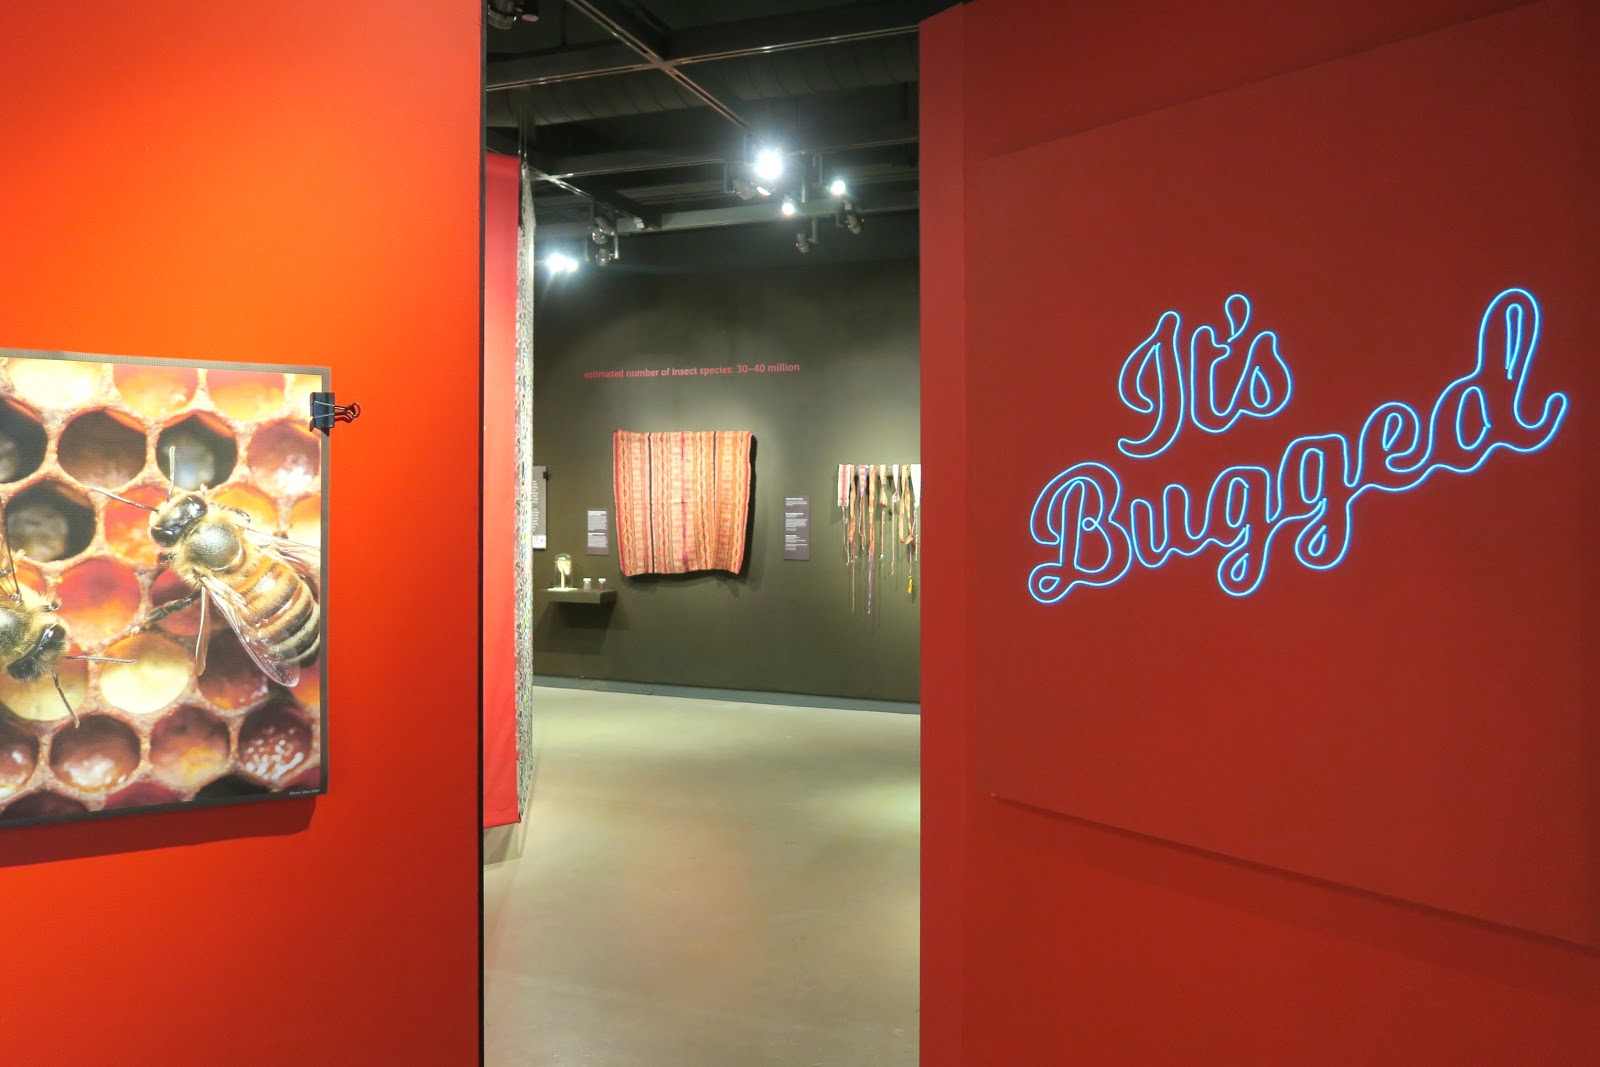
UC Davis Design Museum: "It's Bugged"

When I was growing up, my parents took my sister and me to museums all the time. I even had my birthday party at a science museum one year. We visited museums in the Bay Area, but also when we traveled. History museums, science museums... but never art museums. I honestly can't remember a single time my parents took us to an art museum. It's not their thing. 

I believe I was in high school the first time I visited an actual art museum. I loved it and have visited countless art museums since then. If you look through my US Travel page, you'll see lots of links to art museums that Steve, Trevor and I have visited together. Recently, we went to the Design Museum of our alma mater for the exhibit called "It's Bugged: Insects' Role in Design."


The museum is very small and free to visit. Allow about 30 minutes to see it. According to the press release, "The show explores the two sides of the relationship between people and insects. The first side shows how makers, designers, architects, and artists draw upon nature’s patterns to create beautiful and useful materials and structures, as well as examining the collaboration of humans and insects as producers of raw materials, such as harvested silk and red dye made from cochineals. The outcomes are useful for insects and for people alike, making the relationship complex and compelling."

I'm not sure I agree that harvested silk or red dye made from cochineals is "useful for insects" but I do agree that it is compelling.

Here, Steve and Trevor are examining artwork made with paper from wasp nests. The texture was gorgeous and the patterns so interesting. 


This ceremonial 'singing shawl' from Thailand is worn at funerals. Those are beetle wings knotted to the fringe. They make a gorgeous sound, much like wind chimes, as the wearer moves and dances. They are thought to ward off evil spirits. 


These sashes and belts are from South and Central America, colored with natural dyes, including cochineals. Some of the woven patterns feature insects.


There were a lot of textiles on display, both hanging as fabric and sewn into clothing. 


The exhibit was very interesting and all three of us enjoyed it very much. If you're local, I'd recommend heading to UC Davis to see the exhibit before it closes (April 22, the day after Picnic Day). 

After visiting the museum, we strolled through the hallways looking at the displays of student work. In most cases, there was a sign next to the bulletin board explaining the assignment. It was very interesting to think about how I would complete the same task. These were some of my favorites:


The elevator had a fun design element, too. 


Both UC Davis and the city of Davis are fantastic places to see and experience art. It's very inspirational and uplifting to see art appreciated and even celebrated.

3/9/18

Stuffed Cactus

This post contains affiliate links. 

I made a stuffed cactus and I love it!


It was one of the projects from Felt for the Home, which I received from Leisure Arts to review. 


I chose to make the prickly pear. The first step was cutting out two cactus-shaped pieces of green felt and some flower-shaped pieces of pink felt. 


I used white embroidery floss (3 strands) to cross stitch little x's randomly on one of the cactus pieces. 


Then I used green embroidery floss (also three strands) to backstitch the two cactus pieces together, sewing the flowers in place as I went. 


I left the bottom unstitched. 


I added stuffing, using a chopstick to push it up into the arms of the cactus. 


Finally, I sewed the bottom together. All done!


I love that the cacti from the book are displayed in clay pots with pebbles. I'm strongly considering the same, although my 'pebbles' would actually be these. Wouldn't that be a fun gift?!

Felt for the Home would be another great gift. There are ten project ideas, with detailed supply lists and steps, as well as patterns and a guide to embroidery stitches. I love the donut garland, the succulent garden, and the heart pillow in particular. Best of all, they're easy enough for a sewing novice like me. I see a lot of felt crafting in my future!

3/8/18

Science Fun: Using Red Cabbage to Dye Eggs

After using red cabbage juice as a natural pH indicator, I was curious to see if the resulting shades could be used to dye eggs three different colors. I made a fresh batch of cabbage juice, then divided it into three glasses. I added a teaspoon of vinegar to one (it immediately turned red), a teaspoon of baking soda to another (it turned blue), and left the third just cabbage juice.


I carefully added a raw egg to each cup. Immediately, there was an unexpected difference. The egg in the acidic solution sank to the bottom, the egg in plain cabbage juice hovered, and the egg in the basic solution floated. Fascinating! The eggs all came from the same carton and were stored in the same way, but I have no way of knowing if they were not all the same age. It's possible that I coincidentally put the oldest egg in the basic solution and the youngest in the acidic solution and that's what caused differences, but it's also possible that the acidity of water affected the specific gravity. 


However, as intriguing as that question was, it wasn't the question I was trying to answer. I left the eggs in the cups overnight and then checked the results. Unfortunately, they were a bit underwhelming. The acidic solution resulted in a gorgeous light blue egg (not the pink I'd hoped for), while the neutral and basic solutions barely tinted the eggs at all. They were both very, very pale. Yet there was another surprising result! The egg that sat in plain cabbage juice was perfectly smooth, with no imperfections or calcium bumps whatsoever. Another coincidence, or a result? I'm not sure. The three eggs seemed identical at the beginning of the experiment, but I suppose it's possible that I didn't notice that one was silky smooth and the others were normal eggs with minor bumps. 


So, one question asked and answered, and two more unexpected questions raised! Science is fun!