5/21/19

Christmas Card 2018

This is one of two layouts I made on National Scrapbook Day that weren't for challenges. It is as simple as scrapbook pages get. Christmas card + cream mat + black mat + black strip + journaling.

Christmas Card 2018 (affiliate link)

You'd think that with such a simple page and only a single element, I could have lined it up perfectly straight, but apparently not. I didn't notice it was off looking at it in person, but once it was digital and filling my screen, it became obvious. Fortunately, I have a foolproof method for lifting elements adhered with a tape runner. I won't guarantee it works with all brands, but I've yet to find one that doesn't. You'll need a piece of heavy cardstock (or thin chipboard) that is wider than the element you're trying to remove. Slide the cardstock under one bottom corner. 


Keeping the cardstock flat against the background paper, use two hands to wiggle it back and forth, applying slight pressure toward the top of the element. Keep going until it is 95% loosened, then remove the cardstock. At this point, you can remove the element by hand, or keep it partially tacked down and reposition it. No damage to the background paper!

Into the album!

5/20/19

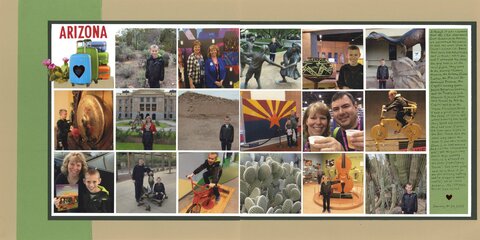
Exploring Arizona

I made this layout for a travel challenge at Scrapbook and Cards Today. It's from 2017, when the Creativation Show moved to Phoenix from Anaheim. Steve and Trevor went along, and my aunt and uncle met us there. While Aunt Vickie and I attended the show, the guys filled their days with adventures.

Arizona 2017 (affiliate link)

This layout was difficult for me, but I couldn't figure out why for the longest time. I think it's because some of the photos have an orange cast that looked really weird with the warm colors I was trying to use. When I switched to the cool green and neutrals, I was happier with the results. I think I'm going to do some color correction and reprint the worst of the photos. I think I'll like the layout more if I do. 

5/17/19

Rose Diamond Art and a Queen Bee

Have you gotten into Diamond Art yet? I absolutely love it. I find it so relaxing. And despite my aging eyes, my awesome magnifying lamp means I can see actually see what I'm doing, day or night! I recently finished Leisure Arts' gorgeous Rose Diamond Art. I cut away the background and temporarily set the rose down onto a piece of blue cardstock to get an idea of how it would look for a project I'm considering. 

I love the rose against the sky blue and will probably proceed with the project I have in mind. But in the meantime, the rose makes the perfect accessory for my latest kids' craft, a Queen Bee. 


---------

Queen Bee


Materials: 


Steps: 


Use the scissors to cut the following pieces, as shown in the picture:
  • large yellow body
  • small yellow head
  • pointy black stinger
  • thin pink wand
  • small silver star
  • silver crown
  • 2 wax paper wings


Set aside the pink and the black scraps. You'll need them later.

Use the Sharpie to draw vertical stripes on the body. Curve them as shown. 


Assemble the bee by gluing the head in front of the right side of the body. Glue the stinger behind the left side of the body. Glue one wing to the front of the body, pointing toward the back. The other wing goes behind the body, pointing toward the front. Attach the crown to the head and the star to the end of the wand. 

Draw eyes, eyelashes, and a smile on the bee's face. 

Cut six very skinny legs from the black cardstock scraps and glue them to the body. Three go in front (the bee's right side) and three go in back (the bee's left side). I positioned the right legs to match up with the black stripes. 

Cut 3 tiny diamonds from the pink cardstock. Cut one in half vertically, then add these 'jewels' to the crown. Cut an even tinier heart to make the queen's lips. 


Note that I temporarily added black paper behind the wings in order to get them to show in the photo. In real life, they are just wax paper and look good, but they simply wouldn't photograph or scan well. 

Another project for my Invertebrates page!

5/16/19

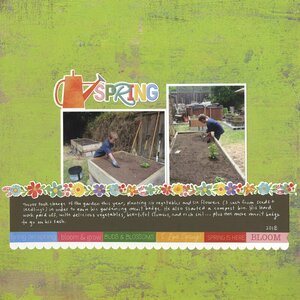
Spring Gardening

This page was inspired by another Scrapbook and Cards Today challenge. The assignment was to  create a layout where you create flowers, use floral paper, or scrap about your garden. 

Spring Garden 2018 (affiliate link)

This was a fun one. When I made the Deflecto make-and-take mini album about Trouble, I only used two of the Photo Play cardstock stickers from the 12x12 sheet. I challenged myself to use as many of the remaining stickers as I could on this layout (while still maintaining my style, of course). I used nine, plus the white border sticker. Mission accomplished!

5/15/19

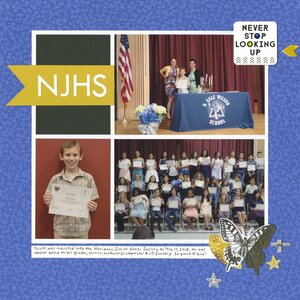
NJHS

I made this layout about Trevor's induction into the National Junior Honor Society for a 3-hour timed challenge at Scrapbook.com. The challenge required us to use our favorite technique or product. 

NJHS (affiliate link)

Using our favorite stuff? That's not exactly a challenge! My favorite layouts are clean and simple, with a patterned paper background and a grid of photos matted with cardstock. Handwritten journaling is a must. 

I'm very happy with how this turned out, particularly the embellishments in the bottom left. The butterfly is hiding the giant head of the person who was sitting in front of me. There's still one more first-row head showing, but it doesn't bother me the way the other one did. Into the album!