3/19/20

'Spell It With It' Challenge for Kids

With the pandemic keeping us home, it's time to get creative! This challenge is open to kids of all ages and can be done independently or with parents. It's a great way to work on spelling, motor skills, and critical thinking. And it's super fun!

---------

"Spell It With It" Challenge for Kids


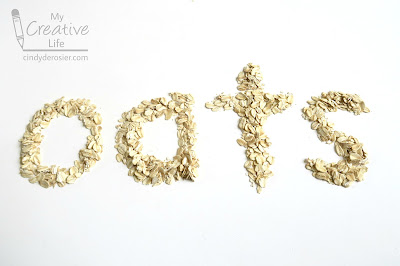
It's simple. Find something in your house, then use it to spell out what it is! Take a photograph, clean up, and move on to the next item.


Here are some other examples.


Now it's your turn! Below are ten categories for you to "Spell It With It." Be creative and interpret them however you'd like. At the bottom, there are two bonus challenges. Whoever spells the longest word and uses the largest item score an extra point. There will be extra points for unique or clever items, beautiful photographs, or anything else that strikes my fancy.


So how do you enter? If you are 13 or over, you can enter on your own. If you are 12 or under, you'll need a parent to enter for you. Here are the steps:

  1. Upload your photos as a comment on the designated post on the My Creative Life Facebook page OR as a comment on the contest pin on the My Creative Life Pinterest account. You can use #SpellItWithIt, but the hashtag is not required. 
  2. Leave a comment on this blog post telling me your age and where to find your photos (either Facebook or Pinterest). 

You have until Friday, April 10 to enter. I will choose winners in different age groups to receive prizes and announce them on Monday, April 13. Good luck and have fun!

Life-Size Grizzly Bear Paw Craft

When I realized that Montana was the only state with no craft suggestions, I made it a priority. I checked their state symbols and the first thing that popped up was a grizzly bear, Montana's state animal. Cool! It's California's state animal, too.

I don't like to reinvent the wheel, so I always check to see what crafts are out there before I spend time duplicating someone else's efforts. A quick search revealed that there are tons of grizzly bear craft ideas for kids, most of them using a paper plate, cardboard tube, or paper bag to make the bear's face or body. I wanted something different, so I started researching grizzly bears in hopes of finding inspiration. When I learned that a grizzly's paw can be 12 inches long with claws up to 4 inches, I knew what I wanted my craft to be.


---------

Life-Size Grizzly Bear Paws


Materials: 

  • two sheets of brown 9" x 12" construction paper
  • one sheet of tan 9" x 12" construction paper
  • pencil
  • scissors
  • brown marker
  • glue
  • tape


Steps:


Orient the brown construction paper vertically and trim around 2 inches off the top, curving as you cut to round it off. Trim a tiny bit off the bottom corners to round them. Repeat this on the second sheet of construction paper. (You can cut both at the same time to be sure they're exactly the same. For young children, have them draw the cut lines first, then connect the two pieces of paper with paper clips on the sides and bottom before they cut.)


Cut two 8" x 1" strips from the tan construction paper and set them aside. Cut ten claws (elongated narrow triangles) from the remaining construction paper. The claws should be around 4" long. 

To draw the features on the bear paw, imagine it like a dinner plate. Using a pencil first so that you can adjust your lines if needed, draw an egg at the bottom left, a taco at the bottom right, a steak in the middle that stretches from end to end, and five marshmallows touching each other along the top. When you're happy with the lines, trace over them with the brown pen. Then cut a bit out around the toes. This is the right paw. 


To make the left paw, draw the same features but in mirror imagine. Trace over the lines in pen, then cut out the toes. 

Turn the paws upside down. Glue the claws behind each of the toes. Tape just the ends of the tan strips to the paws to make a handle. 


When the glue is dry, your completed paws will look like this. 


 I tried to get Trevor to act ferocious for the camera, but he kept laughing. 


This craft is a fun jumping off point for an in-depth study of this fascinating animal. Stores may be sold out of hand sanitizer and toilet paper, but there are plenty of toys, books, puzzles, and other materials to keep kids busy and learning.  

3/18/20

The First Thanksgiving

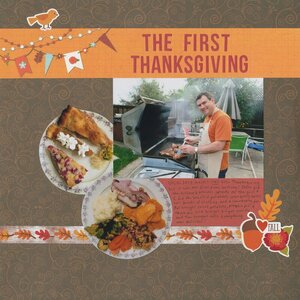
Thanksgiving 2019 wasn't THE first Thanksgiving, but it was the first time we'd ever hosted Thanksgiving. I've literally never cooked a turkey (it's not a favorite of mine) so I was thrilled that Steve wanted to do the turkey on the grill and I could use the oven for the sides. Everything was delicious and our first time hosting Thanksgiving was a success. 

The First Thanksgiving

This layout was a lot of fun to make. I'm really glad I photographed the food; I love that the fussy-cut plates help anchor the main photo.

3/17/20

Cactus Shadow Name Art

This cactus name art started with a random question: Could I stand magnetic letters on their end and do something artistic with the shadows they create? Yes, but it took me awhile to figure out what to do and how to do it! Affiliate links below. 


I had no idea where I was heading with this project when I started. I certainly didn't have cacti in mind as spelled out my name in magnetic letters. and tried to balance them on a piece of chipboard (painted black). I quickly discovered that some letters would balance and others wouldn't. I put a Glue Dot on the bottom of each letter (easily removed, so the letters could go back on the fridge when I was done), which worked like a charm. With my letters secured to the black chipboard, I put second piece of chipboard (painted white) next to it and set them both on the floor in front of a sunny window. I was hoping to cast long shadows onto the white paper, which I could then trace.

Nope. That's not right. Rotate!


After rotating my artwork and waiting for later in the afternoon so the shadows would be longer, I still wasn't getting what I wanted. Time for artificial light, in the form of a flashlight. There are the long shadows I wanted!


It took a bit of coordination to hold the flashlight steady and trace the shadows at the same time (without casting additional shadows that would cover the ones I was trying to trace). This would work much better with a partner. 

When I looked at my finished shadows, I saw cacti. I painted them green (using my favorite acrylic paints, of course)...


... then added darker green shadows. When that was dry, I watered down some blue to make the sky and a light brown to make the sand. When those were dry, I added flowers, spines, and a wash of yellow in the sky. 


This was a really fun experiment. I'm definitely going to play with shadows again and see what artwork it inspires. 

3/16/20

Make Watercolors from Bad Pens

I have a ziplock bag in my craft room labeled BAD PENS. 


When I come across a pen that's drying up, it goes into the bag. Then I use them to make watercolors. All you need to do is pull out the felt nib... 


... and drop it into a shallow container of water. If you can't pull out the nib, like with the yellow Crayola pen at the bottom left, just put the pen into the water. With most pens, you'll see the color start to leach out right away. That violet one, second from the left, was a highlighter. I didn't know if it would behave the same way as standard markers. (Answer: No.)


You can paint with your watercolors right away, but for full intensity wait a day or so. 


If the colors are too pale, just leave your watercolors sitting out uncovered for a day or two to allow some of the water to evaporate. This will concentrate the color. Happy painting!