Showing posts with label Thanksgiving. Show all posts

3/4/22

Thanksgiving 2021

We hosted Steve's family for Thanksgiving in 2021. This including the newest member, our great-nephew. It's been awhile since we've had a toddler in the house; it certainly makes you look at everything with fresh eyes! He too was seeing our house with fresh eyes - a rabbit to meet, stairs to climb, and a large container of balls to go through. He is a delight. 

Thanksgiving 2021 (affiliate link)

I kept this layout really simple. I started pictures of everyone around the table, except me (although that's my plate of food I photographed), then added a picture of the dessert buffet. I added a journaling card, a random scrap to hold the date, a border sticker, and a sticker for the title. My favorite part of the layout is that the StickTogether mosaic of Trouble is photobombing everyone. 

11/23/21

Printable Thanksgiving Place Cards for Coloring

We spent Thanksgiving 2020 at home with just the three of us; this year, there will be 12 at our house. I'm thankful for vaccines and for the food we'll share, but mostly I'm thankful for family. 


We don't really need place cards, but I'll take any excuse to pull out my colored pencils. I started by designing the printable using PicMonkey. There are four place cards on an 8.5" x 11" sheet. You can download the printable (for free) here. I recommend printing on cardstock rather than printer paper. I used Neenah Vellum Bristol (affiliate link here and throughout the post). 


Once they're printed, cut out the place cards. I recommend using a paper trimmer. Don't cut the backs of the place cards from the fronts; you'll be folding them in order to make them stand up. 

Color in the place cards however you'd like, using whatever art materials you'd like. I used my Prismacolors and did the words first because I'm left-handed and didn't want to smear the finished leaves. I made a different gradient on each card by angling a piece of scrap paper and coloring each section of the sentiment at a time. By overlapping the colors slightly, I got great blending. 


Here are the first three place cards. Which gradient do you like best? My favorite is the bottom right...


... which is why I used it for the hero shot at the top of the post. I wrote the names with a gold Sharpie


Do you do place cards for Thanksgiving? How many people will be around your Thanksgiving table? 

11/16/21

Turkey Lollipop Cupcake Topper

Pumpkin pie is ok, but frankly I'd rather have a turkey lollipop in a cupcake as my Thanksgiving dessert. Affiliate links below. 


Steps: 


Put a sheet of parchment paper down on your workspace, then prepare the yellow and orange Candy Melts following the directions on the package. Spoon a quarter-sized dollop of orange Candy Melts onto the parchment paper, then add a nickel-sized dollop of yellow directly on top. Drag the toothpick through the candy to blend the colors and make the feathers. Repeat this process for each of the turkeys you'll be making. 


Prepare the rest of your supplies: unwrap the lollipops you'll be using, set out pairs of candy eyeballs, pick out pairs of red mini hearts, and use a sharp knife to cut the mini M&Ms in half (just press straight down, slowly and firmly).  Melt the Dark Cocoa candy melts according to the directions on the package. Dip a lollipop into the melted candy, turning to coat it on all sides. Place it on top of one of the turkey feathers, then place the the eyes, M&M (beak), and hearts (wattle) onto the face. The M&M should be sitting cut-side down and the two teeny hearts should be right up against each other without a gap. 

Repeat this for as many turkeys as you need. Let them set at room temperature for at least 15 minutes, then poke each lollipop turkey into a frosted cupcake. 


What about you? Would you rather have pumpkin pie or a turkey cupcake following the big meal? Or maybe both? Of course, you could pop these turkeys into slices of pumpkin pie or whatever else you're serving. Lots of possibilities!

11/15/21

Handprint and Footprint Turkey

We're fifteen days into November and I haven't posted any turkey crafts yet. Time to change that! Today's project is a turkey made from handprints and a footprint. 


Handprint and Footprint Turkey


Materials:

  • construction paper or drawing paper (white, red, orange)
  • paint (brown, rust, orange, yellow)
  • foam brush
  • scissors
  • googly eyes
  • glue

Steps:


Put a sheet of white paper onto a hard floor (not carpet). Use brown paint and the foam brush to apply paint to the bottom of one foot, then step onto the paper to get a good footprint. Set the paper aside to dry, then wash your foot but not your paintbrush.
 
Put a second sheet of white paper onto a hard surface, like a table. Or the floor. Paint rust-colored paint onto one hand (it will mix with the brown already on the brush), then stamp it on the bottom left of the paper with your fingers pointing to the left. Add more paint to your hand and stamp five more times, rotating your hand 20°(ish) each time. You'll end up with a semi-circle of red-brown turkey feathers. Don't worry if there are gaps; they'll be filled with the next two layers. 


Without cleaning your hand or the brush, paint your hand orange. Stamp it the same way as with the rust- a total of 6 times, with each handprint rotated 20° clockwise. Do the same thing with yellow. Since all the layers are still wet, the colors will blend.  


Now you can wash your hand and the brush. Take a break; the footprint and handprints need to dry completely before you can continue. 

When the paint has dried, cut out the footprint, leaving a small border of white around the edges of the print. Do the same with the handprint feathers. Then cut out an orange triangular beak and a red wattle. Glue the footprint to the feathers, then add the googly eyes, beak, and wattle. 


Tomorrow I have a fun edible turkey craft to share. 

2/11/21

Thanksgiving for Three

We were under a stay-at-home order for Thanksgiving, so it was just the three of us. (Trouble was here too, but since he's both crepuscular and a raw vegan, he had no interest in our celebration.) It turned out to be a wonderful day, relaxing and spending time together watching the parade, playing board games, and cooking. 

Thanksgiving for Three (affiliate link)

For this layout, I challenged myself to start with a busy background paper. I almost always start with plain cardstock (white, tan, brown, or black) and build from there, so this was outside my comfort zone. Happily, it came together easily and I'm pleased with it. 

11/18/20

Heart Turkey Magnet

I was joking about making place cards for Thanksgiving since it will only be the three of us this year, but then I noticed that the wood hearts sitting near my desk would make awesome turkeys. The next thing I knew, I had this:


The turkey is not connected to the place card; it's leaning up against it. It's actually a refrigerator magnet that my theoretical guests could take home after the meal and put on the fridge. Affiliate links below. 


Heart Turkey Magnet 


Materials:


Steps: 


Paint two hearts brown and set them aside.
 
Cut two pieces of embroidery floss, each around 3 inches. Tie a pony bead to one end of each piece to make the turkey's legs. Cut seven pieces of ribbon, each approximately 3 inches. These will be the tail feathers.  


With the heart upside down, glue the legs and the tail feathers to the turkey body. Add glue to the second heart and sandwich it against the first, trapping the ribbon pieces and embroidery floss between the two. 

Cut out a beak and a waddle from cardstock. Glue them and the googly eyes to the turkey's face. Adhere a magnet to the back and the turkey is done. 

11/9/20

Diamond Art Thanksgiving Pumpkin

I'm all about experimenting. I had no idea whether Diamond Art would work on a real pumpkin, so I gave it a try. I'm happy to report that it worked beautifully! This pumpkin will make a great Thanksgiving centerpiece, but it would be even more cool to use mini pumpkins with guests' names on them to act as place cards. In future years, anyway. In 2020, Thanksgiving will be deRosier, Party of Three. Affiliate links below. 


Diamond Art Thanksgiving Pumpkin


Materials:


Steps:

The first thing you need to do is transfer your design to the pumpkin. I printed out the word thanks, then used a retractable craft pick to pierce holes along the design to give me a guideline for where the gems would go. It worked really well, although I'm concerned that poking holes in the pumpkin's skin will hasten its spoiling. A smarter idea would be to print out the word, scribble on the back of it with a pencil, then trace the word, transferring the pencil marks to the pumpkin. 

Next, paint liquid adhesive along the marked lines. Let the adhesive sit for 15 minutes, or until it appears clear. Then start adding dots. I work from right to left since I'm left-handed. 


That's all there is to it! 

11/3/20

Dimensional Pumpkin Thanksgiving Card

Thanksgiving is going to look very different for a lot of people this year. So much has changed since the start of the COVID-19 pandemic. With so many of those changes being negative, I think it's particularly important to focus on the good things in our lives whenever we can. It can be hard to remember at times, but I try my best to be thankful for everything I have and everyone I love.

I made the orange and green papers I used for the pumpkin using this crayon melt technique. In fact, the green pumpkin stem came from the scraps I saved after making my iguana! If you don't want to do crayon melts, then paint the paper or just use colored cardstock. (But crayon melts is the most fun.)


Dimensional Pumpkin Thanksgiving Card


Materials:

  • cardstock (brown, blue, white)
  • papers colored with melted crayon or paint (orange, green)
  • scissors
  • pen
  • foam dots
  • craft glue

Steps: 


Cut a card base from brown paper. Use the scraps to make the piece for the ground and the mat for the sentiment. 

Cut a piece of blue paper just smaller than the card front. Cut a rectangle just smaller than the mat for the sentiment. 

To make the pumpkin, you are going to cut three pieces from the orange-colored paper. The first is a pumpkin that is slightly smaller than the width of the card base. The second piece should be the same height, but narrower on each side to mimic the ribs of a pumpkin. The third piece is leaf-shaped and will be in the foreground. Cut a stem from the green-colored paper. 

Glue the blue card front to the card base, then glue the brown ground piece on top of that. 

Write THANKFUL on the blue rectangle, then glue it to the brown mat. Use foam dots to adhere the sentiment to the top of the card. 

Glue the largest pumpkin piece and the stem to the card front. Use foam dots to adhere the second pumpkin piece to the first, then more foam dots to connect the third pumpkin piece to the second. 

Add a message of gratitude inside and your card is ready to send.

---------

I did a search for THANKFUL on Amazon and found a lot of cool stuff. My favorite find is this shirt, which is so simple and so pretty. I love that it isn't seasonal, just like being thankful is not only for November. It comes in a handful of colors, but I think I like this dark grey the best. 

3/18/20

The First Thanksgiving

Thanksgiving 2019 wasn't THE first Thanksgiving, but it was the first time we'd ever hosted Thanksgiving. I've literally never cooked a turkey (it's not a favorite of mine) so I was thrilled that Steve wanted to do the turkey on the grill and I could use the oven for the sides. Everything was delicious and our first time hosting Thanksgiving was a success. 

The First Thanksgiving

This layout was a lot of fun to make. I'm really glad I photographed the food; I love that the fussy-cut plates help anchor the main photo.

11/15/18

Cinnamon-Scented Pumpkin Pie Ornament

Who out there loves pumpkin pie?


I don't love it, but I don't hate it. But what I do love is the smell of pumpkin pie spices. Trevor and I found a way to have the smell of pumpkin pie spice in the house with nary a pie in sight. 


---------


Cinnamon-Scented Pumpkin Pie Ornament


Materials:


Steps:

Use the pencil to mark the center of the short side of the sponge. Draw straight lines from that center mark to each of the opposite corners to form a pie-shaped wedge. Cut out the wedge. 


Use your Frisbee to mix orange paint with cinnamon. The spice will darken the paint slightly and give it a delicious smell. How much should you add? That will depend on your paint. We did about 50/50 paint and cinnamon. 


Use the foam brush and a pouncing motion to push the paint into the top and sides of the sponge. Ideally, your sponge is orange and not purple like the one Trevor had to use. If your sponge is not orange, be sure to pounce the paint into all the crevices. 


Let the paint dry. Trace the painted sponge onto a rectangle of kraft cardstock. Roll the far side around a pencil until it reaches the edge of where you traced the sponge. 


Remove the pencil, then cut out the pie crust. You'll make a straight cut from the point all the way through the rolled-up crust on both sides. Then gently unroll the cardstock, add glue, and roll it back up. Add a generous amount of glue to the bottom of the sponge and glue it to the crust. It should fit perfectly!

Dip a cotton ball in cinnamon oil and glue it to the pie. 


Trust me when I say this smells amazing. You can use it as a centerpiece or table decoration, or thread fishing line through the crust and hang it wherever you'd like the scent of pumpkin pie!

11/12/18

Turkey Paper Chain

Our family loves decorating for holidays, particularly at this time of year. I love that our house goes directly from Halloween decorations, to Thanksgiving, to Christmas. And no matter what the season, my favorite thing about decorating is pulling out our artwork through the years and reminiscing. Homemade decorations are the best.

Our latest homemade Thanksgiving decoration? A chain of turkeys.


Follow the easy steps below to make your own. The materials list includes affiliate links.


---------


Paper Chain Turkeys


Materials:


Steps: 

Fold a piece of brown construction paper in half lengthwise, then in half widthwise twice. If you open up the paper you'll see 8 rectangles.


Refold the paper lengthwise, then use the existing fold lines to create an accordion fold. You can think of this as a Z (or an M or a W). Draw a turkey body on the top square. The head and the body should not quite reach to the edges of the paper, but the wings must touch the edges. This is how the turkeys will hold hands. (Or wings, in this case.) This concept is tricky for some children, so I always demonstrate what happens when the wings don't touch the edge before they get out scissors. 


Cut through the layers, following your pencil line. 


You'll end up with two strings of turkeys. Set one string aside, share with a friend, or tape the two strings together to end up with a longer paper chain. 


Glue googly eyes, beaks, wattles, and tail feathers to the turkeys. Anything goes. I chose to layer orange, pink, and yellow feathers.


Did you notice that one turkey's feathers are different than the others'? I noticed while the glue was still wet, but liked it and decided to keep it that way. It adds personality, I think. 


The last step is to hang your paper chain and enjoy!

11/16/17

Angry Birds Turkey Thanksgiving Craft

There are a lot of things I love about my job as Editor of Fun Family Crafts. I've told you how much I love creating round-ups, but what I haven't mentioned is how inspiring it is to see all the crafts that our readers submit. When a submission comes in, I am the one who visits the site to see if the craft is something we want to feature. I'm primarily checking if there is indeed a tutorial (versus just a photo of the finished project with no materials list or instructions) and whether the craft is kid-friendly (99.9% are, but the 0.1% keep the job especially interesting). If it's a go, I edit the text, categorize the post by age range, holiday/occasion, and materials, tag the post with all relevant search terms, and schedule it to run. 

I love seeing all the creativity out there and sharing it with our readers! Occasionally, I like a project idea so much that I make my own version. Such was the case with this Angry Birds printable. Here's what I made:


As you can see, I didn't actually use the printable. I loved the idea of making an angry turkey and took it my own direction. An angry turkey seems fitting for Thanksgiving, doesn't it?

---------


Angry Birds Turkey Thanksgiving Craft


Materials:

  • cardstock
  • scissors
  • craft glue
  • masking tape


Steps:


Basically, do whatever you want. Angry Birds come in all sorts of shapes, so anything goes. Use your creativity! Read on to see how I made mine. 

Cut a teardrop shape from brown cardstock. Add a face. The eyes are two white circles with small black circles inside. Glue one in place, then layer an orange beak over the top. Put a red wattle next to the beak, then place the other eye over it. Add thick black eyebrows.

Cut a pair of wings and a pair of legs from the leftover brown cardstock. Glue the legs in place. I used the rest of the scraps to add dimension between the body and the wings. 


Cut turkey feathers from browns, reds, yellows, and oranges. Arrange them to form the turkey's tail, occasionally placing the body on top to check the spacing. Glue the feathers to the background paper. If your design is perfect and you don't want to risk messing it up by lifting each feather to glue it, use masking tape to join the feathers together. Lift the whole thing, add glue, and stick it to the background paper. 


Glue the body on top of the feathers. That's all there is to it! 

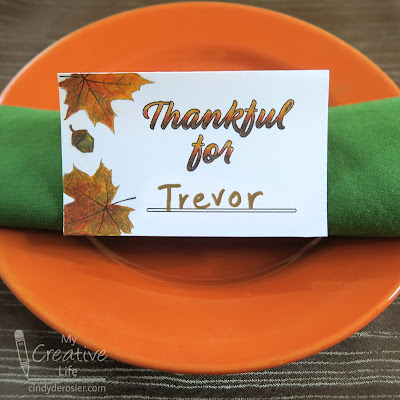
Trevor had a different vision for his turkey. He was adamant that Angry Birds don't have wings or legs, which is true of the game but not true of the movie. 


Here's his wingless, legless turkey. It's awfully cute. 


What a fun project! Make your own this Thanksgiving!

11/11/16

Coloring Books + Plastic Wrap + Stickles = Awesome

Check out the Thanksgiving card I made. That leaf? It's glitter glue. Stickles, to be exact. (Affiliate link here and below.)


I started with a page of leaves from Leisure Art's Bountiful Wonders coloring book. I put a piece of plastic wrap over the page, smoothed it down, and pulled out my Stickles collection. (Everyone should have a Stickles collection.) 


I outlined a nice leaf in red...


.... then filled in the spaces with yellow, orange and brown. I used a skewer to swirl the colors and push them evenly into the spaces. 


Then I made a leaf with greens and browns. 


I let them dry overnight, then checked to see if there were any thin spots. (If so, just fill them in using the same technique and then let them dry.) Gently peel them up off the plastic wrap.... 


... and you have really neat translucent leaves!  


You can see from the ridges that I didn't smooth the plastic wrap down perfectly; now I know. Not a big deal though, because the ridges don't show at all when you glue the leaf to cardstock. 

Here's my card again. I experimented with photographing it with different background colors to see how they would pull out the different colors in the leaf. Brown...


... red... 


... and green at the top of the post. Exciting to have figured out how to use my coloring books in a totally different way! 

11/13/15

Pumpkin Pie Craft

In my line of work, I see A LOT of turkey crafts tutorials this time of year. I also see numerous Pilgrim crafts, leaf crafts and cornucopia crafts. You know what I almost never see? Pumpkin pie crafts. Time to change that. Affiliate links below. 


---------


Pumpkin Pie Craft


Materials:


Steps: 


1. Cut out the pieces for the pie. Start with the bottom crust. It is a long, tan rectangle with a slight angle cut from one end. Cut a slightly smaller rectangle from white, adding the same angle cut from one end. The two rectangles should layer with a little bit of tan showing on the bottom and right of the white. Cut an obtuse triangle from white for the top part of the pie, then cut a wavy strip of tan for the edge of the crust. It should be the same length as the shortest side of the obtuse triangle. 


2. Paint the white rectangle orange. Put a drop or two of brown into the remaining orange paint, mix, and paint the obtuse triangle. 

3. Create a background using the blue and brown cardstock. I actually made my pumpkin pie craft into a card, so I glued a blue rectangle and a brown rectangle onto a white card base. If I were making it as stand-alone art, I would use a solid piece of blue and glue a brown rectangle to it to represent the tabletop. 

4. Glue the pie pieces to the background. Stretch out the cotton ball slightly, then glue it where whipped cream would be.

That's all there is to it!