6/7/19

St. Mark's Lector

Today is Trevor's 13th birthday. I cannot believe how quickly he has grown! There are no words to express how proud I am of him, or of the joy he has brought to my life over the 13 years I've been his mom. This layout is about one of countless times he's shown the world what an awesome person he is.
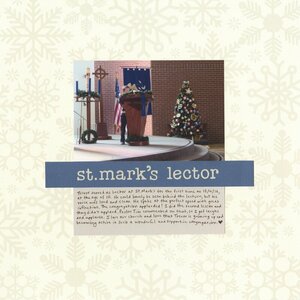

St. Mark's Lector (affiliate link)


Trevor served as a lector at our church for the first time at age 10. He was so small we could barely see him peeking above the lectern as he read. But we heard him loudly and clearly. He did an amazing job reading the text at just the right volume and speed, with just the right inflection.

Since then, he's done the readings 8 or 9 times. He can see over the lectern now, and his voice is just as good as it was that first time. I don't take photos in church very often, but I am so glad I took this picture. I hope he'll get a chance to do the readings at least one Sunday in Advent this year so that I can take a photo. What a great layout that would be, showing how Trevor is growing in the church in every sense of the word.

6/6/19

Snake Pretzels

Know what's better than fresh, homemade soft pretzels? Not much! Homemade pretzels are so delicious. Most of the time, we shape soft pretzels into... well, pretzel shapes. Once, we turned them into candy canes. This time, snakes. 


---------

Snake Pretzels


                                     1 pkg yeast                                1.5 tsp. sugar
                                     1.5 c. water                               4 c. flour
                                     3/4 tsp. salt                               1 egg
                                     blue food color                           food markers (affiliate link)

Heat the water to approximately 110˚F and add the yeast, stirring until dissolved. Add salt, sugar, and flour, then stir to combine. Knead the dough until it is smooth and elastic (approximately 10 minutes). Divide the dough into 24 equal pieces. Roll each piece into a pencil-shaped roll,then place it on an ungreased pan, curving and overlapping it to make snake shapes.


Beat the egg, then add a small amount of blue food color. Use a food-safe paintbrush to paint the now-green egg mixture on the snakes. Sprinkle each lightly with salt (optional). Bake at 400˚F for 12 to 15 minutes.


When the snakes are cool, decorate them with edible markers.


Wouldn't these be fun for a reptile-themed party or something like that? As it is, they were fun alongside an ordinary meal in Casa deRosier. 

6/5/19

Favorite Hymns

Throughout April and into May, the members of my church were asked to submit their favorite hymns. Our summer music will consist entirely of these hymns. There were no limitations or restrictions; if it's a hymn and you like it, nominate it and the Worship Committee will do their best to find it if it isn't in the hymnal. 

Some hymns came to mind immediately, while others kept popping into my head randomly. I kept a list in my purse so that I could add new hymns to my requests each Sunday. The hymns I love most represent a mix of beautiful music, meaningful lyrics, and nostalgia. Some I learned as a kid at our Lutheran church, while others came from the Baptist church where I did AWANA. Others were introduced to me at friends' churches, when I was visiting for weddings, funerals, baptisms, or other ceremonies. 

Below are some of my favorite versions of my favorite hymns. Enjoy. 


I Love to Tell the Story


You Are Mine


When Peace Like a River (It Is Well with My Soul)


How Great Thou Art


Here I Am, Lord

Take My Life That I May Be (music starts 4:55)


He Leadeth Me


Other favorites:

  • Lift High the Cross
  • I Know That My Redeemer Lives!
  • A Mighty Fortress Is Our God
  • Beautiful Savior
  • Blessed Assurance
  • What a Friend We Have in Jesus
  • Seek Ye First the Kingdom of God

I would love to know your favorite hymns. Please share titles with me in the comments, or include links to a particular version you love.

6/4/19

Cousins at 12

The final challenge I completed on National Scrapbook Day, from Scrapbook and Cards Today, was the most difficult for me. At this point, I'd completed 10 layouts and had been scrapping all day long. The challenge was to make a layout using pink, orange, turquoise and white. I hadn't printed any photos that would work with those colors, so I dug through older pictures and came across my nephew's school photos. I chose the one from age 12, Trevor's age now (for another few days!), to do a comparison of the cousins at the same age.

Cousins at 12 (affiliate link)

I started with the striped paper that had all the required colors, plus green. I journaled in orange on white and lined that up with the photos. I added horizontal strips of cardstock in blue, pink, and orange, but I didn't like how it looked. When I pulled out the pink and replaced it with green, which is prominent in the background of Timothy's photo, I liked it a lot better. The layout is really plain, but I'm ok with that. With no competing elements, the focus stays on the photos. 

6/3/19

Scrabble Tile Pendants

I love to craft with friends, even when they're 3000 miles away! Jessie, my friend and roommate at Prime Con, lives across the country from me, but that didn't stop us from collaborating on a project: Crocheted Necklaces with Scrabble Tile Pendants. Read on to learn how I made the pendants (affiliate links below), then hop over to Jessie at Home to see how she created crocheted necklaces for each of the pendants I made! Here's a sneak peek of one of the completed necklaces.


---------


Scrabble Tile Pendants


Materials: 


Steps: 

Before getting started, invert your Diamond Glaze (with the lid still on) and set it in a narrow glass or something else that lets it sit upside down. Leave it for at least 30 minutes. Do not shake! 

Select your letters, then set them on a smooth, flat surface. Hold the tip of the Diamond Glaze just above the center of the tile and squeeze gently. Allow the Diamond Glaze to pool toward the edges. If you squeeze slowly, it should make a dome on the tile without spilling over the edge. 


If it gets too close to an edge and isn't reaching one or more of the corners, use a toothpick to gently guide it into place. 


Continue adding Diamond Glaze until you have a dome. Hopefully there are no bubbles (that's why we inverted the Diamond Glaze), but sometimes they show up for no good reason. If they do, gently poke each bubble with a toothpick. Sometimes I use a needle if I have one handy. 

Without moving, jostling, or otherwise disturbing the tile, let it sit for at least 24 hours. It will look opaque at first (like the letter V below) but will dry crystal clear. 


When your tiles are completely dry, turn them over and use Supertite glue to add jewelry bails. I used three different styles of bails for the pendants I made for Jessie and her twins, Kyla and Vada.


Now head over to Jessie at Home to learn how to turn these pendants into gorgeous beaded necklaces!