
When we visited Tacoma Art Museum, one of the prompts in the hands-on TAM Studio asked visitors to use colored transparencies to create faux stained glass. I didn't have time to create then and there, but I did once I got home. It was a lot of fun to play with patterns and colors!

I actually made three pieces of faux stained glass, using a different adhesive for each. I'd intended to make my project using spray adhesive (affiliate link here and throughout the post), but discovered that my can, which I hadn't used in years, wouldn't spray. I dug through my adhesives drawer to find some alternatives. My main goal was finding something that would dry clear without clouding the adhesive, but hold tight onto the slick acetate. Not an easy combination.
The three adhesives I tested include: Glue Arts Decor Adhesive (no longer sold, but similar to these double-sided adhesive sheets), Mod Podge Ultra, and clear contact paper. As you can see below, the double-sided adhesive and the contact paper both worked well. The Mod Podge Ultra, while a fantastic product with many uses, did not hold onto the glossy transparencies as well.
The double-sided adhesive held really well, but was more visible in the finished craft than the contact paper. It's especially visible under the green and not great under the blue.
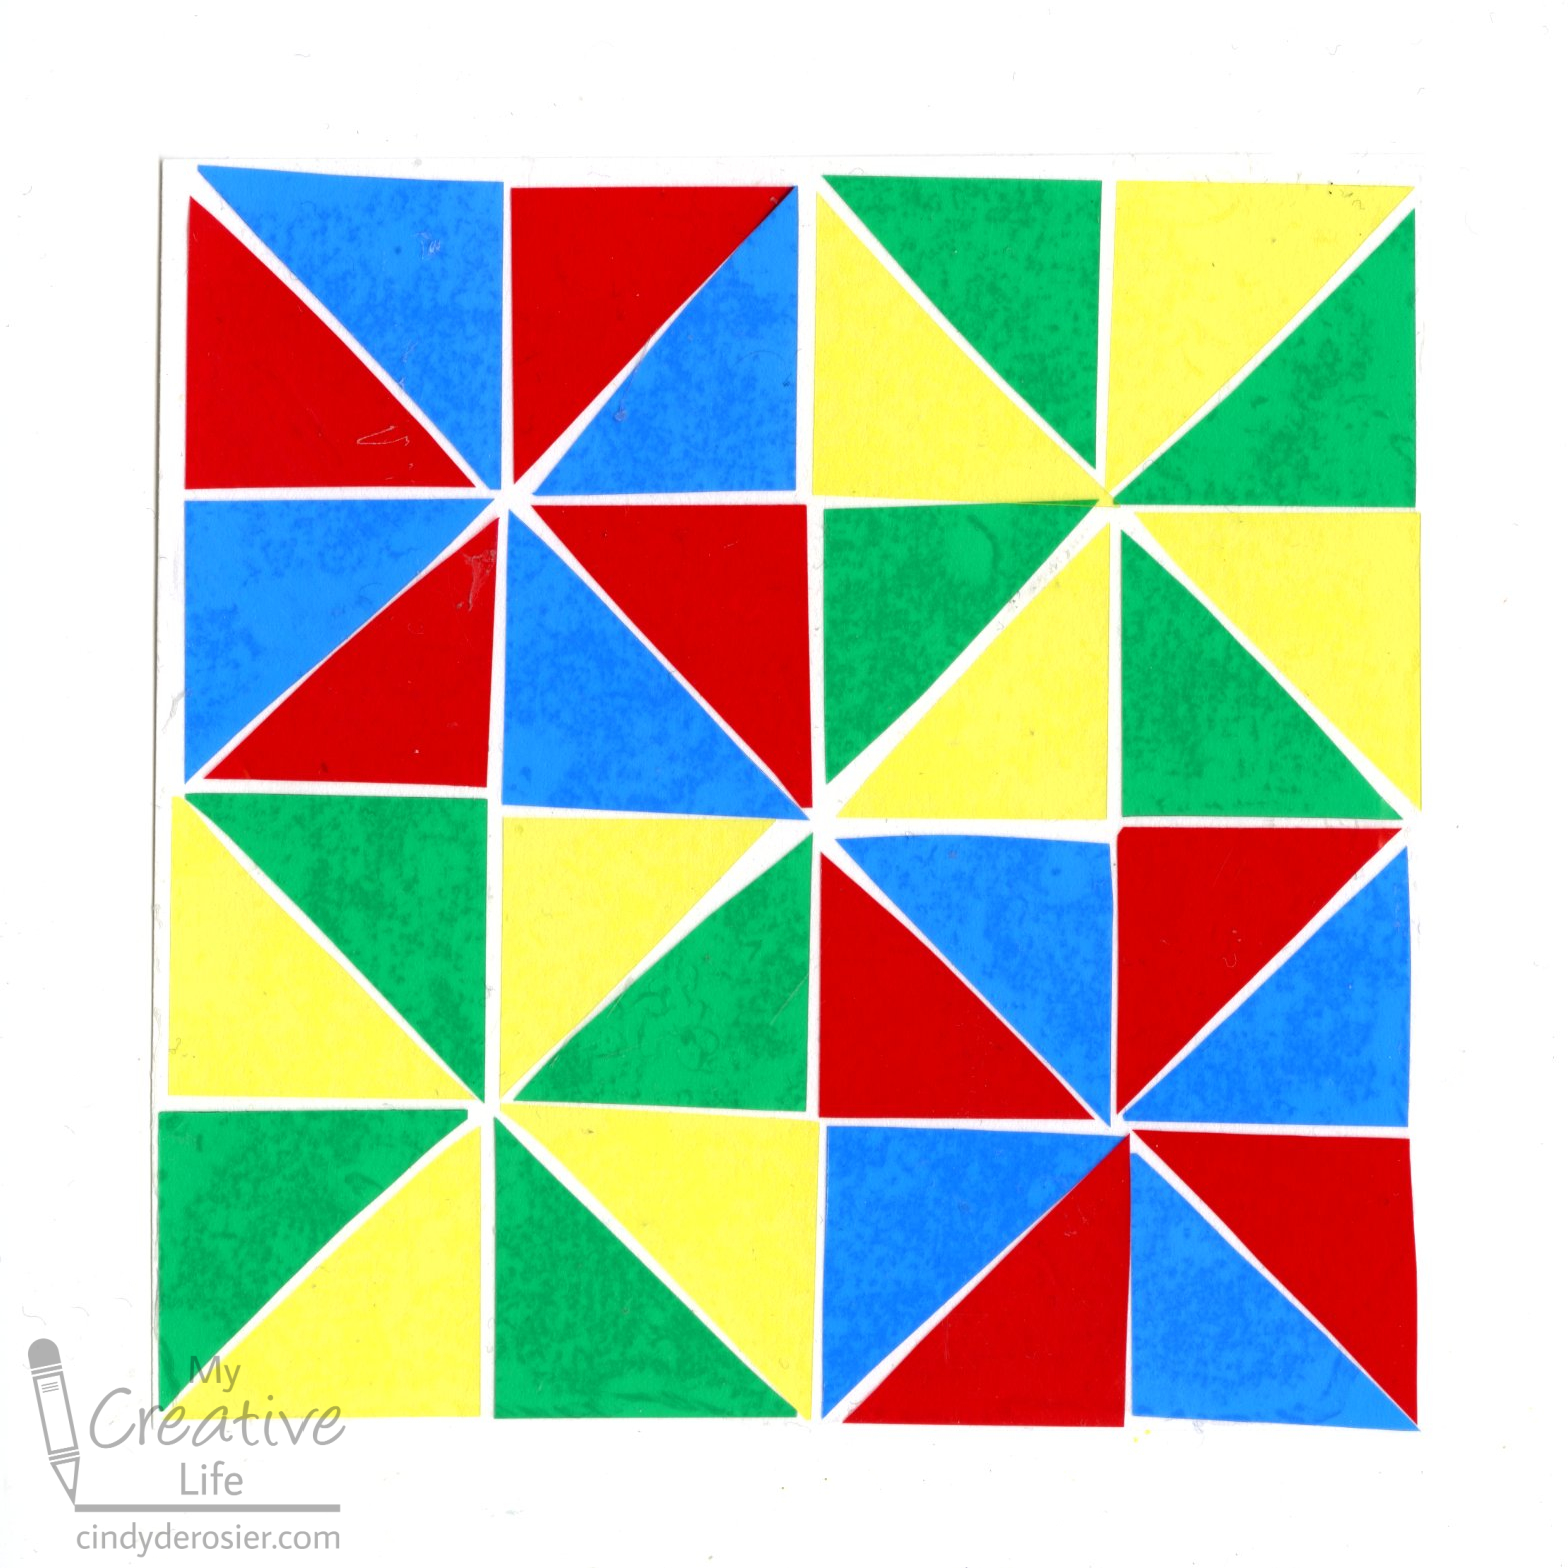
So I recommend using contact paper for this project. Start by cutting a piece of white cardstock into a 4.5" square. Then cut colored transparencies into 1" squares. I strongly recommend using the heavier lighting gels I linked to, as opposed to thin cellophane. The heavier weight cuts better, lays down more smoothly, and generally makes the project less frustrating. I actually had lightweight orange and purple transparencies in addition to the heavier red, yellow, green, and blue, but I ended up not using them.
Arrange the squares on the white paper, then cut some (or all) on the diagonal to make triangles. Play with the pattern possibilities until you find one you like.
Cut a second piece of white cardstock into a 4.5" square and set it on your workspace. Put a repositionable mounting square (indicated by the arrow below) onto the cardstock. Cut a piece of contact paper into a 5" square. Peel off the liner and place the contact paper STICKY SIDE UP onto the mounting square. Now transfer your design to the contact paper, one piece at a time.
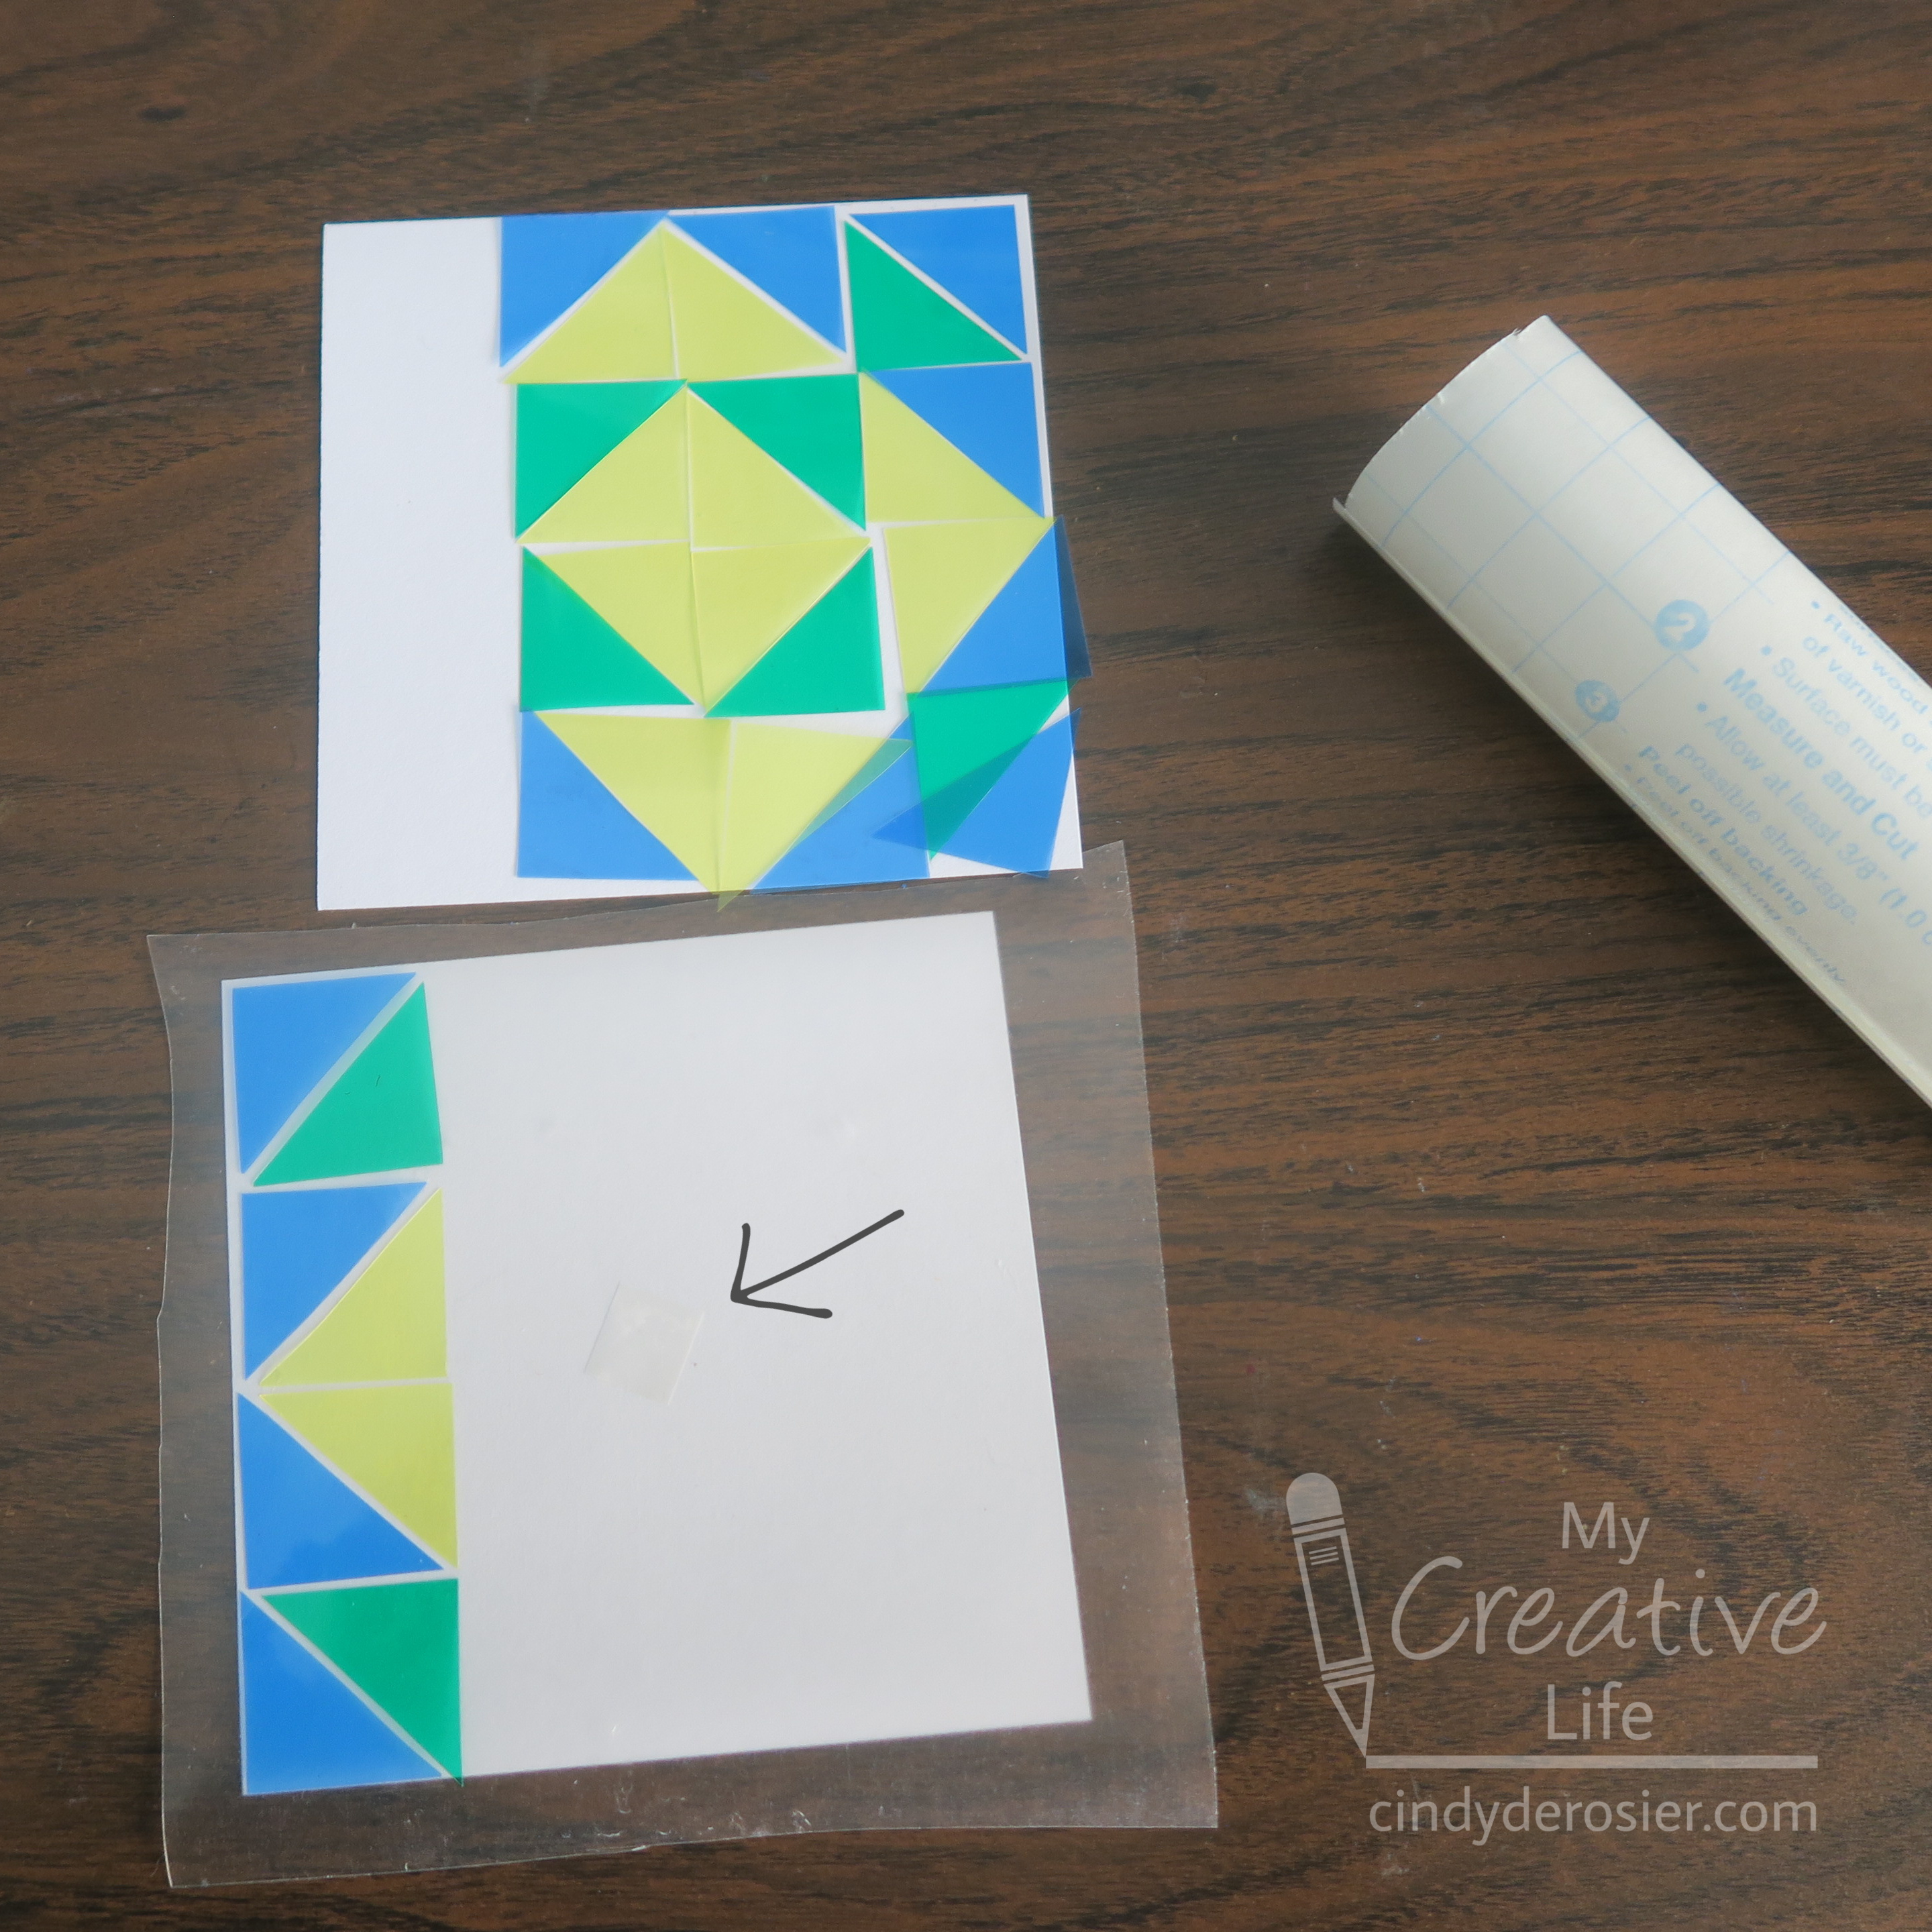
When the whole design is transferred, remove the mounting square and then place the contact paper STICKY SIDE DOWN onto the cardstock. Wrap the sticky edges around the sides of the cardstock to secure them together.
The last step is burnishing the contact paper so that it lays perfectly flat against the transparency bits. Use a bone folder or craft stick to press them together.
Unlike most sun catchers, this faux stained glass doesn't need to be displayed in a window to really shine. It looks just as good displayed on a wall or tabletop as it does in a window. Enjoy!

No comments:
Post a Comment
I moderate comments, so you will not see yours appear right away. Please check back if you had a question; I promise to answer it as soon as I see it. Thank you for taking the time to comment!