Showing posts with label Advent. Show all posts

11/20/23

Ornaments for the Four Sundays of Advent

Advent is a time of preparation for the coming of Christ, both the celebration of his birth (Christmas) and his promised second coming. The first Sunday of Advent is the first day of the liturgical year. It can fall any day between November 27 and December 3. In 2023, Advent starts on December 3. That gives you plenty of time to make your own wall hanging featuring the four Sundays of Advent. 

Starting on December 3, hang one ornament each Sunday. When all four are hanging, you'll know that Christmas is next! Affiliate links below. 


Advent Ornament Wall Hanging


Materials:


Steps: 


Write the four words representing the four Sundays of Advent on the wood slices. You can write freehand or use this transfer technique if you prefer. 


Add some Stickles to the ornaments. I like just a hint of glitter toward the outside edge, but you can add as much as you want. 

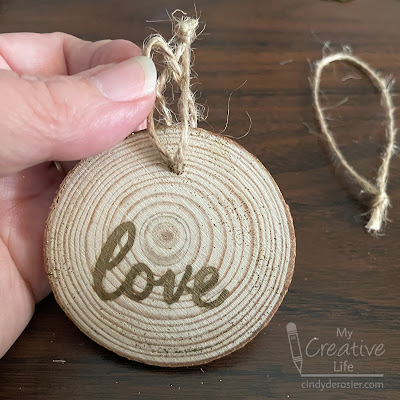
Cut four 8-inch pieces of twine. Tie them into loops, then thread them through each of the ornaments to make the hangers. 


Twist three holly berries together and set them aside. Repeat this for each of the ornaments (12 berries total).

The holly leaves I bought come attached in threes, but if you use them intact, they block the words on the ornaments. I cut them apart, stacked two leaves together, and then used a craft pick to poke a hole in them. 


Put the trio of berries into the hole you just created. Then poke those wires through the hole of the ornament. Snip off any excess wire, then use tape to cover the wires. 


Cut four 8-inch pieces of gold wire. Wrap them tightly around the branch four times, then bend up the ends to make hooks. If your branch is significantly thicker than mine, cut your wire longer than 8". 


Now cut an 18" piece of twine. Tie it to the ends of the branch to make a hanger. That's all there is to it!


Here's a close-up of one of the ornaments so that you can see the glitter:


I taught this craft yesterday to a group at church. We had a lot of fun making them and everyone's turned out great. Now we wait... for the season of waiting!


11/29/21

Paper Plate Advent Wreath

Tis the season of Advent! Yesterday was the first Sunday in Advent and the first day of the new church year. Advent is always a special time as we prepare for Christmas, but this year our family had something extra-special to celebrate - the baptism of our nephew (Trevor's cousin, Ian) and Ian's son, Allen. 

This year, I made a paper plate Advent wreath to mark the season. As you can see, it already has one purple candle for the First Sunday in Advent. For the next three Sundays, we'll add another candle to the wreath (another purple candle, then the pink, then the last purple). While I like Advent chains that count down to Christmas, I prefer the symbolism of adding candles rather than subtracting rings. It's a great visual reminder that Advent is a time to get increasingly prepared to celebrate the birth of Christ. 


Paper Plate Advent Wreath


Materials:

  • paper plate (I used the dessert size)
  • green paint
  • tissue paper (green, red, purple, pink, yellow)
  • white cardstock
  • scissors
  • glue

Steps: 


Cut out the center of the paper plate. Paint the remaining part of the paint green. While it is drying, stack green tissue paper and cut out holly leaves. 
 

Add dots of glue on the wreath, then add a flat layer of holly leaves to cover the paint. Fold the rest of the holly leaves in half. 


Add a dot of glue to one end of a holly leaf, then glue it to the wreath. (If you glue in more than one place, you lose the dimensionality of the wreath.) Continue until the wreath is sufficiently fluffy and full.

Roll balls of red tissue paper and glue then in clusters amongst the holly leaves. 

Cut out four rectangles for the candles. Use your finger to smooth a layer of glue onto each, then press purple tissue paper onto three of them and pink onto the fourth. Trim the excess tissue paper. To make the flames, cut out four teardrops, smooth glue on them, and press yellow tissue paper onto them. Trim the excess. Cut four tiny rectangle wicks. Glue each onto the back of a candle to connect it to the flame. 


Each Sunday, take the appropriate candle (purple, purple, pink. purple), and fold the bottom slightly to make a tab. Spread glue on the tab and attach it to the wreath. 


Happy Advent, everyone!


CLICK.BUY. CREATE. Shop Michaels.com today!

12/21/20

Edible Advent Wreath

As a professional craft blogger, my job is to design creative projects and then write tutorials to teach you how to make them. Ideally, each project should make my readers want to drop everything and immediately start crafting. For that reason, seasonality is huge. If I publish an adorable Halloween costume on November 1 or a great idea for valentines on February 15, chances are very poor that anyone will drop everything to make them. Just like you'll never see a magazine with Thanksgiving recipes in the December issue, I have the most success when I share projects at least a month ahead of when I expect people would want to make them.

And yet, today I'm sharing an edible Advent wreath. Advent started on November 29. Yesterday was the fourth (and final) Sunday of Advent. Advent ends in in just a few days. By all counts, this is a terrible time to be sharing an Advent idea. 


And yet, the reality of my life as a craft blogger is that what I share IS my life. I'm sharing an Advent wreath because our family celebrates Advent. Yesterday was the fourth Sunday of Advent, so all four candles are lit on my edible wreath. In an ideal world, I would have dreamed up this project two months ago then promoted it in early November. But that's not what happened. 

Thankfully, the projects I share here will live on here, on Pinterest, in Google Images, and elsewhere. So even though I'm late to the game this time, I'm hoping this tutorial will inspire someone in 2021 and beyond. And maybe someone in 2020; after all, Advent doesn't end until Christmas begins. 

---------

Edible Advent Wreath


Materials:


Steps:


Pour approximately 2 cups of flake cereal into bowl. Pick out anything that isn't a flake (such as raisins, or in the case of the cereal I used, dried strawberries)

Prepare the green Candy Melts according to the package directions. I used about 15 wafers. Pour the melted candy over the cereal, stirring until it is completely coated. Spoon it onto a piece of parchment paper, forming the shape of a wreath. Let the candy set for 2 minutes, then apply the round red sprinkles to make the berries. Set the wreath aside to set completely. 

Prepare the blue (or purple - your choice) Candy Melts according to the package directions. I used 4 wafers. Pour the melted candy onto a piece of parchment paper, then roll the Pocky in it to coat. I recommend making extras, but remember to keep at least one Pocky the original pink. 

Prepare the yellow Candy Melts according to the package directions. I used 2 wafers. Drop a tiny puddle of melted candy onto a piece of parchment paper, then drag your scribe tool (or a toothpick) through it to make a candle flame. You'll only need four, but I recommend making extras so you can choose the best ones. 


When everything is completely set, use your scribe tool to make holes where the candles will go. Then use a sharp knife to trim your Pocky candles to the desired length. (I trimmed off the uncoated area you see in the photo below.) You can also use the knife to shave off any puddling on the Pocky candles.


Choose your four best flames and peel them off the parchment paper. Remelt the remaining yellow candy. Add a small dollop of candy to the back of each flame, then attach them to the Pocky candles. When the candles are secure, remelt the extra green candy and put a dollop on each hole, then put the candle in place. 


Happy Advent, everyone!

11/23/20

How to Draw an Advent Wreath

I'm the chair of the Education Ministry at our church. My job is to oversee the committee that provides adult and youth Sunday School, Bible studies, youth groups, and other educational opportunities to our members and visitors. Last year, we introduced a special all-ages Advent Fellowship that took place between services on the four Sundays of Advent. We had craft days, sang carols, shared beloved holiday cookies, and celebrated the season together with joy. It was a great success. 

COVID-19 means that this year we can't safely hold in-person Advent worship services, let alone come together for crafts, caroling, and potlucks. We're going to do the next best thing, holding our Advent activities via Zoom. Advent starts next Sunday, November 29 and I'll be leading the congregation in drawing an Advent wreath for that first Sunday. I've made three sample drawings. Each uses a different medium (alcohol markers, crayons, and colored pencils) and they have some other variations as well. Affiliate links below. 

This first drawing is done with my favorite Prismacolor markers. Gorgeous color, great blending, and no streaks. 


I did this drawing with Crayola crayons. I am very brand loyal when it comes to crayons; Crayola crayons are sturdy and provide the smoothest, most vivid color. This was my first time trying out their new Pearl Crayons, introduced in late 2019. I'm a fan!  


I used both Prismacolor colored pencils and Crayola colored pencils for this version of the wreath. The Prismacolors give smoother and richer color than Crayola, but they're also way more expensive. The Crayolas are the best of the student-quality colored pencils. 


Now that I've shown you some coloring options, let's start drawing! Orient a piece of paper vertically and draw four staggered candles just below the center of the page. Do not draw the bottoms of the candles. 

As you can see, I drew my samples with a Sharpie because it's easier to see. You can use a pencil if you want the option to erase. You can also use a ruler if you want straight lines. Imperfect candles don't bother me, but it's up to you.  


Now we're going to add holly. Draw two or three holly leaves at the bottom of each candle, using the same motion you'd make to draw waves in an ocean. Vary the orientation of the holly leaves. Once you've covered the bottom of the candles, continue adding leaves randomly around them to make an oval-shaped wreath. 


When you have filled in the whole wreath with holly, draw little circles in between some of the leaves to make holly berries. Then add a wick and a flame to each candle. 


Now decide what you'd like your text to say and how you want it to look. I used a portion of Mark 1:3 (Prepare ye the way of the Lord), but there are many other verses or phrases that you might prefer. You can also choose to label the four candles or not. Looking at the samples again, you can see three different options for how to use text and how I incorporated the Star of Bethlehem. 


If you're interested in seeing my other Advent crafts for kids, click the link. Happy Advent and happy crafting!

12/4/17

Tissue Paper Advent Wreath

Yesterday was the first day of Advent and the first day of the church year. I love the season of Advent, even if it drives me crazy that so many people mistakenly think we're currently celebrating the Christmas season. (If you haven't read my rant about Advent and the Twelve Days of Christmas, take a moment to do so.) Anyway, Happy Advent!

As he's gotten older, Trevor has started taking a more grown-up role in church services, including reading the lessons in front of the whole congregation. But he still loves the first job he ever did during a church service, which is lighting Advent candles. Starting at age 4, he has had the privilege of lighting the Advent candles at least once each year (depending on how many other kids wanted the job too). Even at age 11, it's one of his highlights each December. I was inspired by Trevor's love of Advent to make and display this wreath.    


---------

Tissue Paper Advent Wreath


Materials:

  • cardstock (green, white, purple, pink, yellow, and red)
  • multiple shades of green tissue paper
  • scissors
  • white glue
  • small circular punch


Steps:


Start by cutting the green cardstock into an oval shape. Tear the darkest green tissue paper into roughly 1" pieces. Squirt glue onto half of the oval. Using one piece of tissue paper at a time, scrunch it up and stick it to the glue. 


When one half is filled in, add more glue and finish the second half. Don't worry if you can still see cardstock. 

Tear the next lighter green tissue paper into pieces. Dot glue randomly on top of the darker green tissue paper and add the lighter green pieces. 


Tear the lightest green tissue paper into pieces. Dot glue anywhere that you can see the green cardstock showing through. Add the tissue paper to those spots, or place it randomly if the cardstock is already covered. 


Hold the oval vertically to make sure everything is glued down. 


Use the white, purple, and pink cardstock to make candles. I chose to make the Christ candle twice as wide and a bit taller than the other candles. I put the candles approximately where I wanted them, then cut them to the length I liked. There's no right or wrong. You can even make four candles the same color, leave out the Christ candle, or otherwise alter it to fit your denomination's traditions. Cut thin strips of white for wicks and glue them to flames cut from the yellow cardstock. 


Glue the flames to the candles, then glue the candles to the wreath. Nestle them down amongst the tissue paper greenery as best you can. Finally, punch small circles from the red cardstock and glue the circles in groups of three to make holly berries. Tuck some behind the candles to show that they're evenly spread throughout the wreath.


 Technically, an Advent wreath would not be completely lit until Christmas day. One option for your wreath, and the one we are using, is to fold back each flame until the appropriate day. Then unfold it to light one candle each Sunday (purple, purple, pink, purple) and the Christ candle on Christmas day.

---------

This Advent craft gives me a good excuse to promote my book, currently on sale. It makes a wonderful gift for Christmas. Thanks for your support!

12/3/13

Our Paper Advent Wreath

Advent is a big deal in our house. On the first day of Advent, which was this past Sunday, we make a paper chain (alternating red and green, with Sundays in yellow).  revor removes one link each day until Christmas arrives. He also starts his Advent calendar (Lego Star Wars this year). Advent is when our Christmas preparations truly begin.

Making his 2013 Advent chain.

Trevor LOVES his Advent chain and Advent calendar, but even more than that he loves the Advent wreath at church. Each year since he was four, he's been selected to light the candle(s) on the Advent wreath on one of the four Sundays. His turn is next Sunday, the second Sunday of Advent. He is so excited he can hardly stand it.  

I asked him if he'd like to make a paper Advent wreath for his bedroom. Each Sunday, he could "light" another candle by adding a paper flame. He thought this was an excellent idea, so we gathered up some paper scraps and got to work.   

First, we cut a brown piece to look like the wooden base that holds the wreath. In the center, we added a large white rectangle to represent the Christmas candle. We added three blue candles (the liturgical color for Advent) and one pink (representing the 3rd Sunday of Advent). We staggered the candles to give the appearance that they are arranged in a circle around the white candle.


We filled in the gaps with holly leaves and berries cut from green and red cardstock.


Trevor hung the wreath in his bedroom (above the poster where he records his lost teeth). He added a yellow flame to represent the first Sunday of Advent.  


Here's how it looks with one candle "lit." We'll add a flame each Sunday until Christmas, when we'll "light" the white candle.  


 Happy Advent!

11/28/11

Tis the Season of Advent

Happy Advent! For those who don't know, Advent started yesterday, November 27. (It always starts on the 4th Sunday before December 25th and is the first day of the church calendar.) During the season of Advent, Christians prepare for the celebration of Jesus' birth. The season is marked by the color purple or dark blue, representing hope. Advent ends when Christmas begins.

Cute hand-crafted Advent calendars are popping up all over the web. I love Advent calendars. I love Advent.

I've actually never made an Advent calendar, though I've made plenty of Advent wreaths and chains over the years. Since Trevor was born, we've had both an Advent chain and an Advent calendar in our house. We start the Advent chain on the first day of Advent (yesterday) and use a commercial Advent calendar starting on December 1 (this year he's getting the LEGO Advent calendar).

Here is Trevor with his Advent chain. We cut construction paper into 8" x 1" strips- yellow for Christmas (at the top), dark blue for the Sundays of Advent, and then alternate red and green for the rest of the chain. 


While we start our Advent chain on the first Sunday of Advent, I have no problem with commercial Advent calendars starting on December 1 (even though Advent can start anywhere from November 27 - December 3). It's convenient, easy to remember, and means that the calendars can be used during any year. But do you know what drives me crazy? Absolutely nuts? When businesses, blog authors, etc. celebrate "The Twelve Days of Christmas" from December 1-12. Why do they do this?! Christmas is not the 1st, the 12th or any date in between. Christmas is a 12-day season that starts on December 25 and ends on Epiphany, January 6. December 1-12 is part of Advent, not Christmas! Aargh!

Thanks for indulging my rant. I feel better.

Tomorrow I'm going to share a tutorial for making adorable (if I do say so myself!) snowman gift tags. Happy Advent to you!