Showing posts with label religious. Show all posts

4/15/26

Fabric Applique Wall Hanging

After making the stuffed cross ornament, I tried another idea using the same fabric. This basic applique project is a great introduction to hand sewing and makes a cute wall hanging. Obviously, you can use a cut-out design from any fabric; it doesn't need to be a cross. The link in the materials list goes to some adorable forest animals. Affiliate links below. 


Fabric Applique Wall Hanging


Materials: 


Steps: 


Cut out the image you're going to applique, leaving a 1/2" border around the edges. Fuse the interfacing to the fabric, then cut out the image precisely. Cut the background fabric about 2" larger than the diameter of the embroidery hoop. Put the background fabric into the hoop, then position the applique piece where you want it. 

Cut a length of embroidery floss in a matching or contrasting color. Choose a hand stitch for your project. I debated blanket stitch but decided to go for the simpler whip stitch. Sew all the way around your shape. 

If your applique is not perfectly centered in the hoop, loosen the embroidery hoop slightly to adjust the background fabric until it looks good. Tighten the hoop, then trim the excess background fabric, leaving 1/4". Glue that to the back of the hoop. 

4/9/26

Stuffed Cross Ornament

Our quilt group has been receiving a lot of fabric donations recently, which we appreciate so much. As we go through the donated fabrics, we sort by color, and occasionally by theme. We also pull out any fabrics that cannot be used on LWR quilts. This includes any prints with religious, patriotic, or military symbols, language, or messages. 

We can't use this fabric for our quilts, so our leader suggested I come up with a craft using it that congregational members could potentially do after church one Sunday. The four different crosses read love, faith, peace, and joy. Each is about 5" tall. 


My first idea was to make ornaments. I cut out two of the yellow joy crosses, put them with the right sides together, then sewed around the edges, leaving the top open. I turned the fabric inside out, stuffed it with Polyfil, added a loop of gold cord, and then used craft glue to close the opening (affiliate links). 


It came out fine, but it's not going to be a great option for the congregation members who usually come to our craft sessions. I have another idea for a project using this fabric that might be a bit easier and less fiddly for the very young and very old who attend. Stay tuned. 

4/11/25

Religious Easter Crafts for Kids

For the past few days, I've been sharing ideas for Easter crafts that relate to the religious aspect of the holiday: Jesus' death and resurrection. Crafts like these are a lot less common than secular Easter crafts featuring jelly beans, bunnies, and chicks, so I put together a roundup to help parents and Sunday School teachers find project ideas for Lent and Easter. 


You can find all of these crafts (and more) on my Easter Crafts page. Scroll down to the bottom and you'll see all of the religious crafts grouped together. 

4/10/25

Tape-Resist Cross Easter Eggs

This fun Easter craft combines a more secular symbol of Easter (dyed eggs) with a religious symbol (a cross). They're really fun to make and something crafters of all ages will enjoy. Affiliate links below. 


Tape-Resist Cross Easter Eggs


Materials:


Steps: 


Cut egg shapes out of cardstock. I made a pattern with scratch paper and then used that to cut out multiple eggs at once. 

Cut a strip of painter's tape about half the height of the egg and place it vertically on the egg. Cut a slightly shorter piece of tape to make the cross piece. Press firmly on both to make sure they are flush with the paper. 


Use blending brushes to add ink to the eggs, directly over the tops of the crosses. You can do a single color or blend lots of colors together. Don't leave white spaces or the tape-resist effect won't work as well. 


Peel up the tape and you should have perfectly white crosses on your colorful eggs. Enjoy!

4/9/25

Crown of Thorns Craft

I wish I could remember all the clever crafts I did in Sunday School during the 70's and early 80's. I had some really creative teachers. I vaguely remember a Play-Doh crown of thorns. My version is made with Model Magic. Affiliate links below. 


Crown of Thorns Craft


Materials: 


Steps: 


Begin by making a 'stain' for the toothpicks. Place a small amount of brown paint into an empty container. Add a few drops of water and stir until it is well-mixed. It should be thin, but heavily pigmented. Cut the toothpicks in half with the wire cutters and drop them into the stain. Swish them around so they're all covered. Set them aside. 

Knead the Model Magic. When it is soft, use about 1/8 to make a thin rope. Lay it in a circle on your work surface. Make another similarly-sized rope and wrap it around the first one. Continue to make ropes and add them to the previous ones. You're not going for a neat braid - you're aiming for a messy crown of thorns. 

When you are happy with the crown, remove the toothpicks from the paint and dry them with a paper towel. Insert them into the crown at different angles. 

I chose to display my finished crown with a Bible verse that references it: 

Matthew 27:29 ... and after twisting some thorns into a crown, they put it on his head. They put a reed in his right hand and knelt before him and mocked him, saying, “Hail, King of the Jews!”

4/8/25

Palm Sunday Craft for Kids

Palm Sunday has special meaning for me as a mom. When Trevor was little, Palm Sunday was his absolute favorite church service of the year. He loved proceeding into the sanctuary waving palm fronds, then spending the rest of the service weaving palms together. He would ask for months when "Pom" Sunday was coming. It was so cute. When it came time to choose a date for Trevor's confirmation, we chose Palm Sunday.    

I wish I had thought of today's craft 15 years ago or so. Trevor would have loved it. But hopefully there's another young child who loves Palm Sunday that will enjoy this craft. Affiliate links below. 


Palm Sunday Craft for Kids


Materials: 


Steps: 


While the glue gun is heating, arrange the small craft sticks on one of the large craft sticks to look like a palm frond. Leave enough space at the bottom so there is a "handle" to hold onto the palm. Glue each stick in place. 


Paint the palm frond green. While it is drying, learn about the word 'Hosanna.' 


Write 'Hosanna' on white cardstock and glue it to the second large craft stick. Now put your sign in one hand and your palm frond in the other and practice for Palm Sunday!

12/10/24

St. Lucia Day Star Boy Hats

St. Lucia Day is a Swedish tradition, celebrated each year on December 13. It commemorates the martyr Lucia of Syracuse, who brought food to Christians hiding in Roman catacombs, lighting the way with a wreath of candles on her head. The modern celebration features a procession with Lucia, trailed by handmaidens, star boys, and gingerbread men. In addition to being the bearer of light, Lucia brings treats. These include gingerbread biscuits and S-shaped saffron buns. 

Many Lutheran churches in the United States celebrate St. Lucia Day, either annually or occasionally, on the Sunday closest to the 13th. I remember having celebrated it a handful of times in my childhood. On Sunday, my church will be celebrating St. Lucia Day, for the first time in many years. I was in charge of making the hats for our four star boys. Affiliate links below. 


St. Lucia Day Star Boy Hats


Materials:


Steps:


Tie the end of a piece of string to a pencil, then cut it so that it is 18” long. Hold the loose end of the string at one of the corners of the poster board, then use the pencil to draw an arc extending from one edge of the poster board to the other. If you need more than one star boy hat, repeat the process on the opposite corner of the poster board; it is large enough to make two hats. 

Cut along the arc. Draw or trace stars onto the center of the hat, then draw a 1.5" border along the arc. Fill in the stars and border with Treasure Gold. It will take two coats, but the shine is well-worth the effort. 

When the paint is dry, it is time to coerce your poster board into a cone. It doesn’t want to become a cone, so this is a little tricky. Once you get it into position, use binder clips to prevent it from springing open and trying to un-cone itself. Apply hot glue along the length of the seam, then remove the binder clips. 

Your star boys will keep their hats on with two pieces of yarn tied under their chins. Cut yarn into 12” pieces. Put a 1” line of hot glue on the inside of the side of the cone (where a strap would go) and place a piece of yarn there. Repeat on the process on the other side to make the second strap.

11/25/24

Quilled Cross Ornaments

Quilling is a great craft. It's inexpensive and easy to learn. The projects you make can be as simple or as complex as you want them to be. This simple quilled cross ornament is a great project for people who are totally new to quilling. Affiliate links below. 


Quilled Cross Ornament


Materials:


Steps: 


Cut four crosses from white cardstock. You will be using one whole cross plus three extra borders for each ornament. 


Glue the borders, one at a time, on top of the base cross. You’re forming a barrier that will hold the quilled shapes in place. 

If you are not able to find a die with a border like this (I wasn’t able to find this particular die for sale online to link to it), you can glue a quilling strip on its edge to form the border. This is the more traditional method for quilling. You can use that technique for any shape, which makes it a lot more versatile. 

Now start quilling rolls. You can make loose or tight curls, teardrops, marquise shapes, or a combination of them. As you complete each roll, glue it in the cross. Continue until the entire area is filled. 

You can get completely different looks depending on what rolls you use to fill the cross. The cross on the left has a variety of shapes arranged symmetrically, while the cross on the right has a single shape in different sizes. 


Open a paperclip to make a hanger. Attach it to the back with hot glue or a piece of tape. Your ornament is ready to hang on the tree or to display anywhere in your home. 

3/19/24

Easter Morning Empty Tomb Craft

I'm teaching an Easter-themed craft at church on Sunday. I made two versions and I'd love to hear which you prefer. In both cases, the empty tomb and the rolled away stone are popped up, adding dimension to the project.

Choice A is at the very break of dawn, with pinks, oranges, and yellows in the sky. The empty tomb and crosses are black in shadow.  


Choice B is later on Easter morning, with blues, yellows, and just a hint of orange in the sky. The empty tomb and crosses are brown. 


As I said, I'm curious to hear which you prefer. I'm going to have supplies for both options available when I'm teaching. Affiliate links below. 


Easter Morning Empty Tomb Craft


Materials:


Steps:


Print 'He is Risen' in the upper left corner of the white cardstock, then trim it to 8x8" (I chose this size because I can go in a shadowbox). Save the larger scrap; you'll be cutting it to place in the empty tomb. Use the inks and blending brushes to color the top half of the background paper as well as the scrap. 


Tear the black cardstock to make a hill. Trim it so that it is 8" wide and high enough to cover the white at the bottom of the paper. Use the black scraps to cut a tomb, round stone, and small strips for the crosses. I experimented with adding chalk to the tomb and stone, which is what you see below. I ended up cutting them down and using the backs. 


Glue the crosses together, then glue them and the hill to the background paper. Trim the inked scrap so that it fits behind the tomb opening, then glue it in place. 

Use the foam squares to adhere the tomb to the paper. Do the same with the stone; since it goes on top of the edge of the tomb, it will be raised twice as far off the base. 


The steps to make Choice B are basically the same, with one exception: it's difficult to tear chipboard. Use scissors for the hill. 


Remember to tell me in the comments which version you like better! I'm eager to see which the church members choose. 

2/7/23

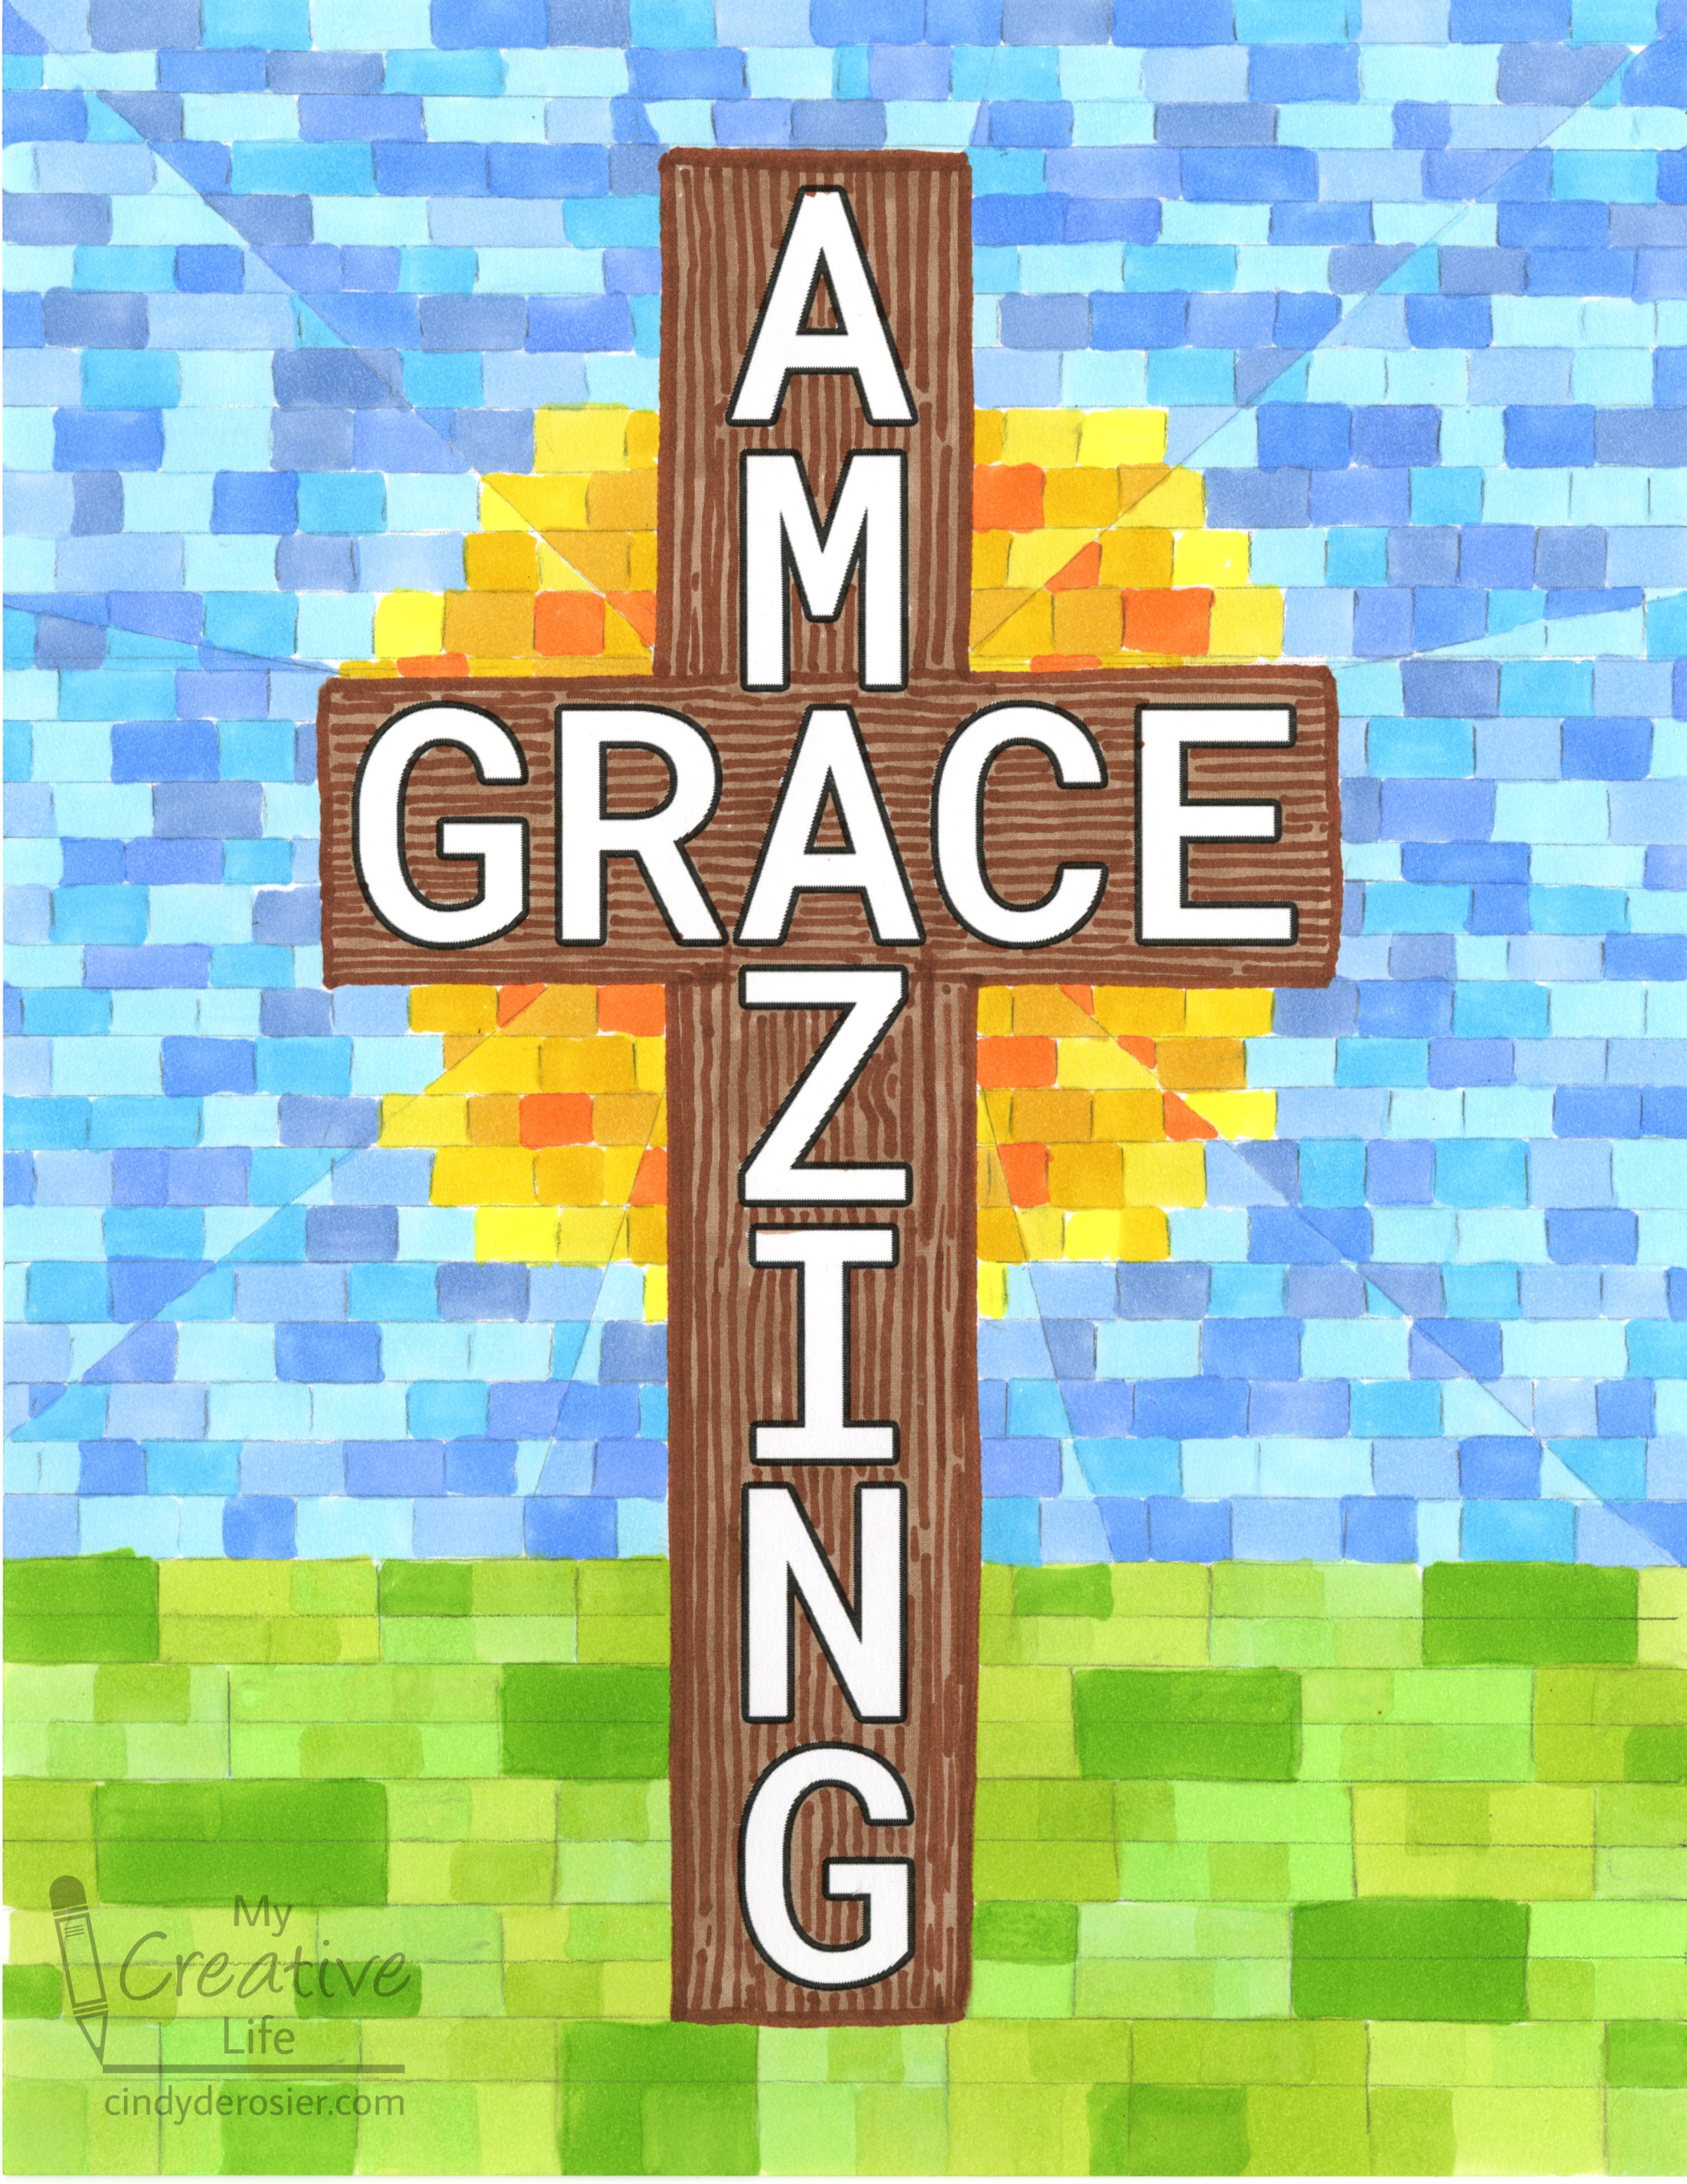
Celebrating 250 Years of 'Amazing Grace' with a Coloring Page Inspired by Stained Glass

This year marks 250 years since the hymn Amazing Grace was written. It's one of my favorites (although for some reason I didn't include it in this list of my faves) and I think a lot of Christians would include it on their list of favorites. A quick search of "most popular hymns" confirmed this for me. Open the Bible lists 'Amazing Grace' as #1 of the 25 most popular Christian hymns. GodTube also places it at #1, as does Music Grotto and a bunch of other sites. In fact, every link I opened had it within the top 3 of all time. 

Our church is starting a multi-week study of Amazing Grace for our Adult Forum. That inspired me to make a simple coloring page to go along with the lessons. I made and printed the page last week, but I didn't color it until Saturday, when my grief about losing Trouble made it impossible to do anything else.


I hadn't imagined anything nearly so detailed when I designed the coloring page.


But it felt right. Coloring soothed me as I grieved. What would have ordinarily felt ridiculously tedious was instead comforting. 

I colored the cross first, using two Ohuhu Honolulu markers to make the wood grain. 


I wanted to make the background look like stained glass, so I drew some light guidelines below the horizon and colored in that section with six shades of green. I liked it, but decided to do the top section with smaller blocks of color. I added a bunch of guidelines that were much closer together than the others, then added diagonal lines to mimic the panels of stained glass. I didn't measure any of this (which you can tell in the finished product); I just went with what I felt at the time. 

I imagined a warm, comforting glow behind the cross, so that's what I colored next. I used six shades of yellow and orange Honolulus. 


After finishing the sky (6 more shades of Honolulus), I didn't like how blocky the grass area looked, so I went back in and tried to create smaller blocks out of what was already there. It didn't work with the darkest green, but I was able to break up the other blocks.  


The final step was mimicking the lead lines in the stained glass. I used a medium grey marker for that.  


I learned a lot from coloring this page. First, and most important, is that coloring can be incredibly beneficial during difficult times, especially coloring an inspirational image that feels comforting. My other lessons were less profound. Among them, when I don't feel like measuring something that really should be measured, I can use the computer to do it for me. It would have taken less time to add the guidelines digitally and reprint my coloring page than it did for me to draw them by hand, and the results would have been significantly better. With that in mind, I'll be creating a new version of my coloring page with the guidelines in place. 

12/13/21

Nativity Drawing

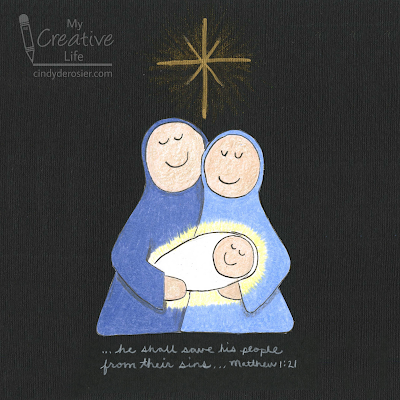
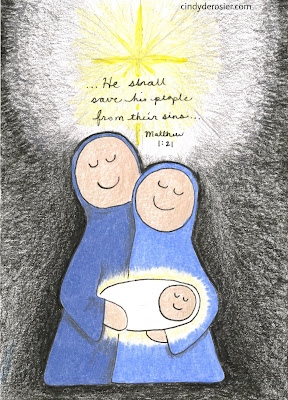
Yesterday, I taught some members of my church how to draw a Nativity scene. It was fun teaching the class and everyone's projects turned out beautifully. Make your own! Affiliate links below. 


Nativity Drawing


Materials:


Steps:


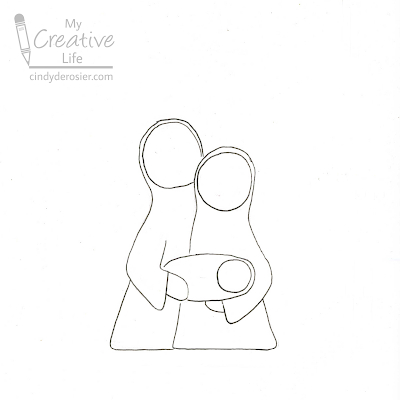
Use a pencil to very lightly draw Joseph, Mary, and Jesus on white cardstock. Start by making an oval about the size of your thumb for Baby Jesus. Add a circle for his head on the right hand side of the oval. Draw Mary's head directly above Jesus' and then Joseph's head slightly behind Mary's. Draw Mary's gown and arm, then add Joseph's cloak and arm. 

When you are happy with your drawing, trace over the lines with the black pen. 


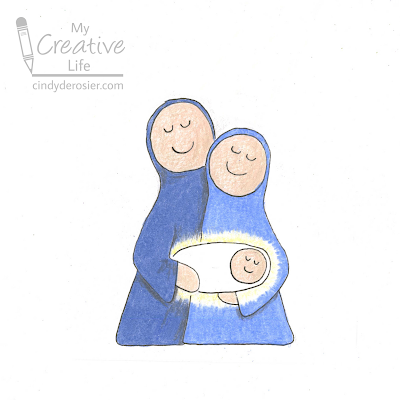
Add the faces. I used simple curves for their eyes and mouths. Obviously, you can do whatever you'd like. Feel free to give Joseph a beard, add noses, etc. 

Color in the three faces and two visible hands with the flesh tone of your choice. Then use a yellow colored pencil to draw a glow around the baby. 


Color the clothing, leaving Jesus' swaddling clothes white. For depth, I added some shadows underneath the arms and where Mary is shading Joseph. 


Cut out your drawing, then set it onto a piece of black cardstock. With a very sharp white colored pencil, write a verse or a message along the bottom. I used part of Matthew 1:21 (... he shall save his people from their sins...")

Glue the Holy Family in place, then draw the Star of Bethlehem using the gold Sharpie. Add glitter with the Nuvo pen. 


---------


I did my first draft entirely with colored pencil before deciding that coloring in the background was WAY too time-consuming for such a short class. But it was a fun experiment for me to do. 


I hope you are all enjoying the Advent season. 

11/29/21

Paper Plate Advent Wreath

Tis the season of Advent! Yesterday was the first Sunday in Advent and the first day of the new church year. Advent is always a special time as we prepare for Christmas, but this year our family had something extra-special to celebrate - the baptism of our nephew (Trevor's cousin, Ian) and Ian's son, Allen. 

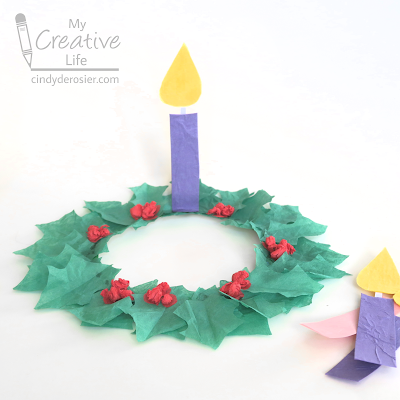
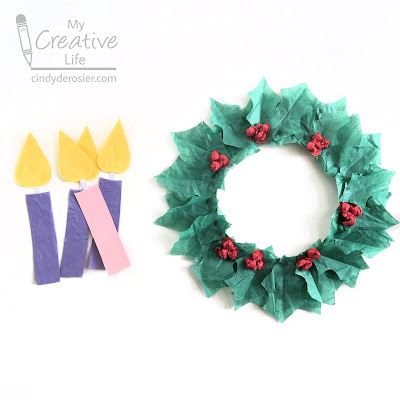
This year, I made a paper plate Advent wreath to mark the season. As you can see, it already has one purple candle for the First Sunday in Advent. For the next three Sundays, we'll add another candle to the wreath (another purple candle, then the pink, then the last purple). While I like Advent chains that count down to Christmas, I prefer the symbolism of adding candles rather than subtracting rings. It's a great visual reminder that Advent is a time to get increasingly prepared to celebrate the birth of Christ. 


Paper Plate Advent Wreath


Materials:

  • paper plate (I used the dessert size)
  • green paint
  • tissue paper (green, red, purple, pink, yellow)
  • white cardstock
  • scissors
  • glue

Steps: 


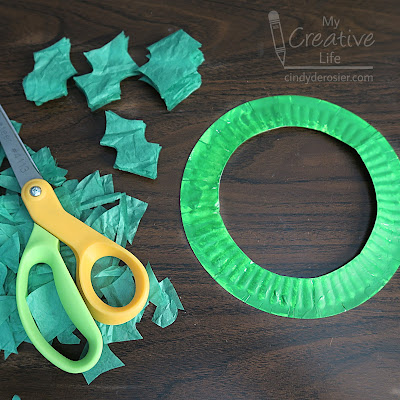
Cut out the center of the paper plate. Paint the remaining part of the paint green. While it is drying, stack green tissue paper and cut out holly leaves. 
 

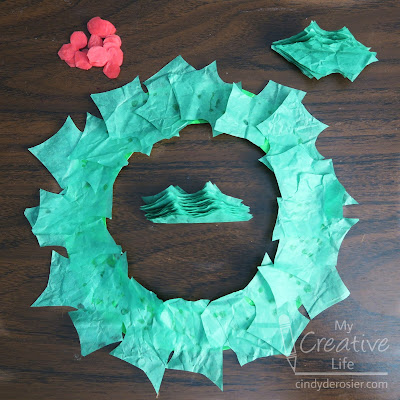
Add dots of glue on the wreath, then add a flat layer of holly leaves to cover the paint. Fold the rest of the holly leaves in half. 


Add a dot of glue to one end of a holly leaf, then glue it to the wreath. (If you glue in more than one place, you lose the dimensionality of the wreath.) Continue until the wreath is sufficiently fluffy and full.

Roll balls of red tissue paper and glue then in clusters amongst the holly leaves. 

Cut out four rectangles for the candles. Use your finger to smooth a layer of glue onto each, then press purple tissue paper onto three of them and pink onto the fourth. Trim the excess tissue paper. To make the flames, cut out four teardrops, smooth glue on them, and press yellow tissue paper onto them. Trim the excess. Cut four tiny rectangle wicks. Glue each onto the back of a candle to connect it to the flame. 


Each Sunday, take the appropriate candle (purple, purple, pink. purple), and fold the bottom slightly to make a tab. Spread glue on the tab and attach it to the wreath. 


Happy Advent, everyone!


CLICK.BUY. CREATE. Shop Michaels.com today!

3/30/21

A Quintet of Cross Cards

On Sunday, our family celebrated a significant milestone - Trevor's confirmation. In this religious ceremony, a person (usually in their early teens) who was baptized as an infant publicly affirms that baptism. After over a year of study, Trevor's confirmation was scheduled for Palm Sunday: April 5, 2020. Then the pandemic hit and we postponed. We waited to reschedule until Trevor's grandparents, godparents, and others were able to safely join us to celebrate, but as the pandemic raged, we decided not to postpone any longer. We scheduled Trevor's ceremony for Palm Sunday again: March 28, 2021. The three of us, Trevor's mentor (Stu), and a small portion of the congregation were physically in the church while our friends and families watched via live broadcast.

Obviously, I'll be scrapping photos from Trevor's confirmation and will post the layout here when I do. Today I'm sharing five cards I made: one which I gave to Trevor's mentor as a thank you from me, and four more that Trevor is using to write thank-you notes for gifts he received. Affiliate links below. 

This is the card for Stu:


I used a white card base, layered a piece of brown cardstock on that, then added a white layer embossed with swirls. Finally, I adhered a die-cut cross. On the inside, I used a heart punch on embossed white cardstock, then layered a die-cut sentiment on top. 

Here are the cards Trevor will be using: 


By happy coincidence, my friend Ann hosted a virtual cardmaking class for the congregation the same day as Trevor's ceremony. She provided kits that we picked up from her front porch, which made it so easy for crafters of all levels of experience to create along with her. They're intended as Easter cards, but they work just as well as thank-you cards for confirmation gifts. 

The top cards each feature a die cut over patterned paper. The bottom left is also a die cut over patterned paper, with iridescent sequins on it. The card on the bottom right is a stamped cross, heat-embossed in white, with watercolors painted over it and more sequins. It was a lot of fun making them, and even more fun chatting with my fellow congregants as I did. 

3/8/21

Drawing a Cross with Easter Lilies

Just like we did during Advent, our church is doing special activities via Zoom leading up to Easter. After yesterday's church service, I taught the congregation how to draw this cross with Easter lilies.

Easter lily drawing
 
To make your own, you need white drawing paper, a pencil, a ruler, and colored pencils. I made my step-out drawings with Sharpie so they would show up on camera, but I definitely recommend using pencil and sketching lightly.  

Orient your paper vertically. Draw the two open blooms in the top-right and bottom-left quadrants, each with six petals that overlap one another. Draw the side view of a lily in the bottom-right quadrant. 

how to draw Easter lilies - first step

Draw a stem that starts at the base of the upper-right lily and continues diagonally down to the left. It should pass behind the lily at the bottom left. Add a stem connecting the lily on the right, then another stem extending to the left, with the unopened blossom at the end. 

Add stamen to each of the open blooms. 

Easter lilies with cross - stems

Draw long, narrow leaves along each of the stems. 

Easter lilies with cross leaves

Place a ruler horizontally across the paper, adjusting it so that it sits where you want the crossbar of the cross to be. Draw lines on either side of the ruler, lifting your pencil when you cross any part of the lily. Connect the two sides to complete the crossbar. 

Turn the ruler 90° to draw the main post of the cross. Again, draw lines on both sides of the ruler, lifting your pencil when you cross any part of the lily. You should be here:

Easter lilies with cross uncolored

Use a brown pencil to outline the cross, then draw grain on the wood. Color in the wood with various shades of brown. Color the stems, leaves, and stamen green and the anthers orangey-yellow. Outline the lilies (I used purple on this sample, but black, blue, and grey are all good choices). Lightly draw lines on the petals of the lilies with light grey to give dimension, then add a little bit of shadowing in the center of the open flowers. 

Easter lilies with cross

Finally, color in the sky blue background. Or....

Easter lily drawing

.... use microtip scissors to cut out your design and adhere it to a sheet of cardstock, which is what I did with the sample I made as I was teaching. We agreed that it the lilies really pop against the black and it is a great choice for Good Friday. 

learn how to draw Easter lilies on the cross

I made my drawings on 8.5x11" copy paper, but you could easily draw this much smaller to create a beautiful card to send for Easter. Either way, give it a try!

12/21/20

Edible Advent Wreath

As a professional craft blogger, my job is to design creative projects and then write tutorials to teach you how to make them. Ideally, each project should make my readers want to drop everything and immediately start crafting. For that reason, seasonality is huge. If I publish an adorable Halloween costume on November 1 or a great idea for valentines on February 15, chances are very poor that anyone will drop everything to make them. Just like you'll never see a magazine with Thanksgiving recipes in the December issue, I have the most success when I share projects at least a month ahead of when I expect people would want to make them.

And yet, today I'm sharing an edible Advent wreath. Advent started on November 29. Yesterday was the fourth (and final) Sunday of Advent. Advent ends in in just a few days. By all counts, this is a terrible time to be sharing an Advent idea. 


And yet, the reality of my life as a craft blogger is that what I share IS my life. I'm sharing an Advent wreath because our family celebrates Advent. Yesterday was the fourth Sunday of Advent, so all four candles are lit on my edible wreath. In an ideal world, I would have dreamed up this project two months ago then promoted it in early November. But that's not what happened. 

Thankfully, the projects I share here will live on here, on Pinterest, in Google Images, and elsewhere. So even though I'm late to the game this time, I'm hoping this tutorial will inspire someone in 2021 and beyond. And maybe someone in 2020; after all, Advent doesn't end until Christmas begins. 

---------

Edible Advent Wreath


Materials:


Steps:


Pour approximately 2 cups of flake cereal into bowl. Pick out anything that isn't a flake (such as raisins, or in the case of the cereal I used, dried strawberries)

Prepare the green Candy Melts according to the package directions. I used about 15 wafers. Pour the melted candy over the cereal, stirring until it is completely coated. Spoon it onto a piece of parchment paper, forming the shape of a wreath. Let the candy set for 2 minutes, then apply the round red sprinkles to make the berries. Set the wreath aside to set completely. 

Prepare the blue (or purple - your choice) Candy Melts according to the package directions. I used 4 wafers. Pour the melted candy onto a piece of parchment paper, then roll the Pocky in it to coat. I recommend making extras, but remember to keep at least one Pocky the original pink. 

Prepare the yellow Candy Melts according to the package directions. I used 2 wafers. Drop a tiny puddle of melted candy onto a piece of parchment paper, then drag your scribe tool (or a toothpick) through it to make a candle flame. You'll only need four, but I recommend making extras so you can choose the best ones. 


When everything is completely set, use your scribe tool to make holes where the candles will go. Then use a sharp knife to trim your Pocky candles to the desired length. (I trimmed off the uncoated area you see in the photo below.) You can also use the knife to shave off any puddling on the Pocky candles.


Choose your four best flames and peel them off the parchment paper. Remelt the remaining yellow candy. Add a small dollop of candy to the back of each flame, then attach them to the Pocky candles. When the candles are secure, remelt the extra green candy and put a dollop on each hole, then put the candle in place. 


Happy Advent, everyone!