12/13/13

A Scrabble Merry Christmas Craft

Any Scrabble fans on your gift list?


I spend a lot of time searching Google Images hoping to find awesome craft tutorials to feature on Fun Family Crafts. Recently, I was searching for religious Christmas crafts and came across an image of a beautiful unfinished laser-cut cross. I knew right away that it wasn't a tutorial, but I followed the link anyway.  


I was thinking about how I would paint or decorate it, when I was struck with an idea. As you know, I am obsessed with Scrabble. I could use Scrabble tiles to make a cross like this!


---------


Scrabble Merry Christmas Ornament


Supplies: 


  • Scrabble tiles (MERRY CHRISTMAS minus one R)
  • sturdy chipboard
  • strong double-sided tape
  • ribbon or cording


Steps: 


The first thing I did was to line up the word CHRISTMAS and cut a strip of chipboard just a hair shorter and narrower than the word.

 
I did the same for MERRY, borrowing the shared R from CHRISTMAS.

 
I covered the two pieces of cardstock with double-sided tape.

 
I peeled back the liner and started applying the letters.  It bothered me a bit that the M was printed so far to the left.  I checked through all my M's and they're all like that.  Interesting!

 
Next, I peeled off the liner on the MERRY strip of cardstock, applied the M and E, then stuck it to the CHRISTMAS piece.


I attached the final two letters, then added gold cording on the back.  Here's my completed cross:


I love how it turned out! I'm going to be bummed when it's time to take it down after Christmas.

12/12/13

Cork Snowmen

Here's the last of our cork projects... cork snowmen!  


Mine
Materials: cork, white paint, black Glossy Accents (or black paint or a black pen), orange pipe cleaner, black felt, screw eye, clear filament, and ribbon.

I took a bunch of pictures of all the steps to make these snowmen, but I have no idea where the pictures went.  Frustrating.  Fortunately, they're not too difficult to make.  First, paint the cork white and let dry.  I used dots of Glossy Accents for eyes and mouth.  Trevor wasn't able to control the Glossy Accents to his satisfaction, so he used the back of two different sized paintbrushes dipped in black paint to make his eyes and mouth.  Sharpie would work too, with the benefit of no drying time required.     

Next, cut a small piece of orange pipe cleaner and bend to form a carrot shape.  Poke a hole in the cork, add glue, and insert the pipe cleaner.  Cut a circle of black felt to make the hat.  Poke a screw eye through the center of the felt and into the top of the cork.  Insert a piece of filament through the screw eye, then wrap a small rectangle of felt around it to form the hat. Glue a small circle of felt to the top to cover the screw eye and close the hat.  Finally, tie a piece of ribbon around the snowman's neck to make a scarf.  We used wired ribbon, but any ribbon will do.   


Trevor's

Trevor and I had a lot of fun crafting with corks.  Each of our projects was a collaboration, with one of us suggestion or trying something and the other springboarding off that idea.  I love when that happens.  I hope you're inspired to do some trash-to-treasure crafting of your own this winter!

12/11/13

Cork Reindeer

Here's the second (and easiest) of our three cork critters! 


Mine.
To make a cork reindeer, you need: a cork, brown paint, half of a brown pipe cleaner, wire snips, googly eyes, a red pom pom, and glue.  Paint the cork brown.  While that is drying, snip the pipe cleaner into half, then into half again.  Twist one piece around another to form each antler. Use the wire snips to poke a hole in the cork, add glue, and insert the antlers.  Glue the eyes and pom pom in place.  That's all there is to it!

To add a hanger, attach clear filament to the back.  Or simply perch your ornament on a shelf or on the tree.  The flat base allows it to stand up easily.


Trevor's.
One more cork project to go!

12/10/13

Cork Penguins

Remember the extra corks from yesterday's Cork Christmas Trees?  We used them to make three different ornaments.  First, a penguin.  Isn't he cute?


Mine.  

Materials: corks, black and white acrylic paint, screw eyes, black enamel paint, googly eyes, felt, and glue.

We started by painting the corks with a coat of white paint.  When they were dry, we added the black. 


They looked like this:


We weren't able to find black screw eyes, so we used enamel paint to make them black.  A broken cork held them securely in place so that we could paint both sides.

 
When the paint was dry, we screwed in the screw eye, glued googly eyes in place, and added felt beaks and wings.  

Trevor's.
 Add a simple black ribbon or cord to hang the penguin on the tree.  Inexpensive, easy, and totally adorable!  Tomorrow I'll share another of the cork ornaments we made.

12/9/13

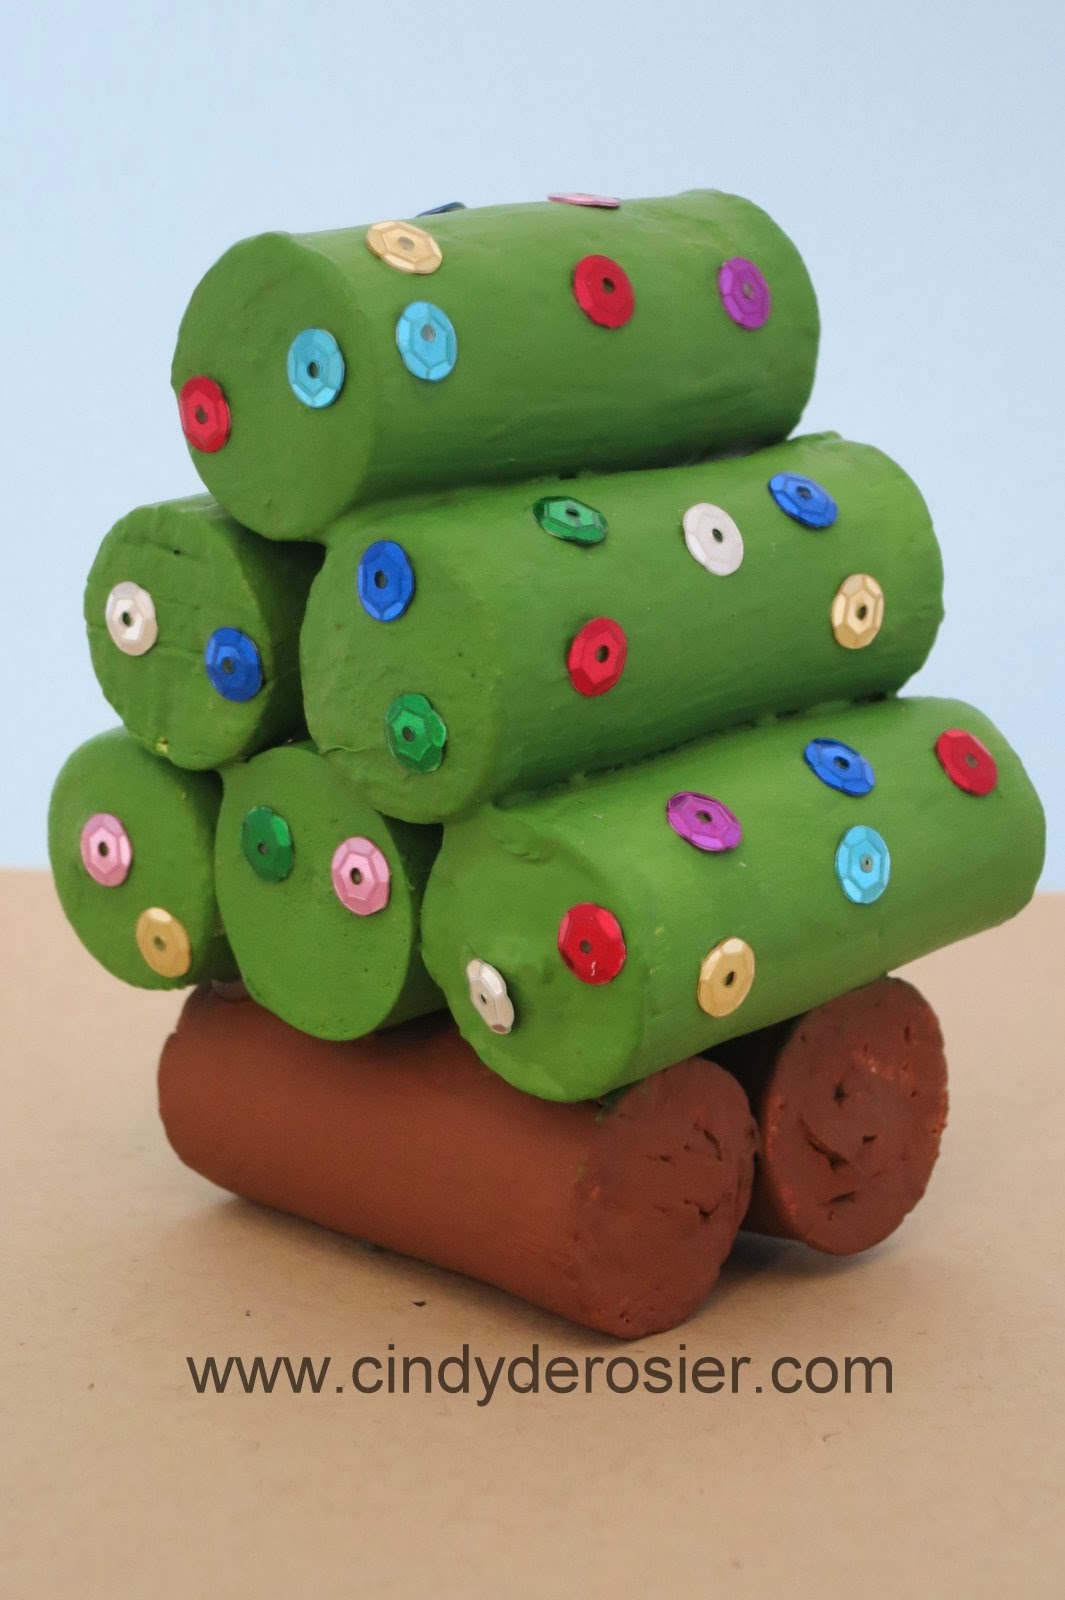
Cork Christmas Tree

When Trevor was three, he made this Christmas tree at preschool.

 
It's so simple - just 8 corks hot glued together.  Obviously, the teachers used the glue gun, not the children.  The kids painted their trees and sprinkled on glitter.  Trevor, ever conservative, used about 10 times less glitter than anyone else.  Plenty of kids had so much glitter you couldn't tell the tree was actually green underneath. 

Now that Trevor is able to use the glue gun independently (with me nearby, of course), I thought it would be fun to make another version of this project.  We began by adding a coat of gesso to a bunch of corks.  He'd only be using 8, but we prepped corks for other projects.  (I'll share those throughout the week.)  

 
When the gesso was dry, Trevor painted six corks green and two corks brown.  He glued them together to form the tree.

 
He didn't want to use glitter like the preschoolers did.  Instead, he chose to add colorful sequins to his tree.

 
Truly a trash-to-treasure project!