
Back in my teaching days, I used games and fun activities to help my students learn multiplication and division facts. One of my favorites, which worked beautifully for Trevor, is Tic Tac Toe Dice. Physical activities, like playing Steal the Bacon with products or coloring multiplication tables, worked for some kids, while songs and chants helped others. Regardless of the method, it's crucial for their future success that kids learn multiplication and division facts as soon as possible. When kids don't know 6x7 or 9x4 off the top of their heads, they're going to struggle with almost all of the math beyond third grade.
I don't think I ever encountered a 5th grader who didn't know the 1, 2, 5, and 10 facts, and the vast majority of them also knew the 3's and 4's. But I had plenty of students each year who didn't know the 6, 7, 8, and 9 facts well enough to apply them to the more challenging math we did. I wish I'd thought of the idea of Multiplication Fact Bracelets idea back then, because I think these may have helped some of them. Making the bracelets is a useful way to practice facts, of course, but by wearing them and looking at them frequently, and even using them as a fidget device, I imagine some kids could become more confident with their times tables. Affiliate links below.

Multiplication Facts Bracelets
Materials:
Steps:
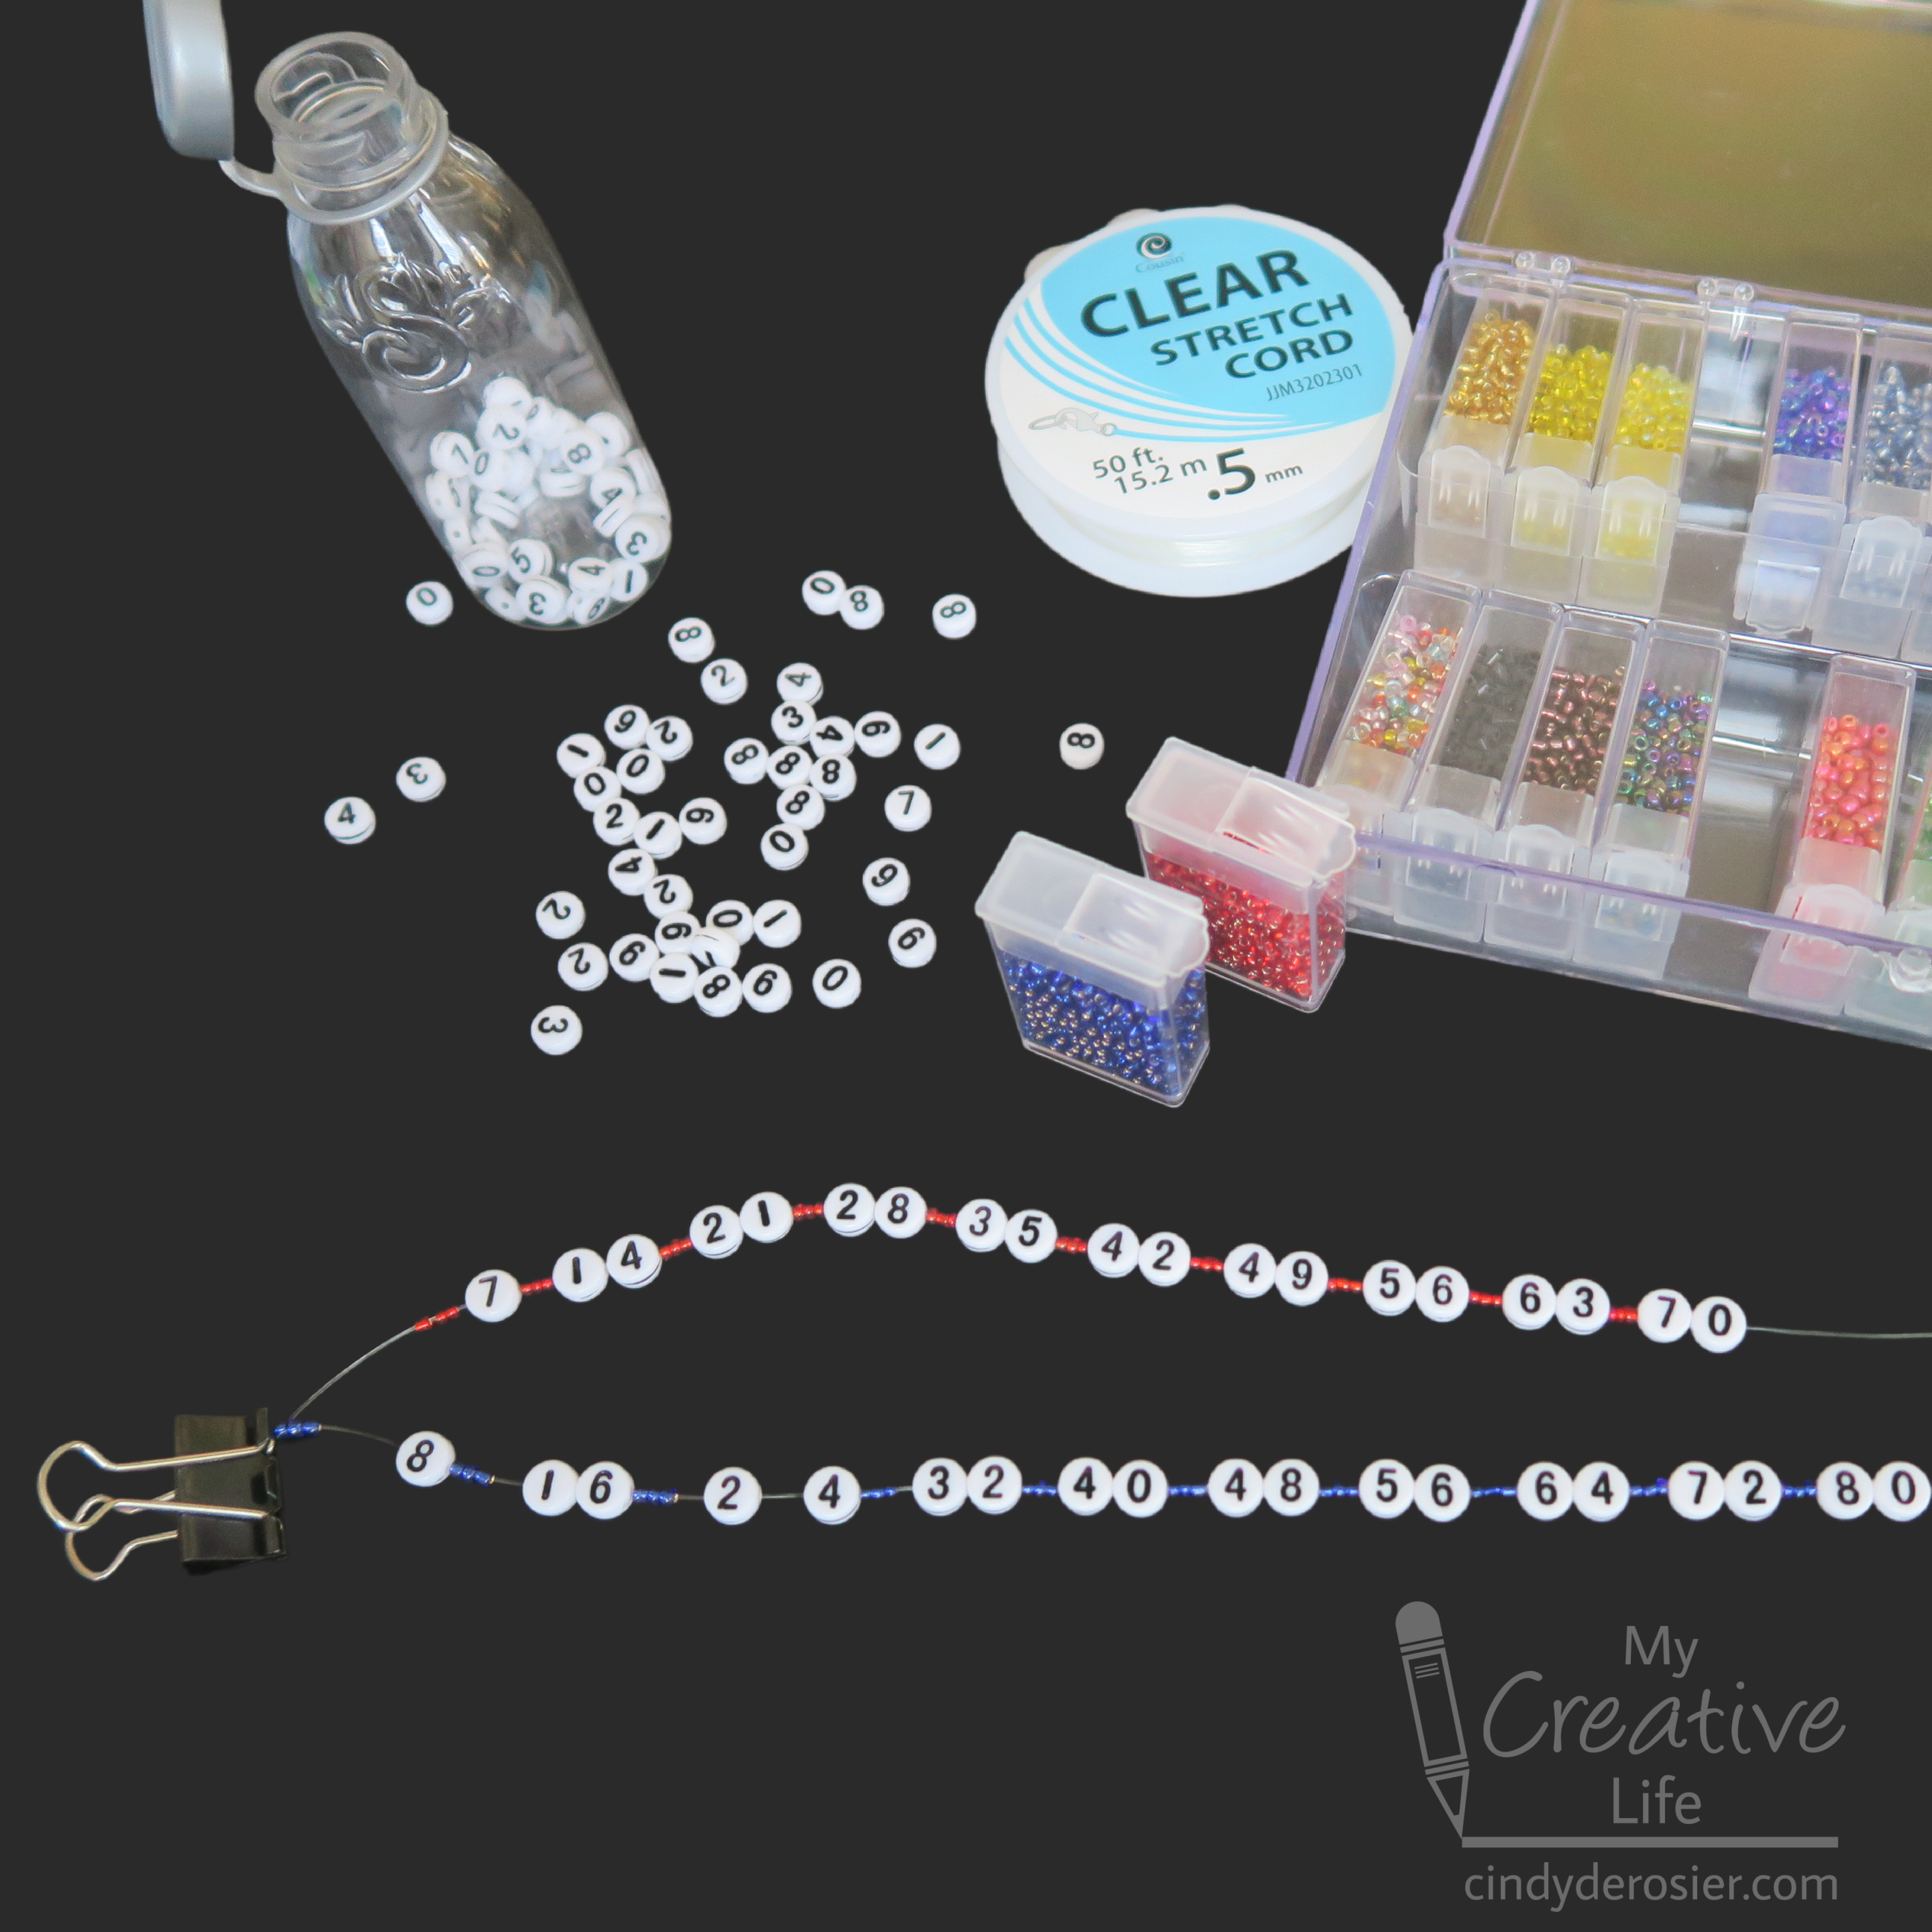
Cut a 12" length of stretch cord. This will leave you with plenty to tie off the bracelet when you're done beading. Attach a binder clip to one end of the stretch cord to keep the beads from falling off that end.
Choose a single color of seed beads for each bracelet. I used yellow for the 6's, red for the 7's, blue for the 8's, and green for the 9's. If you're doing this in a classroom, have everyone make the same set of facts in the same colors, so that you can refer to the "blue 8's" bracelet without causing confusion or the inevitable, "My 8's are pink!" interruptions. I'll use the blue 8's for this tutorial; obviously, follow the same steps for the other bracelets.
Begin by putting three blue seed beads onto the cord. The cord is sturdy enough that you can use it to poke into the hole of a bead to thread it. Then add the number 8. Add three more blue seed beads, then then 16. Three more blue seed beads, then 24. Make sure the numbers are all facing the same direction. There is no up and down for 0, 1, 3, and 8, but it matters for the others, particularly the 6 and 9. Continue this pattern until you reach 80.
Carefully remove the binder clip and then tie the ends together using a surgeon's knot. It's basically the same as the square knot they already know with an extra 'up and over' when you make it.

Put the tied bracelets on a piece of parchment paper, then add a dot of glue directly onto the knot you just tied. Let the glue dry completely, then cut off the extra cord.

The surgeon's knot and glue combination is strong, but to make sure your bracelet doesn't come apart when you're stretching it to put it on, hold onto the knot with one hand while you stretch the bracelet over the other.

These bracelets are also fun for teaching the concept of Least Common Multiple. In the photo, you can see that 56 is visible on both the red (7) and the blue (8) bracelets and that 48 is visible on both the yellow (6) and the blue (8). Are these the LCMs of those pairs of numbers? Rotate the two bracelets to see if there's another lower number they both share!


Thank you!
ReplyDelete