Showing posts with label nature. Show all posts

5/12/23

Cat Painted Rock

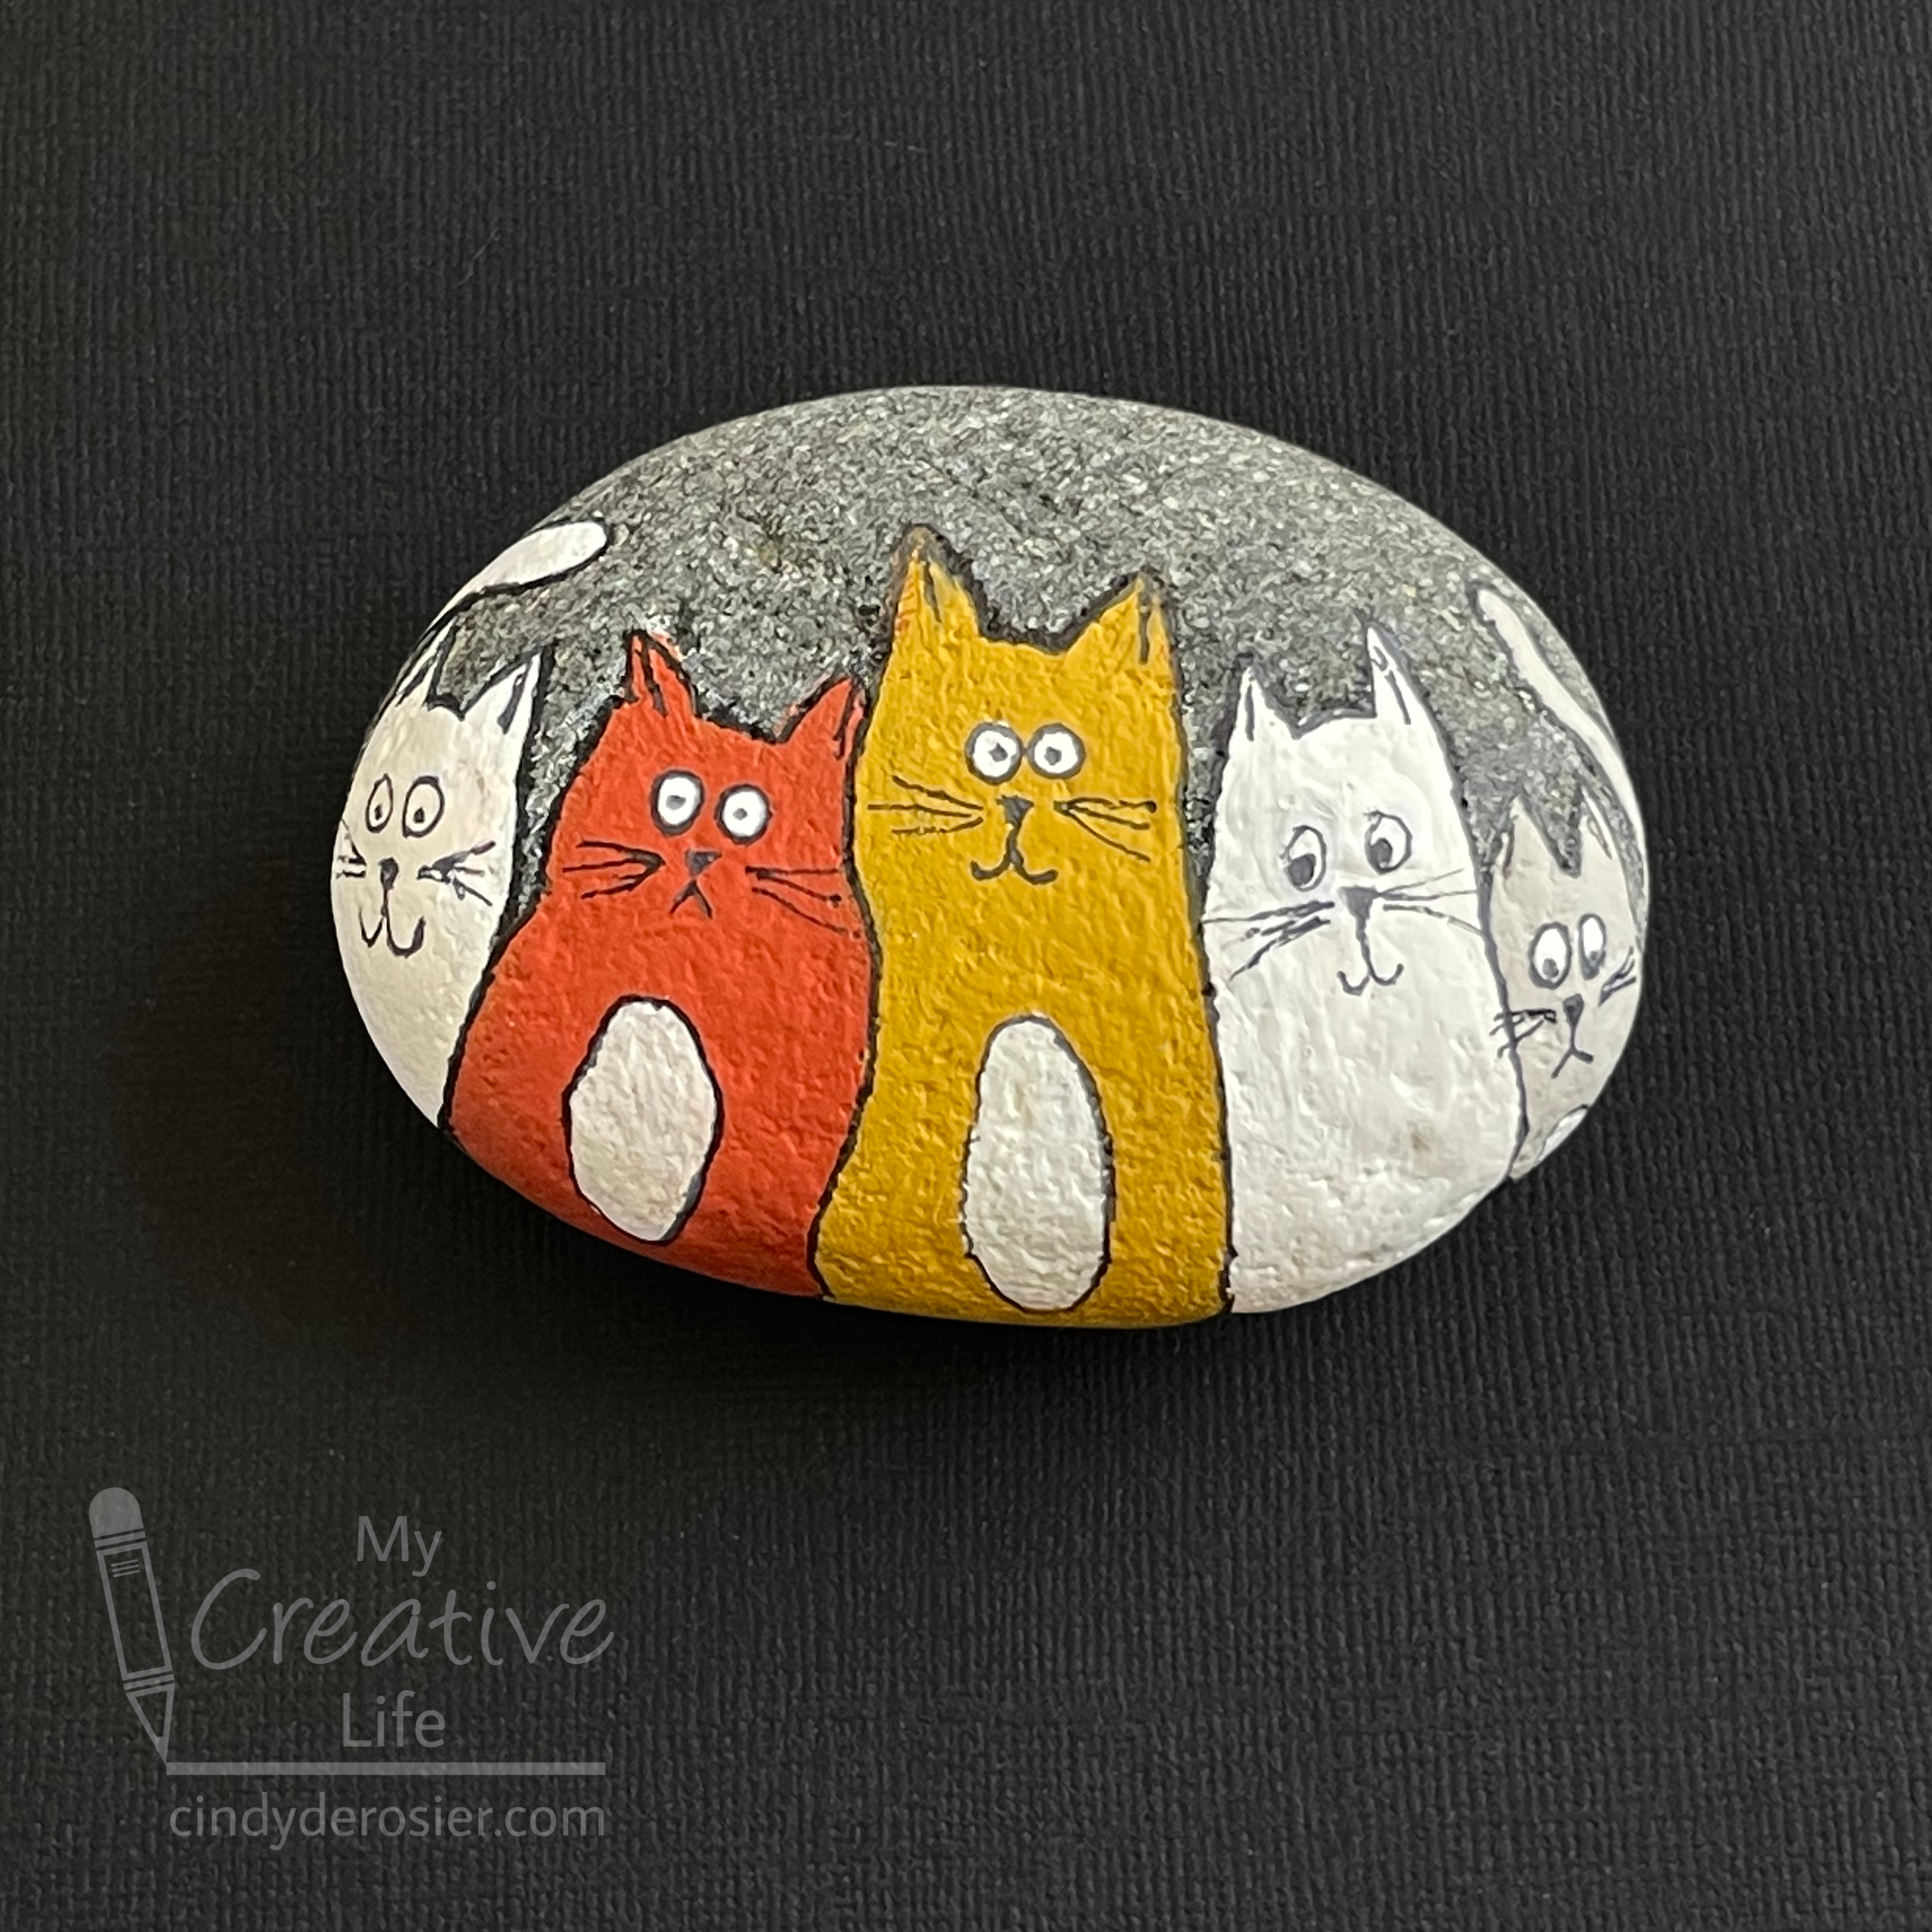
In over 12 years as a craft blogger, I've only shared a painted rock craft once. Time for another! Here is a cat painted rock. To clarify, it's not a cat-painted rock. I painted it. I don't even have a cat, let alone one who paints. Affiliate links below. 


Cat Painted Rock


Materials:


Steps:


Use the white colored pencil to lightly sketch the shape of your cats. I started with what would become the gold cat and worked my way outward. No details - just the oval shape of the cat with ears on top. 

Paint the cats whatever color you want. When the paint is dry, add white bellies (if desired) and white eyes (kinda necessary). When that paint is dry, use the Sharpie to outline the cats and add their facial features, including pupils. 

Spray the rock with Mod Podge Ultra to seal it.

10/19/22

Fall Leaf Luminarias

Luminarias looks so pretty lining a path at night. Use fall leaves to make make your own luminaries to display during autumn. They're particularly nice to set out for Halloween to welcome the trick-or-treaters. Affiliate links below. 


Fall Leaf Luminarias


Materials: 


Steps: 


Spread out the paper bags and arrange the leaves on top of them. I made my luminarias two at a time and used a box to contain the spray. 


Spritz the spray ink over the leaves until the visible white area is mostly covered. If you leave visible white, there won't be contrast when you remove the leaves.  


You can remove the leaves immediately and set the bags aside to dry while you spray the next batch. Continue until you've decorated enough bags to line your walkway. 

Fill the bags with an inch or so of dried beans (or rice or pebbles). You want enough to keep the bags upright and in place. Nestle the tea lights into the beans and arrange the luminarias. Beautiful!


I made these for fall, but luminarias are even more common for the Christmas season in places like New Mexico. I found this fascinating article about the difference between luminarias and farolitos that you might enjoy. You can make a winter version by following the same steps. Try using different elements from nature (holly leaves and berries, for example). You can also use different colors. 
 

10/7/22

Fall Leaf Fashion

A few days ago, I went for a long walk to collect fall leaves for an upcoming craft. As I was thinking about all the common ways to craft with fall leaves, it occurred to me that most are designed for young children. For example, my Fall Leaves Wall Hanging is easy enough for preschoolers to do. I challenged myself to come up with a fall leaf craft that would appear to tweens and older kids who are no longer interested in gluing leaves to a paper plate to make a wreath. Presenting, Fall Leaf Fashion!


I started by cutting out models to inspire my fabulous fashions. (Read here, if you've forgotten how in touch with fashion I am.) I had scraps of tan and black cardstock sitting on my desk, so that's what I used. Obviously, you can make your models with whatever skin tone, hair color, and body type you want. 


Here are my models after they were glued. 


I had a wide variety of leaf shapes and colors to inspire my fashions. After a lot of trial and error, and trying different outfits on different girls, I settled on the fashions for my runway show. I hadn't intended a fall collection to look beachy, but at least the garments show creativity in the use of textures, a strong sense of proportion, and good use of color. Hopefully Nina won't be bored. 


I miss the Tim, Heidi, and Nina era of Project Runway

4/8/22

Earth Day Nature Collage

There is so much beauty in nature. Some of my favorite crafts are made with fallen leaves, acorns, pinecones, and other found treasures. This project is particularly great for Earth Day, because instead of removing items from nature, you're just rearranging what's already there. There's so much room for creativity. The collage you make is temporary, so be sure to take a photo!


Earth Day Nature Collage


Materials: 

  • leaves, rocks, and other natural materials already on the ground*

Steps: 


Clear a place in the dirt for your collage. I used a place along our fence that has fallen leaves from the neighbor's tree. I pushed them aside to expose a heart-shaped workspace. 

It's easiest to center your project by starting with the R. I made mine out of small rocks. I picked the lightest colored ones I could find so they would contrast with the dirt. I made the A and T next. Then I added the E and the H. Finally, I outlined the shape of the heart with the yellowest of the fallen leaves. 

Don't forget to take a photo! 


*I picked the dandelions (which I was harvesting for Trouble, who LOVES them); everything was already on the ground. 

11/8/12

Fall Leaves Wall Hanging

We live near the beautiful San Francisco Bay Area, where fall arrives a bit later than in much of the rest of the country. Our leaves are just starting to fall around here. There have been years where our leaves didn't fall until mid-December. So even though I've been seeing fall leaf crafts around the Internet for about two months now, we're just starting ours!

Today we made a Fall Leaves Wall Hanging. 


Step one was to go for a nature walk. Trevor and I collected a large variety of leaves.

 
When we got home, we gathered clear contact paper (affiliate link), scissors, a hole punch, yarn, and our leaves.

 
Next, we cut a large piece of contact paper. We folded it in half, then peeled back the paper liner from one half. We carefully placed our leaves on the exposed sticky side of the contact paper.  


Next, we removed the paper liner from the rest of the contact paper and folded it over the leaves. Trevor carefully pressed out any air bubbles. Next, he punched holes at the top and tied a piece of yarn on to make a hanger. That's all there is to it!

This project looks absolutely gorgeous in a window.  I tried to photograph it, but eventually gave up and had Trevor hold it outdoors. This gives you a good idea of how it looks in a window. The colors and textures of the leaves are beautiful. 

 
It looks almost as pretty hanging on a wall.  

 
What a fun way to bring a bit of the outdoors in!

9/29/11

Our Acorn Wreath

Trevor has always been a collector, specifically of nature items such as rocks, pine cones, feathers, oak galls, and acorns. Lots and lots of acorns. Not long after we made the acorn napkin rings, Trevor discovered that the trees by the field where he plays soccer had just started dropping acorns by the thousands. He happily gathered up a few hundred to take home.

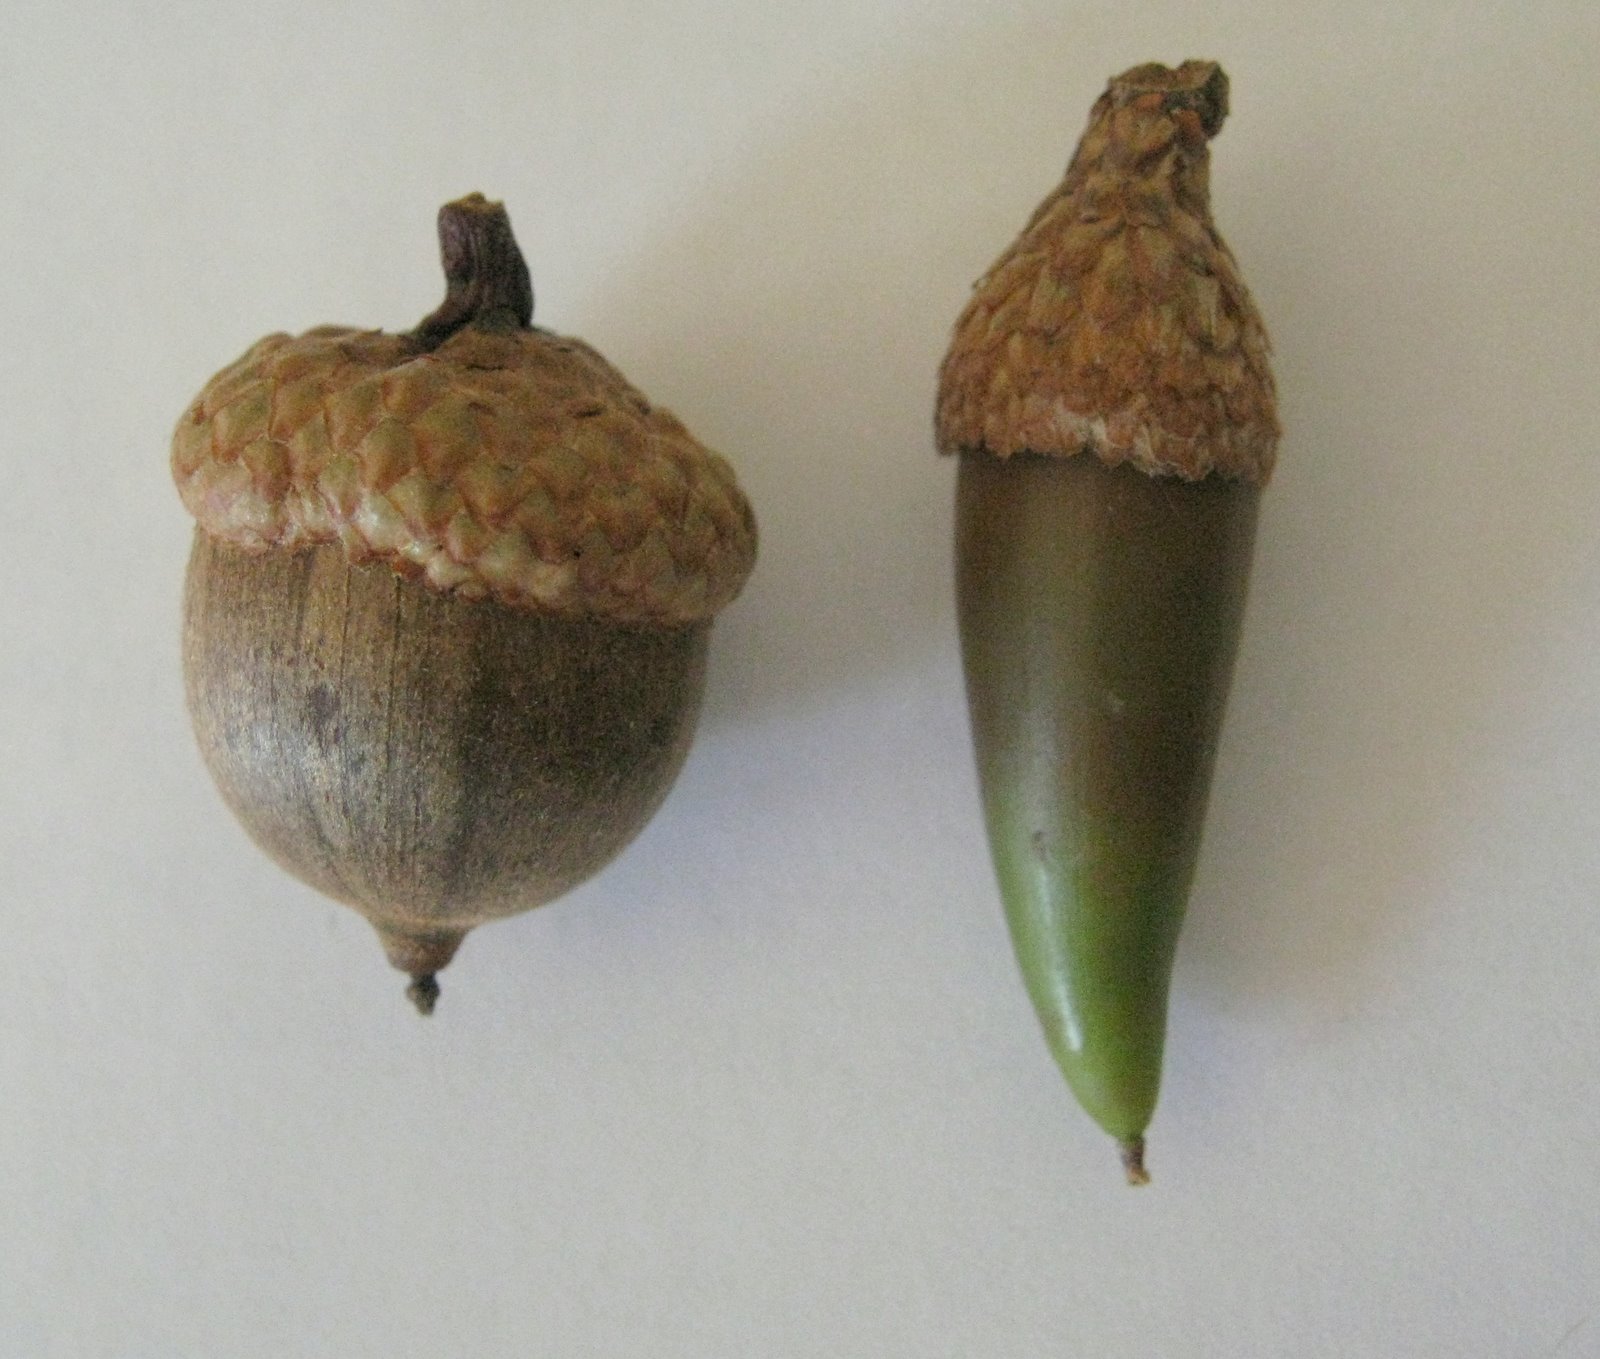
He was fascinated by how different the two types of acorns looked. The one on the left is the type I collected near his school to make the napkin rings. The one on the right is from the soccer field.


We decided to make a wreath. We took a cheap paper plate, cut off the outside edge, and then cut out the center. This left us with a basic wreath shape.

We painted it brown.


Then we used the glue gun to attach the acorns around the perimeter. I operated the glue gun and Trevor placed the acorns. While he is extremely responsible and very cautious, I don't think at 5 he is old enough to operate a glue gun yet. That was fine with him. 

We added a bit of orange ribbon and hung up our wreath. I really like the way it turned out. And you can't beat the price, since everything in the project we either gathered ourselves or found around the house.


Make one of your own! It's so easy and so much fun.