
Time for another name art project! This one is inspired by graffiti, but done with pens and colored pencils on paper rather than spray paint on someone else's property.

I made this outdoors, reclined in a lawn chair (see Creative Resolution #4) and the quick photos I took of each step are terrible. So I whipped up a quick recreation of the first three steps:
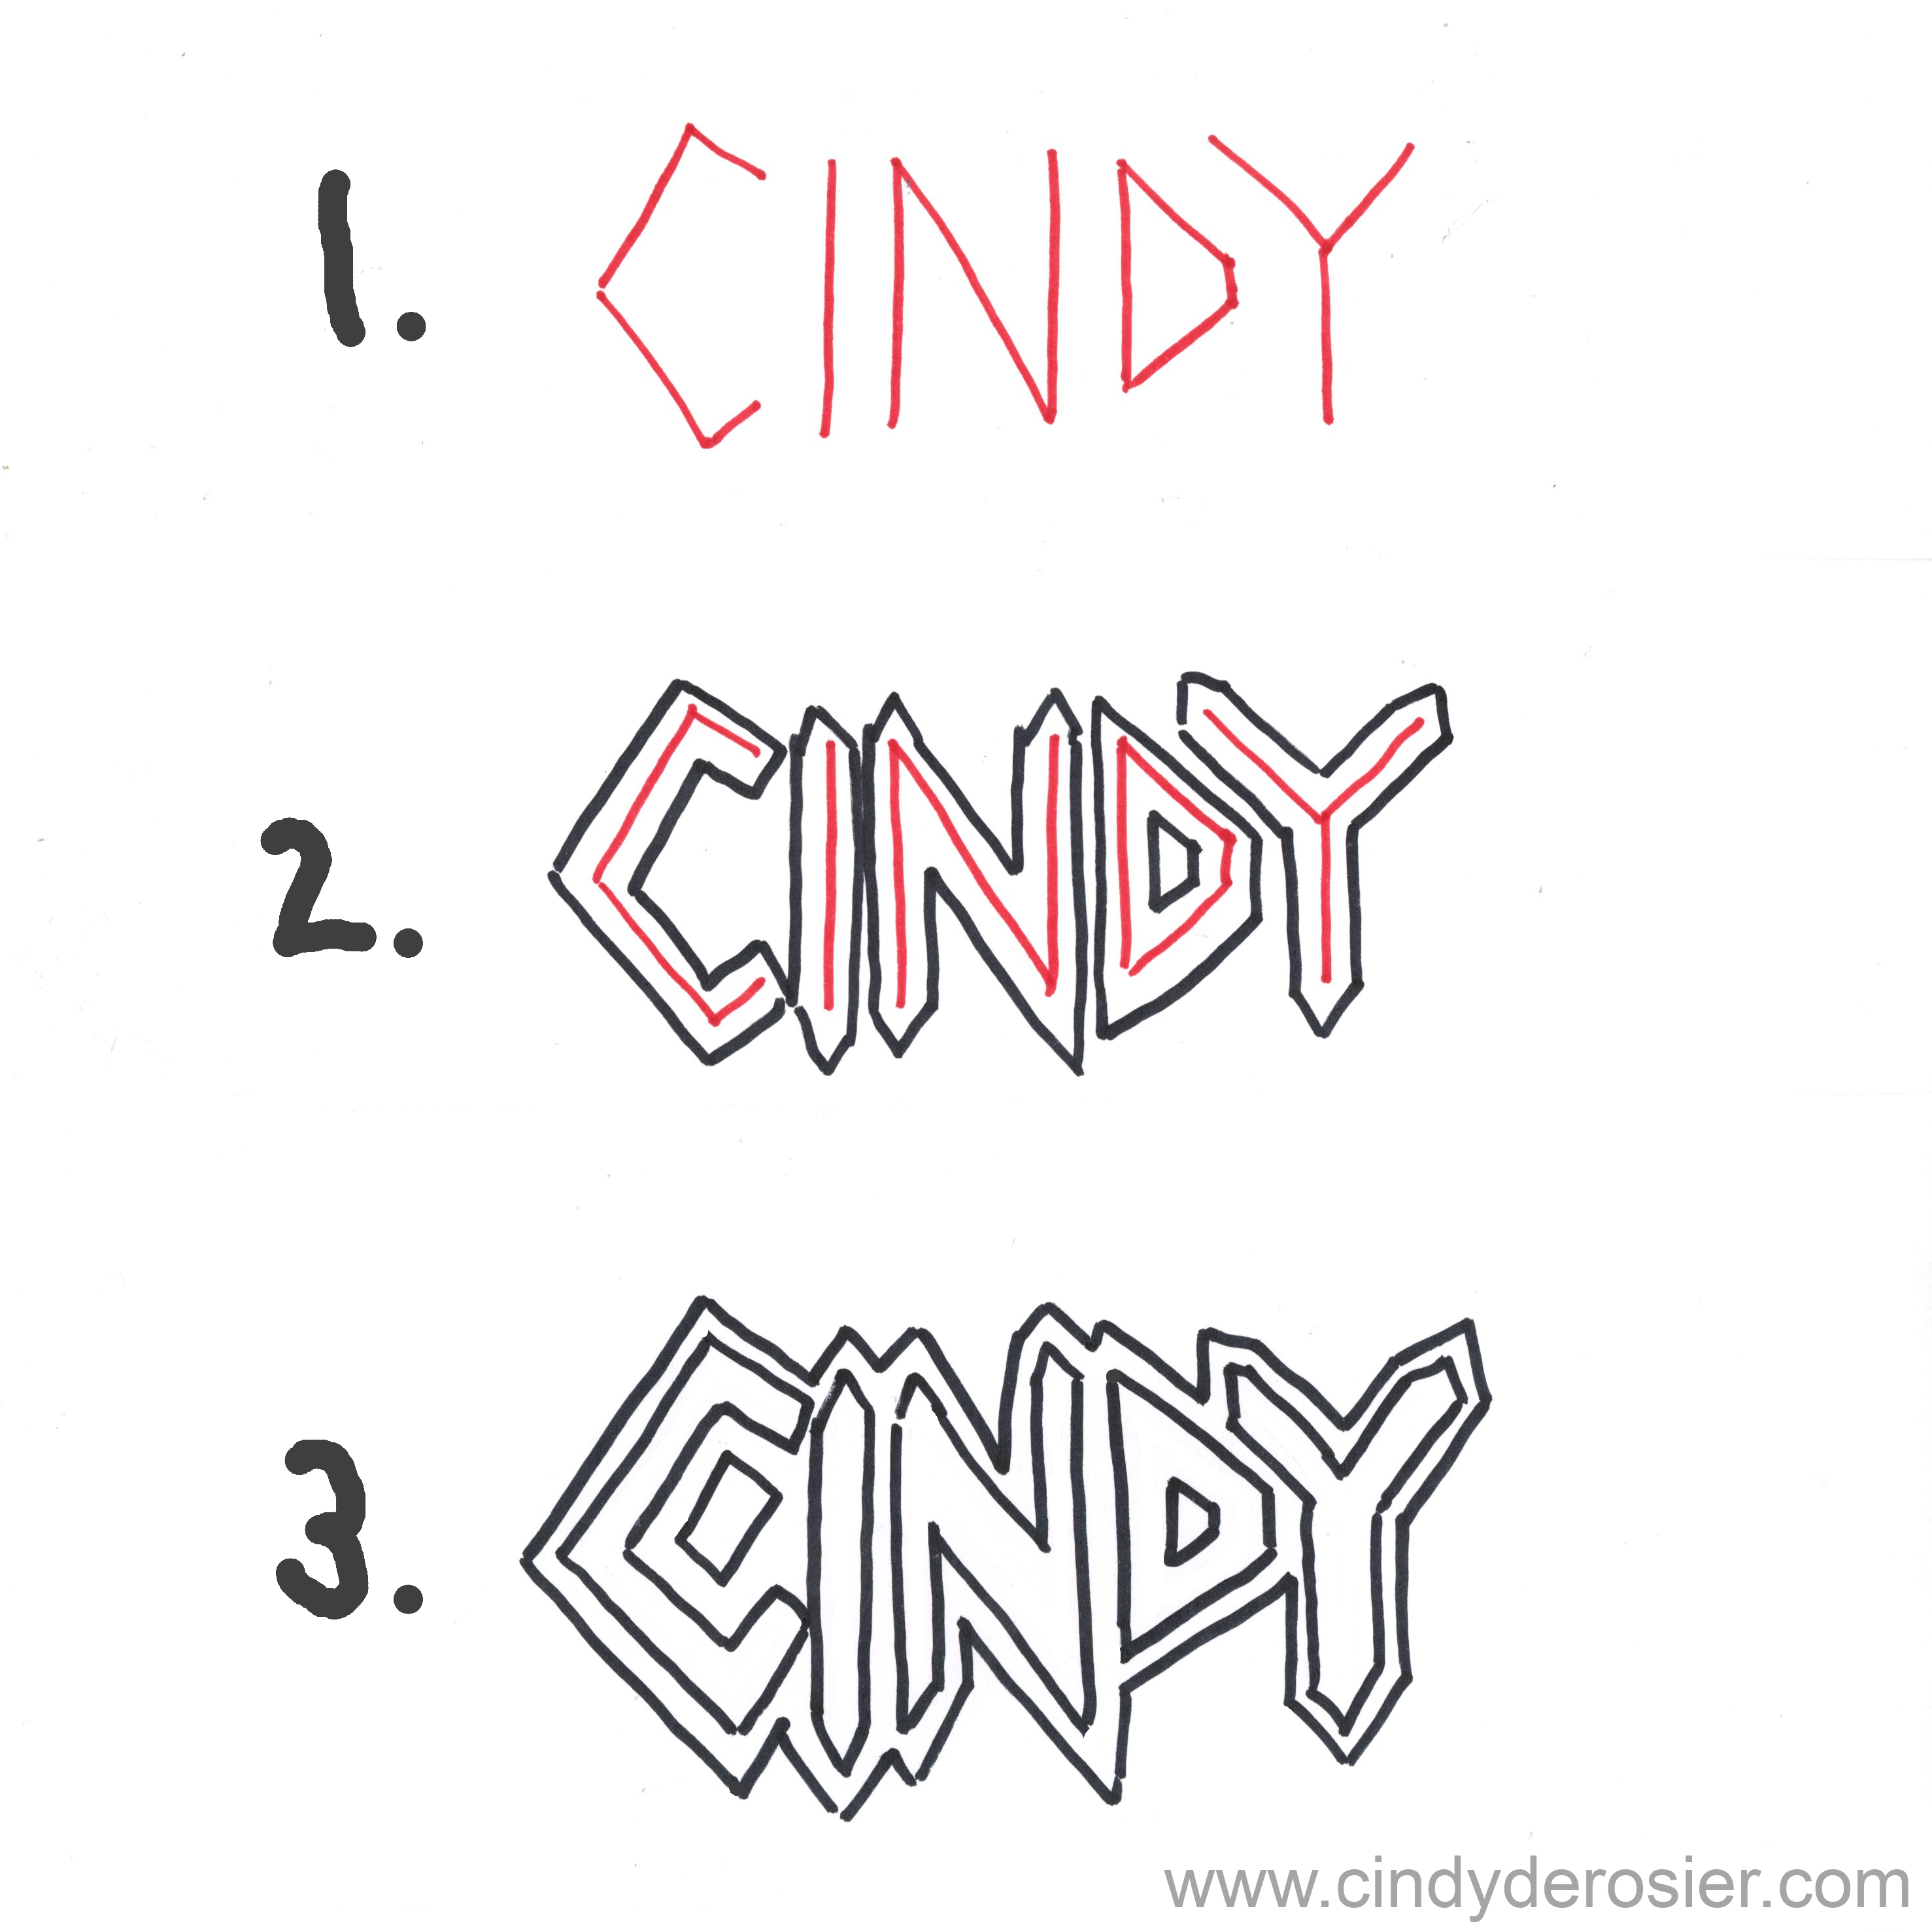
1. Start by writing your name LIGHTLY IN PENCIL in the middle of the paper. Use all capital letters and straighten any curves.
2. Outline each letter, adding a pointy end to every letter along the top and bottom of your name.
3. Erase the lines you drew in Step 1. Now, outline the entire name (as opposed to the individual letters), again adding pointy ends.

4. Color in your name however you'd like. I used three alcohol markers, which blended to look like more than just three.
5. Draw a brick pattern behind your name. Start with horizontal lines, then add vertical lines to define each brick.

6. Color in the bricks with a grey base coat.
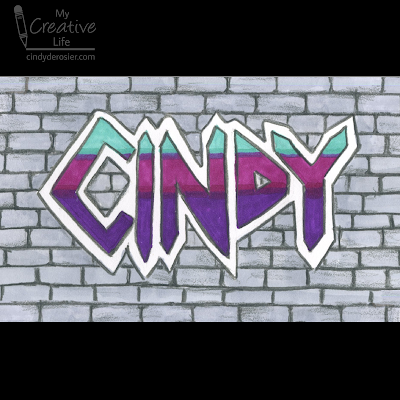
7. Outline your name with a dark grey colored pencil. Use the same pencil to outline each brick, rounding off each corner slightly. Color lightly over some of the bricks to give them a worn, dirty look.
8. Trim off the excess paper above and below the bricks.
---------
This project would look so cool in a classroom! I'm picturing one long continuous wall of names, with the bricks lined up. If I were doing that, I'd precut the papers to a uniform size before starting the lesson and I'd make sure everyone used the same color for their bricks.

Looks pretty cool!
ReplyDelete