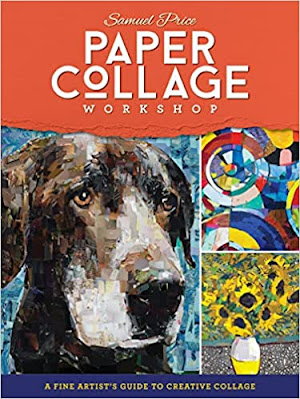
I just finished reading an excellent book,
Paper Collage Workshop, by Samuel Price (affiliate link here and below). True to its name, this book feels very much like a workshop, leading the reader through the absolute basics first before progressing to increasingly difficult skills and projects. Check out the detail in this dog portrait. Wow.
All of the projects toward the back of the book are way (WAY!) beyond my level, but that's fine. I picked up a lot of tips and tricks from Price that I used on my simple candy cane. And I am inspired to eventually try more advanced projects.
Candy Cane Magazine Mosaic
Materials:
Steps:
Draw a candy cane on the paper. Color in the red stripes, then outline the candy cane with green. No need to be perfect. This will all be covered. And, at least in my case, it still won't be perfect. But no matter!
Go through the magazine to find some large white areas. Cut out the white in the shape of your candy cane. You can do this freehand or by putting the magazine page on top of your sketch and tracing. You will probably use 4-5 different pieces to cover the whole candy cane. Paint a thin layer of glue on the candy cane and place the white pieces where they go.
Now look through the magazine and pull out sections with red. You may get lucky and find a gardening magazine about tomatoes, as I did. If not, check ads. Lots of then have red since it's attention-grabbing. Cut out the red stripes to fit the shapes, then glue them in place. This is a bit tedious, but again, there's no need for perfection. Here's how mine looked at this point:
Fill in the background with green. Again, the gardening magazine was great for this; I found a two-page spread that was almost entirely solid green. After I cut out the text and photos, I had a great amount of green to use. I started with cutting pieces to butt up against the candy cane to define its edges and cover my white and red mistakes. Then I just worked my way outward with random squares.
When the glue is dry, paint a final coat of paint over the entire surface to seal it. Other than dry time, the project took me about an hour. Obviously, the size of your project and the size you decide to cut your collage pieces will determine how long it will take you. Enjoy!