11/17/21

Art Class #2: The Art and Science of Drawing: Learn to Observe, Analyze, and Draw Any Subject

I've learned so much about coloring, specifically with colored pencils, since I began my self-created class in mid-September. What I thought would be a brief look at a few videos, books, and blog posts has turned into a much deeper dive than I'd expected. I'm enjoying every minute and have no plans to wrap up my study of coloring. 

However, the goal I'd set was to take two art classes, not one. It would be easy enough to just mark that goal as complete; after all, everything I've done as part of my coloring class could easily count as more than one class. But I intended the goal to cover two different topics, so I'm sticking with that. 

Happily, my second topic fell into my lap in the form of an offer from the publisher to review The Art & Science of Drawing: Learn to Observe, Analyze, and Draw Any Subject, by Brent Eviston (affiliate link here and below). I dove into the book the day it arrived and have been working my way through the lessons and projects ever since. 
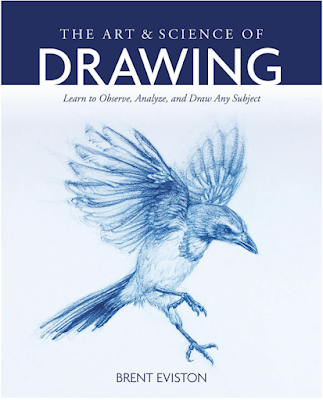
 

Eviston's philosophy is that drawing is not a talent, but rather a skill that anyone with good instruction and dedicated practice can learn. His book starts at the most basic of skills (literally, how to hold a pencil), breaking down everything you need to know in minute detail. From there, Eviston proceeds through basic shapes before moving on to 3D drawing, contour drawing, shading, and finally figure drawing. Each chapter starts with a series of lessons that each have a small project, then ends with a larger, more comprehensive project that puts those lessons to use. 

When I first started reading the book, it was so tempting to skip the early projects and get to the 'good stuff' in the second half of the book. But Eviston strongly recommends against that. Every skill builds on the previous skill. And even people who have been drawing for years have gaps in their skills and knowledge. That's definitely true for me. 

I'm about halfway through the book (meaning, I still haven't gotten to the 'good stuff') and have learned so much already. I can't wait to jump into the more advanced techniques, but I am committed to working through the fundamentals first so that I'm ready. I really like Eviston's teaching style and philosophy and am pleased with the progress I'm making. I'm seriously impressed with how much information is packed into such a relatively inexpensive book. Two thumbs up for  The Art & Science of Drawing: Learn to Observe, Analyze, and Draw Any Subject!

11/16/21

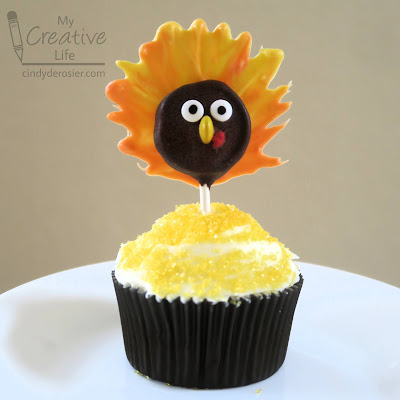
Turkey Lollipop Cupcake Topper

Pumpkin pie is ok, but frankly I'd rather have a turkey lollipop in a cupcake as my Thanksgiving dessert. Affiliate links below. 


Steps: 


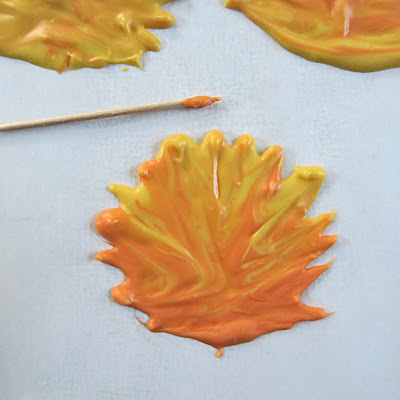
Put a sheet of parchment paper down on your workspace, then prepare the yellow and orange Candy Melts following the directions on the package. Spoon a quarter-sized dollop of orange Candy Melts onto the parchment paper, then add a nickel-sized dollop of yellow directly on top. Drag the toothpick through the candy to blend the colors and make the feathers. Repeat this process for each of the turkeys you'll be making. 


Prepare the rest of your supplies: unwrap the lollipops you'll be using, set out pairs of candy eyeballs, pick out pairs of red mini hearts, and use a sharp knife to cut the mini M&Ms in half (just press straight down, slowly and firmly).  Melt the Dark Cocoa candy melts according to the directions on the package. Dip a lollipop into the melted candy, turning to coat it on all sides. Place it on top of one of the turkey feathers, then place the the eyes, M&M (beak), and hearts (wattle) onto the face. The M&M should be sitting cut-side down and the two teeny hearts should be right up against each other without a gap. 

Repeat this for as many turkeys as you need. Let them set at room temperature for at least 15 minutes, then poke each lollipop turkey into a frosted cupcake. 


What about you? Would you rather have pumpkin pie or a turkey cupcake following the big meal? Or maybe both? Of course, you could pop these turkeys into slices of pumpkin pie or whatever else you're serving. Lots of possibilities!

11/15/21

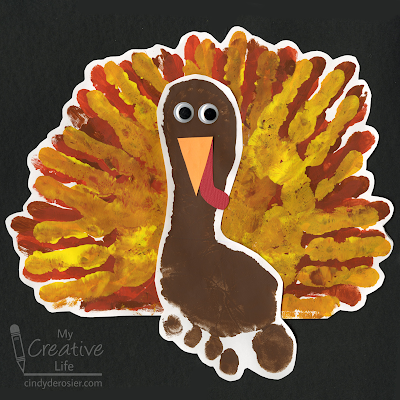
Handprint and Footprint Turkey

We're fifteen days into November and I haven't posted any turkey crafts yet. Time to change that! Today's project is a turkey made from handprints and a footprint. 


Handprint and Footprint Turkey


Materials:

  • construction paper or drawing paper (white, red, orange)
  • paint (brown, rust, orange, yellow)
  • foam brush
  • scissors
  • googly eyes
  • glue

Steps:


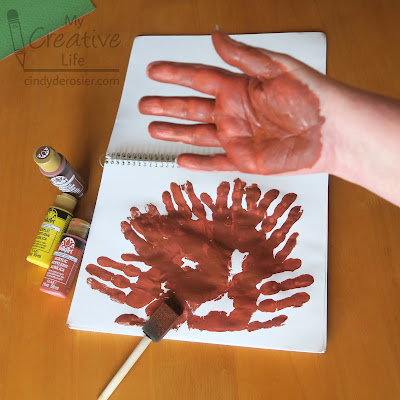
Put a sheet of white paper onto a hard floor (not carpet). Use brown paint and the foam brush to apply paint to the bottom of one foot, then step onto the paper to get a good footprint. Set the paper aside to dry, then wash your foot but not your paintbrush.
 
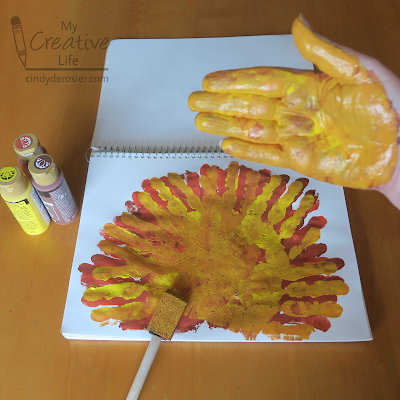
Put a second sheet of white paper onto a hard surface, like a table. Or the floor. Paint rust-colored paint onto one hand (it will mix with the brown already on the brush), then stamp it on the bottom left of the paper with your fingers pointing to the left. Add more paint to your hand and stamp five more times, rotating your hand 20°(ish) each time. You'll end up with a semi-circle of red-brown turkey feathers. Don't worry if there are gaps; they'll be filled with the next two layers. 


Without cleaning your hand or the brush, paint your hand orange. Stamp it the same way as with the rust- a total of 6 times, with each handprint rotated 20° clockwise. Do the same thing with yellow. Since all the layers are still wet, the colors will blend.  


Now you can wash your hand and the brush. Take a break; the footprint and handprints need to dry completely before you can continue. 

When the paint has dried, cut out the footprint, leaving a small border of white around the edges of the print. Do the same with the handprint feathers. Then cut out an orange triangular beak and a red wattle. Glue the footprint to the feathers, then add the googly eyes, beak, and wattle. 


Tomorrow I have a fun edible turkey craft to share. 

11/12/21

How to Draw Pumpkin Pie

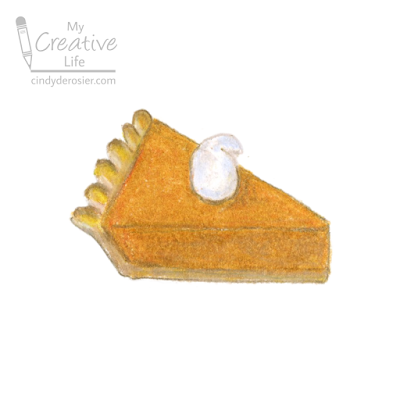
I'm a huge fan of integrated curriculum. Art pairs well with literally every other subject area, and I'm particularly fond of using art projects to reinforce math vocabulary. Many teachers draw pie as a way to teach students about pi, but there's no reason to stop there. Back in my teaching days, I enjoyed giving my students drawing instructions using geometry terms they'd recently learned. This slice of pumpkin pie provides an excellent example of a scalene triangle. 


How to Draw Pumpkin Pie


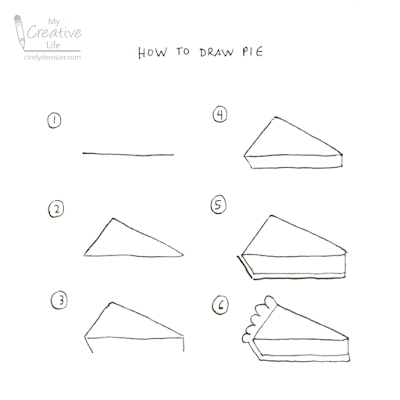
  1. Draw a horizontal line segment in the center of the paper. 
  2. Use that line segment as the base of a scalene triangle. The base should be the longest side of the triangle. This is the top of your pie. 
  3. Add two short line segments onto the base of the triangle. The one on the left should angle down and to the right. The one on the right should be vertical. 
  4. Draw a horizontal line connecting the two new line segments. It should be parallel to the original line segment. Now you've finished the pie filling. 
  5. To draw the bottom of the crust, find the obtuse angle you made in the previous step. Draw the same angle slightly below the other one, extending the line segments the same length as the others. 
  6. Finish the crust by drawing a series of scallops along the shortest side of the scalene triangle.  


This drawing gave me an idea I'm excited to test. If it works, I'll share the results with you next week. If it doesn't, forget I said anything. 


11/11/21

Shrinky Dinks Gift Charms

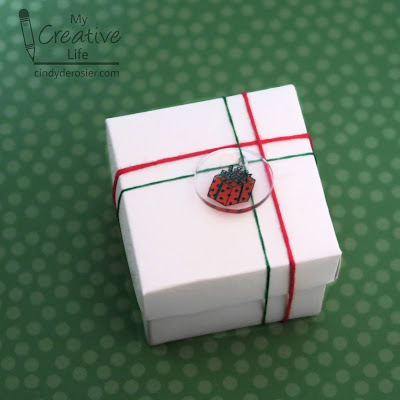
I was obsessed with Shrinky Dinks when I was a kid. But other than dangling my very favorites from the laces of my roller skates, I never really knew what to do with the dozens of shrunken charms I made. It turns out, I could have been using them as gift toppers. Isn't it the perfect touch for this teeny tiny gift box?!


Way back in my first year as a blogger, I did a lengthly comparison of how different art materials performed on Shrinky Dinks. This time, I tried one of my craft room staples that I didn't use last time: Sharpies. Specifically, I used the Ultra Fine Point Sharpies that I LOVE. (Affiliate link here and below.) I stamped an image and colored it in, but you could trace or draw freehand to make your charms. And, of course, you can vary the size however you'd like. Anything goes!


Shrinky Dinks Gift Charms


Materials:


Steps:


Punch 2" circles from the shrink plastic, then punch a 1/4" hole at the top. Stamp the image onto the circles, then color in the designs with Sharpies. Follow the directions on the package to shrink the gift charms. 

When the charms are cool, thread them onto strands of embroidery floss. Tie the embroidery floss around a wrapped gift and it's ready to give!