Showing posts with label pom pom. Show all posts

3/20/26

Puzzle Piece Flower Bouquet

Puzzle pieces make beautiful flowers. This is a fun craft for your guests to make during a puzzle themed party, or you can make them ahead of time as decoration. Affiliate links below. 

Paint a coat of gesso on to the puzzle pieces. When it is dry, add a coat of acrylic paint. Use a colored pencil to add lines that mimic the veins and ridges of petals. Then glue a pom pom in the center of the flower. 


Twist the pipe cleaners to form leaves. I made two leaves with stems and two without. I recommend making all the leaves with stems, as you can always cut them off later. Add a coat of glue to each leaf and lay it on top of tissue paper. 


When the glue is dry, cut around each leaf. Twist the stems of the flowers together. 


Twist the stems of the leaves around the flower stems. (I did that with the two I had, then glued a third leaf in place. I didn't use the fourth leaf.) Arrange the flowers in the vase. 


I love how my puzzle piece bouquet turned out! It's going on display next to my Lego flowers

11/11/22

Puzzle Piece Ornament: Kids Catching Snowflakes

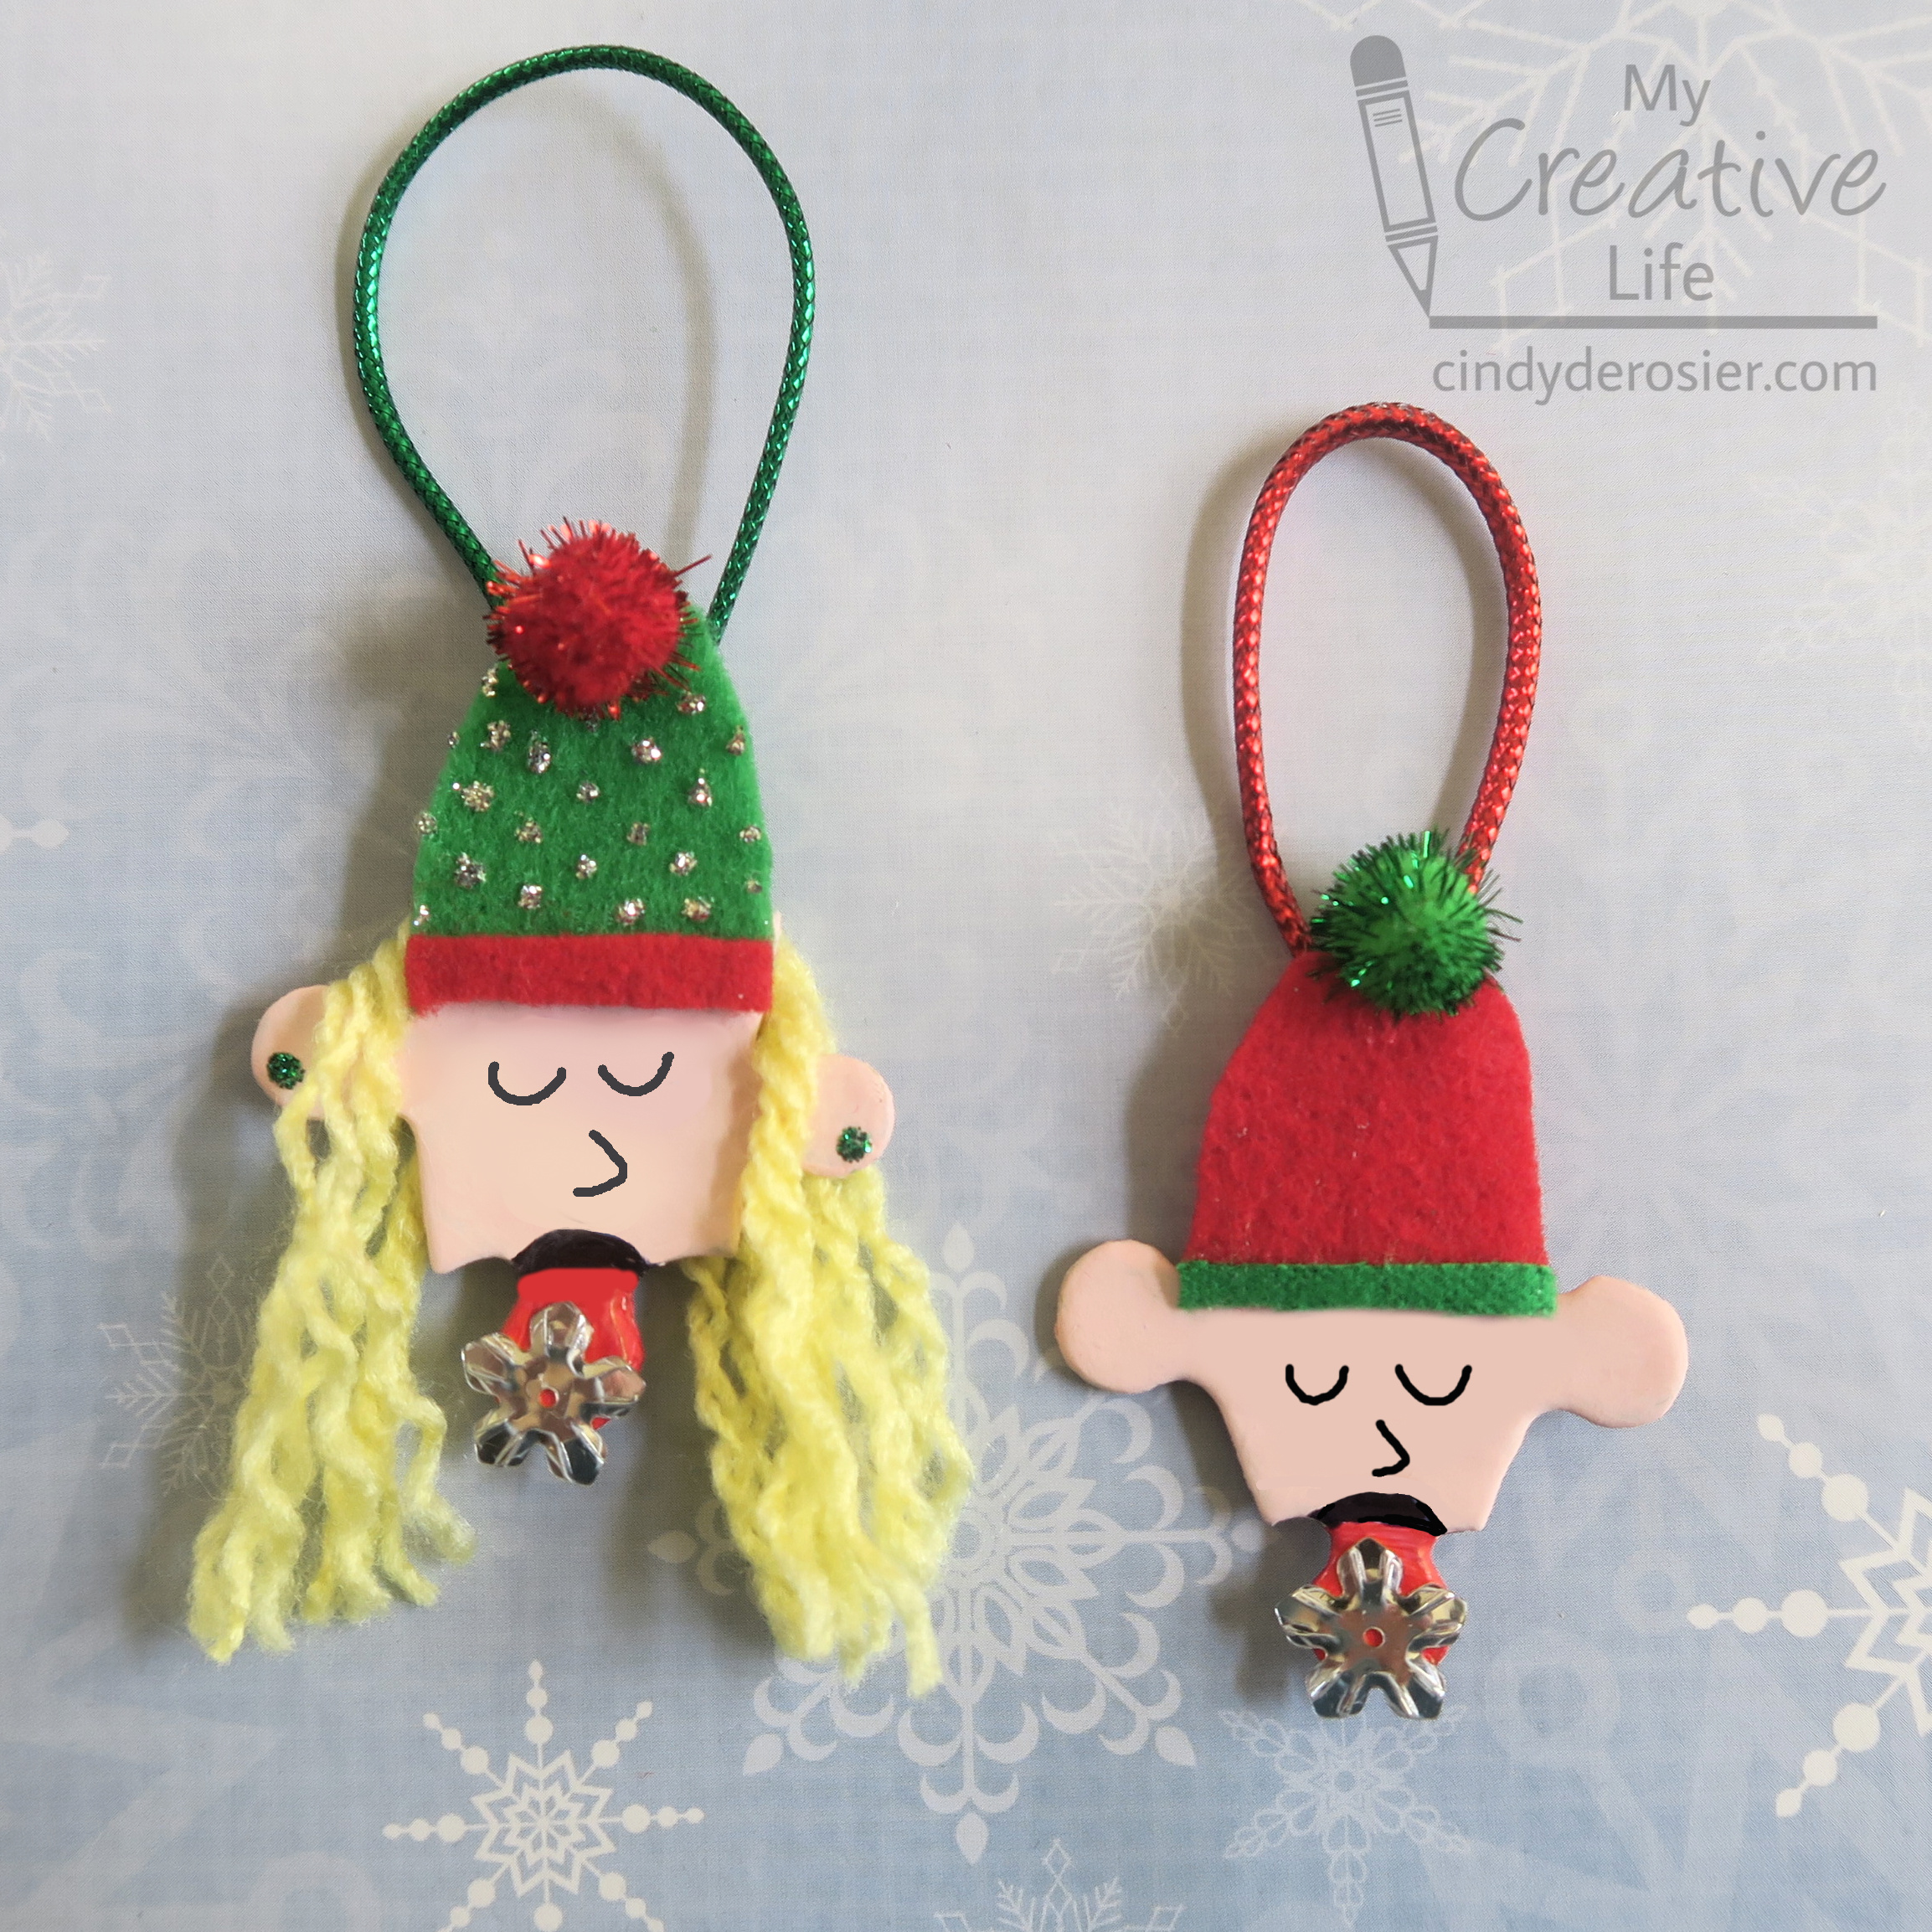
I love crafting with puzzle pieces. Thanks to the horrible puzzle company that shall not be named, I have a lifetime supply. I used two to make this pair of ornaments.  


Puzzle Piece Ornaments: Kids Catching Snowflakes


Materials: 


Steps: 


Prepare the puzzle pieces by gently sanding them to remove the glossy finish. (Skip this step if you are using puzzle pieces made specifically for crafting.) Paint each piece with your desired skin tone. 

When the paint is dry, use a red Sharpie to color in the tongue. 


With a black Sharpie, color the open mouth above the tongue. You can draw the rest of the face now (eyes and nose) or wait until later. Glue a snowflake to the end of the tongue.

Make the hats from felt. I used a contrasting color for the band. Glue the two parts together, then glue them to the puzzle pieces. Add a piece of metallic cord for the ornament hanger.  

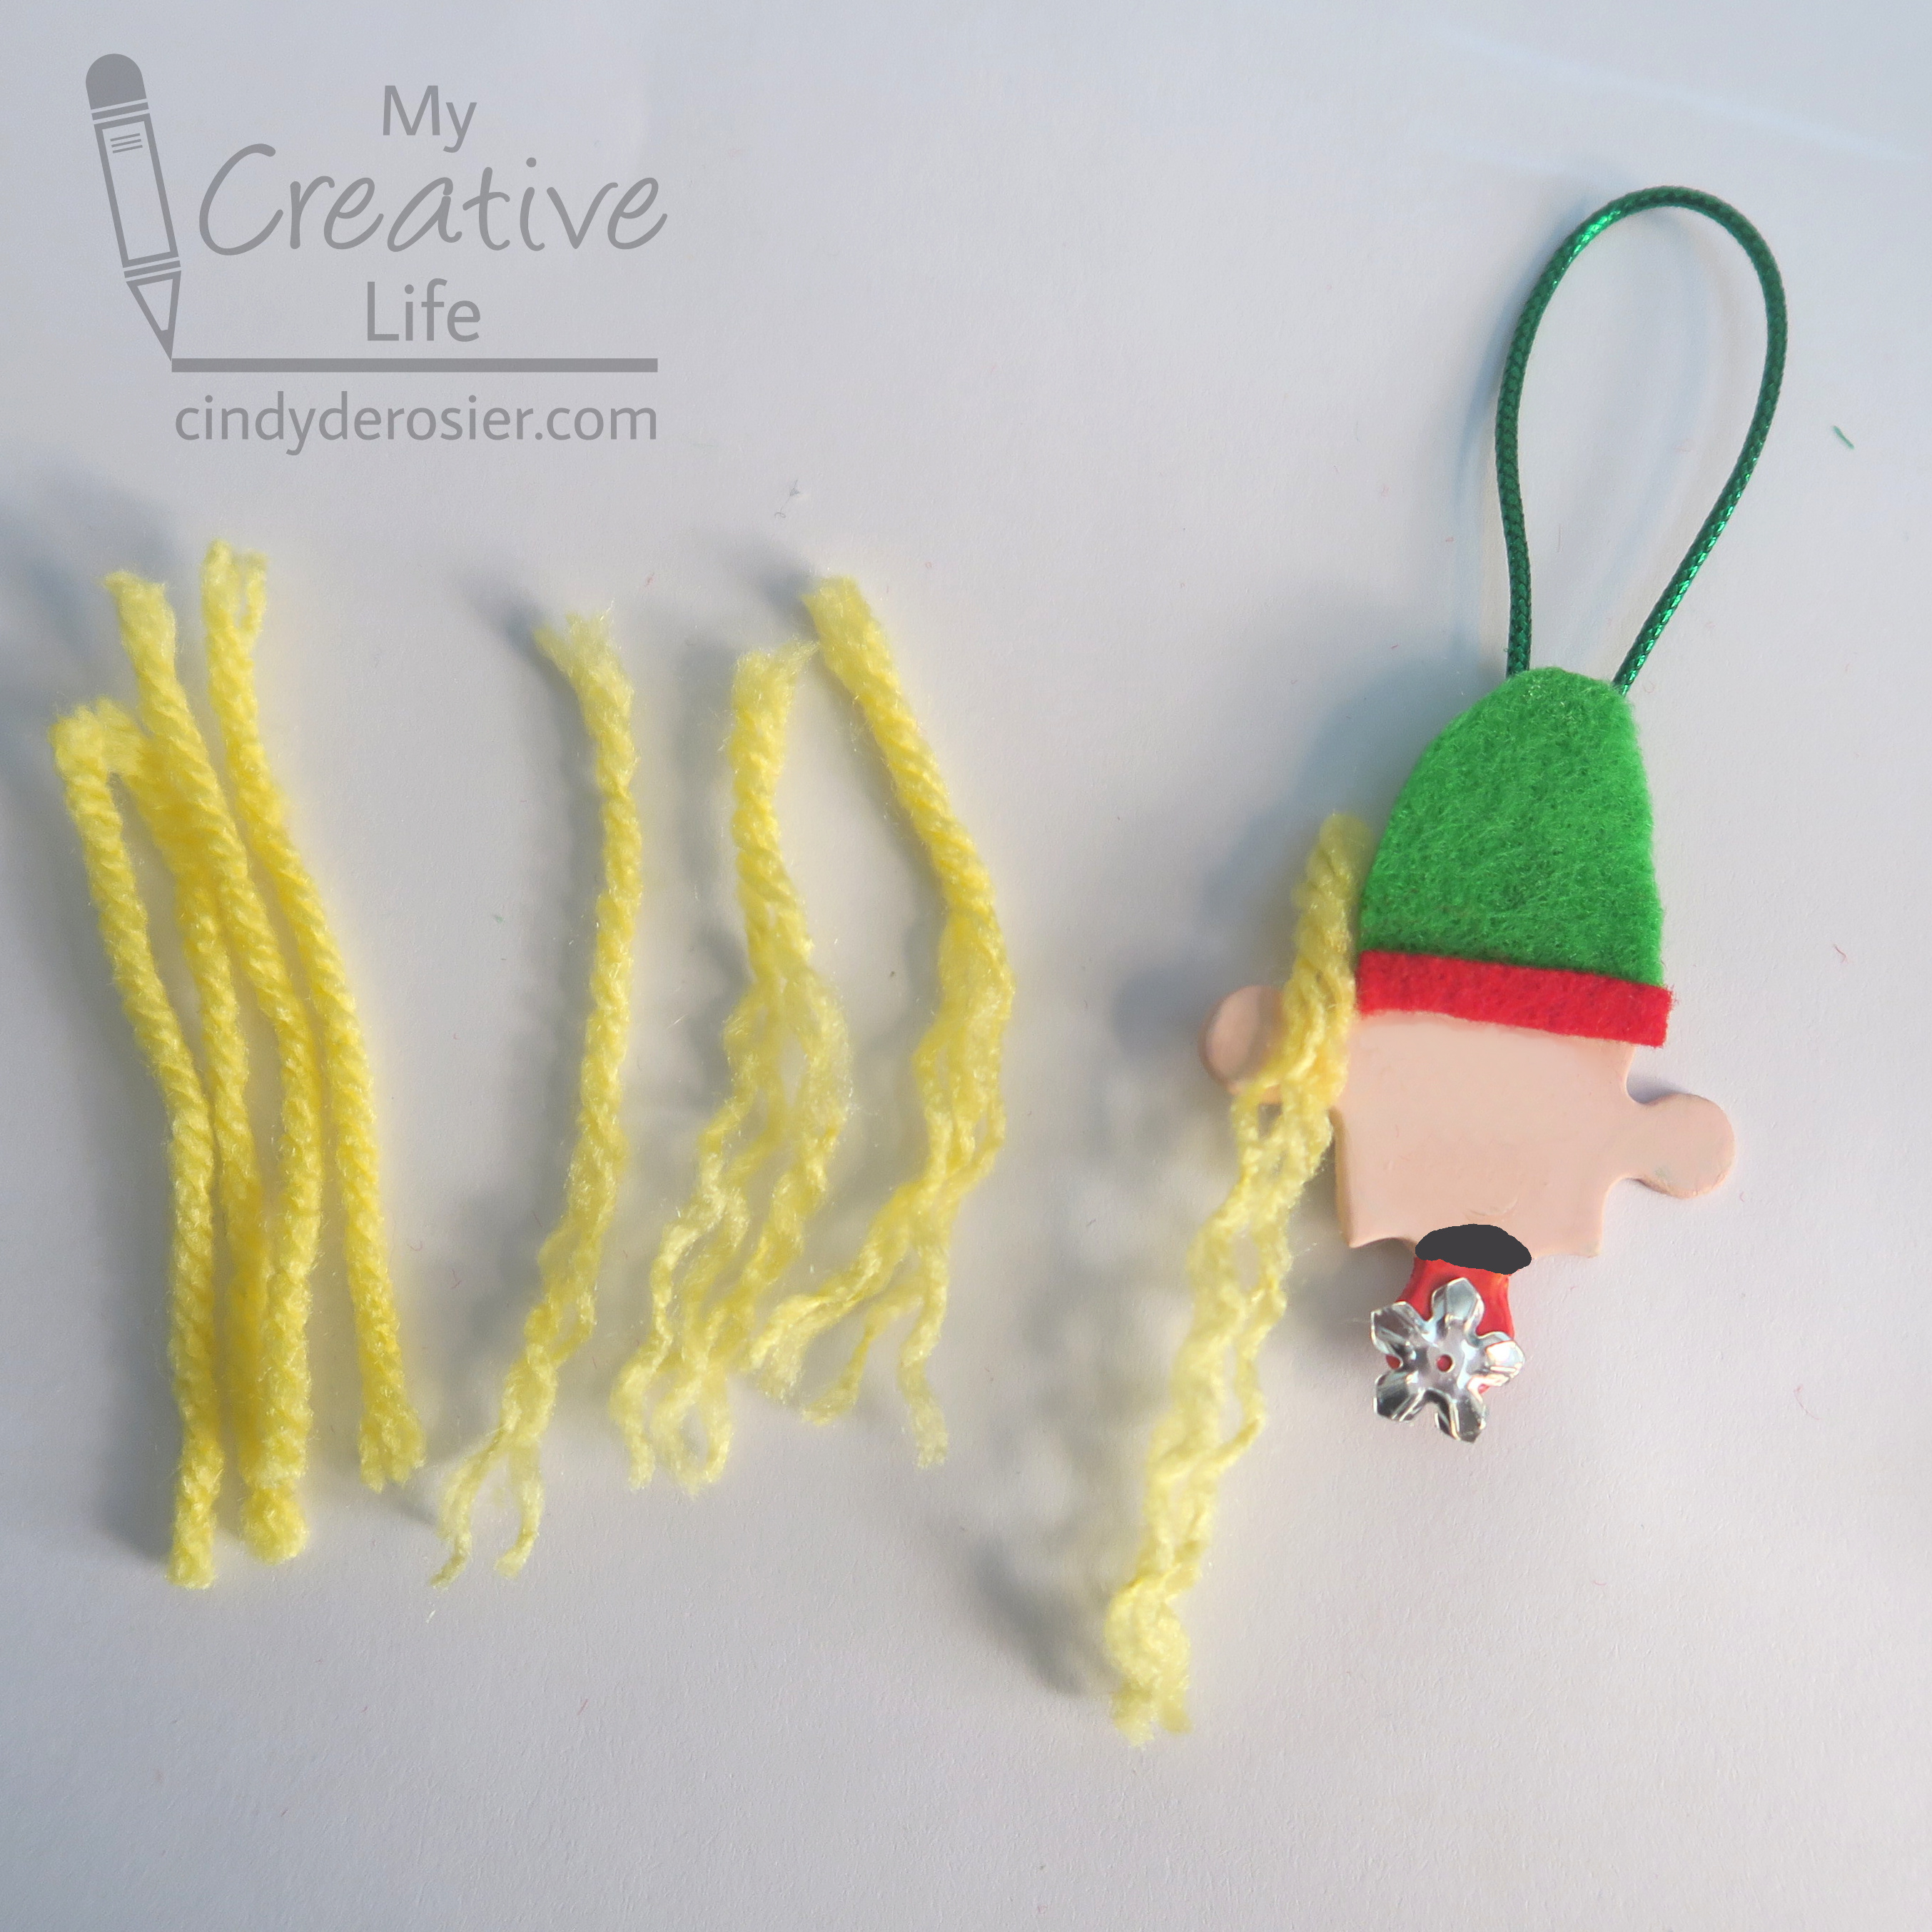
Cut lengths of yarn to make the hair. Leave it as is, or untwist it to get wavy hair. Glue it in place. Obviously, you can change the hair color and length, style it differently (ponytails or braids would be cute), or leave it off entirely. 


Decorate with Stickles. I put silver dots on the girl's hat and green dots for her earrings. I left the boy undecorated. Finally, glue the glitter pom pom to the hat. 


Only 46 days until Christmas! 

12/15/21

Paddle Spoon Reindeer Ornament

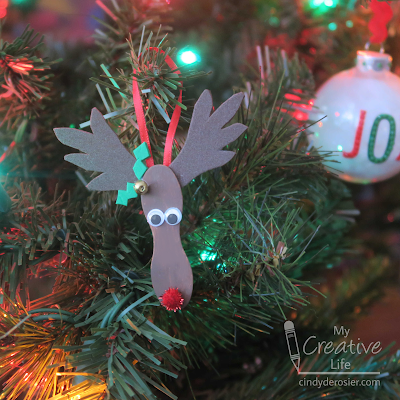
This is my latest homemade ornament, which I'm calling a Paddle Spoon Reindeer because "paddle spoon" is the search term that finally worked when I tried to figure out what to call the mini wavy craft stick that makes up the reindeer's face. It's hanging right by my Diamond Dotz Joy ornament. Slowly but surely, the homemade ornaments are crowding out the store-bought ones on the tree (as it should be). Affiliate links below.    


Paddle Spoon Reindeer Ornament


Materials:


Steps: 


Paint the paddle spoon brown and set it aside. Cut the brown craft foam to make a pair of antlers, then cut the green craft foam to make two teeny holly leaves. Cut a length of ribbon to make the hanger.

Glue the antlers behind the paddle spoon, then glue the eyes, pom pom, holly leaves, and bell in place. When those are dry, glue the ribbon hanger to the back. 

12/5/19

Pipe Cleaner Wreath Ornament

If you're not familiar with Red Ted Art, it's well-worth checking out. While I don't personally know Maggy, I've admired her kid-friendly crafts for years. Today's project is inspired by Maggy's Easy Yarn Wreath Ornament. I was curious to see what would happen if I switched out the yarn for pipe cleaners. I love the result! Affiliate links below.


Pipe Cleaner Wreath Ornament


Materials:


Steps:


Trace a 3" circle with a 2" inner circle on chipboard. Cut out the pieces to make the base of your wreath.

Snip a green pipe cleaner in half and set one piece aside. Fold the other piece in half, and hold it behind the base with the folded end pointing toward the outside of the wreath. Bend the two ends up and over the base, then thread them through the folded end. Pull tight. 


Continue adding pipe cleaner halves until the whole base is covered. 


Give the pipe cleaners a trim so that all the ends are even.


Bend the outer portions of the pipe cleaners to the left to mimic the way a real wreath is assembled. 


Cut a length of monofilament and tie it around the wreath to make a hanger. 

Take a red pipe cleaner (don't snip it in half like the green ones) and twist it to form a bow shape. Glue it to the wreath, covering the monofilament hanger. Add colorful pom poms to the wreath, including a red one in the center of the bow. 


Hang your finished wreath on the tree, use it as a gift topper, or slide it down the neck of a wine (or sparkling cider) bottle for a fabulous hostess gift!

11/18/19

Cardboard Tube Reindeer Gift Packaging

When you're a craft blogger, literally everything is a potential craft supply. Even the cut-off sleeves from a reindeer costume. In this case, those sleeves became gift wrap that looks like a reindeer and hides fun surprises inside. Affiliate links below.


Cardboard Tube Reindeer Gift Packaging


Materials:


Steps:


Cut the sleeve into two pieces. Set the piece without the seam aside and cut the seamed piece into half. 

Gather holiday washi tapes, candies, and other small gifts. Test that everything fits into the cardboard tube. 


Wrap the non-seam piece tightly around the cardboard tube. Stuff the excess material into the tube on both ends. This will secure the fabric in place. No glue needed!


Wad the two extra piece of sleeve material into the two ends of the tube. This prevents the items from falling out. Cut roughly 1/3 off each pipe cleaner. Take that cut piece and twist it around the larger piece to form 3-pronged antlers. Slide the antlers into the tube. Still no glue needed. The material will hold it in place. 


Stand the reindeer upright. Use the Supertite to glue googly eyes and a pom pom nose to the reindeer. Now nestle the reindeer among the other gifts under the tree.


Quick and easy, and so super cute!

9/23/16

Two-in-One: Cardboard Tube Bear or Dog

My latest cardboard tube project is a bear:


Or a dog. It's the same tube. I just changed out the ears.


Materials: cardboard tube, paint (dark brown, white), scissors, craft glue, googly eyes, black mini pom pom

Paint the cardboard tube dark brown. Add a drop of white paint to the brush and wipe it on the inside of the tube until no more comes off. This will be the muzzle and tummy. When the paint is dry, cut one of the halves open.


Use that open piece to cut the muzzle and tummy from the light brown interior. Use the dark brown part to make rounded ears for the bear, or pointy ears for the dog. Cut a slit halfway up the center of each ear. Slide the ears of choice onto the edge of the tube.


Glue the muzzle and tummy in place, securing them with a rubber band until the paint is dry. Add the googly eyes and pom pom nose. Done!

8/31/16

Build Your Own Catapult

My next Little Passports writing assignment was about homemade catapults. Right up Trevor's alley!


Materials: 
plastic spoon, tongue depressor, cork, 2 rubber bands and pom poms


Use the rubber bands to connect the spoon to the tongue depressor. Slide the cork under the neck of the spoon. Put a pom pom in the bowl of the spoon and you're ready to go!


I'd be remiss if I didn't mention some important safety considerations. Never point a catapult at people or animals. Launch soft items, such as pom poms, cotton balls, or marshmallows. Choose a clear area, such as the backyard, where nothing will be broken or damaged. 

Trevor experimented with several different methods of launching pom poms, starting with the catapult on the ground. 

He discovered he improved his accuracy by holding the catapult upright. 


There are so many ways to use this catapult for family fun! Set up hoops or buckets with points for each pom pom that lands inside. Use the catapult and pom poms in place of bocce balls. Draw chalk targets on the garage door and try to storm the castle. What other games can you dream up?

4/8/16

Very Hungry Caterpillar Pencil

Who loves Eric Carle? Everyone, that's who! I love all of his books, but like most people, my favorite is The Very Hungry Caterpillar. In fact, that was the theme for Trevor's 1st birthday party! I had so much fun designing and making the cake way back when. This Very Hungry Caterpillar Pencil would have been such a fun party favor. Too bad I thought of it nine years too late.


The inspiration for this project came from Easy Foam Crafts (affiliate link here and below). The project in the book is the Inch Worm Pencil. I made a few tweaks to the directions to turn it into a Very Hungry Caterpillar Pencil.


-------

Very Hungry Caterpillar Pencil


Materials: 


Steps: 


Begin by cutting the green foam into a long, narrow strip. Mine is around 9" x 1", but it's certainly not exact. Round off the corners, then use the hole punch (I used my Crop-a-Dile) to punch holes. Once again, it's obvious I didn't measure. Close enough! Cut the green scraps to make a roughly gumdrop-shaped nose and two oval inner eyes. Cut two oval outer eyes from yellow, then two antenna from purple.


Thread the green body piece onto the pencil, leaving the writing end free. 


Fold the end of the body over and glue it to the top of the pencil. (Skip this step if you want the eraser to be accessible. I used a color pencil without an eraser.) Glue the head in place. Add the eyes, nose and antenna.


I'm really happy with how my caterpillar looks. I might need to make some foam foods for him to enjoy....

3/21/16

Felt Rabbit Electronics Case

Remember the cute rabbit finger puppet that Trevor made? It was inspired by the Monster Finger Puppets in the book, Crafting with Felt (affiliate link). Today, I'm sharing Trevor's next project from the same book. It's a felt electronics case. And, of course, it's shaped like a bunny.


The book has patterns and detailed instructions to make four different felt phone cases: a lion, a bear, a frog and a pig. They are adorable, but around here it's all rabbit, all the time. Trevor does not have a phone, so he decided that his rabbit would be a case for his DS and the charger.


-------


Felt Rabbit Electronics Case


Materials: 


Step one was carefully reading the directions. Trevor does not have much sewing experience, so I told him to read the directions out loud for the animal that was the closest to what he was picturing in his head for the rabbit. That was the bear. The directions were easy to understand. We talked about how to adapt the ears from bear to rabbit, how the face would differ, and what changes Trevor would need to make for the fact that his DS is larger and thicker than a phone. Once I was confident he knew what he was doing, I got out the materials he needed and he dove right in.

Trevor began by putting his DS and charger on a piece of scratch paper to see what size he needed. Then he cut two pieces of grey felt to that size. He cut two grey ears, two black eyes, a pink nose, two pink inner ears, and a white tummy.

He used hot glue to attach the facial features, the tummy, and the ears to one piece of grey felt. He glued the pom pom to the other piece of felt. Then it was time to tackle the sewing. The book has handy illustrations of the various embroidery stitches, so Trevor was able to look at the picture to figure out how to make a blanket stitch. 


It was hard for him at first. He took a break at the halfway point, but came back 15 minutes later and finished the rest quickly. 


The photo at the top of the post has the DS and the charger inside the rabbit case. Here's the rabbit sitting next to the DS and charger:


And the back:


We've had a lot of fun with this book. Big thanks again to Leisure Arts for providing us with it! Leisure Arts has a fantastic collection of craft books and coloring books for all ages. Trevor and I will be reviewing a different book in April, so be sure to check back. In the meantime, head over to Leisure Arts to see if anything catches your eye!


1/30/15

Twisteezwire Critters

I was browsing the Twisteezwire website while writing up my review of their Mask Kit when their Puzzle Piece Bug tutorial caught my eye. I'm always on the lookout for fun crafts using puzzle pieces! (You may recall the ridiculous situation with a puzzle purchase awhile back that resulted in me having a large stash of useless puzzle pieces.) I showed the tutorial to Trevor and he was totally onboard with the idea of making puzzle piece Twisteezwire bugs. Affiliate links below. 

We each started by choosing a puzzle piece and Twisteezwire. We followed the steps to make three sets of legs to create a basic insect. We continued with the antenna. Then we used Glue Dots to attach googly eyes. With the basic technique mastered, we were able to use our own creativity to make some totally cute (if I do say so myself!) critters. Introducing....
  

Dot, the Ladybug
(by Cindy)


To make Dot, you need a red puzzle piece, 3 Twisteezwires (red, black, and white), six red beads, two googly eyes, glue dots, six black sequins, glue, and wax paper. Make a basic bug with the puzzle piece, red legs, and black antenna. Slide a bead about 1/2 inch up each leg and twist to secure. Add eyes. Create wings by looping the white wire, sliding it through a set of legs on the underside of Dot, then forming another loop. Tear two small pieces of wax paper that are slightly larger than the loops. Put glue on the back of the loops, then attach the wax paper. Let the glue dry completely, then trim the excess wax paper away from the loops. Glue the sequins to Dot's back.


Buggy, the Bug
(by Trevor)


To make Buggy, you need an orange puzzle piece, two Twisteezwires (green and orange), six orange buttons, two googly eyes, and glue dots. Make a basic bug with oversize antenna. Thread each leg through the button holes, then twist to secure. Add eyes.


Chesapeake, the Blue Crab
(by Cindy)


To make Chesapeake, you need a neutral-colored puzzle piece, Twisteezwire (blue and black), eight blue beads, two black beads, glue dots and googly eyes. Start by making a basic bug. Add a bead to each of the middle and back legs, twisting to secure. Add two beads each to the front two legs to form claws. Cut a small length of black wire for the eye stalks and attach like you would antenna. Glue googly eyes in place.


Spinner, the Spider
(by Trevor)


To make Spinner, you need a neutral puzzle piece, tan Twisteezwire, a large black pom pom, a medium black pom pom, glue, glue dots, and googly eyes. Begin by cutting the tan Twisteezwire into fourths, not thirds like usual. Attach the first three sets of legs as usual, and add the final set of legs opposite the third set, using the same technique. Bend up the end of each leg slightly to allow Spinner to balance. Glue the large pom pom onto the back of the puzzle piece and the medium pom pom onto the front. Use glue dots to attach the googly eyes to the face.

........

What do you think? Any favorites? Trevor is already talking about the next set of critters we're going to make!

6/24/14

Spider Napkin Ring and a Fair Wrap-Up

Yesterday I shared the spider-themed tablesetting that Trevor entered at the county fair.  His napkin ring was my favorite part.  I had absolutely nothing to do with making it, other than cutting the cardboard tube, then plugging in the glue gun and monitoring its use.  The design and implementation is 100% Trevor.


Materials: empty cardboard tube, black paint, 2 brown pipe cleaners, black pom pom, brown pom pom, 2 black seed beads, scissors, hot glue gun, and craft glue.

Begin by cutting about 2 inches off of a cardboard tube.  Paint it black and let it dry. Meanwhile, bend one pipe cleaner into something that looks approximately like this:


Bend the other one in mirror image.  Heat up the glue gun.  Line up the two pom poms and two pipe cleaners like in the photo and glue them together, then glue the whole thing to the napkin ring.  Use craft glue to attach the seed beads.  Done!

We did a lot more than just Trevor's tablesetting contest while we were at the fair.  Top priority though was seeing how his other entries did.  Here's his entry in the poster contest.  First place!


The Pinewood Derby cars aren't judged in the 5-8 year old category.  They just receive a participation ribbon.... unless they are selected as Judge's Favorite!


You can see a much better photo of Trevor's "Toothless" car here.


Trevor was thrilled with his Judge's Favorite, first, and third places.  A very fine showing, indeed!  He's entered the bulk of his art and craft projects in our local county fair, which isn't until August.  So expect another fair wrap-up in about 7 weeks!

12/19/12

Puzzle Piece Reindeer

Last Christmas, I bought Trevor a "Can You See What I See?" puzzle. He loves Walter Wick's books (affiliate link here and below) and he loves puzzles, so he was really excited when he unwrapped it. When he dumped out the pieces, we were both shocked by what we saw. Dozens of bent pieces. Many pieces with the picture de-laminated from the back. Pieces that looked like they'd been stepped on.

This was not a cheap dollar store puzzle. It was not a thrift store find. This was a brand-new, perfectly packaged $10.99 puzzle. This was a puzzle that should have lasted for decades. Instead, it was utter garbage.

I immediately contacted the manufacturer, an American company who I won't name (though I will say it begins with a C, so that no one mistakenly thinks I'm referring to any of the many awesome puzzle manufacturers). They offered to replace the puzzle. And then I didn't hear anything for over a month. I contacted them again. After 8 more weeks, the new package arrived. We opened it... um, wow. Instead of a 300 piece "Can You See What I See?" puzzle, Trevor received a 150 piece puzzle with pastel cats on it.  

Now, I'm sure there are school-age boys who like pastel cats, but Trevor isn't one of them. I called the company again and demanded a refund. They ignored me. I called, emailed, and mailed a copy of my email to their office. At that point, they told me that they only do wholesale, so they can't issue refunds. The store where I bought it wouldn't do a refund either. Eventually (when they realized I wasn't giving up), the company offered a replacement puzzle. Again. In May, 5 months after Trevor had opened his Christmas gift, he was finally able to do the puzzle I'd bought him.

So what's my point? Well, when I finally received a satisfactory replacement puzzle, the company told me to keep the damaged puzzle. I weeded out the 80+ pieces that were completely mauled and put the remaining ones into a Christmas tub so that we could use them for crafting. Today I'm sharing our first puzzle piece craft. 


Puzzle Piece Reindeer


Materials 


Steps: 


Sand the front of each piece to remove the shiny gloss. The piece on the left has not been sanded; the one on the right is perfect.

 
Paint the pieces brown and let them dry. It will probably take two coats. Glue the border piece on top of the two inner pieces.  

 
Add googly eyes and a pom pom nose. Glue the cord in the back between the two antler pieces.

 
Here it is, hanging on the tree.

 
I love our finished reindeer. At least some good came from one of the worst customer service experiences of my life!