
I LOVED roller skating when I was a kid. Roller skating on the sidewalk was ok, but the roller rink was my true love. My friends and I spent many happy hours at our local rink, Roller King. General Skate was great, but I especially loved the contests, particularly Shoot the Duck, Lucky Dice, and Limbo. My days as a limbo champ are way behind me, but few things in life beat the thrill of knocking out the competition and claiming your free concession vouchers at the DJ booth. Ah, memories!
Two of the defining characteristics of a 1970's roller rinks include blacklight and wildly-patterned industrial carpet, which went up the walls and covered the benches. I loved both of these. I always made sure to wear clothes that would look awesome under the blacklight when I skated. I loved trying to follow the patterns on the carpet. Today's project is an ode to the roller rink of my youth. Affiliate links below.

Groovy Glowing Tape Resist Art
Materials:
- white cardstock
- circle punches
- acrylic or watercolor paper
- 1/4" painter's tape
- Folk Art Glow paint (yellow and pink)
- Folk Art paint (blue and black)
- craft glue
Steps:
Punch 20+ cardstock circles in a variety of sizes. Divide them into four piles for the four paint colors you'll be using.
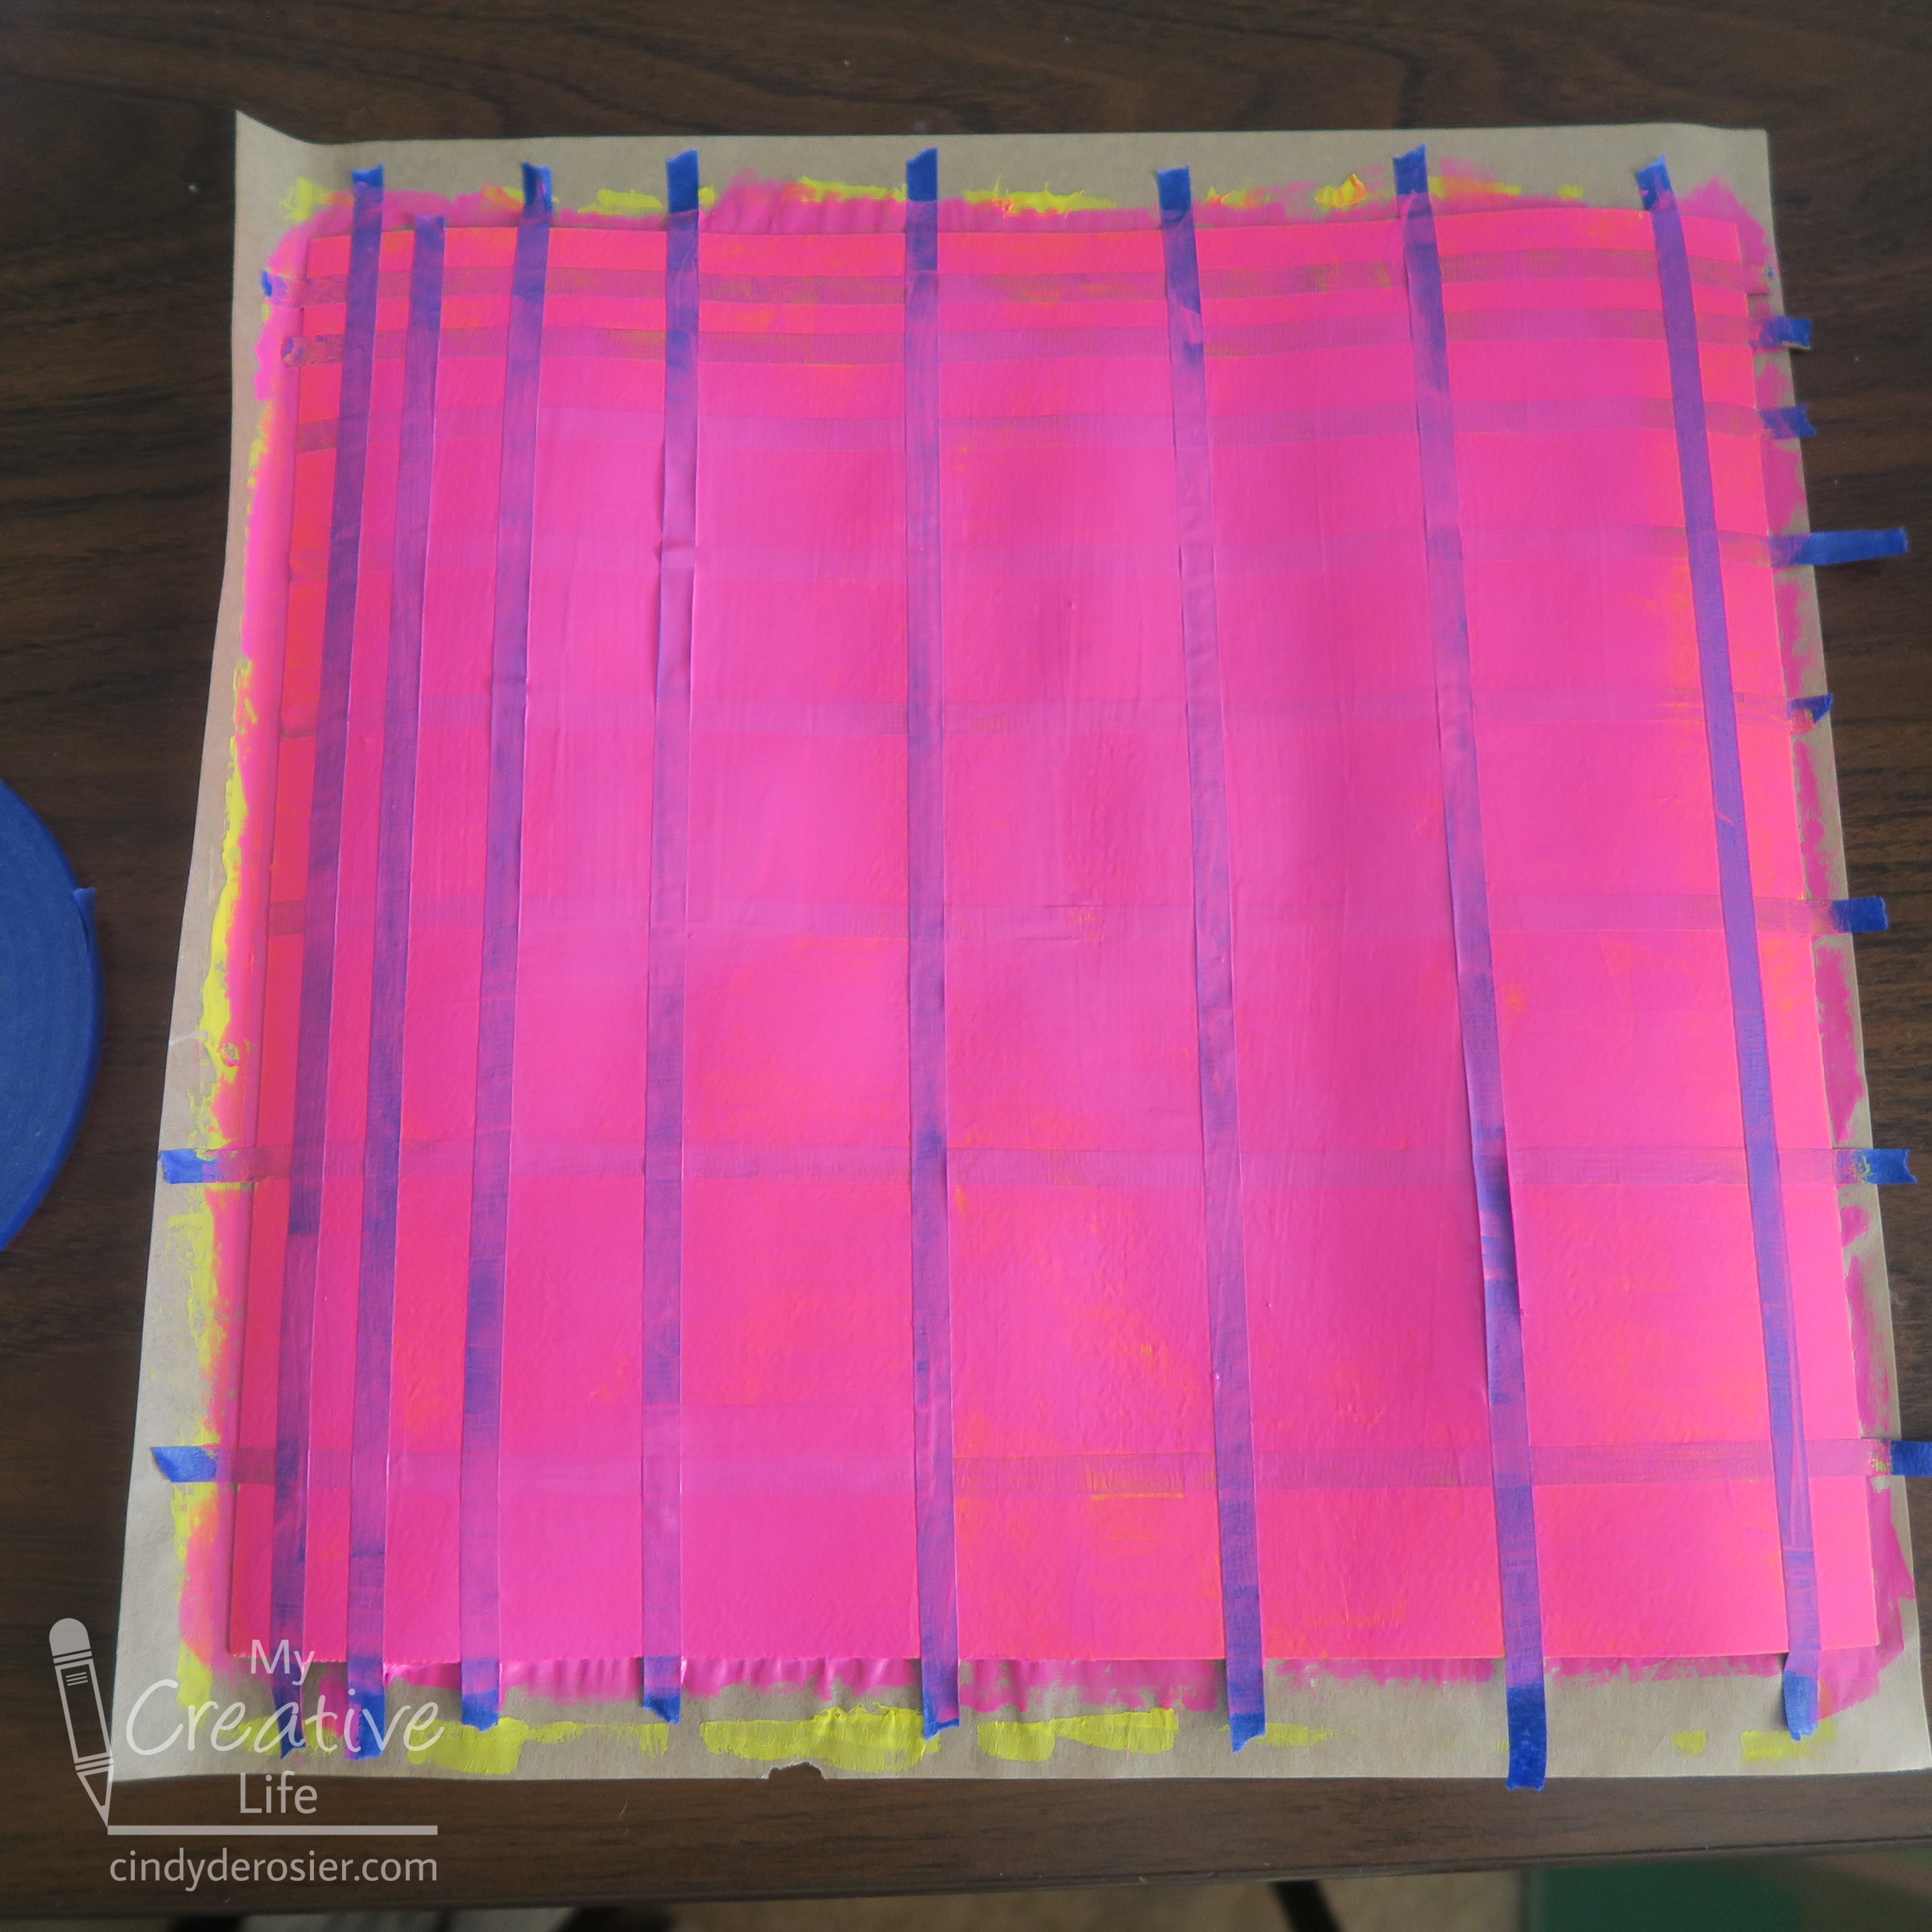
Cover your desktop with a piece of cardboard that is larger than the paper you'll be using for the project. Add strips of tape to the paper, all going horizontally. Each piece should extend off the edge of the paper onto the cardboard. (This is important for removing the tape later.) Paint over the entire paper yellow. Then paint one set of cardstock circles. Let both dry completely.

Add vertical strips of tape on top of the yellow. Again, make sure the ends of the tape extend beyond the edge of the paper. Paint a set of cardstock circles in pink. Let the paint dry completely.
This is a case of "do as I say, not as I did." I didn't let the pink paint dry fully before adding diagonal strips of tape and painting over them in blue. As soon as I did it, I knew I'd messed up. The tape curled in the center (where the paint was still a little moist), as you can see below.
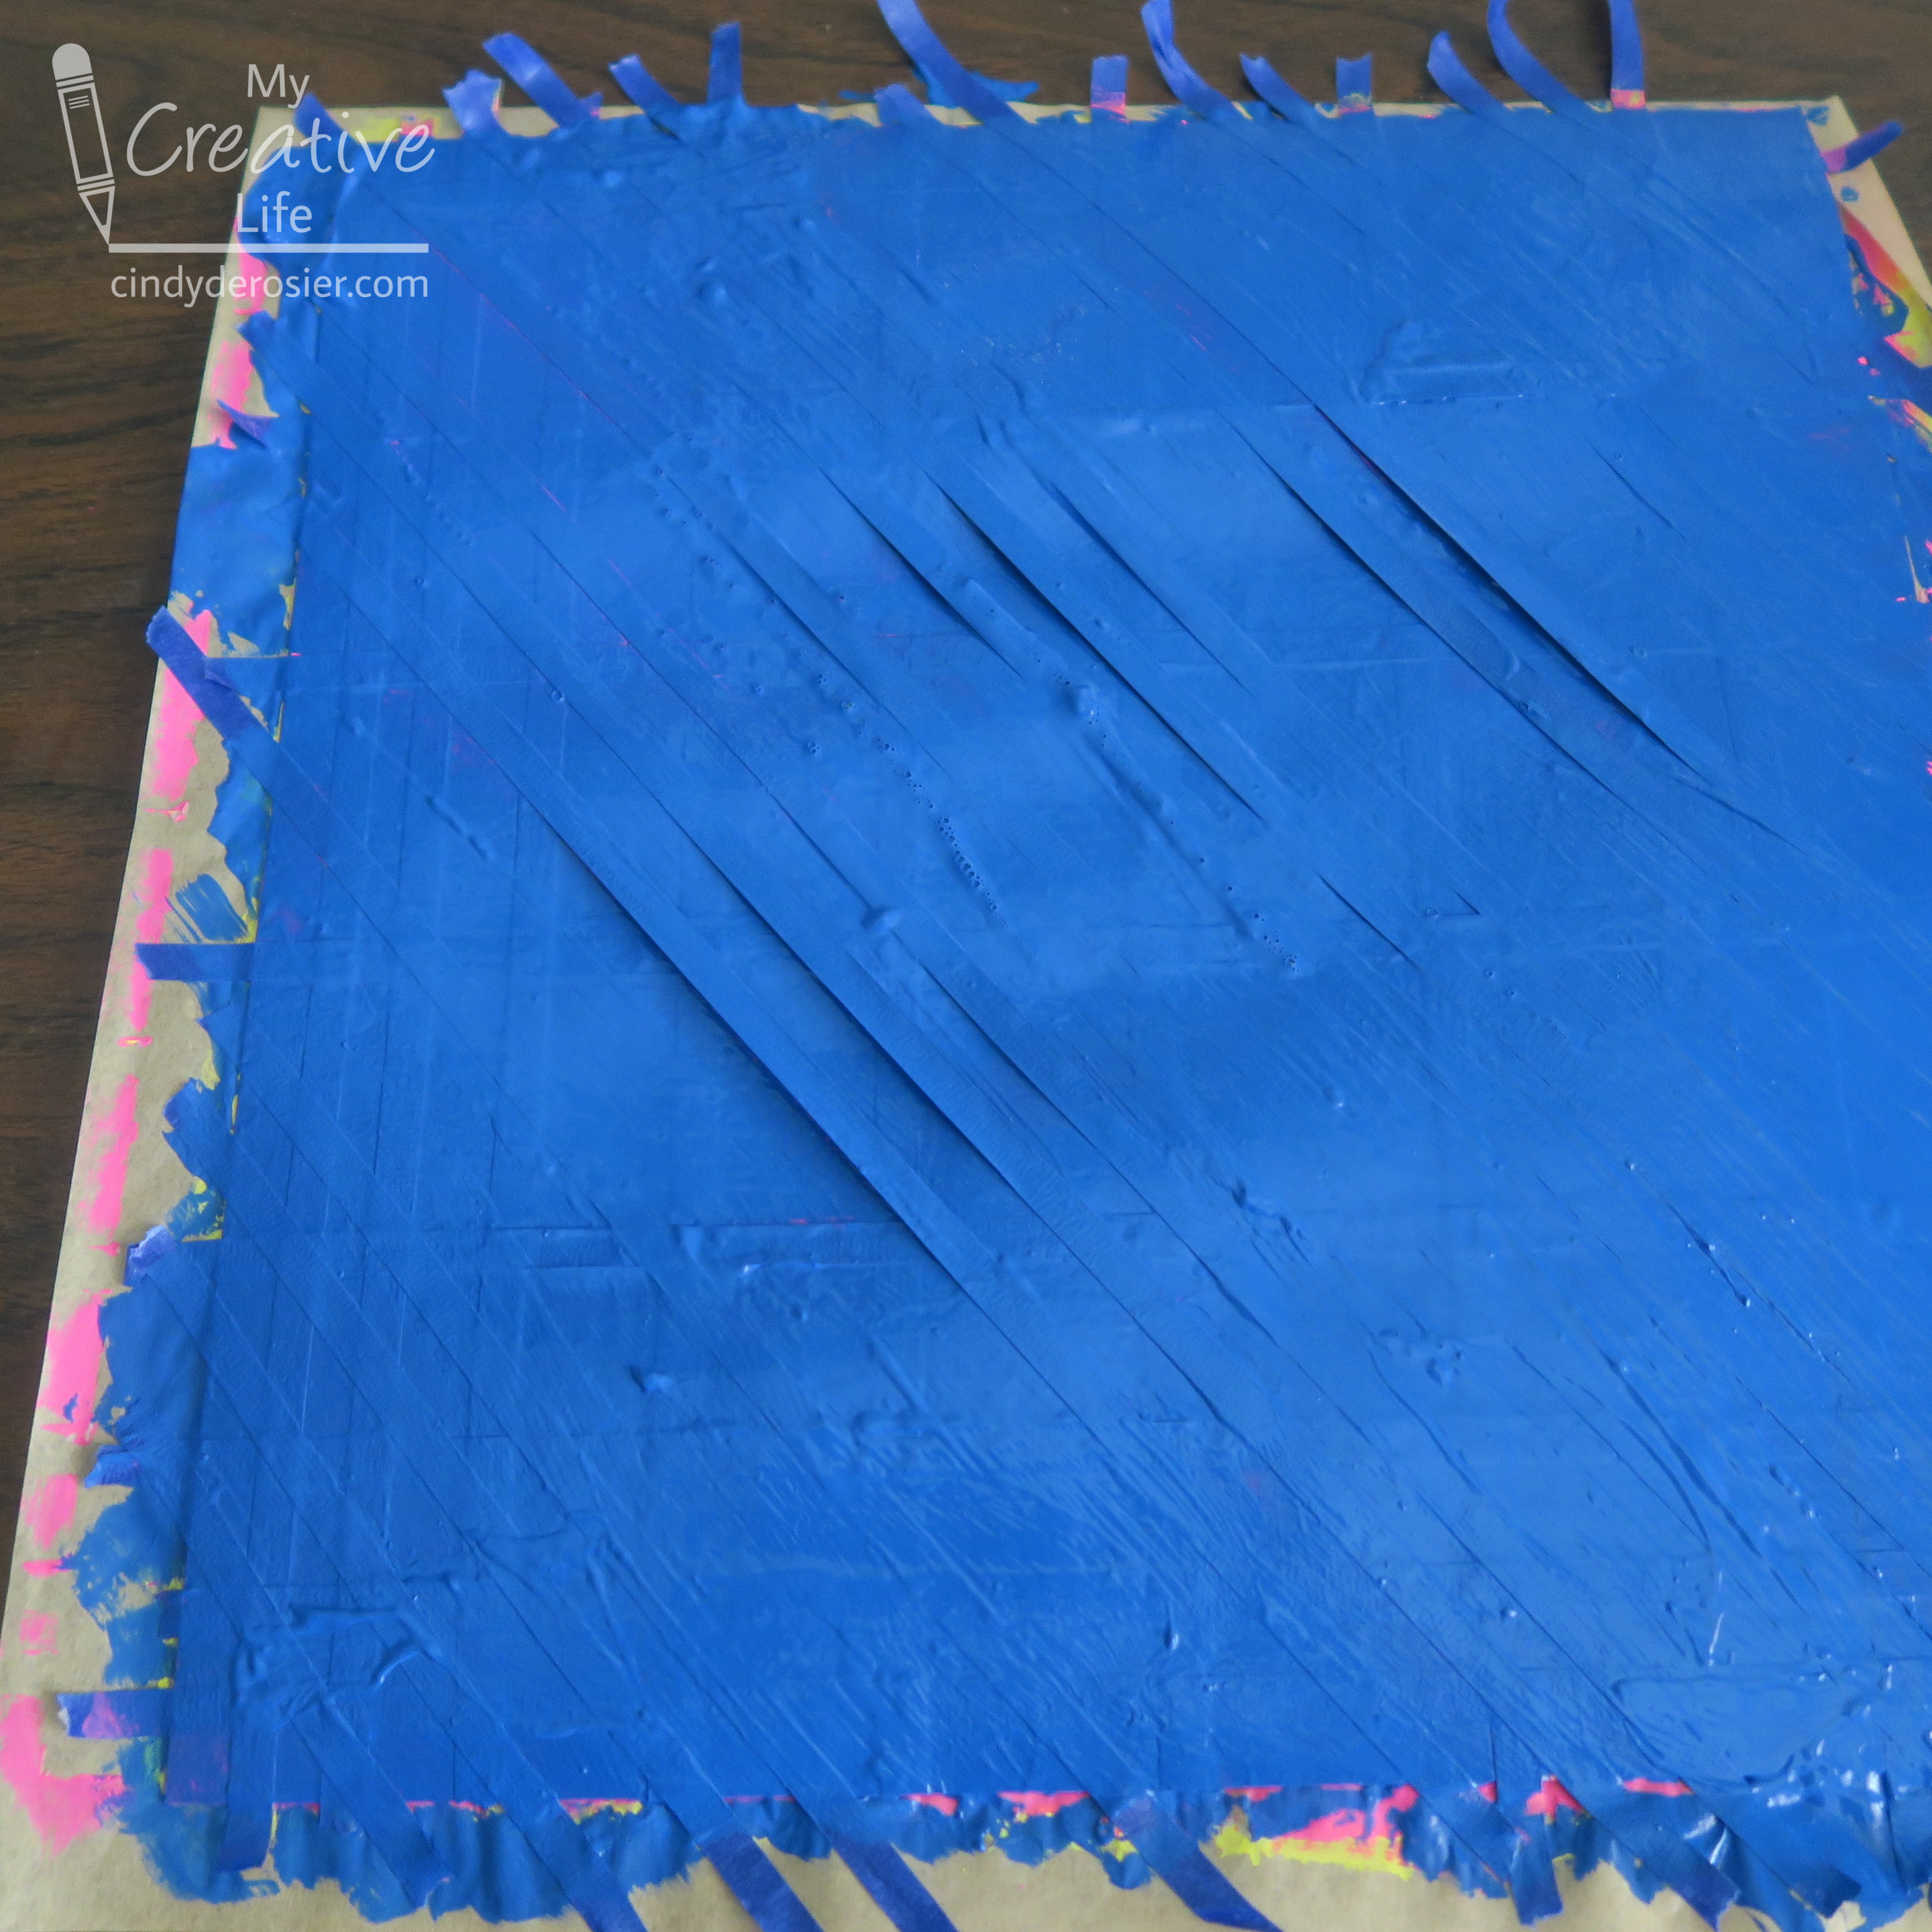
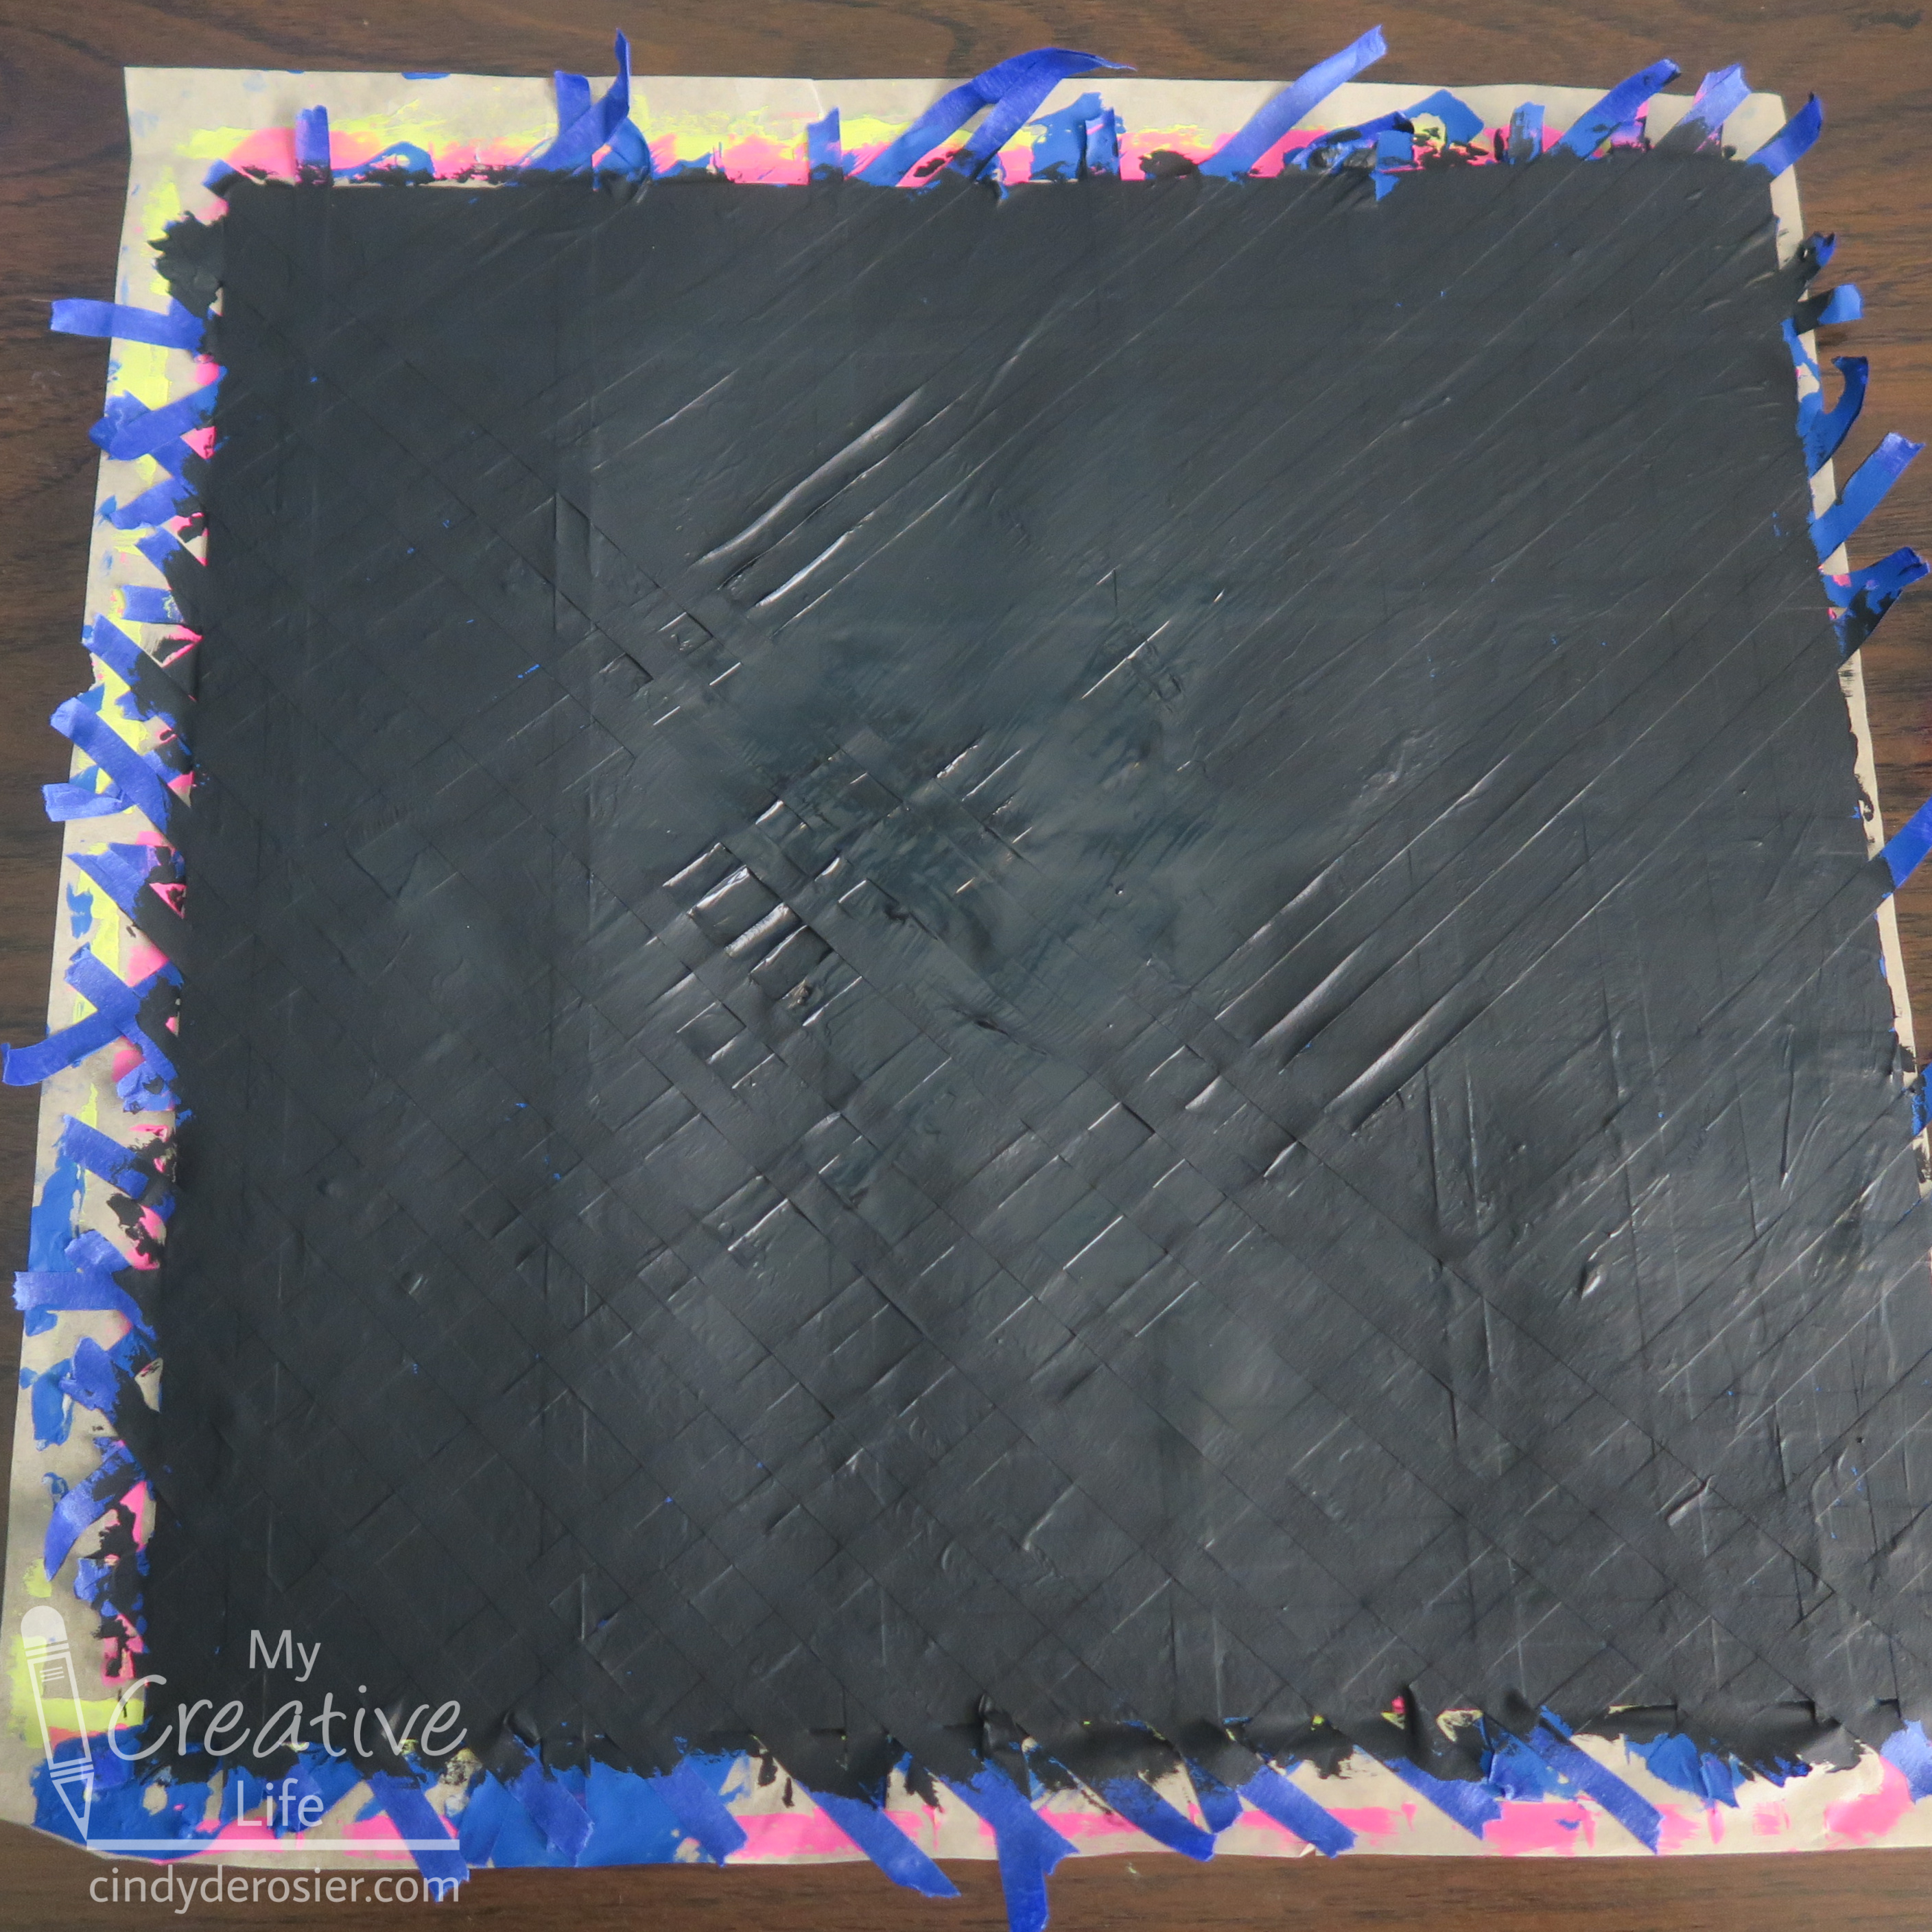
Not only did that allow blue paint to get underneath and cover up the pink I was trying to preserve, but when the tape stayed curled when I added the final diagonal layer on top. I couldn't get those last pieces to stick well in the center. I did the best I could, then added a layer of black. Then I painted the last of the cardstock circles.
I let everything dry really well. The next day, I slowly and carefully peeled up the tape, starting with the top layer of diagonals, then working down to the other diagonals, then the verticals, then the horizontals. This is what I revealed (rotated 90° in the photo).

As you can see, I didn't get perfectly clean lines, particularly in the center where the blue covered the pink. There are other places where I apparently didn't press the tape down enough, but that's ok. You can touch up any small mess-ups, or not. If you place your painted circles strategically, they can hide mistakes.
I had a lot of fun making this and reminiscing about the good ole days at Roller King.

Very cool!
ReplyDelete